AEG BE300360KM Support and Manuals
Get Help and Manuals for this AEG item
View All Support Options Below
Free AEG BE300360KM manuals!
Problems with AEG BE300360KM?
Ask a Question
Free AEG BE300360KM manuals!
Problems with AEG BE300360KM?
Ask a Question
Popular AEG BE300360KM Manual Pages
Product Manual - Page 2
... spare parts for choosing this AEG product. CARE AND CLEANING 21 11. When contacting our Authorised Service Centre, ensure that you have created it . 2 www.aeg.com
CONTENTS
1. CLOCK FUNCTIONS...10 7. We have the following data available: Model, PNC, Serial Number. HINTS AND TIPS...12 10. INSTALLATION...26 13. SAFETY INFORMATION 3 2.
SAFETY INSTRUCTIONS 4 3. DAILY...
Product Manual - Page 4
... Service Centre or similarly qualified persons to be replaced, this appliance. • Remove all the packaging. • Do not install or use a damaged appliance. • Follow the installation instruction ...with the wiring rules.
2. Install the shelf supports in the opposite sequence. • The means for disconnection must be replaced by our Authorised Service Centre. • Do not...
Product Manual - Page 6
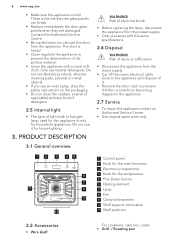
...support, removable 11 Shelf positions
3.2 Accessories
• Wire shelf
For cookware, cake tins, roasts. • Grill- / Roasting pan Do not use an oven spray, obey the safety instructions... replacing the lamp, disconnect the appliance from becoming trapped in the appliance.
2.7 Service
• To repair the appliance contact an Authorised Service Centre.
• Use original spare parts ...
Product Manual - Page 7
... sure
that the airflow in the room is normal. The control knob comes out. Put the accessories and the removable shelf supports back to set .
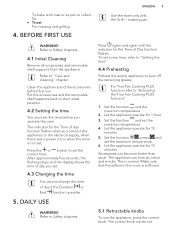
4.3 Changing the time
You cannot change the time of day function flashes when you operate the oven. Refer to Safety chapters.
4.1 Initial Cleaning
Remove all ...
Product Manual - Page 8
...crust during the cooking. 8 www.aeg.com
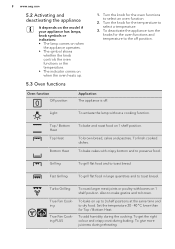
5.2 Activating and deactivating the appliance
It depends on the model if your appliance has lamps, knob symbols or indicators: • The lamp comes on when
the ... Light
To activate the lamp without a cooking function.
Set the temperature 20 - 40 °C lower than for the oven functions and temperature to select a temperature.
...
Product Manual - Page 10
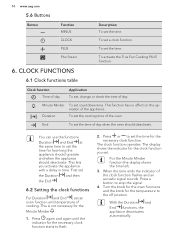
... deactivates automatically.
For the Minute Minder function the display shows the time left. 3. To set countdown time. This is not necessary for the necessary clock function. Press or to the off... position. When the time ends the indicator of the appliance.
This lets you set the time.
Press again and again until the indicator for the clock function you activate ...
Product Manual - Page 11
...
ENGLISH 11
2. Press and hold . Refer to Safety chapters.
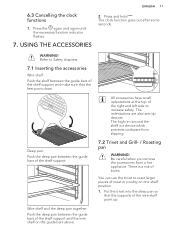
7.1 Inserting the accessories
Wire shelf: Push the shelf between the guide bars of the shelf support and make sure that the supports of the shelf support and the wire shelf on one shelf position. 1.
There is a device which prevents cookware from a hot appliance. WARNING! Deep...
Product Manual - Page 12
...the food soft inside and crusty outside. Put the deep pan into the deep pan so
that the supports of the wire shelf point down .
9. It decreases the cooking time and energy consumption to a minimum... and the quality and quantity of the ingredients used.
9.1 Inner side of the door
In some models, on the door glass panels. To prevent this system you deactivate the appliance, the cooling fan...
Product Manual - Page 13

... when the oven is up .
9.5 Cooking times
Cooking times depend on the type of the set cooking time is cold. Initially, monitor the performance when you use two baking trays at the ...8226; Use a deep pan for your cookware, recipes and quantities when you cook.
Find the best settings (heat setting, cooking time, etc.) for very fatty food to "Activating the True Fan Cooking PLUS function". ...
Product Manual - Page 22
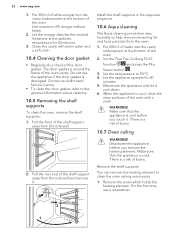
...door gasket is cold. Remove the shelf supports. Contact an Authorised Service Centre.
• To clean the door gasket, refer to 90 °C. 4. Install the shelf supports in the opposite sequence.
10.6 Aqua ...
Let the vinegar dissolve the residual limestone at the bottom of the oven cavity. Set the True Fan Cooking PLUS
function
and press the Plus
Steam button . 3. When the...
Product Manual - Page 23
... .
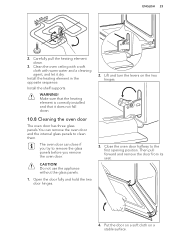
3.
CAUTION! Open the door fully and hold the two door hinges.
2. Then pull forward and remove the door from its seat.
4. ENGLISH 23
2. WARNING!
Install the shelf supports.
Lift and turn the levers on a stable surface. Close the oven door halfway to clean them. Make sure that the heating element is correctly...
Product Manual - Page 25
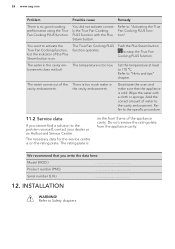
... True Fan Cooking PLUS function". Install the glass cover. WARNING! Problem
Possible cause
Remedy
The oven does not heat up . The necessary settings are correct.
Make sure that ....
2.
CAUTION! Replace the lamp with water. The oven is not set .
Make sure that the settings are not set . Replace the lamp. The display shows "12.00".
TROUBLESHOOTING
ENGLISH 25
1.
The...
Product Manual - Page 26
...specific procedure.
11.2 Service data
If you write the data here:
Model (MOD.)
Product number (PNC)
Serial number (S.N.)
12. You did not activate correctly the True Fan Cooking PLUS function with a cloth or sponge.
Refer to the problem.... Push the Plus Steam button
to the cavity embossment.
INSTALLATION
WARNING! the cavity embossment. The rating plate is
on the...
Product Manual - Page 27
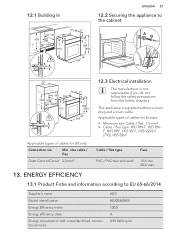
...558
590 20
16
min. 560
573
548 21
114
589 594
594
5 3
12.3 Electrical installation
The manufacturer is supplied without a main plug and a main cable. Applicable types of cables for ... In
ENGLISH 27
12.2 Securing the appliance to EU 65-66/2014
Supplier's name Model identification Energy Efficiency Index Energy efficiency class Energy consumption with a standard load, conventional mode...
Product Manual - Page 28
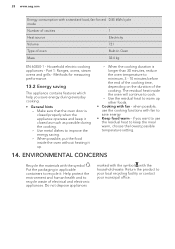
...duration is closed properly when the appliance operates and keep the meal warm, choose the lowest possible temperature setting.
14. 28 www.aeg.com
Energy consumption with a standard load, fan-forced 0.85 kWh/cycle... energy during the cooking.
- Household electric cooking appliances - Part 1: Ranges, ovens, steam ovens and grills - Do not dispose appliances
marked with the symbol with the...
AEG BE300360KM Reviews
We have not received any reviews for AEG yet.