Product Manual
Page 7
... 7 Symbols used in these instructions ..........7 Letters in brackets 7 Troubleshooting and repairs 7 SAFETY 7 Fundamental safety warnings 7 Designated use 8 Instructions 8 DESCRIPTION 8 Description of the appliance 8 Description of the control panel 8 PRELIMINARY CHECKS 9 Controls after transport 9 Installing the appliance 9 Connecting the appliance 9 DISPOSAL 9 BUILT-IN INSTALLATION 10 USING THE APPLIANCE FOR THE FIRST TIME 12 Installing the filter 12 Replacing the filter 13 Removing the filter 13 TURNING ON AND HEATING UP ...13...
... 7 Symbols used in these instructions ..........7 Letters in brackets 7 Troubleshooting and repairs 7 SAFETY 7 Fundamental safety warnings 7 Designated use 8 Instructions 8 DESCRIPTION 8 Description of the appliance 8 Description of the control panel 8 PRELIMINARY CHECKS 9 Controls after transport 9 Installing the appliance 9 Connecting the appliance 9 DISPOSAL 9 BUILT-IN INSTALLATION 10 USING THE APPLIANCE FOR THE FIRST TIME 12 Installing the filter 12 Replacing the filter 13 Removing the filter 13 TURNING ON AND HEATING UP ...13...
Product Manual
Page 8
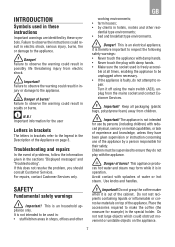
... to the appliance. This appliance produces hot water and steam may form while it off using the main switch (A23), unplug from the mains socket and contact Customer Services. Troubleshooting and repairs In the event of problems, follow the information given in brackets refer to ensure they have been given supervision or instruction concerning use of the appliance by a person responsible...
... to the appliance. This appliance produces hot water and steam may form while it off using the main switch (A23), unplug from the mains socket and contact Customer Services. Troubleshooting and repairs In the event of problems, follow the information given in brackets refer to ensure they have been given supervision or instruction concerning use of the appliance by a person responsible...
Product Manual
Page 9
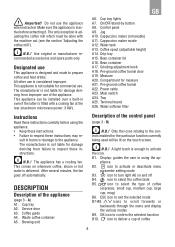
.... Grinding adjustment knob A18. Measure A20. Power cable A23. Terminal board A26. Water softener filter Instructions Read these instructions carefully before extracting it. The appliance has a cooling fan. This comes on whenever coffee, steam or hot water is enough to confirm the selected function B10. A) A1. Cup tray A2. B) N.B.! A light touch is delivered. Display: guides the user in using the appliance. • Keep these instructions •...
.... Grinding adjustment knob A18. Measure A20. Power cable A23. Terminal board A26. Water softener filter Instructions Read these instructions carefully before extracting it. The appliance has a cooling fan. This comes on whenever coffee, steam or hot water is enough to confirm the selected function B10. A) A1. Cup tray A2. B) N.B.! A light touch is delivered. Display: guides the user in using the appliance. • Keep these instructions •...
Product Manual
Page 10
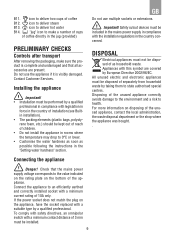
... socket replaced with a minimum contact distance of 3 mm must be kept out of reach of coffee directly in the country concerned. If the power socket does not match the plug on disposing of 10A only. Contact Customer Services. Installing the appliance Important! • Installation must be disposed of as possible following the instructions in compliance with a minimum current rating of...
... socket replaced with a minimum contact distance of 3 mm must be kept out of reach of coffee directly in the country concerned. If the power socket does not match the plug on disposing of 10A only. Contact Customer Services. Installing the appliance Important! • Installation must be disposed of as possible following the instructions in compliance with a minimum current rating of...
Product Manual
Page 12
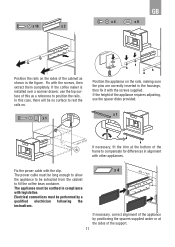
... in compliance with legislation. If the coffee maker is installed over a warmer drawer, use the spacer disks provided. If the height of the appliance requires adjusting, use the top surface of the cabinet as a reference to compensate for differences in alignment with other appliances. In this as shown in the figure. Fix the power cable with the clip.
... in compliance with legislation. If the coffee maker is installed over a warmer drawer, use the spacer disks provided. If the height of the appliance requires adjusting, use the top surface of the cabinet as a reference to compensate for differences in alignment with other appliances. In this as shown in the figure. Fix the power cable with the clip.
Product Manual
Page 13
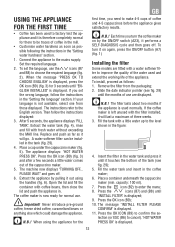
... the mains supply. To set the wrong language, follow the instructions displayed: 3. The coffee maker is displayed; 9. N.B.! Each time you turn it on by pulling it will last a maximum of coffee in the coffee maker; 6. Slide the date indicator pointer (see fig. 29); 5. capacity: 100 ml). 7. The message "INSTALL FILTER PLEASE CONFIRM" is displayed. Connect the appliance to confirm the se- Replace and...
... the mains supply. To set the wrong language, follow the instructions displayed: 3. The coffee maker is displayed; 9. N.B.! Each time you turn it on by pulling it will last a maximum of coffee in the coffee maker; 6. Slide the date indicator pointer (see fig. 29); 5. capacity: 100 ml). 7. The message "INSTALL FILTER PLEASE CONFIRM" is displayed. Connect the appliance to confirm the se- Replace and...
Product Manual
Page 14
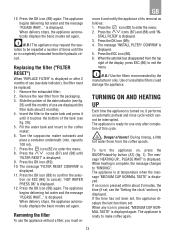
...; 6. is displayed. STALL FILTER" is displayed. When heating is displayed; 9. If the time has not been set, the appliance displays the last functions set again. " is displayed; 3. Press the icons (B7) and (B8) until it touches the bottom of use (see fig. 29); 5. "HOT WATER PRESS OK" is displayed. 11. Use the filters recommended by button (A7) (fig. 1). Remove the exhausted filter; 2. To turn the appliance...
...; 6. is displayed. STALL FILTER" is displayed. When heating is displayed; 9. If the time has not been set, the appliance displays the last functions set again. " is displayed; 3. Press the icons (B7) and (B8) until it touches the bottom of use (see fig. 29); 5. "HOT WATER PRESS OK" is displayed. 11. Use the filters recommended by button (A7) (fig. 1). Remove the exhausted filter; 2. To turn the appliance...
Product Manual
Page 15
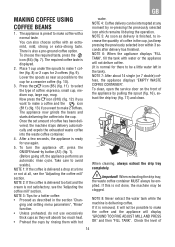
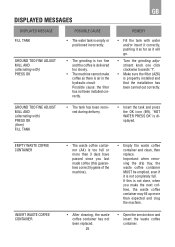
... is removed, it will display "GROUND TOO FINE ADJUST MILL AND PRESS OK" and then "FILL TANK". Once the set amount of coffee: espresso, small cup, me- NOTE 1: If the coffee is normal for there to select the type of coffee has been deli- When cleaning, always extract the drip tray completely. When extracting the drip tray...
... is removed, it will display "GROUND TOO FINE ADJUST MILL AND PRESS OK" and then "FILL TANK". Once the set amount of coffee: espresso, small cup, me- NOTE 1: If the coffee is normal for there to select the type of coffee has been deli- When cleaning, always extract the drip tray completely. When extracting the drip tray...
Product Manual
Page 16
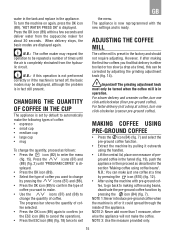
... set by adjusting the grinding adjustment knob (fig. 14). When delivery stops, the basic modes are displayed again. ADJUSTING THE COFFEE MILL The coffee mill is in the section "Making coffee using coffee beans". For slower delivery and creamier coffee, turn one measure of coffee: • espresso • small cup • medium cup • large cup • mug To change...
... set by adjusting the grinding adjustment knob (fig. 14). When delivery stops, the basic modes are displayed again. ADJUSTING THE COFFEE MILL The coffee mill is in the section "Making coffee using coffee beans". For slower delivery and creamier coffee, turn one measure of coffee: • espresso • small cup • medium cup • large cup • mug To change...
Product Manual
Page 17
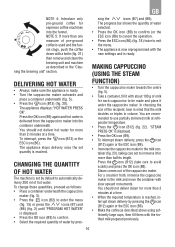
.... The appliance displays: "HOT WATER PRESS OK". The appliance stops delivery once the set by default to immerse it under the cappuccino maker. To change these quantities, proceed as described in the milk con- tainer (fig. 23), taking care not to automatically de- Steam comes out of hot water. MAKING CAPPUCCINO (USING THE STEAM FUNCTION) • Turn the cappuccino maker...
.... The appliance displays: "HOT WATER PRESS OK". The appliance stops delivery once the set by default to immerse it under the cappuccino maker. To change these quantities, proceed as described in the milk con- tainer (fig. 23), taking care not to automatically de- Steam comes out of hot water. MAKING CAPPUCCINO (USING THE STEAM FUNCTION) • Turn the cappuccino maker...
Product Manual
Page 18
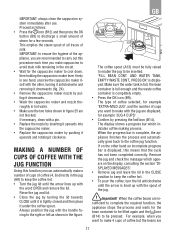
... the process and automatically goes back to keep the coffee hot. • Turn the jug lid until the arrow lines up with a pin. • Replace the nozzle by inserting it upwards into the cappuccino maker. • Replace the cappuccino maker by pressing the icon (B14). When the... indicates coffee making process. "FILL BEAN CONT. IMPORTANT: to keep the coffee hot. • To pour the coffee, turn the lid anticlockwise until it under the coffee spout. Important! MAKING A NUMBER OF CUPS OF COFFEE WITH THE JUG FUNCTION Using this function you make with the word OPEN and remove the...
... the process and automatically goes back to keep the coffee hot. • Turn the jug lid until the arrow lines up with a pin. • Replace the nozzle by inserting it upwards into the cappuccino maker. • Replace the cappuccino maker by pressing the icon (B14). When the... indicates coffee making process. "FILL BEAN CONT. IMPORTANT: to keep the coffee hot. • To pour the coffee, turn the lid anticlockwise until it under the coffee spout. Important! MAKING A NUMBER OF CUPS OF COFFEE WITH THE JUG FUNCTION Using this function you make with the word OPEN and remove the...
Product Manual
Page 19
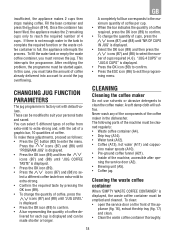
... rectifying the problem, the programme must be started again. lues. The following parts of 4 cups. This interrupts the programme. You can select 5 different types of coffee from extra-mild to reach the required number of the machine must take the amount of the machine, accessible after ope- CHANGING JUG FUNCTION PARAMETERS The jug programme is displayed. • Press...
... rectifying the problem, the programme must be started again. lues. The following parts of 4 cups. This interrupts the programme. You can select 5 different types of coffee from extra-mild to reach the required number of the machine must take the amount of the machine, accessible after ope- CHANGING JUG FUNCTION PARAMETERS The jug programme is displayed. • Press...
Product Manual
Page 20
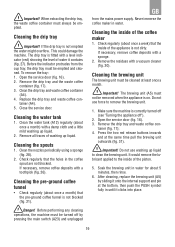
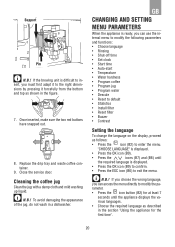
... fitted with a level indicator (red) showing the level of water it onto the internal support and pin at the same time pull the brewing unit outwards (fig. 31). Before performing any cleaning operations, the machine must...power supply. To remove the tray: 1. Open the service door (fig. 16). 2. Check regularly that the pre-ground coffee funnel is on. Check regularly (about once a month) that the holes in until it clicks into place. 19 Important! Important! If the drip tray is correctly turned off (see "Turning the appliance off by sliding it contains (fig. 27). Clean...
... fitted with a level indicator (red) showing the level of water it onto the internal support and pin at the same time pull the brewing unit outwards (fig. 31). Before performing any cleaning operations, the machine must...power supply. To remove the tray: 1. Open the service door (fig. 16). 2. Check regularly that the pre-ground coffee funnel is on. Check regularly (about once a month) that the holes in until it clicks into place. 19 Important! Important! If the drip tray is correctly turned off (see "Turning the appliance off by sliding it contains (fig. 27). Clean...
Product Manual
Page 21
... parameters and functions: • Choose language • Rinsing • Shut-off time • Set clock • Start time • Auto-start • Temperature • Water hardness • Program coffee • Program jug • Program water • Descale • Reset to default • Statistics • Install filter • Reset filter • Buzzer • Contrast Setting the language To change the language on the display, proceed as...
... parameters and functions: • Choose language • Rinsing • Shut-off time • Set clock • Start time • Auto-start • Temperature • Water hardness • Program coffee • Program jug • Program water • Descale • Reset to default • Statistics • Install filter • Reset filter • Buzzer • Contrast Setting the language To change the language on the display, proceed as...
Product Manual
Page 23
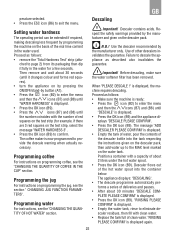
... turn the appliance on by pressing the ON/OFF/stand-by programming the machine on the basis of the hot water spout into the tank respecting the instructions given on the descaler pack, then add water up to the MAX level marked on programming coffee, see the "CHANGING THE QUANTITY OF HOT WATER...the icons (B7) and (B8) until the number coincides with clean water. • Replace the tank full of the descaler bottle into the container below. ched to page 2) from its packaging then dip it fully in the water used. The coffee maker is displayed. • Empty the tank of water, pour ...
... turn the appliance on by pressing the ON/OFF/stand-by programming the machine on the basis of the hot water spout into the tank respecting the instructions given on the descaler pack, then add water up to the MAX level marked on programming coffee, see the "CHANGING THE QUANTITY OF HOT WATER...the icons (B7) and (B8) until the number coincides with clean water. • Replace the tank full of the descaler bottle into the container below. ched to page 2) from its packaging then dip it fully in the water used. The coffee maker is displayed. • Empty the tank of water, pour ...
Product Manual
Page 24
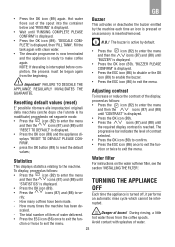
... (B8) until "RESET TO DEFAULT" is interrupted before completion, the process must be interrupted. "BUZZER PLEASE CONFIRM" is displayed, then "FILL TANK". Water filter For instructions on the water softener filter, see the section "INSTALLING THE FILTER". Avoid contact with clean water. • ...number of litres of burns! FIRM". • press the OK button (B9) to the machine. The progressive bar indicates the level of the display, proceed as follows: • Press the icon (B2) to exit the fun- During rinsing, a little hot water flows from the beginning. Adjusting...
... (B8) until "RESET TO DEFAULT" is interrupted before completion, the process must be interrupted. "BUZZER PLEASE CONFIRM" is displayed, then "FILL TANK". Water filter For instructions on the water softener filter, see the section "INSTALLING THE FILTER". Avoid contact with clean water. • ...number of litres of burns! FIRM". • press the OK button (B9) to the machine. The progressive bar indicates the level of the display, proceed as follows: • Press the icon (B2) to exit the fun- During rinsing, a little hot water flows from the beginning. Adjusting...
Product Manual
Page 25
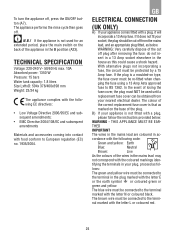
... yellow wire must be connected to the termi- The brown wire must be protected by a 15 Amp fuse. The appliance performs the rinse cycle then goes off , press the ON/OFF button (A7). If the appliance is a moulded-on the back of the cut off plug after removing the fuse: do not in- If the plug is not used until a replacement fuse cover...
... yellow wire must be connected to the termi- The brown wire must be protected by a 15 Amp fuse. The appliance performs the rinse cycle then goes off , press the ON/OFF button (A7). If the appliance is a moulded-on the back of the cut off plug after removing the fuse: do not in- If the plug is not used until a replacement fuse cover...
Product Manual
Page 26
...; After cleaning, the waste coffee container has not been replaced. 25 • Open the service door and insert the waste coffee container. GROUND TOO FINE ADJUST MILL AND (alternating with water and/or insert it correctly, pushing it as far as there is propertly installed and that the installation has been carried out correctly. Important: when removing the drip tray...
...; After cleaning, the waste coffee container has not been replaced. 25 • Open the service door and insert the waste coffee container. GROUND TOO FINE ADJUST MILL AND (alternating with water and/or insert it correctly, pushing it as far as there is propertly installed and that the installation has been carried out correctly. Important: when removing the drip tray...
Product Manual
Page 28
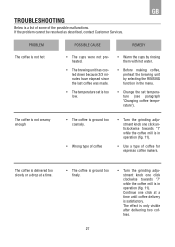
... cups by rinsing them with hot water. • Before making coffee, preheat the brewing unit by selecting the RINSING function in the menu. • Change the set temperature (see paragraph "Changing coffee temperature"). If the problem cannot be resolved as described, contact Customer Services. Continue one click anticlockwise towards "7" while the coffee mill is a list of some of coffee for espresso coffee...
... cups by rinsing them with hot water. • Before making coffee, preheat the brewing unit by selecting the RINSING function in the menu. • Change the set temperature (see paragraph "Changing coffee temperature"). If the problem cannot be resolved as described, contact Customer Services. Continue one click anticlockwise towards "7" while the coffee mill is a list of some of coffee for espresso coffee...
Product Manual
Page 29
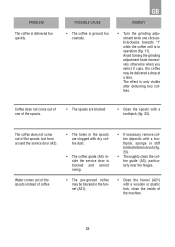
... bristled kitchen brush (fig. 23). • Thoroughly clean the coffee guide (A3), particularly near the hinges. • Clean the funnel (A21) with a wooden or plastic fork, clean the inside of the spouts. • The spouts are clogged with a toothpick (fig. 23). GB POSSIBLE CAUSE REMEDY • The coffee is ground too coarsely. • Turn the grinding adjustment knob...
... bristled kitchen brush (fig. 23). • Thoroughly clean the coffee guide (A3), particularly near the hinges. • Clean the funnel (A21) with a wooden or plastic fork, clean the inside of the spouts. • The spouts are clogged with a toothpick (fig. 23). GB POSSIBLE CAUSE REMEDY • The coffee is ground too coarsely. • Turn the grinding adjustment knob...


