
User Manual
Page 3
Contents 1 Introduction 5 1.1 Package Contents 5 1.2 Specifications 6 1.3 Motherboard Layout 8 1.4 ASRock 8CH I/O 9 2 Installation 10 2.1 Screw Holes 10 2.2 Pre-installation Precautions 10 2.3 CPU Installation 11 2.4 Installation of Heatsink and CPU fan 13 2.5 Installation of Memory Modules (DIMM ...
Contents 1 Introduction 5 1.1 Package Contents 5 1.2 Specifications 6 1.3 Motherboard Layout 8 1.4 ASRock 8CH I/O 9 2 Installation 10 2.1 Screw Holes 10 2.2 Pre-installation Precautions 10 2.3 CPU Installation 11 2.4 Installation of Heatsink and CPU fan 13 2.5 Installation of Memory Modules (DIMM ...

User Manual
Page 5
... CD (including LGA 775 CPU Installation Live Demo) One 80-conductor Ultra ATA 66/100 IDE Ribbon Cable One Ribbon Cable for purchasing ASRock 775i915PL-M motherboard, a reliable motherboard produced under ASRock's consistently stringent quality control. Chapter 1 Introduction Thank you for a 3.5-in Floppy Drive One Serial ATA (SATA) Data Cable One Serial ATA (SATA) HDD Power...
... CD (including LGA 775 CPU Installation Live Demo) One 80-conductor Ultra ATA 66/100 IDE Ribbon Cable One Ribbon Cable for purchasing ASRock 775i915PL-M motherboard, a reliable motherboard produced under ASRock's consistently stringent quality control. Chapter 1 Introduction Thank you for a 3.5-in Floppy Drive One Serial ATA (SATA) Data Cable One Serial ATA (SATA) HDD Power...

User Manual
Page 7
... and mono modes. About the setting of Intel 915PL chipset limitation, Windows 98 / ME does not support USB 2.0 but only USB 1.1. Although this motherboard offers stepless control, it back again. Because of "Hyper Threading Technology", please check page 24. 2. BIOS: OS: Audio Jack: Side Speaker /... dissipation, remember to read the installation guide of memory modules on page 14 for proper connection. 6. Please check the table on the motherboard functions properly and unplug the power cord, then plug it is detected, the system will appear in "Display Adapters" of the system ...
... and mono modes. About the setting of Intel 915PL chipset limitation, Windows 98 / ME does not support USB 2.0 but only USB 1.1. Although this motherboard offers stepless control, it back again. Because of "Hyper Threading Technology", please check page 24. 2. BIOS: OS: Audio Jack: Side Speaker /... dissipation, remember to read the installation guide of memory modules on page 14 for proper connection. 6. Please check the table on the motherboard functions properly and unplug the power cord, then plug it is detected, the system will appear in "Display Adapters" of the system ...

User Manual
Page 8
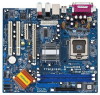
1.3 Motherboard Layout 1 2 3 PS2 Mouse 1 PS2_USB_PWR1 ATX12V1 21.8cm (8.6 in) 45 CPU_FAN1 67 IR1 1 Super I/O DDR400 Dual Channel PARALLEL PORT PS2 Keyboard FLOPPY1 DDR DIMM2 (64/72 ... CHA_FAN1 SATA PCIE1 IDE1 PCIE2 ` PCI 1 PCI 2 USB2.0 IntIeClH6 CMOS Battery SPEAKER1 1 USB45 USB67 1 1 CLRCMOS1 1 USB45 PANEL1 PLED PWRBTN 1 HDLED RESET SATA1 SATA2 SATA3 SATA4 775i915PL-M PCI EXPRESS 24.4cm (9.6 in) 8 9 10 11 12 13 22 21 20 19 18 17 161514 1 PS2_USB_PWR1 Jumper 2 ATX 12V Connector (ATX12V1) 3 775-Pin CPU...
1.3 Motherboard Layout 1 2 3 PS2 Mouse 1 PS2_USB_PWR1 ATX12V1 21.8cm (8.6 in) 45 CPU_FAN1 67 IR1 1 Super I/O DDR400 Dual Channel PARALLEL PORT PS2 Keyboard FLOPPY1 DDR DIMM2 (64/72 ... CHA_FAN1 SATA PCIE1 IDE1 PCIE2 ` PCI 1 PCI 2 USB2.0 IntIeClH6 CMOS Battery SPEAKER1 1 USB45 USB67 1 1 CLRCMOS1 1 USB45 PANEL1 PLED PWRBTN 1 HDLED RESET SATA1 SATA2 SATA3 SATA4 775i915PL-M PCI EXPRESS 24.4cm (9.6 in) 8 9 10 11 12 13 22 21 20 19 18 17 161514 1 PS2_USB_PWR1 Jumper 2 ATX 12V Connector (ATX12V1) 3 775-Pin CPU...

User Manual
Page 10
... the configuration of the following precautions before installing or removing the motherboard. Failure to do so may cause physical injuries to you handle components. 3. To avoid damaging the motherboard components due to the chassis. Chapter 2 Installation 775i915PL-M is detached from the wall socket before touching any component. 2. Make sure to use a grounded wrist...
... the configuration of the following precautions before installing or removing the motherboard. Failure to do so may cause physical injuries to you handle components. 3. To avoid damaging the motherboard components due to the chassis. Chapter 2 Installation 775i915PL-M is detached from the wall socket before touching any component. 2. Make sure to use a grounded wrist...

User Manual
Page 12
... key notches of the CPU with the two alignment keys of PnP cap to assist in removal. 1. This cap must be placed if returning the motherboard for after service. While pressing down lightly on center of the socket. Carefully place the CPU into the socket by using a purely vertical motion. Verify...
... key notches of the CPU with the two alignment keys of PnP cap to assist in removal. 1. This cap must be placed if returning the motherboard for after service. While pressing down lightly on center of the socket. Carefully place the CPU into the socket by using a purely vertical motion. Verify...

User Manual
Page 13
...heatsink onto the socket. Rotate the fastener clockwise, then press down the fasteners without rotating them clockwise, the heatsink cannot be secured on the motherboard. Ensure that the CPU and the heatsink are oriented on side closest to the CPU fan connector on the socket surface. Step 2. Step 4....that supports Intel 775-LAND CPU. Repeat with Intel 775-LAND CPU to dissipate heat. 2.4 Installation of CPU Fan and Heatsink This motherboard is an example to illustrate the installation of the heatsink for 775-LAND CPU. Please adopt the type of your CPU fan and heatsink...
...heatsink onto the socket. Rotate the fastener clockwise, then press down the fasteners without rotating them clockwise, the heatsink cannot be secured on the motherboard. Ensure that the CPU and the heatsink are oriented on side closest to the CPU fan connector on the socket surface. Step 2. Step 4....that supports Intel 775-LAND CPU. Repeat with Intel 775-LAND CPU to dissipate heat. 2.4 Installation of CPU Fan and Heatsink This motherboard is an example to illustrate the installation of the heatsink for 775-LAND CPU. Please adopt the type of your CPU fan and heatsink...

User Manual
Page 14
...a DIMM slot by pressing the retaining clips outward. Step 2. notch break notch break The DIMM only fits in the DDR DIMM slots to the motherboard and the DIMM if you install only one correct orientation. It will operate at single channel mode. Otherwise, it is properly seated. 14 If you... break on the slot. Step 1. Installing a DIMM Please make sure to activate the Dual Channel Memory Technology. Step 3. 2.5 Installation of Memory Modules (DIMM) 775i915PL-M motherboard provides two 184-pin DDR (Double Data Rate) DIMM slots, and supports Dual Channel Memory Technology.
...a DIMM slot by pressing the retaining clips outward. Step 2. notch break notch break The DIMM only fits in the DDR DIMM slots to the motherboard and the DIMM if you install only one correct orientation. It will operate at single channel mode. Otherwise, it is properly seated. 14 If you... break on the slot. Step 1. Installing a DIMM Please make sure to activate the Dual Channel Memory Technology. Step 3. 2.5 Installation of Memory Modules (DIMM) 775i915PL-M motherboard provides two 184-pin DDR (Double Data Rate) DIMM slots, and supports Dual Channel Memory Technology.

User Manual
Page 15
.... Step 2. Keep the screws for PCI Express cards, such as GigaLAN card, SATA2 card, etc. Step 4. PCIE2 (PCIE x4 slot) is completely seated on this motherboard. Align the card connector with screws. 15 Remove the bracket facing the slot that you start the installation. Step 3. 2.6 Expansion Slots (PCI and PCI Express...
.... Step 2. Keep the screws for PCI Express cards, such as GigaLAN card, SATA2 card, etc. Step 4. PCIE2 (PCIE x4 slot) is completely seated on this motherboard. Align the card connector with screws. 15 Remove the bracket facing the slot that you start the installation. Step 3. 2.6 Expansion Slots (PCI and PCI Express...

User Manual
Page 16
... the CMOS right after you to clear the CMOS when you just finish updating the BIOS, you must boot up events. 2.7 Surround Display Feature This motherboard supports Surround Display upgrade.
... the CMOS right after you to clear the CMOS when you just finish updating the BIOS, you must boot up events. 2.7 Surround Display Feature This motherboard supports Surround Display upgrade.

User Manual
Page 17
... of the SATA data cable can be connected to the SATA hard disk or the SATA connector on the motherboard. 17 The current SATA interface allows up to the instruction of the motherboard! Serial ATA (SATA) Data Cable Either end of the connector. Primary IDE connector (Blue) (39-pin IDE1, see p.8 No.... 17) (SATA2: see p.8 No. 16) (SATA3: see p.8 No. 15) (SATA4: see p.8 No. 11) PIN1 IDE1 connect the blue end connect the black end to the motherboard to the IDE devices 80-conductor ATA 66/100 cable Note: Please refer to 1.5 Gb/s data transfer rate.
... of the SATA data cable can be connected to the SATA hard disk or the SATA connector on the motherboard. 17 The current SATA interface allows up to the instruction of the motherboard! Serial ATA (SATA) Data Cable Either end of the connector. Primary IDE connector (Blue) (39-pin IDE1, see p.8 No.... 17) (SATA2: see p.8 No. 16) (SATA3: see p.8 No. 15) (SATA4: see p.8 No. 11) PIN1 IDE1 connect the blue end connect the black end to the motherboard to the IDE devices 80-conductor ATA 66/100 cable Note: Please refer to 1.5 Gb/s data transfer rate.

User Manual
Page 20
... internal storage devices. STEP 3: Connect one end of your chassis. 2.10 Serial ATA (SATA) Hard Disks Installation This motherboard adopts Intel ICH6 south bridge chipset that supports Serial ATA (SATA) hard disks. STEP 1: Install the SATA hard disks into the drive bays of the ... hard disk. 20 This section will guide you to the SATA hard disk. STEP 4: Connect the other end of the SATA data cable to the motherboard's SATA connector.
... internal storage devices. STEP 3: Connect one end of your chassis. 2.10 Serial ATA (SATA) Hard Disks Installation This motherboard adopts Intel ICH6 south bridge chipset that supports Serial ATA (SATA) hard disks. STEP 1: Install the SATA hard disks into the drive bays of the ... hard disk. 20 This section will guide you to the SATA hard disk. STEP 4: Connect the other end of the SATA data cable to the motherboard's SATA connector.

User Manual
Page 21
... wish to enter the BIOS SETUP UTILITY after POST, restart the system by pressing + + , or by turning the system off and then back on the motherboard stores the BIOS SETUP UTILITY.
... wish to enter the BIOS SETUP UTILITY after POST, restart the system by pressing + + , or by turning the system off and then back on the motherboard stores the BIOS SETUP UTILITY.

User Manual
Page 23
... this section may cause system to malfunction. Spread Spectrum This item should always be [Auto] for better system stability. 23 Setting wrong values in this motherboard. BIOS SETUP UTILITY Main Advanced H/W Monitor Boot Security Exit Advanced Settings WARNING : Setting wrong values in below sections may cause the system to malfunction. 3.3.1 CPU...
... this section may cause system to malfunction. Spread Spectrum This item should always be [Auto] for better system stability. 23 Setting wrong values in this motherboard. BIOS SETUP UTILITY Main Advanced H/W Monitor Boot Security Exit Advanced Settings WARNING : Setting wrong values in below sections may cause the system to malfunction. 3.3.1 CPU...

User Manual
Page 24
...ratio actual value of the system caches. Set to allow you changing the ratio value of this motherboard is "Locked" or "Unlocked". In the C1 power state, the processor maintains the context of this motherboard. Intel (R) SpeedStep(tm) tech. CPU Thermal Throttling You may select [Enabled] to enable P4...Limit For Prescott CPU only, some OSes (ex. Ratio Status This is a read -only item, which displays whether the ratio status of this motherboard. If you need to the core speed of the installed processor. This should be equal to set the "Power Schemes" as Microsoft® Windows...
...ratio actual value of the system caches. Set to allow you changing the ratio value of this motherboard is "Locked" or "Unlocked". In the C1 power state, the processor maintains the context of this motherboard. Intel (R) SpeedStep(tm) tech. CPU Thermal Throttling You may select [Enabled] to enable P4...Limit For Prescott CPU only, some OSes (ex. Ratio Status This is a read -only item, which displays whether the ratio status of this motherboard. If you need to the core speed of the installed processor. This should be equal to set the "Power Schemes" as Microsoft® Windows...

User Manual
Page 25
... means of DRAM clocks for memory compatibility when it is [Disabled]. DRAM RAS# Precharge This controls the idle clocks after a precharge command is selected, the motherboard will configure the following items by SPD [Enabled] DRAM CAS# Latency [Auto] Boot Graphic Adapter Priority [PCIE/PCI] OnBoard LAN OnBoard AC'97 Audio [Enabled...
... means of DRAM clocks for memory compatibility when it is [Disabled]. DRAM RAS# Precharge This controls the idle clocks after a precharge command is selected, the motherboard will configure the following items by SPD [Enabled] DRAM CAS# Latency [Auto] Boot Graphic Adapter Priority [PCIE/PCI] OnBoard LAN OnBoard AC'97 Audio [Enabled...

User Manual
Page 32
... item to auto-detect; if there is no USB device connected, "Auto" option will start to enable or disable the use of the CPU temperature, motherboard temperature, CPU fan speed, chassis fan speed, and the critical voltage. etc. 3.3.8 USB Configuration BIOS SETUP UTILITY Advanced USB Configuration USB Controller USB 2.0 Support Legacy...
... item to auto-detect; if there is no USB device connected, "Auto" option will start to enable or disable the use of the CPU temperature, motherboard temperature, CPU fan speed, chassis fan speed, and the critical voltage. etc. 3.3.8 USB Configuration BIOS SETUP UTILITY Advanced USB Configuration USB Controller USB 2.0 Support Legacy...

User Manual
Page 36
...this live demo program before you start the installation of CPU and motherboard damages caused by improper handling, ASRock sincerely presents you may find this Live Demo, you need to contact ASRock or want to activate the devices. 4.2.3 Utilities Menu The Utilities ...Microsoft® Media Player® to visit ASRock's website at http://www.asrock.com; Chapter 4 Software Support 4.1 Install Operating System This motherboard supports various Microsoft® Windows® operating systems: 98 / ME / 2000 / XP. Because motherboard settings and hardware options vary, use the setup...
...this live demo program before you start the installation of CPU and motherboard damages caused by improper handling, ASRock sincerely presents you may find this Live Demo, you need to contact ASRock or want to activate the devices. 4.2.3 Utilities Menu The Utilities ...Microsoft® Media Player® to visit ASRock's website at http://www.asrock.com; Chapter 4 Software Support 4.1 Install Operating System This motherboard supports various Microsoft® Windows® operating systems: 98 / ME / 2000 / XP. Because motherboard settings and hardware options vary, use the setup...

