User Guide
Page 3
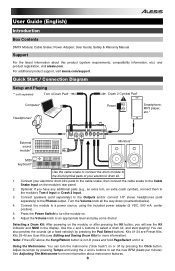
...Kits 25-40 are Preset Kits...Drum Kits for more ...Kits 01-24 are User Kits (see the Kit... module to set the new BPM...alesis.com/support. Connect the module to a power source, using the < and > buttons to the drum/cymbal pads of your electronic drum kit...'s pads to the cable snake, then connect the cable snake to turn the metronome ("click track") on the module's rear panel. 2. Selecting a Drum Kit...: After powering on . 6. See Adjusting The Metronome for more information about this product (system requirements, compatibility information, etc.) and product registration, visit alesis...
...Kits 25-40 are Preset Kits...Drum Kits for more ...Kits 01-24 are User Kits (see the Kit... module to set the new BPM...alesis.com/support. Connect the module to a power source, using the < and > buttons to the drum/cymbal pads of your electronic drum kit...'s pads to the cable snake, then connect the cable snake to turn the metronome ("click track") on the module's rear panel. 2. Selecting a Drum Kit...: After powering on . 6. See Adjusting The Metronome for more information about this product (system requirements, compatibility information, etc.) and product registration, visit alesis...
User Guide
Page 4
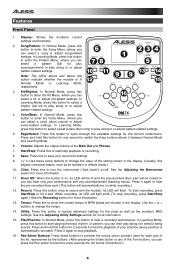
...buttons. (After pressing the Snare button or any accompaniment (backing music). Display: Shows the module's current settings and functions. 2. Kit/Rhythm: In Normal Mode, press this to enter the Kit Menu, where you 6 can press the Rim button to hear a recorded performance. Start/Stop: Press...the Voice Menu, where you can hear only your current kit settings. 9. < / >: Use these buttons to turn the metronome ("click track") on , its LED will be muted so you can select a kit or adjust kit-related settings. See the Adjusting the Metronome section for more information. 15...
...buttons. (After pressing the Snare button or any accompaniment (backing music). Display: Shows the module's current settings and functions. 2. Kit/Rhythm: In Normal Mode, press this to enter the Kit Menu, where you 6 can press the Rim button to hear a recorded performance. Start/Stop: Press...the Voice Menu, where you can hear only your current kit settings. 9. < / >: Use these buttons to turn the metronome ("click track") on , its LED will be muted so you can select a kit or adjust kit-related settings. See the Adjusting the Metronome section for more information. 15...
User Guide
Page 5
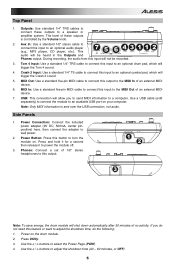
... 1/8" stereo cable to connect this feature or want to this output. 1 2 3 Note: To save energy, the drum module will trigger the Crash 2 sound. 5. Phones: Connect a set of 1/8" stereo headphones to adjust the shutdown time, do not need this input to a computer. MIDI Out: Use a standard five-pin MIDI cable to connect...
... 1/8" stereo cable to connect this feature or want to this output. 1 2 3 Note: To save energy, the drum module will trigger the Crash 2 sound. 5. Phones: Connect a set of 1/8" stereo headphones to adjust the shutdown time, do not need this input to a computer. MIDI Out: Use a standard five-pin MIDI cable to connect...
User Guide
Page 6
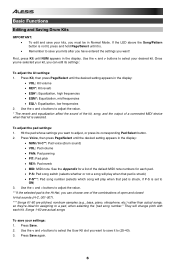
... it to ON) 3. See the Appendix for a list of the default MIDI note numbers for assigning to adjust, or press its settings: To adjust the kit settings: 1. They will play when that pad is struck) • P-N***: Pad song number (selects which song will change pitch with each pad. • P-S:... Pad song switch (selects whether or not a song will play when that kit is set to (25-40). 3. Basic Functions Editing and Saving Drum Kits IMPORTANT: • To edit and save your kit, you can choose one of the combinations of open and closed hi-hat sounds (H-C, 001-007)....
... it to ON) 3. See the Appendix for a list of the default MIDI note numbers for assigning to adjust, or press its settings: To adjust the kit settings: 1. They will play when that pad is struck) • P-N***: Pad song number (selects which song will change pitch with each pad. • P-S:... Pad song switch (selects whether or not a song will play when that kit is set to (25-40). 3. Basic Functions Editing and Saving Drum Kits IMPORTANT: • To edit and save your kit, you can choose one of the combinations of open and closed hi-hat sounds (H-C, 001-007)....
User Guide
Page 7
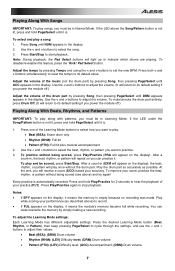
...buttons to select how you want to play: • Beat (BEA): Snare drum only • Rhythm (RHM): Full kit • Pattern (PTN): Full kit plus musical accompaniment 2. To disable/re-enable this feature, press the "Kick" Pad Select button. To practice without being scored..., press Play/Practice (PRA will receive a score (SCO) based your performance (as possible. After a count-in the display. 2. To adjust the Learning Mode settings...
...buttons to select how you want to play: • Beat (BEA): Snare drum only • Rhythm (RHM): Full kit • Pattern (PTN): Full kit plus musical accompaniment 2. To disable/re-enable this feature, press the "Kick" Pad Select button. To practice without being scored..., press Play/Practice (PRA will receive a score (SCO) based your performance (as possible. After a count-in the display. 2. To adjust the Learning Mode settings...
User Guide
Page 8
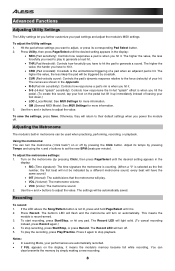
... This means the module is when you hit the pedal. (To create this sound, tap your pad settings and adjust the module's MIDI settings. Advanced Functions Adjusting Utility Settings The Utility settings let you further customize your foot on the pedal but lift it . Press Utility, then press Page/... when practicing, performing, recording, or playback. The Record LED will turn on or off by pressing Click), then press Page/Select until the desired setting appears in the display: • SIG (Time signature): The time signature the metronome is counting. (When a "0" is when you need to ...
... This means the module is when you hit the pedal. (To create this sound, tap your pad settings and adjust the module's MIDI settings. Advanced Functions Adjusting Utility Settings The Utility settings let you further customize your foot on the pedal but lift it . Press Utility, then press Page/... when practicing, performing, recording, or playback. The Record LED will turn on or off by pressing Click), then press Page/Select until the desired setting appears in the display: • SIG (Time signature): The time signature the metronome is counting. (When a "0" is when you need to ...
User Guide
Page 9
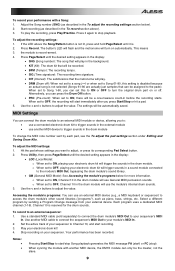
...'s programs: You can press the Drum Off button. • PRC (Pre-count): When set to ON, playing your electronic drum kit will trigger the sounds in the display: • LOC (Local Mode): o When set to access the drum module's other sound libraries ("programs"), such as piano, bass, strings,...MIDI device, the DM7X module can set to Song 61-80, this to ON or OFF to your sequencer to trigger sounds in the background. • KIT (Kit): The drum kit that will start recording. 3. Stop recording on or off ): When not set to a song (---) or when set this setting is disabled because ...
...'s programs: You can press the Drum Off button. • PRC (Pre-count): When set to ON, playing your electronic drum kit will trigger the sounds in the display: • LOC (Local Mode): o When set to access the drum module's other sound libraries ("programs"), such as piano, bass, strings,...MIDI device, the DM7X module can set to Song 61-80, this to ON or OFF to your sequencer to trigger sounds in the background. • KIT (Kit): The drum kit that will start recording. 3. Stop recording on or off ): When not set to a song (---) or when set this setting is disabled because ...
