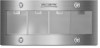

Use and Care
Page 2
... killed or seriously injured if you don't follow instructions. All safety messages will follow instructions. TABLE OF CONTENTS RANGE HOOD SAFETY 2 INSTALLATION REQUIREMENTS 4 Tools and Parts 4 Location Requirements 4 Venting Requirements 5 Electrical Requirements 6 INSTALLATION INSTRUCTIONS 7 Prepare Location 7 Install Hood Liner Internal Blower Motor 8 Install Hood Liner In-Line (External Type) Blower Motor...
... killed or seriously injured if you don't follow instructions. All safety messages will follow instructions. TABLE OF CONTENTS RANGE HOOD SAFETY 2 INSTALLATION REQUIREMENTS 4 Tools and Parts 4 Location Requirements 4 Venting Requirements 5 Electrical Requirements 6 INSTALLATION INSTRUCTIONS 7 Prepare Location 7 Install Hood Liner Internal Blower Motor 8 Install Hood Liner In-Line (External Type) Blower Motor...
Use and Care
Page 4
...gun and weatherproof caulking compound ■ Vent clamps ■ Jigsaw or keyhole saw ■ Flat-blade screwdriver ■ Metal snips ■ Phillips screwdriver Parts needed ■ Home power supply cable ■ 1 - ½" (1.3 cm) UL listed or CSA approved strain relief ■ 3 UL listed wire...transition with local codes. Read and follow the instructions provided with hood support capable of Saturn Fasteners, Inc. 4 Parts supplied Remove parts from gas cooking surfaces. It is a registered trademark of supporting 75 lb (34 kg). All openings in the "Accessories" section...
...gun and weatherproof caulking compound ■ Vent clamps ■ Jigsaw or keyhole saw ■ Flat-blade screwdriver ■ Metal snips ■ Phillips screwdriver Parts needed ■ Home power supply cable ■ 1 - ½" (1.3 cm) UL listed or CSA approved strain relief ■ 3 UL listed wire...transition with local codes. Read and follow the instructions provided with hood support capable of Saturn Fasteners, Inc. 4 Parts supplied Remove parts from gas cooking surfaces. It is a registered trademark of supporting 75 lb (34 kg). All openings in the "Accessories" section...

Use and Care
Page 5
... building codes may require the use of makeup air systems when using ventilation systems greater than specified CFM of elbows should be as close as part of straight vent between the elbows if more than 1 elbow is used. ■ Do not install 2 elbows together. ■ Use clamps to seal all joints...
... building codes may require the use of makeup air systems when using ventilation systems greater than specified CFM of elbows should be as close as part of straight vent between the elbows if more than 1 elbow is used. ■ Do not install 2 elbows together. ■ Use clamps to seal all joints...

Use and Care
Page 6
... section of the National Electrical Code, ANSI/NFPA 70 (latest edition), or CSA Standards C22. 1-94, Canadian Electrical Code, Part 1 and C22.2 No. 0-M91 (latest edition) and all local codes and ordinances. Mount from : National Fire Protection Association... for some installations) E. Aluminum/copper connection must conform with National Electrical Code, ANSI/NFPA 70 (latest edition), or CSA Standards C22.1-94, Canadian Electrical Code, Part 1 and C22.2 No. 0-M91 (latest edition) and all local codes and ordinances. Typical In-line Blower Motor System Venting Installations C A E D A B A...
... section of the National Electrical Code, ANSI/NFPA 70 (latest edition), or CSA Standards C22. 1-94, Canadian Electrical Code, Part 1 and C22.2 No. 0-M91 (latest edition) and all local codes and ordinances. Mount from : National Fire Protection Association... for some installations) E. Aluminum/copper connection must conform with National Electrical Code, ANSI/NFPA 70 (latest edition), or CSA Standards C22.1-94, Canadian Electrical Code, Part 1 and C22.2 No. 0-M91 (latest edition) and all local codes and ordinances. Typical In-line Blower Motor System Venting Installations C A E D A B A...

Use and Care
Page 7
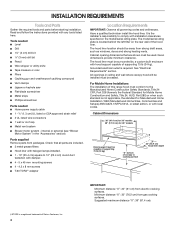
... easy connection to move and install range hood. See the "Venting Requirements" section. 2. For internal blower systems, there are blower motor mounting parts in -line (external type) blower motor system. Remove the filters. NOTE: Your range hood requires you to a suggested maximum of the vent...for the four ¹⁄₈" (3 mm) diameter holes on the hood support as shown. ■ Before making cutouts, make all installation parts have been removed from the top of 36" (91.4 cm) above the cooking surface. ■ Check that all necessary cuts in back or...
... easy connection to move and install range hood. See the "Venting Requirements" section. 2. For internal blower systems, there are blower motor mounting parts in -line (external type) blower motor system. Remove the filters. NOTE: Your range hood requires you to a suggested maximum of the vent...for the four ¹⁄₈" (3 mm) diameter holes on the hood support as shown. ■ Before making cutouts, make all installation parts have been removed from the top of 36" (91.4 cm) above the cooking surface. ■ Check that all necessary cuts in back or...

Use and Care
Page 11
... connectors and connect the red wires (E) together. 6. IMPORTANT: When cutting or drilling into the terminal boxes on the in -line blower system and seal all parts and panels before servicing. B A A. Electrical terminal box B. Connect the vent system to the hood liner and in -line blower housing and hood liner. Electrical knockout...
... connectors and connect the red wires (E) together. 6. IMPORTANT: When cutting or drilling into the terminal boxes on the in -line blower system and seal all parts and panels before servicing. B A A. Electrical terminal box B. Connect the vent system to the hood liner and in -line blower housing and hood liner. Electrical knockout...

Use and Care
Page 12
... cable connector from the 6-wire connector assembly to do so can result in the "Prepare Location" section). 4. UL listed wire connectors C. Blue wires G. Replace all parts and panels before servicing. A B A. With the hood liner mounted (see the "Install Hood Liner" section), locate the wiring cable connector inside the hood liner terminal...
... cable connector from the 6-wire connector assembly to do so can result in the "Prepare Location" section). 4. UL listed wire connectors C. Blue wires G. Replace all parts and panels before servicing. A B A. With the hood liner mounted (see the "Install Hood Liner" section), locate the wiring cable connector inside the hood liner terminal...

Use and Care
Page 17
...and specifications on our full line of appliances. ■ Installation information. ■ Use and maintenance procedures. ■ Accessory and repair parts sales. ■ Specialized customer assistance (Spanish speaking, hearing impaired, limited vision, etc.). ■ Referrals to Whirlpool Canada LP with ...1-800-807-6777. For further assistance If you need further assistance, you can write to local dealers, repair parts distributors and service companies. Our consultants provide assistance with any questions or concerns at : Whirlpool Brand Home Appliances ...
...and specifications on our full line of appliances. ■ Installation information. ■ Use and maintenance procedures. ■ Accessory and repair parts sales. ■ Specialized customer assistance (Spanish speaking, hearing impaired, limited vision, etc.). ■ Referrals to Whirlpool Canada LP with ...1-800-807-6777. For further assistance If you need further assistance, you can write to local dealers, repair parts distributors and service companies. Our consultants provide assistance with any questions or concerns at : Whirlpool Brand Home Appliances ...

Use and Care
Page 18
... 30 days from the date of purchase. 6. Service calls to correct the installation of your major appliance if it was purchased. Consumable parts are excluded from warranty coverage. 3. After checking "Troubleshooting," you on the product. In Canada, call 1-800-253-1301. Service calls... or installation date for in a remote area where service by an authorized Whirlpool servicer is not available. 10. Repairs to parts or systems resulting from unauthorized modifications made to obtain service under these excluded circumstances shall be repaired in the home and only...
... 30 days from the date of purchase. 6. Service calls to correct the installation of your major appliance if it was purchased. Consumable parts are excluded from warranty coverage. 3. After checking "Troubleshooting," you on the product. In Canada, call 1-800-253-1301. Service calls... or installation date for in a remote area where service by an authorized Whirlpool servicer is not available. 10. Repairs to parts or systems resulting from unauthorized modifications made to obtain service under these excluded circumstances shall be repaired in the home and only...

Warranty
Page 1
...purchase date is covered by Whirlpool. 5. You will pay for in an inaccessible location or is contrary to the appliance. 9. Repairs to parts or systems resulting from defects in accordance with published installation instructions. 11. In the U.S.A., call 1-800-807-6777. 9/07 Keep this... user or operator instructions and/or installation instructions. 4. The removal and reinstallation of purchase or installation date for Factory Specified Parts and repair labor to obtain service under these excluded circumstances shall be repaired in the home and only in-home service is...
...purchase date is covered by Whirlpool. 5. You will pay for in an inaccessible location or is contrary to the appliance. 9. Repairs to parts or systems resulting from defects in accordance with published installation instructions. 11. In the U.S.A., call 1-800-807-6777. 9/07 Keep this... user or operator instructions and/or installation instructions. 4. The removal and reinstallation of purchase or installation date for Factory Specified Parts and repair labor to obtain service under these excluded circumstances shall be repaired in the home and only in-home service is...