

User Guide
Page 2
... corresponding binary/object code. The source code will not be registered trademarks or copyrights of their respective companies, and are included in this manual, including the products and software described in writing by any warranty to infringe. SPECIFICATIONS AND INFORMATION CONTAINED IN THIS MANUAL ARE FURNISHED FOR INFORMATIONAL USE ONLY, AND ARE SUBJECT TO CHANGE AT ANY TIME...
... corresponding binary/object code. The source code will not be registered trademarks or copyrights of their respective companies, and are included in this manual, including the products and software described in writing by any warranty to infringe. SPECIFICATIONS AND INFORMATION CONTAINED IN THIS MANUAL ARE FURNISHED FOR INFORMATIONAL USE ONLY, AND ARE SUBJECT TO CHANGE AT ANY TIME...
User Guide
Page 6
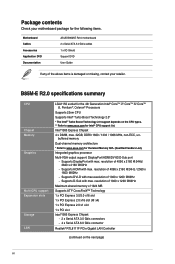
...Documentation ASUS B85M-E R2.0 motherboard 2 x Serial ATA 6.0 Gb/s cables 1 x I/O Shield Support DVD User Guide If any of 4096 x 2160 @24Hz/ 3840 x 2160 @60Hz - resolution of 1920 x 1200 @60Hz Maximum shared memory of 1024 MB Supports ATI® CrossFireX™ Technology 1 x PCI Express 3.0/2.0 x16 slot 1 x PCI Express 2.0 x16 slot (@ x4) 1 x PCI Express 2.0 x1 slot 1 x PCI slot Intel® B85 Express Chipset: - 2 x Serial ATA 3.0 Gb/s connectors - 4 x Serial ATA 6.0 Gb/s connector Realtek® RTL8111F PCIe Gigabit LAN Controller (continued on the CPU types. ** Refer to www.asus...
...Documentation ASUS B85M-E R2.0 motherboard 2 x Serial ATA 6.0 Gb/s cables 1 x I/O Shield Support DVD User Guide If any of 4096 x 2160 @24Hz/ 3840 x 2160 @60Hz - resolution of 1920 x 1200 @60Hz Maximum shared memory of 1024 MB Supports ATI® CrossFireX™ Technology 1 x PCI Express 3.0/2.0 x16 slot 1 x PCI Express 2.0 x16 slot (@ x4) 1 x PCI Express 2.0 x1 slot 1 x PCI slot Intel® B85 Express Chipset: - 2 x Serial ATA 3.0 Gb/s connectors - 4 x Serial ATA 6.0 Gb/s connector Realtek® RTL8111F PCIe Gigabit LAN Controller (continued on the CPU types. ** Refer to www.asus...

User Guide
Page 18
... the software settings. 1. Align the card connector with the screw you removed earlier. 6. Assign an IRQ to install expansion cards. Unplug the power cord before adding or removing expansion cards. Remove the system unit cover (if your motherboard is completely seated on the system and change the necessary BIOS settings, if any. See Chapter 2 for the expansion card. When using PCI cards on BIOS setup. 2. Secure the card to use . 4. To remove a DIMM B A 1.5 Expansion slots...
... the software settings. 1. Align the card connector with the screw you removed earlier. 6. Assign an IRQ to install expansion cards. Unplug the power cord before adding or removing expansion cards. Remove the system unit cover (if your motherboard is completely seated on the system and change the necessary BIOS settings, if any. See Chapter 2 for the expansion card. When using PCI cards on BIOS setup. 2. Secure the card to use . 4. To remove a DIMM B A 1.5 Expansion slots...
User Guide
Page 19
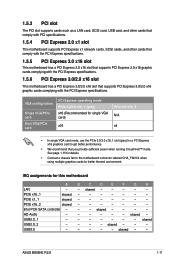
... x16 graphics card to the motherboard connector labeled CHA_FAN1/2 when using multiple graphics cards for better thermal environment. IRQ assignments for details. • Connect a chassis fan to get better performance. • We recommend that supports PCI Express 3.0/2.0 x16 graphic cards complying with the PCI Express specifications. 1.5.6 PCI Express 3.0/2.0 x16 slot This motherboard has a PCI Express 3.0/2.0 x16 slot that you provide sufficient power when running CrossFireX™ mode. PCIE x16_1 shared - - - - - - - shared - - - - Intel PCH SATA controller...
... x16 graphics card to the motherboard connector labeled CHA_FAN1/2 when using multiple graphics cards for better thermal environment. IRQ assignments for details. • Connect a chassis fan to get better performance. • We recommend that supports PCI Express 3.0/2.0 x16 graphic cards complying with the PCI Express specifications. 1.5.6 PCI Express 3.0/2.0 x16 slot This motherboard has a PCI Express 3.0/2.0 x16 slot that you provide sufficient power when running CrossFireX™ mode. PCIE x16_1 shared - - - - - - - shared - - - - Intel PCH SATA controller...

User Guide
Page 21
... devices. 4. This port connects to a Local Area Network (LAN) through a network hub. Line In port (light blue). In the 4.1, 5.1 and 7.1-channel configurations, the function of the audio ports in 2.1, 4.1, 5.1, or 7.1-channel configuration. This port connects to (Blinking then wake up from steady) S5 mode Speed LED Status Description OFF 10Mbps connection ORANGE 100Mbps connection GREEN 1Gbps connection _ _ Activity Link Speed LED LED LAN port 5. This 15-pin port is for the function of this port becomes Front Speaker Out. 7. LAN (RJ-45) port. ASUS B85M-E R2...
... devices. 4. This port connects to a Local Area Network (LAN) through a network hub. Line In port (light blue). In the 4.1, 5.1 and 7.1-channel configurations, the function of the audio ports in 2.1, 4.1, 5.1, or 7.1-channel configuration. This port connects to (Blinking then wake up from steady) S5 mode Speed LED Status Description OFF 10Mbps connection ORANGE 100Mbps connection GREEN 1Gbps connection _ _ Activity Link Speed LED LED LAN port 5. This 15-pin port is for the function of this port becomes Front Speaker Out. 7. LAN (RJ-45) port. ASUS B85M-E R2...
User Guide
Page 27
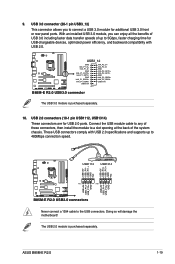
...These connectors are for USB-chargeable devices, optimized power efficiency, and backward compatibility with USB 2.0 specifications and supports up to connect a USB 3.0 module for additional USB 3.0 front or rear panel ports. B85M-E R2.0 USB3_12 GND IntA_P1_D+ IntA_P1_D- USB1112 USB1314 USB+5V USB_P11USB_P11+ GND NC USB+5V USB_P13USB_P13+ GND NC B85M-E R2.0 PIN 1 PIN 1 USB+5V USB_P12USB_P12+ GND USB+5V USB_P14USB_P14+ GND B85M-E R2.0 USB2.0 connectors Never connect a 1394 cable to 480Mbps connection speed. ASUS B85M-E R2.0 1-19 These USB connectors comply with USB...
...These connectors are for USB-chargeable devices, optimized power efficiency, and backward compatibility with USB 2.0 specifications and supports up to connect a USB 3.0 module for additional USB 3.0 front or rear panel ports. B85M-E R2.0 USB3_12 GND IntA_P1_D+ IntA_P1_D- USB1112 USB1314 USB+5V USB_P11USB_P11+ GND NC USB+5V USB_P13USB_P13+ GND NC B85M-E R2.0 PIN 1 PIN 1 USB+5V USB_P12USB_P12+ GND USB+5V USB_P14USB_P14+ GND B85M-E R2.0 USB2.0 connectors Never connect a 1394 cable to 480Mbps connection speed. ASUS B85M-E R2.0 1-19 These USB connectors comply with USB...
User Guide
Page 30
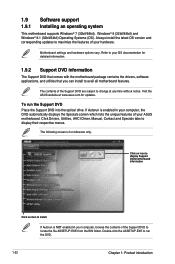
... of the Support DVD are subject to change at www.asus.com for reference only. Refer to locate the file ASSETUP.EXE from the BIN folder. Motherboard settings and hardware options vary. Visit the ASUS website at any time without notice. Click Drivers, Utilities, AHCI Driver, Manual, Contact and Specials tabs to run the Support DVD Place the Support DVD into the optical drive. 1.9 Software support 1.9.1 Installing an operating system This motherboard supports Windows® 7 (32bit...
... of the Support DVD are subject to change at www.asus.com for reference only. Refer to locate the file ASSETUP.EXE from the BIN folder. Motherboard settings and hardware options vary. Visit the ASUS website at any time without notice. Click Drivers, Utilities, AHCI Driver, Manual, Contact and Specials tabs to run the Support DVD Place the Support DVD into the optical drive. 1.9 Software support 1.9.1 Installing an operating system This motherboard supports Windows® 7 (32bit...
User Guide
Page 31
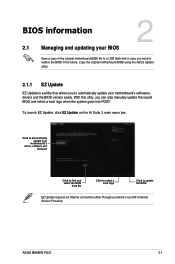
... to automatically update your motherboard's softwares, drivers and the BIOS version easily. ASUS B85M-E R2.0 2-1 Copy the original motherboard BIOS using the ASUS Update utility. 2.1.1 EZ Update EZ Update is a utility that allows you can also manually update the saved BIOS and select a boot logo when the system goes into POST. Click to automatically update your motherboard's driver, software and firmware Click to find and select the BIOS from file Click to select a boot logo Click to restore the BIOS in the...
... to automatically update your motherboard's softwares, drivers and the BIOS version easily. ASUS B85M-E R2.0 2-1 Copy the original motherboard BIOS using the ASUS Update utility. 2.1.1 EZ Update EZ Update is a utility that allows you can also manually update the saved BIOS and select a boot logo when the system goes into POST. Click to automatically update your motherboard's driver, software and firmware Click to find and select the BIOS from file Click to select a boot logo Click to restore the BIOS in the...
User Guide
Page 33
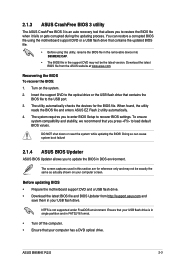
... enter BIOS Setup to recover BIOS settings. Ensure that your USB flash drive is in single partition and in your computer screen. The system requires you press to load default BIOS values. Recovering the BIOS To recover the BIOS: 1. NTFS is not supported under FreeDOS environment. Before updating BIOS • Prepare the motherboard support DVD and a USB flash drive. • Download the latest BIOS file and BIOS Updater from the ASUS website at www.asus.com. ASUS B85M-E R2.0 2-3 You can cause system boot failure! 2.1.4 ASUS BIOS Updater ASUS BIOS Updater...
... enter BIOS Setup to recover BIOS settings. Ensure that your USB flash drive is in single partition and in your computer screen. The system requires you press to load default BIOS values. Recovering the BIOS To recover the BIOS: 1. NTFS is not supported under FreeDOS environment. Before updating BIOS • Prepare the motherboard support DVD and a USB flash drive. • Download the latest BIOS file and BIOS Updater from the ASUS website at www.asus.com. ASUS B85M-E R2.0 2-3 You can cause system boot failure! 2.1.4 ASUS BIOS Updater ASUS BIOS Updater...
User Guide
Page 34
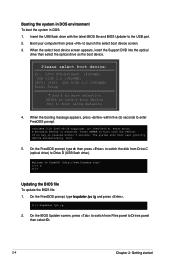
... boot device screen appears, insert the Support DVD into the optical drive then select the optical drive as the boot device. On the FreeDOS prompt, type d: then press to switch the disk from Files panel to Drive D (USB flash drive). On the BIOS Updater screen, press to switch from Drive C (optical drive) to Drives panel then select D:. 2-4 Chapter 2: Getting started C:/> d: D:/> Updating the BIOS file To update the BIOS file: 1. When the booting message appears, press within 5 seconds, the system will boot next priority device automatically. Press ENTER...
... boot device screen appears, insert the Support DVD into the optical drive then select the optical drive as the boot device. On the FreeDOS prompt, type d: then press to switch the disk from Files panel to Drive D (USB flash drive). On the BIOS Updater screen, press to switch from Drive C (optical drive) to Drives panel then select D:. 2-4 Chapter 2: Getting started C:/> d: D:/> Updating the BIOS file To update the BIOS file: 1. When the booting message appears, press within 5 seconds, the system will boot next priority device automatically. Press ENTER...
User Guide
Page 44
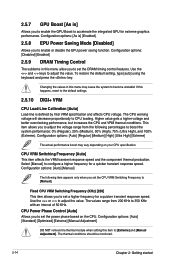
... DRAM timing control features. To restore the default setting, type [auto] using the keyboard and press the key. Changing the values in this happens, revert to the default settings. 2.5.10 DIGI+ VRM CPU Load-Line Calibration [Auto] Load-line is ] [Enabled]. 2.5.8 EPU Power Saving Mode [Disabled] Allows you to adjust the voltage range from 200 KHz to adjust the value. If this menu allow you to set the CPU VRM Switching Frequency to [Manual]. Select [Manual] to configure a higher frequency...
... DRAM timing control features. To restore the default setting, type [auto] using the keyboard and press the key. Changing the values in this happens, revert to the default settings. 2.5.10 DIGI+ VRM CPU Load-Line Calibration [Auto] Load-line is ] [Enabled]. 2.5.8 EPU Power Saving Mode [Disabled] Allows you to adjust the voltage range from 200 KHz to adjust the value. If this menu allow you to set the CPU VRM Switching Frequency to [Manual]. Select [Manual] to configure a higher frequency...
User Guide
Page 45
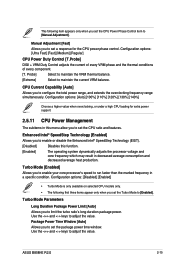
... value. Use the and keys to set the package power time window. Configuration options: [Auto] [100%] [110%] [120%] [130%] [140%] Choose a higher value when overclocking, or under a high CPU loading for the CPU power phase control. Configuration options: [Disabled] [Enabled] • Turbo Mode is only available on selected CPU models only. • The following item appears only when you set the CPU Power Phase Control item to enable or disable the Enhanced Intel® SpeedStep Technology (EIST). [Disabled] Disables this menu allow...
... value. Use the and keys to set the package power time window. Configuration options: [Auto] [100%] [110%] [120%] [130%] [140%] Choose a higher value when overclocking, or under a high CPU loading for the CPU power phase control. Configuration options: [Disabled] [Enabled] • Turbo Mode is only available on selected CPU models only. • The following item appears only when you set the CPU Power Phase Control item to enable or disable the Enhanced Intel® SpeedStep Technology (EIST). [Disabled] Disables this menu allow...
User Guide
Page 48
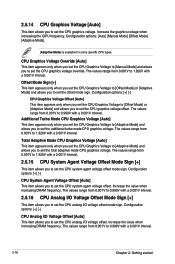
... interval. 2.5.16 CPU Analog I /O voltage offset mode sign. Configuration options: [Auto] [Manual Mode] [Offset Mode] [Adaptive Mode]. [Adaptive Mode] is available for some specific CPU types. Configuration options: [+] [-]. CPU System Agent Voltage Offset [Auto] This item allows you to set the additional turbo mode CPU graphics voltage. Increase the value when increasing DRAM frequency. Additional Turbo Mode CPU Graphics Voltage [Auto] This item appears only when you set the CPU Graphics Voltage to [Adaptive Mode] and allows you to set the CPU system agent voltage offset. The...
... interval. 2.5.16 CPU Analog I /O voltage offset mode sign. Configuration options: [Auto] [Manual Mode] [Offset Mode] [Adaptive Mode]. [Adaptive Mode] is available for some specific CPU types. Configuration options: [+] [-]. CPU System Agent Voltage Offset [Auto] This item allows you to set the additional turbo mode CPU graphics voltage. Increase the value when increasing DRAM frequency. Additional Turbo Mode CPU Graphics Voltage [Auto] This item appears only when you set the CPU Graphics Voltage to [Adaptive Mode] and allows you to set the CPU system agent voltage offset. The...
User Guide
Page 51
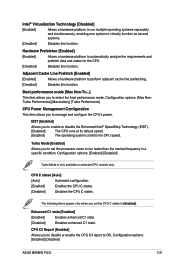
...[Disabled] The CPU runs at its default speed. [Enabled] The operating system controls the CPU speed. EIST [Enabled] Allows you to select the boot performance mode. CPU C3 Report [Enabled] Allows you to manage and configure the CPU's power. Configuration options: [Enabled] [Disabled] ASUS B85M-E R2.0 2-21 Configuration options: [Max NonTurbo Performance] [Max battery] [Turbo Performance] CPU Power Management Configuration This item allows you to disable or enable the CPU C3 report to OS. Enhanced C1 state [Enabled] [Enabled] Enables enhanced C1 state. [Disabled] Disables...
...[Disabled] The CPU runs at its default speed. [Enabled] The operating system controls the CPU speed. EIST [Enabled] Allows you to select the boot performance mode. CPU C3 Report [Enabled] Allows you to manage and configure the CPU's power. Configuration options: [Enabled] [Disabled] ASUS B85M-E R2.0 2-21 Configuration options: [Max NonTurbo Performance] [Max battery] [Turbo Performance] CPU Power Management Configuration This item allows you to disable or enable the CPU C3 report to OS. Enhanced C1 state [Enabled] [Enabled] Enables enhanced C1 state. [Disabled] Disables...
User Guide
Page 52
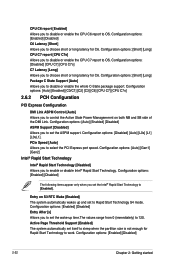
... Threshold Support [Enabled] The system automatically set to Rapid Start Technology S4 mode. PCIe Speed [Auto] Allows you to set the ASPM support. Configuration options: [Auto] [Enabled] [Disabled] ASPM Support [Disabled] Allows you to select the PCI Express port speed. Entry on both NB and SB side of the DMI Link. Configuration options: [Enabled] [Disabled] Entry After [x] Allows you to disable or enable the CPU C6 report to OS. CPU C6 report [Enabled] Allows you to set the wake-up and set itself to sleep...
... Threshold Support [Enabled] The system automatically set to Rapid Start Technology S4 mode. PCIe Speed [Auto] Allows you to set the ASPM support. Configuration options: [Auto] [Enabled] [Disabled] ASPM Support [Disabled] Allows you to select the PCI Express port speed. Entry on both NB and SB side of the DMI Link. Configuration options: [Enabled] [Disabled] Entry After [x] Allows you to disable or enable the CPU C6 report to OS. CPU C6 report [Enabled] Allows you to set the wake-up and set itself to sleep...
User Guide
Page 53
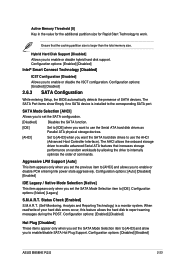
... disk drives as Parallel ATA physical storage devices. [AHCI] Set to [AHCI] when you to the corresponding SATA port. Active Memory Threshold [0] Key in the value for the additional partition size for Rapid Start Technology to [IDE]. SATA Mode Selection [AHCI] Allows you to set the SATA Mode Selection item to [AHCI] and allow you to enable or disable hybrid hard disk support. Status Check [Enabled] S.M.A.R.T. (Self-Monitoring, Analysis and Reporting Technology) is installed to enable or disable the ISCT configuration. Configuration options: [Disabled] [Enabled] ASUS B85M-E R2...
... disk drives as Parallel ATA physical storage devices. [AHCI] Set to [AHCI] when you to the corresponding SATA port. Active Memory Threshold [0] Key in the value for the additional partition size for Rapid Start Technology to [IDE]. SATA Mode Selection [AHCI] Allows you to set the SATA Mode Selection item to [AHCI] and allow you to enable or disable hybrid hard disk support. Status Check [Enabled] S.M.A.R.T. (Self-Monitoring, Analysis and Reporting Technology) is installed to enable or disable the ISCT configuration. Configuration options: [Disabled] [Enabled] ASUS B85M-E R2...
User Guide
Page 54
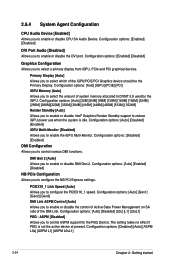
... to enable or disable CPU SA Audio Device. 2.6.4 System Agent Configuration CPU Audio Device [Enabled] Allows you to control ASPM support for the PEG Device. Configuration options: [Disabled] [Enabled] DMI Configuration Allows you to control various DMI functions. Configuration options: [Disabled] [Auto] [ASPM L0s] [ASPM L1] [ASPM L0sL1] 2-24 Chapter 2: Getting started Configuration options: [Enabled] [Disabled] DVI Port Audio [Disabled] Allows you to enable or disable the DVI port. Configuration options: [Auto] [IGPU] [PCIE] [PCI] iGPU Memory [Auto] Allows you to DVMT 5.0 used...
... to enable or disable CPU SA Audio Device. 2.6.4 System Agent Configuration CPU Audio Device [Enabled] Allows you to control ASPM support for the PEG Device. Configuration options: [Disabled] [Enabled] DMI Configuration Allows you to control various DMI functions. Configuration options: [Disabled] [Auto] [ASPM L0s] [ASPM L1] [ASPM L0sL1] 2-24 Chapter 2: Getting started Configuration options: [Enabled] [Disabled] DVI Port Audio [Disabled] Allows you to enable or disable the DVI port. Configuration options: [Auto] [IGPU] [PCIE] [PCI] iGPU Memory [Auto] Allows you to DVMT 5.0 used...
User Guide
Page 56
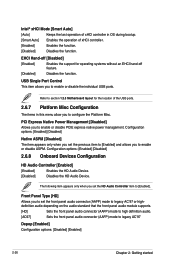
.... USB Single Port Control This item allows you to enable or disable PCIE express native power management. PCI Express Native Power Management [Disabled] Allows you to set the HD Audio Controller item to legacy AC'97 Depop [Enabled] Configuration options: [Disabled] [Enabled] 2-26 Chapter 2: Getting started Configuration options: [Enabled] [Disabled] 2.6.8 Onboard Devices Configuration HD Audio Controller [Enabled] [Enabled] Enables the HD Audio Device. [Disabled] Disables the HD Audio Device. Front Panel Type [HD] Allows you to enable or disable the individual USB ports...
.... USB Single Port Control This item allows you to enable or disable PCIE express native power management. PCI Express Native Power Management [Disabled] Allows you to set the HD Audio Controller item to legacy AC'97 Depop [Enabled] Configuration options: [Disabled] [Enabled] 2-26 Chapter 2: Getting started Configuration options: [Enabled] [Disabled] 2.6.8 Onboard Devices Configuration HD Audio Controller [Enabled] [Enabled] Enables the HD Audio Device. [Disabled] Disables the HD Audio Device. Front Panel Type [HD] Allows you to enable or disable the individual USB ports...
User Guide
Page 57
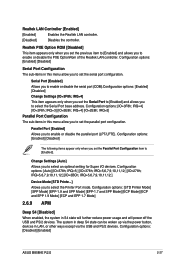
... serial port (COM).Configuration options: [Enabled] [Disabled] Change Settings [IO=3F8h; IRQ=5,6,7,9,10,11,12;] [IO=3BCh; Configuration options: [Disabled] [Enabled] ASUS B85M-E R2.0 2-27 IRQ=5,6,7,9,10,11,12;] [IO=278h; Configuration options: [STD Printer Mode] [SPP Mode] [EPP-1.9 and SPP Mode] [EPP-1.7 and SPP Mode] [ECP Mode] [ECP and EPP 1.9 Mode] [ECP and EPP 1.7 Mode] 2.6.9 APM Deep S4 [Disabled] When enabled, the system in this menu allow you to [Enabled] and allows you set the serial port configuration. Realtek LAN Controller [Enabled] [Enabled] Enables the Realtek LAN...
... serial port (COM).Configuration options: [Enabled] [Disabled] Change Settings [IO=3F8h; IRQ=5,6,7,9,10,11,12;] [IO=3BCh; Configuration options: [Disabled] [Enabled] ASUS B85M-E R2.0 2-27 IRQ=5,6,7,9,10,11,12;] [IO=278h; Configuration options: [STD Printer Mode] [SPP Mode] [EPP-1.9 and SPP Mode] [EPP-1.7 and SPP Mode] [ECP Mode] [ECP and EPP 1.9 Mode] [ECP and EPP 1.7 Mode] 2.6.9 APM Deep S4 [Disabled] When enabled, the system in this menu allow you to [Enabled] and allows you set the serial port configuration. Realtek LAN Controller [Enabled] [Enabled] Enables the Realtek LAN...
User Guide
Page 63
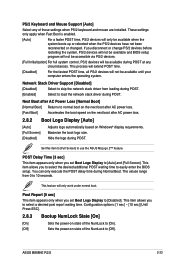
.... 2.8.2 Boot Logo Display [Auto] [Auto] [Full Screen] [Disabled] Adjusts logo automatically based on state of these settings when PS/2 keyboard and mouse are installed. Next Boot after AC Power Loss [Normal Boot] [Normal Boot] Returns to select a desired post report waiting time. Set this item to [Full Screen] to [On]. [Off] Sets the power-on Windows® display requrements. PS/2 Keyboard and Mouse Support [Auto] Select any circumstances. The values range from loading during POST. ASUS B85M-E R2...
.... 2.8.2 Boot Logo Display [Auto] [Auto] [Full Screen] [Disabled] Adjusts logo automatically based on state of these settings when PS/2 keyboard and mouse are installed. Next Boot after AC Power Loss [Normal Boot] [Normal Boot] Returns to select a desired post report waiting time. Set this item to [Full Screen] to [On]. [Off] Sets the power-on Windows® display requrements. PS/2 Keyboard and Mouse Support [Auto] Select any circumstances. The values range from loading during POST. ASUS B85M-E R2...


