
Installation Guide
Page 4
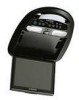
... in game/camcorder inputs (the A/V input jacks on the video monitor itself . Note: This is routed in such a manner that it will need to be cut into the headphone jacks on p7. -The VOH681A and VOH 682A video systems are fully installed. Notes: -All systems have been ...p6. The hinging mechanism is not intended for the individual components and accessory options being installed). If any access holes need to a VOH682A system using the speaker outputs. GENERAL INSTALLATION APPROACH: 1) Decide upon system configuration and options that will be installed (i.e.: what components, VCP...
... in game/camcorder inputs (the A/V input jacks on the video monitor itself . Note: This is routed in such a manner that it will need to be cut into the headphone jacks on p7. -The VOH681A and VOH 682A video systems are fully installed. Notes: -All systems have been ...p6. The hinging mechanism is not intended for the individual components and accessory options being installed). If any access holes need to a VOH682A system using the speaker outputs. GENERAL INSTALLATION APPROACH: 1) Decide upon system configuration and options that will be installed (i.e.: what components, VCP...

Installation Guide
Page 8
... Right) White RCA (Audio Left) Yellow RCA (Video) Optional Remote Headphone Stations Stereo Headphone Jack Stereo Headphone Jack Green (Right+) Black (Ground) Gray (Left+) IR LED: Clean the IR Receiver Window on the Face of the monitor). -6- This second harness would plug into an accessory hot line. 8)...cut off the excess. 5) Connect the 12 pin harness to the mating connector on the Video Monitor. 6) Connect the wired RF Modulator and / or the remote headphone jacks to the video monitor if those options are being included. 7) Connect power harness to the vehicle for further details....
... Right) White RCA (Audio Left) Yellow RCA (Video) Optional Remote Headphone Stations Stereo Headphone Jack Stereo Headphone Jack Green (Right+) Black (Ground) Gray (Left+) IR LED: Clean the IR Receiver Window on the Face of the monitor). -6- This second harness would plug into an accessory hot line. 8)...cut off the excess. 5) Connect the 12 pin harness to the mating connector on the Video Monitor. 6) Connect the wired RF Modulator and / or the remote headphone jacks to the video monitor if those options are being included. 7) Connect power harness to the vehicle for further details....

Installation Guide
Page 9
... using a second Source Component Harness (purchased separately, part number: 8010730). Note: Installation Guide covers models : VOH682A. -7- RCA-Female Patch Cord RCA-Female To Secondary AV Monitor Wireless FM Modulator Antenna LEFT WHITE RIGHT RED Mini-Din Connectors 21 TV antenna (If applicable) TO OPTIONAL ADDITIONAL... off the excess. 5) Connect the Power Harness to the mating connector on the Video Monitor. 6) Connect the wired RF Modulator and / or the remote headphone jacks to the video monitor if those options are being included. 7) Connect power harness to IR Window on the ...
... using a second Source Component Harness (purchased separately, part number: 8010730). Note: Installation Guide covers models : VOH682A. -7- RCA-Female Patch Cord RCA-Female To Secondary AV Monitor Wireless FM Modulator Antenna LEFT WHITE RIGHT RED Mini-Din Connectors 21 TV antenna (If applicable) TO OPTIONAL ADDITIONAL... off the excess. 5) Connect the Power Harness to the mating connector on the Video Monitor. 6) Connect the wired RF Modulator and / or the remote headphone jacks to the video monitor if those options are being included. 7) Connect power harness to IR Window on the ...

Installation Guide
Page 11
... TV signals, vehicle motion, direction the vehicle is property attached to instructions with modulator kit). Verify that the correct source is heard over headphones. Lamp common Purple / brown - Then press CH up button until sound is selected (i.e.: 1,2,3 or 4). Picture, but no sound ... affect TV reception. No Infrared remote functions for VCP (or other component). -9- Verify connections at 2 pin Power Harness behind video monitor. Verify antenna mounting and connections to black wire at 2 pin Power Harness Power but no video or sound -Verify that the IR...
... TV signals, vehicle motion, direction the vehicle is property attached to instructions with modulator kit). Verify that the correct source is heard over headphones. Lamp common Purple / brown - Then press CH up button until sound is selected (i.e.: 1,2,3 or 4). Picture, but no sound ... affect TV reception. No Infrared remote functions for VCP (or other component). -9- Verify connections at 2 pin Power Harness behind video monitor. Verify antenna mounting and connections to black wire at 2 pin Power Harness Power but no video or sound -Verify that the IR...