
Owners Manual
Page 3
......9 1.7 Maintenance and cleaning safety 10 1.8 Lighting safety 11 1.9 Steam program safety 11 2 Environmental instructions 12 2.1 Compliance with the WEEE Regulations and Waste Disposal 12 2.2 Packaging information 12 2.3 Standard conformity and test information / EU declaration of conformity..........12 3 Your drying machine 13 3.1 Technical specifications 13 3.2 General appearance 14 3.3 Scope of delivery 14 4 Installation 15 4.1 Right place for installation 15 4.2 Removing the shipping safety group 15 4.3 Water connection...
......9 1.7 Maintenance and cleaning safety 10 1.8 Lighting safety 11 1.9 Steam program safety 11 2 Environmental instructions 12 2.1 Compliance with the WEEE Regulations and Waste Disposal 12 2.2 Packaging information 12 2.3 Standard conformity and test information / EU declaration of conformity..........12 3 Your drying machine 13 3.1 Technical specifications 13 3.2 General appearance 14 3.3 Scope of delivery 14 4 Installation 15 4.1 Right place for installation 15 4.2 Removing the shipping safety group 15 4.3 Water connection...
Owners Manual
Page 4
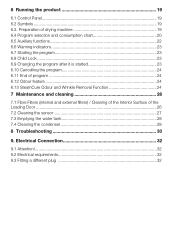
... 6.8 Child Lock...23 6.9 Changing the program after it is started 23 6.10 Cancelling the program 24 6.11 End of program 24 6.12 Odour feature 24 6.13 SteamCure Odour and Wrinkle Removal Function 24 7 Maintenance and cleaning 26 7.1 Fibre Filters (internal and external filters) / Cleaning of the Interior Surface of the Loading Door...26 7.2 Cleaning the sensor 27 7.3 Emptying the water tank 28 7.4 Cleaning the condenser 28 8 Troubleshooting 30 9. 6 Running...
... 6.8 Child Lock...23 6.9 Changing the program after it is started 23 6.10 Cancelling the program 24 6.11 End of program 24 6.12 Odour feature 24 6.13 SteamCure Odour and Wrinkle Removal Function 24 7 Maintenance and cleaning 26 7.1 Fibre Filters (internal and external filters) / Cleaning of the Interior Surface of the Loading Door...26 7.2 Cleaning the sensor 27 7.3 Emptying the water tank 28 7.4 Cleaning the condenser 28 8 Troubleshooting 30 9. 6 Running...
Owners Manual
Page 5
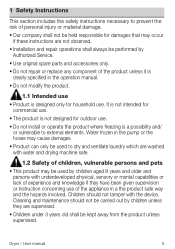
... these instructions are not observed. • Installation and repair operations shall always be performed by Authorized Service. • Use original spare parts and accessories only. • Do not repair or replace any component of the product unless it is clearly specified in the operation manual. • Do not modify the product. 1.1 Intended use • Product is a possibility and/ or vulnerable to dry and...
... these instructions are not observed. • Installation and repair operations shall always be performed by Authorized Service. • Use original spare parts and accessories only. • Do not repair or replace any component of the product unless it is clearly specified in the operation manual. • Do not modify the product. 1.1 Intended use • Product is a possibility and/ or vulnerable to dry and...
Owners Manual
Page 6
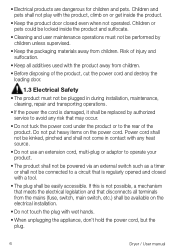
... used with a tool. • The plug shall be performed by authorized service to the rear of the product, cut the power cord and destroy the loading door. 1.3 Electrical Safety • The product must not be easily accessible. • Electrical products are dangerous for children and pets. Risk of injury and suffocation. • Keep all terminals from the mains (fuse, switch, main switch, etc.) shall be replaced...
... used with a tool. • The plug shall be performed by authorized service to the rear of the product, cut the power cord and destroy the loading door. 1.3 Electrical Safety • The product must not be easily accessible. • Electrical products are dangerous for children and pets. Risk of injury and suffocation. • Keep all terminals from the mains (fuse, switch, main switch, etc.) shall be replaced...

Owners Manual
Page 7
... product when transporting. • Do not use the extruding parts of the product (such as the loading door) to the right side when viewed from the front. 1.5 Installing safety • To prepare the product ready for installation, ensure that the electrical installation and water drain is proper by the customer. • Check for any , remove the water drain connections. • This product is damaged. •...
... product when transporting. • Do not use the extruding parts of the product (such as the loading door) to the right side when viewed from the front. 1.5 Installing safety • To prepare the product ready for installation, ensure that the electrical installation and water drain is proper by the customer. • Check for any , remove the water drain connections. • This product is damaged. •...
Owners Manual
Page 8
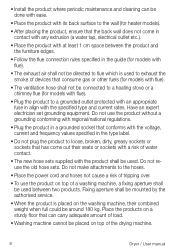
...hose shall not be connected to a heating stove or a chimney flue (for models with flue). • Plug the product to a grounded outlet protected with an appropriate fuse in the guide (for models with flue). • The exhaust air shall not be directed to flue which is placed on top of water contact. • The new hose sets...the drying machine. 8 Dryer / User manual Place the products on a sturdy floor that can be done with ease. • Place the product with its back surface to the wall (for heater models). • After placing the product, ensure that the back wall does not come ...
...hose shall not be connected to a heating stove or a chimney flue (for models with flue). • Plug the product to a grounded outlet protected with an appropriate fuse in the guide (for models with flue). • The exhaust air shall not be directed to flue which is placed on top of water contact. • The new hose sets...the drying machine. 8 Dryer / User manual Place the products on a sturdy floor that can be done with ease. • Place the product with its back surface to the wall (for heater models). • After placing the product, ensure that the back wall does not come ...
Owners Manual
Page 10
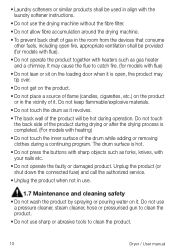
... inner surface of the drum while adding or removing clothes during operation. Do not use a pressure cleaner, steam cleaner, hose or pressurised gun to clean the product. • Do not use . 1.7 Maintenance and cleaning safety • Do not wash the product by spraying or pouring water on it. Unplug the product (or shut down the connected fuse) and call the authorized service. • Unplug the product...
... inner surface of the drum while adding or removing clothes during operation. Do not use a pressure cleaner, steam cleaner, hose or pressurised gun to clean the product. • Do not use . 1.7 Maintenance and cleaning safety • Do not wash the product by spraying or pouring water on it. Unplug the product (or shut down the connected fuse) and call the authorized service. • Unplug the product...
Owners Manual
Page 11
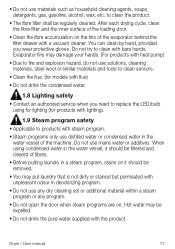
... loading door. • Clean the fibre accumulation on . Evaporator fins may damage your hands. (For products with heat pump) • Due to fire and explosion hazard, do not use solutions, cleaning materials, steel wool or similar materials and tools to clean sensors. • Clean the flue. (for products with lighting). 1.9 Steam program safety • Applicable to replace the LED/bulb using condensed water in the water...
... loading door. • Clean the fibre accumulation on . Evaporator fins may damage your hands. (For products with heat pump) • Due to fire and explosion hazard, do not use solutions, cleaning materials, steel wool or similar materials and tools to clean sensors. • Clean the flue. (for products with lighting). 1.9 Steam program safety • Applicable to replace the LED/bulb using condensed water in the water...
Owners Manual
Page 15
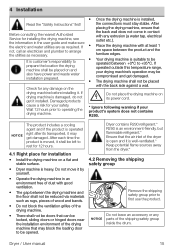
... be locked, sliding doors or hinged doors near the installation environment of the drying machine that the air inlet of the dryer is heavy. Dryer / User manual 15 It is customer's responsibility to rest for 12 hours. 4.1 Right place for any damage on a flat and stable surface. • Dryer machine is open and it shall be compromised and get damaged. If operated outside this temperature...
... be locked, sliding doors or hinged doors near the installation environment of the drying machine that the air inlet of the dryer is heavy. Dryer / User manual 15 It is customer's responsibility to rest for 12 hours. 4.1 Right place for any damage on a flat and stable surface. • Dryer machine is open and it shall be compromised and get damaged. If operated outside this temperature...
Owners Manual
Page 16
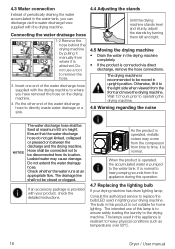
... heavy physical conditions such as temperatures over 50°C. 16 Dryer / User manual Wait 12 hours prior to operating the drying machine. 4.6 Warning regarding the noise NOTICE The water discharge hose shall be closed or clogged. The drainage line shall not be fixed at an appropriate flow. Consult the authorized service to where you can discharge via direct discharge, remove the hose connections. If an accessory package...
... heavy physical conditions such as temperatures over 50°C. 16 Dryer / User manual Wait 12 hours prior to operating the drying machine. 4.6 Warning regarding the noise NOTICE The water discharge hose shall be closed or clogged. The drainage line shall not be fixed at an appropriate flow. Consult the authorized service to where you can discharge via direct discharge, remove the hose connections. If an accessory package...
Owners Manual
Page 17
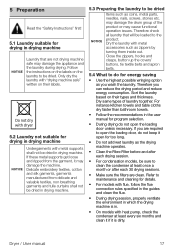
... clean. Close the zippers, hooks and clasps, button up the covers' buttons, tie textile belts and apron belts. 5.4 What to open the loading door, do not keep it open the loading door unless necessary. Dry same types of the product or may damage the machine. Dryer / User manual 17 Dry the laundry with heat pump, check the condenser at least once a month or after each 30 drying sessions. • Make sure the filters...
... clean. Close the zippers, hooks and clasps, button up the covers' buttons, tie textile belts and apron belts. 5.4 What to open the loading door, do not keep it open the loading door unless necessary. Dry same types of the product or may damage the machine. Dryer / User manual 17 Dry the laundry with heat pump, check the condenser at least once a month or after each 30 drying sessions. • Make sure the filters...
Owners Manual
Page 19
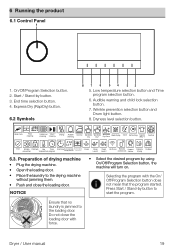
...Water tank Filter cleaning Condenser Start/ cleaning Stand-by using On/Off/Program Selection button, the machine will turn on. Ensure that the program started. Dryer / User manual 19 6 Running the product 6.1 Control Panel 1 1. Wrinkle prevention selection button and Drum light button. 8. Selecting the program with force. NOTICE • Select the desired program by Drying Audible warning Iron Dry Wardrobe Wardrobe Wardrobe Wool drying Silent Refreshing Hygiene Dry Dry+ Dry Extra (Baby+) Feather End Wrinkle Child lock Low Timer prevention temperature...
...Water tank Filter cleaning Condenser Start/ cleaning Stand-by using On/Off/Program Selection button, the machine will turn on. Ensure that the program started. Dryer / User manual 19 6 Running the product 6.1 Control Panel 1 1. Wrinkle prevention selection button and Drum light button. 8. Selecting the program with force. NOTICE • Select the desired program by Drying Audible warning Iron Dry Wardrobe Wardrobe Wardrobe Wool drying Silent Refreshing Hygiene Dry Dry+ Dry Extra (Baby+) Feather End Wrinkle Child lock Low Timer prevention temperature...
Owners Manual
Page 22
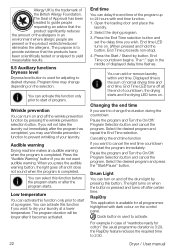
... the required time to desired dryness. Low temperature You can turn on and off after it does not sound when the program is completed. End time LED turns on the control panel. Press the Start / Stand-by pressing the wrinkle prevention selection button. The ":" sign in case of countdown, the drying starts and the drying LED turns on when the button is completed. The light turns on . Wrinkle prevention...
... the required time to desired dryness. Low temperature You can turn on and off after it does not sound when the program is completed. End time LED turns on the control panel. Press the Start / Stand-by pressing the wrinkle prevention selection button. The ":" sign in case of countdown, the drying starts and the drying LED turns on when the button is completed. The light turns on . Wrinkle prevention...
Owners Manual
Page 26
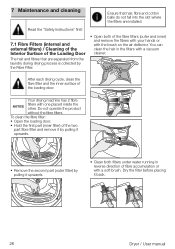
... fibre filter: • Open the loading door. • Hold the first part (inner filter) of the loading door. 7 Maintenance and cleaning Ensure that are installed. Your drying machine has 2 fibre NOTICE filters with a vacuum cleaner. After each drying cycle, clean the fibre filter and the inner surface of the two part fibre filter and remove it by pulling it upwards. • Remove the second part (outer filter) by the Fibre Filter. • Open both filters under water running...
... fibre filter: • Open the loading door. • Hold the first part (inner filter) of the loading door. 7 Maintenance and cleaning Ensure that are installed. Your drying machine has 2 fibre NOTICE filters with a vacuum cleaner. After each drying cycle, clean the fibre filter and the inner surface of the two part fibre filter and remove it by pulling it upwards. • Remove the second part (outer filter) by the Fibre Filter. • Open both filters under water running...
Owners Manual
Page 30
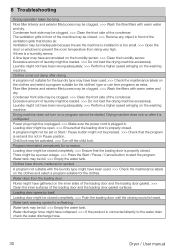
... the power cord is a humidity sensor. Clothes come out damp after it is too small. >>> Open the door or windows to prevent the room temperature from the loading door. A program not suitable for the clothes. Loading door might not have shrunk, hardened or spoiled. A program not suitable with warm water and dry. Water discharge hose might be closed . Drying machine does not run after drying. Drying machine does not turn on /flashing. The...
... the power cord is a humidity sensor. Clothes come out damp after it is too small. >>> Open the door or windows to prevent the room temperature from the loading door. A program not suitable for the clothes. Loading door might not have shrunk, hardened or spoiled. A program not suitable with warm water and dry. Water discharge hose might be closed . Drying machine does not run after drying. Drying machine does not turn on /flashing. The...
Owners Manual
Page 31
... product may have been turned on using On/Off button. >>> Check that it is clean. If the problem persists after following the instructions in the drier to the plastic part. Dryer / User manual 31 Fibre filter (interior and exterior filter) may be formed on the screen, please follow the steps below. If you see the "F L t" message on the fibre filter pores that the filter cloth is heard from...
... product may have been turned on using On/Off button. >>> Check that it is clean. If the problem persists after following the instructions in the drier to the plastic part. Dryer / User manual 31 Fibre filter (interior and exterior filter) may be formed on the screen, please follow the steps below. If you see the "F L t" message on the fibre filter pores that the filter cloth is heard from...
Owners Manual
Page 32
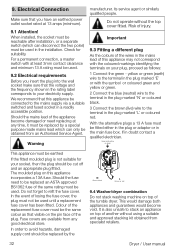
... the colours of the replacement fuse cover must be obtained from specialist retailers. 32 Dryer / User manual Should the fuse need replacing at any good electrical store. Colour of the wires in the installation. It is not suitable for suitability. Check for your electricity supply. Do not operate without using a suitable and approved stacking kit obtained from an Authorised Service Agent. With the alternative plugs a 13 A fuse must be cut off...
... the colours of the replacement fuse cover must be obtained from specialist retailers. 32 Dryer / User manual Should the fuse need replacing at any good electrical store. Colour of the wires in the installation. It is not suitable for suitability. Check for your electricity supply. Do not operate without using a suitable and approved stacking kit obtained from an Authorised Service Agent. With the alternative plugs a 13 A fuse must be cut off...
Owners Manual
Page 33
...; Time taken off work. • Damaged food, clothing or other than those offered under the terms of this guarantee? • Repairs to the product required as a result of faulty materials, defective components or manufacturing defects. • Functional replacement parts to repair a product. • The costs of a Beko Approved Engineer to ice trays, scrapers, cutlery baskets, filters and light bulbs. • Repairs necessary as a direct...
...; Time taken off work. • Damaged food, clothing or other than those offered under the terms of this guarantee? • Repairs to the product required as a result of faulty materials, defective components or manufacturing defects. • Functional replacement parts to repair a product. • The costs of a Beko Approved Engineer to ice trays, scrapers, cutlery baskets, filters and light bulbs. • Repairs necessary as a direct...
Owners Manual
Page 34
... covered by this guarantee will be governed by Irish law and the Irish courts will not be provided. Does Beko offer replacements? Appointments outside these hours may at the sole discretion of any service call if: • You cannot provide evidence that your product has not been installed or operated in England and Wales with the User Instructions...
... covered by this guarantee will be governed by Irish law and the Irish courts will not be provided. Does Beko offer replacements? Appointments outside these hours may at the sole discretion of any service call if: • You cannot provide evidence that your product has not been installed or operated in England and Wales with the User Instructions...
Owners Manual
Page 36
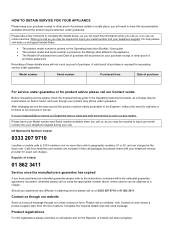
... from the list of options. For help please visit beko.co.uk/support/model-finder • The product model number is printed on the Operating Instruction Booklet / User guide • The product model and serial number is found, and even though your product may be required to input your serial number into your telephone keypad during your telephone service provider for requesting service under guarantee. Model number Serial number Purchased from landlines...
... from the list of options. For help please visit beko.co.uk/support/model-finder • The product model number is printed on the Operating Instruction Booklet / User guide • The product model and serial number is found, and even though your product may be required to input your serial number into your telephone keypad during your telephone service provider for requesting service under guarantee. Model number Serial number Purchased from landlines...


