User Manual
Page 3
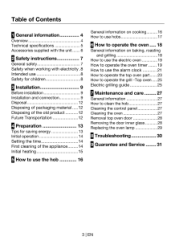
... to use the electric oven 19 How to operate the oven timer 19 How to use the alarm clock 21 How to operate the top oven part 23 How to operate the grill -Top oven 25 Electric grilling guide 25 M Maintenance and care 27 General information 27 How to clean the hob 27 Cleaning the control panel 27 Cleaning the oven 27 Removal top oven door 28 Removing the door inner glass 28 Replacing the oven lamp 29 8 Troubleshooting 30 9 Guarantee and Service...
... to use the electric oven 19 How to operate the oven timer 19 How to use the alarm clock 21 How to operate the top oven part 23 How to operate the grill -Top oven 25 Electric grilling guide 25 M Maintenance and care 27 General information 27 How to clean the hob 27 Cleaning the control panel 27 Cleaning the oven 27 Removal top oven door 28 Removing the door inner glass 28 Replacing the oven lamp 29 8 Troubleshooting 30 9 Guarantee and Service...
User Manual
Page 4
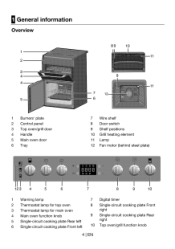
... information Overview 1 2 3 4 4 5 1 Burners' plate 2 Control panel 3 Top oven/grill door 4 Handle 5 Main oven door 6 Tray 89 10 11 11 7 12 6 7 Wire shelf 8 Door switch 9 Shelf positions 10 Grill heating element 11 Lamp 12 Fan motor (behind steel plate) 23 4 5 6 7 8 9 10 1 Warning lamp 2 Thermostat lamp for top oven 3 Thermostat lamp for main oven 4 Main oven function knob 5 Single-circuit cooking plate Rear left 6 Single-circuit cooking plate Front left 7 Digital timer 8 Single-circuit cooking plate Front right 9 Single-circuit cooking plate Rear right 10 Top oven/grill function knob...
... information Overview 1 2 3 4 4 5 1 Burners' plate 2 Control panel 3 Top oven/grill door 4 Handle 5 Main oven door 6 Tray 89 10 11 11 7 12 6 7 Wire shelf 8 Door switch 9 Shelf positions 10 Grill heating element 11 Lamp 12 Fan motor (behind steel plate) 23 4 5 6 7 8 9 10 1 Warning lamp 2 Thermostat lamp for top oven 3 Thermostat lamp for main oven 4 Main oven function knob 5 Single-circuit cooking plate Rear left 6 Single-circuit cooking plate Front left 7 Digital timer 8 Single-circuit cooking plate Front right 9 Single-circuit cooking plate Rear right 10 Top oven/grill function knob...
User Manual
Page 5
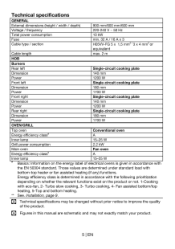
.... Those values are schematic and may be changed without prior notice to improve the quality of electrical ovens is given in this manual are determined under standard load with bottom-top heater or fan assisted heating (if any) functions. ID Technical specifications may not exactly match your product. 5 I EN Technical specifications GENERAL External dimensions (height / width / depth) Voltage / frequency Total power consumption Fuse Cable type...
.... Those values are schematic and may be changed without prior notice to improve the quality of electrical ovens is given in this manual are determined under standard load with bottom-top heater or fan assisted heating (if any) functions. ID Technical specifications may not exactly match your product. 5 I EN Technical specifications GENERAL External dimensions (height / width / depth) Voltage / frequency Total power consumption Fuse Cable type...
User Manual
Page 7
... that will instruct them from the mains during use the product when your dishes. The heat accumulation might damage the bottom of the oven. • Keep all ventilation slots clear of electric shock! • Never use . • Do not place baking trays, dishes or aluminium foil directly onto the bottom of the oven. Call Authorised Service Agent. • Do not operate the product if...
... that will instruct them from the mains during use the product when your dishes. The heat accumulation might damage the bottom of the oven. • Keep all ventilation slots clear of electric shock! • Never use . • Do not place baking trays, dishes or aluminium foil directly onto the bottom of the oven. Call Authorised Service Agent. • Do not operate the product if...
User Manual
Page 8
.... This product should also not be used for defrosting, baking, roasting and grilling food. Safety for children • Accessible parts of the appliance will be installed by removing the fuse or switching off after every use . Make sure that the gas/electrical connection do not load any items above the appliance that the oven surface and bottom of the pots are switched off the circuit breaker. •...
.... This product should also not be used for defrosting, baking, roasting and grilling food. Safety for children • Accessible parts of the appliance will be installed by removing the fuse or switching off after every use . Make sure that the gas/electrical connection do not load any items above the appliance that the oven surface and bottom of the pots are switched off the circuit breaker. •...
User Manual
Page 10
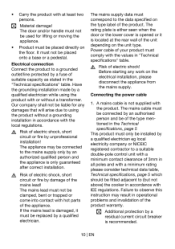
... is only guaranteed after correct installation. • Carry the product with the values in "Technical specifications" table. Connecting the power cable 1. I L Risk of the product warranty. The door and/or handle must correspond to using the product with the local regulations. The appliance may result in operational problems and invalidation of electric shock, short circuit or fire by a residual current circuit breaker is recommended. 101 EN The...
... is only guaranteed after correct installation. • Carry the product with the values in "Technical specifications" table. Connecting the power cable 1. I L Risk of the product warranty. The door and/or handle must correspond to using the product with the local regulations. The appliance may result in operational problems and invalidation of electric shock, short circuit or fire by a residual current circuit breaker is recommended. 101 EN The...
User Manual
Page 11
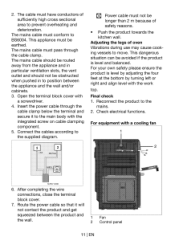
... the wall and/or cabinets. 3. Connect the cables according to position between the product and 1 Fan the wall. 2 Control panel 11 l EN Final check 1. Adjusting the legs of safety reasons. • Push the product towards the kitchen wall. 2. Route the power cable so that it to BS6004. The cable must conform to the main body with the work top. Open the terminal block cover with a cooling fan...
... the wall and/or cabinets. 3. Connect the cables according to position between the product and 1 Fan the wall. 2 Control panel 11 l EN Final check 1. Adjusting the legs of safety reasons. • Push the product towards the kitchen wall. 2. Route the power cable so that it to BS6004. The cable must conform to the main body with the work top. Open the terminal block cover with a cooling fan...
User Manual
Page 12
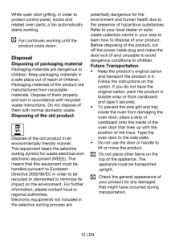
... of the old product in order to protect control panel, knobs and related oven parts; ID Do not place other items on the carton. Keep packaging materials in order to be transported upright. Before disposing of your product. Tape the oven door to the side walls. • Do not use the door or handle to children. a fan automatically starts working until the product cools down. Disposing...
... of the old product in order to protect control panel, knobs and related oven parts; ID Do not place other items on the carton. Keep packaging materials in order to be transported upright. Before disposing of your product. Tape the oven door to the side walls. • Do not use the door or handle to children. a fan automatically starts working until the product cools down. Disposing...
User Manual
Page 13
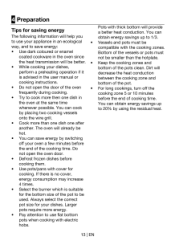
... will perform a preheating operation if it decrease the heat conduction is suitable for the bottom size of the oven • For long cookings, turn off your appliance in an ecological • Vessels and pots must coated cookware in the user manual or between the cooking zone and cooking instructions. Do not open the door of the pot to 1/3. If there is no cover, energy consumption...
... will perform a preheating operation if it decrease the heat conduction is suitable for the bottom size of the oven • For long cookings, turn off your appliance in an ecological • Vessels and pots must coated cookware in the user manual or between the cooking zone and cooking instructions. Do not open the door of the pot to 1/3. If there is no cover, energy consumption...
User Manual
Page 14
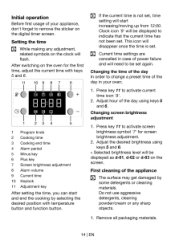
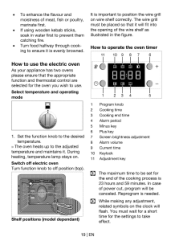
.... Changing screen brightness adjustment 1. Changing the time of the day In order to change a preset time of the day in case of power failure and will disappear once the time is not set, time setting will be set . Initial operation Before first usage of your oven; 1. First cleaning of the appliance ID The surface may get damaged by selecting the desired position with temperature button and function button.
.... Changing screen brightness adjustment 1. Changing the time of the day In order to change a preset time of the day in case of power failure and will disappear once the time is not set, time setting will be set . Initial operation Before first usage of your oven; 1. First cleaning of the appliance ID The surface may get damaged by selecting the desired position with temperature button and function button.
User Manual
Page 15
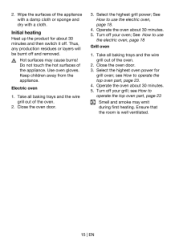
.... Take all baking trays and the wire grill out of the appliance. See How to operate the top oven part, page 23. 4. see How to use the electric oven, page 18 Grill oven 1. Turn off your oven; Select the highest oven power for about 30 minutes and then switch it off and removed. Turn off your grill; Initial heating Heat up the product for grill oven; Thus, any production residues or layers...
.... Take all baking trays and the wire grill out of the appliance. See How to operate the top oven part, page 23. 4. see How to use the electric oven, page 18 Grill oven 1. Turn off your oven; Select the highest oven power for about 30 minutes and then switch it off and removed. Turn off your grill; Initial heating Heat up the product for grill oven; Thus, any production residues or layers...
User Manual
Page 18
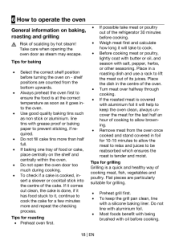
... a roasting dish and use a rack to lift the meat out of scalding by hot steam! 6 How to operate the oven General information on baking, roasting and grilling A Risk of its juices. Place the dish in foil for grilling. • Preheat grill first. • To keep the oven clean, always uncover the meat for roasting • Preheat oven first. • If possible take to cook. • Before cooking meat or poultry, lightly...
... a roasting dish and use a rack to lift the meat out of scalding by hot steam! 6 How to operate the oven General information on baking, roasting and grilling A Risk of its juices. Place the dish in foil for grilling. • Preheat grill first. • To keep the oven clean, always uncover the meat for roasting • Preheat oven first. • If possible take to cook. • Before cooking meat or poultry, lightly...
User Manual
Page 19
...; Turn food halfway through cook- During heating, temperature lamp stays on wire shelf correctly. You must be set for the oven you wish to use the electric oven As your appliance has two ovens please ensure that the appropriate function and thermostat control are selected for the end of power cut, program will flash. Shelf positions (model dependant) 0 0 Ed cru Ro a L3 El 23 4 5 1 Program knob 2 Cooking time 3 Cooking...
...; Turn food halfway through cook- During heating, temperature lamp stays on wire shelf correctly. You must be set for the oven you wish to use the electric oven As your appliance has two ovens please ensure that the appropriate function and thermostat control are selected for the end of power cut, program will flash. Shelf positions (model dependant) 0 0 Ed cru Ro a L3 El 23 4 5 1 Program knob 2 Cooking time 3 Cooking...

User Manual
Page 20
... displayed once the cooking starts. If you press any key, the oven will be displayed. 9. Do not forget to activate cooking end time symbol '3'. 4. Select operation mode and temperature. » The oven will sound. 8. Adjust the cooking time using 5 and 6 keys. » Once the cooking end time is set temperature. Select operation mode and temperature. » Oven timer automatically calculates the startup time for 2 minutes. Press 1 key to activate cooking time symbol (2). 2. Switch on semi-automatic operation In this operation mode...
... displayed once the cooking starts. If you press any key, the oven will be displayed. 9. Do not forget to activate cooking end time symbol '3'. 4. Select operation mode and temperature. » The oven will sound. 8. Adjust the cooking time using 5 and 6 keys. » Once the cooking end time is set temperature. Select operation mode and temperature. » Oven timer automatically calculates the startup time for 2 minutes. Press 1 key to activate cooking time symbol (2). 2. Switch on semi-automatic operation In this operation mode...
User Manual
Page 24
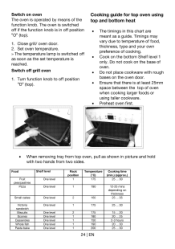
Cooking guide for top oven using taller cookware. • Preheat oven first. AMR • When removing tray from two sides. Close grill/ oven door. 2. Switch off position "0" (top). 1. Timings may vary due to off as soon as the set temperature is switched off position "0" (top). Switch on oven The oven is at least 25mm space between the top of oven when cooking larger foods or using top and bottom heat • The timings in...
Cooking guide for top oven using taller cookware. • Preheat oven first. AMR • When removing tray from two sides. Close grill/ oven door. 2. Switch off position "0" (top). 1. Timings may vary due to off as soon as the set temperature is switched off position "0" (top). Switch on oven The oven is at least 25mm space between the top of oven when cooking larger foods or using top and bottom heat • The timings in...

User Manual
Page 25
... the grill heater for grilling. Electric grilling guide • The timings in use the upper level for grilling. • Food which requires browning only should be heated when main oven is cooked on the floor of the dish. Set grill temperature to the depth of the grill compartment, according to 150 °C and preheat for OPEN DOOR GRILLING. Turn function knob to ensure it...
... the grill heater for grilling. Electric grilling guide • The timings in use the upper level for grilling. • Food which requires browning only should be heated when main oven is cooked on the floor of the dish. Set grill temperature to the depth of the grill compartment, according to 150 °C and preheat for OPEN DOOR GRILLING. Turn function knob to ensure it...
User Manual
Page 27
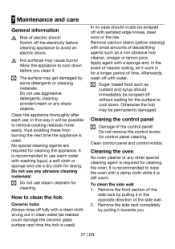
.... Cleaning the control panel [1:1 Damage of electric shock! Cleaning the oven No oven cleaner or any abrasive cleaning materials! Allow the appliance to use warm water with washing liquid, a soft cloth or sponge and use a dry cloth for cleaning the appliance. Clean control panel and control knobs. Remove the front section of decalcifying agents such as residue could damage the ceramic glass surface next time the hob is required for control panel cleaning. Remove...
.... Cleaning the control panel [1:1 Damage of electric shock! Cleaning the oven No oven cleaner or any abrasive cleaning materials! Allow the appliance to use warm water with washing liquid, a soft cloth or sponge and use a dry cloth for cleaning the appliance. Clean control panel and control knobs. Remove the front section of decalcifying agents such as residue could damage the ceramic glass surface next time the hob is required for control panel cleaning. Remove...
User Manual
Page 29
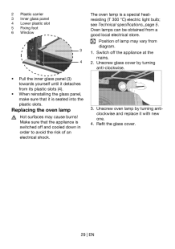
Refit the glass cover. 29 I EN Replacing the oven lamp Hot surfaces may vary from diagram. 1. Make sure that it is seated into the plastic slots. Unscrew oven lamp by turning anti-clockwise. 3. The oven lamp is a special heatresisting (T 300 °C) electric light bulb; see Technical specifications, page 5. Oven lamps can be obtained from a good local electrical store. 2 Plastic carrier 3 Inner glass panel 4 Lower plastic slot 5 Fixing...
Refit the glass cover. 29 I EN Replacing the oven lamp Hot surfaces may vary from diagram. 1. Make sure that it is seated into the plastic slots. Unscrew oven lamp by turning anti-clockwise. 3. The oven lamp is a special heatresisting (T 300 °C) electric light bulb; see Technical specifications, page 5. Oven lamps can be obtained from a good local electrical store. 2 Plastic carrier 3 Inner glass panel 4 Lower plastic slot 5 Fixing...

User Manual
Page 30
... fuse box. If the appliance has a timer, the timer may not be carried out by unprofessional repairs! previously. There are not set. No power. Electrical equipment Malfunction/problem The appliance does not work Oven does not heat. If necessary, replace or reset them . Then switch the oven off with function knobs, set . number for a couple of this user manual. 30 I EN No current. Function knob and/thermostat knob are no customer service...
... fuse box. If the appliance has a timer, the timer may not be carried out by unprofessional repairs! previously. There are not set. No power. Electrical equipment Malfunction/problem The appliance does not work Oven does not heat. If necessary, replace or reset them . Then switch the oven off with function knobs, set . number for a couple of this user manual. 30 I EN No current. Function knob and/thermostat knob are no customer service...
User Manual
Page 31
... parts, including knobs and flaps • Accessory items. inciucfiny ice trays, scrapers. Uscr Instructions Booklet provided. • Professional Installation by a Gas Safe (cr BORD GAIS) registered Gas Installer. • 'The guarantee is given only within the boundaries of a Boko approved repairer to carry out the repair. 9 Guarantee and Service Your Beko proouct is guaranteed against the cost of breakdown repairs : Fmestanding apoilances : 1 year Built...
... parts, including knobs and flaps • Accessory items. inciucfiny ice trays, scrapers. Uscr Instructions Booklet provided. • Professional Installation by a Gas Safe (cr BORD GAIS) registered Gas Installer. • 'The guarantee is given only within the boundaries of a Boko approved repairer to carry out the repair. 9 Guarantee and Service Your Beko proouct is guaranteed against the cost of breakdown repairs : Fmestanding apoilances : 1 year Built...


