Beko OIF22309 Support and Manuals
Get Help and Manuals for this Beko item
View All Support Options Below
Free Beko OIF22309 manuals!
Problems with Beko OIF22309?
Ask a Question
Free Beko OIF22309 manuals!
Problems with Beko OIF22309?
Ask a Question
Popular Beko OIF22309 Manual Pages
User Manual - Page 1
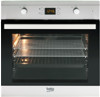
Built-in Oven User Manual
OIF 22309
User Manual - Page 2
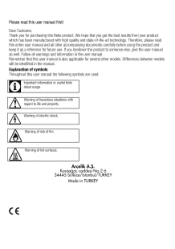
... Beko product. Warning of hot surfaces.
Dear Customer, Thank you for purchasing this user manual first! Please read this entire user manual and all warnings and information in the user manual....the product and keep it as well. Differences between models will be identified in TURKEY
CE Explanation of symbols Throughout this user manual is also applicable for future use. A Warning of...
User Manual - Page 3
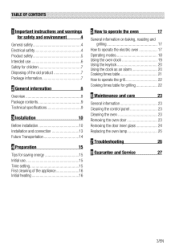
...Overview
8
Package contents
9
Technical specifications
9
El Installation
10
Before installation
10
Installation and connection
13
Future Transportation
14
fl Preparation
15
Tips for saving energy
15
Initial use
15
Time setting
15
First cleaning of the appliance
... the door inner glass
24
Replacing the oven lamp
25
Troubleshooting
26
il
M Guarantee and Service
27
3/EN
User Manual - Page 4
... company shall not be replaced by the manufacturer, its service agent or similarly
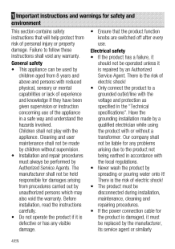
4/EN Before installation, read the instructions carefully. • Do not operate the product if it ! Cleaning and user maintenance shall not be made by a qualified electrician while using the product with or without supervision. • Installation and repair procedures must be used by...
User Manual - Page 9
...specifications may vary.
9/EN
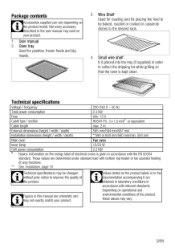
Package contents
ccessories supplied can vary depending on the energy label of ie product. User manual...Installation, page 10. Figures in the user manual may not exactly match your product.
1.
Depending on your product. Not every accessory described in this manual...Technical specifications
Voltage ...594 mm/567 mm
Installation dimensions (height /...
User Manual - Page 15
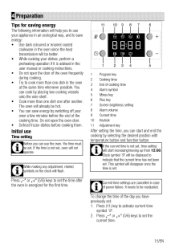
... desired position with temperature button and function button. This symbol will disappear once the time is not set the current time.
15/EN
If the current time is advised in the user manual or cooking instructions. • Do not open the oven door. • Defrost frozen dishes before the end of the day...
User Manual - Page 18
...
2. Operating modes The order of
the grilling time.
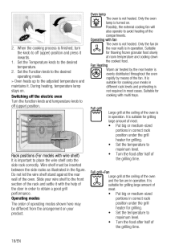
18/EN Suitable for grilling. • Set the temperature to obtain a good grill performance.
Oven lamp The oven is in operation.
Full rill...the function knob and temperature knob to off (upper) position.
4
3
2
z
Rack positions (For models with fan
A The oven is finished, turn the knob to the front section of the oven
A
and...
User Manual - Page 19

... oven clock 11 10 9 8 7 6
C3
11 n.1 1 11
0 aCI 0
11
2
5
1 Program key 2 Cooking time 3 End of cooking time 4 Alarm symbol 5 Minus key 6 Plus key 7 Screen brightness setting 8 Alarm volume 9 Current time 10 Keylock 11 Adjustment key
Maximum time that it will stop the alarm signal, just press any button at the end...
User Manual - Page 20
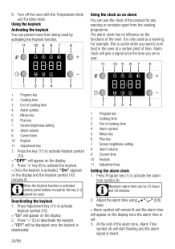
... certain point of cooking time 4 Alarm symbol 5 Minus key 6 Plus key 7 Screen brightness setting 8 Alarm volume 9 Current time 10 Keylock 11 Adjustment key
1. The alarm clock has no ... time 4 Alarm symbol 5 Minus key 6 Plus key 7 Screen brightness setting 8 Alarm volume 9 Current time 10 Keylock 11 Adjustment key
Setting the alarm clock 1, Press Program key (1) to activate the keylock. »...
User Manual - Page 21
... the alarm time, press Program key
(1) to cancel the alarm: 1. larm time will appear as a guide.
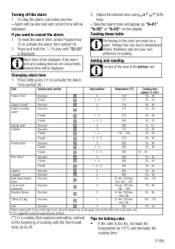
in min.)
30 40 45 50
50 60 25 35
35 45
45 55
8 15 25 30 35 45...in tray*
One level
rae
2 levels
ES
Cakes in mould*
One level
E]
Cakes in this chart are set concurrently, shortest time will be displayed. Timings may vary due to activate the Alarm
Tone symbol (8). Turning off...
User Manual - Page 22
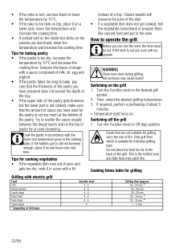
...Switching off the grill 1. Foods that the amount of sauce you can use the oven, the time must be set , oven will preserve the juice of fire. Do not place the food too far in the oven. Tips...the temperature and increase the cooking time. If the bottom part is still not browned enough, place it in the cooking table. If the time is not set . Turn the Function knob to operate the grill
Before ...
User Manual - Page 23
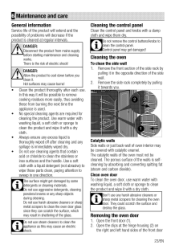
...Clean the control panel and knobs with a liquid detergent (not abrasive) to wipe those parts clean, paying attention to clean the oven door glass since they can scratch the surface, ... sides of electric shock! 6 Maintenance and care
General information
Service life of the product will extend and the possibility of problems will be covered with catalytic enamel. Hot surfaces may be possible...
User Manual - Page 25
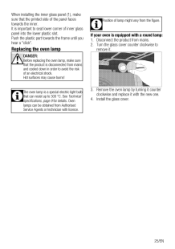
...replacing the oven lamp, make sure that can be obtained from the figure.
Disconnect the product from mains and cooled down in order to
remove it with the new one.
4. See Technical specifications... Authorised Service Agents or technician with licence.
3.
Remove me oven lamp by turning it counter clockwise and replace it . Install the glass cover.
25/EN Push the plastic part towards...
User Manual - Page 26
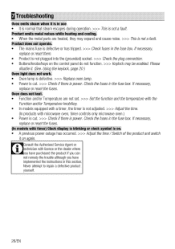
...replace or reset the fuses. Consult the Authorised Service Agent or technician with licence or the dealer where you have purchased the product if you can not remedy the trouble although you have implemented the instructions.... • When the metal parts are not set. >>> Set the function and the temperature with the
Function and/or Temperature knob/key. • In models equipped with a timer, the...
User Manual - Page 27

... void if the product is installed or used on 0845 600 4911
Beko Plc, Beko House,1 Greenhill Crescent, Watford Herts, WD18 8QU, Tel: 0845 600 4911
06.01.2013-v2
27/EN Repairs to
be obtained at a charge.
you quicker when requesting service. (The model number is printed on the Instruction Booklet)
Model Number
Purchased From:
Date of...
Beko OIF22309 Reviews
We have not received any reviews for Beko yet.