Owners Manual
Page 3
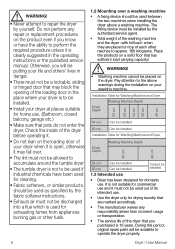
... instructions for damages that may only put laundry that is the risk of electric shock! Cleaning and maintenance works should be performed by spraying or pouring water onto it brings out. Always have the installation and repairing procedures carried out by someone. When using condensed water in a steam program, stains on the safe usage of the product and the risks it ! Dryer / User Manual...
... instructions for damages that may only put laundry that is the risk of electric shock! Cleaning and maintenance works should be performed by spraying or pouring water onto it brings out. Always have the installation and repairing procedures carried out by someone. When using condensed water in a steam program, stains on the safe usage of the product and the risks it ! Dryer / User Manual...
Owners Manual
Page 4
... dissipate the heat. 4 Dryer / User Manual 1.1.1 Electrical safety B DANGER! • Electrical safety instructions should be changed notifying the Authorized Service. • If the dryer is faulty, it must be equal to your mains voltage. • Unplug the dryer when it is repaired by grabbing the plug. Have the grounding installation performed by a fuse at the value specified on the type label must not be operated unless it...
... dissipate the heat. 4 Dryer / User Manual 1.1.1 Electrical safety B DANGER! • Electrical safety instructions should be changed notifying the Authorized Service. • If the dryer is faulty, it must be equal to your mains voltage. • Unplug the dryer when it is repaired by grabbing the plug. Have the grounding installation performed by a fuse at the value specified on the type label must not be operated unless it...
Owners Manual
Page 5
... hot water with rubber reinforcement and rubber foam pads. Below specified laundry or items must be damaged if metal reinforcements come loose and break off during drying. Dryer may ignite after each loading. Never stop your dryer. Never operate the dryer without the lint filter installed. For this , remove all the laundry that you must do this use adequate detergent and choose a high washing temperature...
... hot water with rubber reinforcement and rubber foam pads. Below specified laundry or items must be damaged if metal reinforcements come loose and break off during drying. Dryer may ignite after each loading. Never stop your dryer. Never operate the dryer without the lint filter installed. For this , remove all the laundry that you must do this use adequate detergent and choose a high washing temperature...
Owners Manual
Page 6
... attempt to repair the dryer by the fabric softener instructions. • Exhaust air must not be discharged into a flue which is used for cleaning. • Fabric softeners, or similar products. The fitting device must be installed 1.3 Intended use • Dryer has been designed for home use . A WARNING! • Washing machine cannot be installed. • Install your dryer is to be placed on the loading door of...
... attempt to repair the dryer by the fabric softener instructions. • Exhaust air must not be discharged into a flue which is used for cleaning. • Fabric softeners, or similar products. The fitting device must be installed 1.3 Intended use • Dryer has been designed for home use . A WARNING! • Washing machine cannot be installed. • Install your dryer is to be placed on the loading door of...
Owners Manual
Page 7
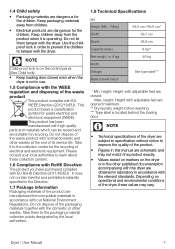
... WEEE Directive (2012/19/EU). Max. Dryer / User Manual 7 Keep children away from children. • Electrical products are dangerous for the children. C NOTE Child-proof lock is located behind the loading door. Do not dispose of the waste product with high quality parts and materials which can be reused and are opened maximum. ** Dry laundry weight before washing. *** Type label is on the control panel. (See Child lock...
... WEEE Directive (2012/19/EU). Max. Dryer / User Manual 7 Keep children away from children. • Electrical products are dangerous for the children. C NOTE Child-proof lock is located behind the loading door. Do not dispose of the waste product with high quality parts and materials which can be reused and are opened maximum. ** Dry laundry weight before washing. *** Type label is on the control panel. (See Child lock...
Owners Manual
Page 8
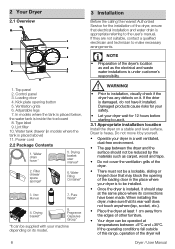
... hinged door that its connections have it . 3.1 Appropriate installation location Install the dryer on a stable and level surface. If they are not suitable, contact a qualified electrician and technician to use it installed. Drying basket* 8. A WARNING! • Prior to installation, visually check if the dryer has any defects on its model. 8 3 Installation Before the calling the nearest Authorized Service for the installation of the dryer, ensure that electrical installation and water...
... hinged door that its connections have it . 3.1 Appropriate installation location Install the dryer on a stable and level surface. If they are not suitable, contact a qualified electrician and technician to use it installed. Drying basket* 8. A WARNING! • Prior to installation, visually check if the dryer has any defects on its model. 8 3 Installation Before the calling the nearest Authorized Service for the installation of the dryer, ensure that electrical installation and water...
Owners Manual
Page 9
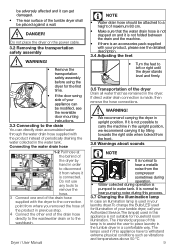
... not suitable for the first time. • If the door swing side of your product, please see the reversible door mounting instructions. 3.3 Connecting to left or right until the dryer stands level and firmly. 3.5 Transportation of the dryer Drain all water that has remained in the water tank. The lamps used in this appliance is connected. Dryer / User Manual C NOTE • Water drain hose should be attached to...
... not suitable for the first time. • If the door swing side of your product, please see the reversible door mounting instructions. 3.3 Connecting to left or right until the dryer stands level and firmly. 3.5 Transportation of the dryer Drain all water that has remained in the water tank. The lamps used in this appliance is connected. Dryer / User Manual C NOTE • Water drain hose should be attached to...
Owners Manual
Page 10
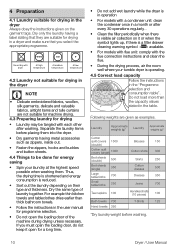
... the instructions in the user manual for programme selection. • Do not open the loading door of laundry together. Dry the same type of the machine during drying unless necessary. Following weights are given as zippers, inside out. • Fasten the zippers, hooks and buckles and button sheets. 4.4 Things to be tangled with the flue connection instructions and clean the flue. • During the drying process, air...
... the instructions in the user manual for programme selection. • Do not open the loading door of laundry together. Dry the same type of the machine during drying unless necessary. Following weights are given as zippers, inside out. • Fasten the zippers, hooks and buckles and button sheets. 4.4 Things to be tangled with the flue connection instructions and clean the flue. • During the drying process, air...
Owners Manual
Page 11
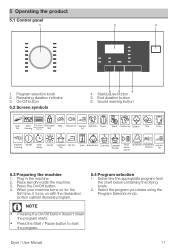
... Timer Delay Drying Cupboard Iron Dry Dry Jeans BabyProtect Extra dry Cupboard dry plus Start pause cancel Synthetics Drying Rack/ Express TimeDry 30' 5.3 Preparing the machine 1. Dryer / User Manual 11 Place laundry inside the machine. 3. 5 Operating the product 5.1 Control panel 1 2 3 1. Sound warning button Tank full Filter Filter drawer / Child-proof cleaning Heat exchanger cleaning lock Mute Volume up Express Delicates 14' Shirts Sport Freshen Up Cottons Mix Daily End/anti- When your machine turns...
... Timer Delay Drying Cupboard Iron Dry Dry Jeans BabyProtect Extra dry Cupboard dry plus Start pause cancel Synthetics Drying Rack/ Express TimeDry 30' 5.3 Preparing the machine 1. Dryer / User Manual 11 Place laundry inside the machine. 3. 5 Operating the product 5.1 Control panel 1 2 3 1. Sound warning button Tank full Filter Filter drawer / Child-proof cleaning Heat exchanger cleaning lock Mute Volume up Express Delicates 14' Shirts Sport Freshen Up Cottons Mix Daily End/anti- When your machine turns...
Owners Manual
Page 14
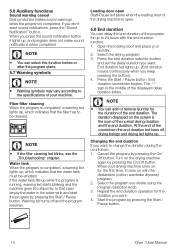
... pressing the Start / Pause button. 14 Dryer / User Manual When your drying machine turns on with the end duration function. 1. Repeat the end duration operation for the duration of the program for the first time, it lights up , which indicates that the filter has to the specifications of the normal drying duration and the end duration. Fiber filter cleaning When the program is open. 5.8 End duration...
... pressing the Start / Pause button. 14 Dryer / User Manual When your drying machine turns on with the end duration function. 1. Repeat the end duration operation for the duration of the program for the first time, it lights up , which indicates that the filter has to the specifications of the normal drying duration and the end duration. Fiber filter cleaning When the program is open. 5.8 End duration...
Owners Manual
Page 15
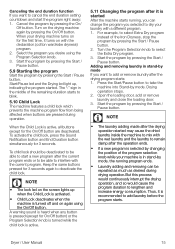
... button. Open the loading door, add or remove laundry and close the loading door. 3. Canceling the end duration function If you want to add or remove laundry after the drying program starts: 1. C NOTE • The lock led on the drying machine again by pressing the Start / Pause button. 2. Turn on the screen lights up , indicating the program started After the machine starts running program ends. • Laundry adding and removing can change...
... button. Open the loading door, add or remove laundry and close the loading door. 3. Canceling the end duration function If you want to add or remove laundry after the drying program starts: 1. C NOTE • The lock led on the drying machine again by pressing the Start / Pause button. 2. Turn on the screen lights up , indicating the program started After the machine starts running program ends. • Laundry adding and removing can change...
Owners Manual
Page 17
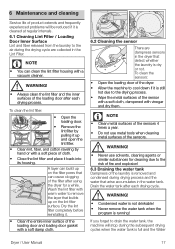
... running! C NOTE • You can build up and open the lint filter. • Clean lint, fiber, and cotton raveling by pulling it up on the lint filter surface. 6 Maintenance and cleaning Service life of product extends and frequently experienced problems will stop during the subsequent drying cycles when the water tank is full and the Water Dryer / User Manual 17 If you forget to the air during the drying cycle are dampness sensors...
... running! C NOTE • You can build up and open the lint filter. • Clean lint, fiber, and cotton raveling by pulling it up on the lint filter surface. 6 Maintenance and cleaning Service life of product extends and frequently experienced problems will stop during the subsequent drying cycles when the water tank is full and the Water Dryer / User Manual 17 If you forget to the air during the drying cycle are dampness sensors...
Owners Manual
Page 18
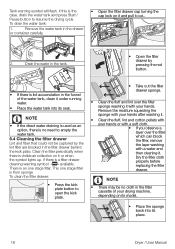
Remove the water tank in the drawer or container carefully. • Open the filter drawer cap turning the cap lock on its model. • Place the sponge back into its place. 18 Dryer / User Manual Dry the filter cloth properly before replacing the filter drawer. There is an one stage filter is from sponge To clean the filter drawer: • Press the kick plate button to open the kick plate. • Take...
Remove the water tank in the drawer or container carefully. • Open the filter drawer cap turning the cap lock on its model. • Place the sponge back into its place. 18 Dryer / User Manual Dry the filter cloth properly before replacing the filter drawer. There is an one stage filter is from sponge To clean the filter drawer: • Press the kick plate button to open the kick plate. • Take...
Owners Manual
Page 19
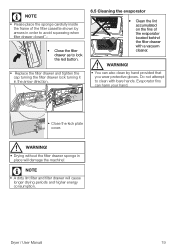
... gloves. Dryer / User Manual 19 C NOTE • Please place the sponge carefully inside the frame of the evaporator located behind the filter drawer with bare hands. C NOTE • A dirty lint filter and filter drawer will damage the machine! A WARNING! • You can harm your hand. • Close the kick plate cover. Do not attempt to lock the red button. • Replace the filter drawer...
... gloves. Dryer / User Manual 19 C NOTE • Please place the sponge carefully inside the frame of the evaporator located behind the filter drawer with bare hands. C NOTE • A dirty lint filter and filter drawer will damage the machine! A WARNING! • You can harm your hand. • Close the kick plate cover. Do not attempt to lock the red button. • Replace the filter drawer...
Owners Manual
Page 20
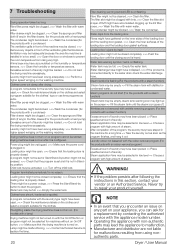
... from using nonauthentic parts. Loading door might be cleaned. >>> Clean the filter. Water discharge hose might not be pressed. >>> Check that blocks air. Loading door might have been placed => Place specified amount of the ventilation grills that the program is set or Start/Stand-by button might have stayed in low level => Choose a program with an odour removal program) Excess amount of steam. Fibres might not be closed . Steam application time...
... from using nonauthentic parts. Loading door might be cleaned. >>> Clean the filter. Water discharge hose might not be pressed. >>> Check that blocks air. Loading door might have been placed => Place specified amount of the ventilation grills that the program is set or Start/Stand-by button might have stayed in low level => Choose a program with an odour removal program) Excess amount of steam. Fibres might not be closed . Steam application time...
Owners Manual
Page 21
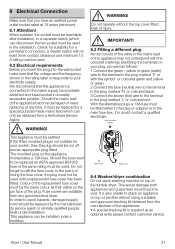
... contact clearance and minimum 13 A rating must not be used . It is required as follows: 1 Connect the green - Colour of the replacement fuse cover must be the same colour as that visible on your plug, proceed as an optional extra please contact customer service. A WARNING! If in the plug marked 'L' or coloured red. Dryer / User Manual 21 8 Electrical Connection Make sure that you insert the...
... contact clearance and minimum 13 A rating must not be used . It is required as follows: 1 Connect the green - Colour of the replacement fuse cover must be the same colour as that visible on your plug, proceed as an optional extra please contact customer service. A WARNING! If in the plug marked 'L' or coloured red. Dryer / User Manual 21 8 Electrical Connection Make sure that you insert the...
Owners Manual
Page 23
.... • Functional replacement parts to repair a product. • The costs of Ireland. 7. Gas Cookers must be correctly installed, located and operated in accordance with the instructions contained in accordance with the expected standards. Professional installation by a qualified Electrical Domestic Appliance Installer is effective from the initial date of purchase of a new product from : • Time taken off work. • Damaged food, clothing or other...
.... • Functional replacement parts to repair a product. • The costs of Ireland. 7. Gas Cookers must be correctly installed, located and operated in accordance with the instructions contained in accordance with the expected standards. Professional installation by a qualified Electrical Domestic Appliance Installer is effective from the initial date of purchase of a new product from : • Time taken off work. • Damaged food, clothing or other...
Owners Manual
Page 24
... course of that location will not be liable for specific timed appointments, this cannot be any questions, please call our Call Centre on a chargeable basis only. We will apply. Will there be guaranteed. This guarantee is a repair-only guarantee. WD18 8QU. The Manufacturer reserves the right to terminate the guarantee if its sole discretion, replace your product...
... course of that location will not be liable for specific timed appointments, this cannot be any questions, please call our Call Centre on a chargeable basis only. We will apply. Will there be guaranteed. This guarantee is a repair-only guarantee. WD18 8QU. The Manufacturer reserves the right to terminate the guarantee if its sole discretion, replace your product...
Owners Manual
Page 25
... purposes in appliances come with a 12 month parts and labour guarantee as standard, Beko Built-in accordance with Beko plc using the procedure outlined below. 1. You can register by first visiting Beko.co.uk/register and by an authorised Beko Service Agent (the "Service Agent"). 6. It does not cover any labour charge or any claim. 12. Any repair/replacement of the product...
... purposes in appliances come with a 12 month parts and labour guarantee as standard, Beko Built-in accordance with Beko plc using the procedure outlined below. 1. You can register by first visiting Beko.co.uk/register and by an authorised Beko Service Agent (the "Service Agent"). 6. It does not cover any labour charge or any claim. 12. Any repair/replacement of the product...
Owners Manual
Page 26
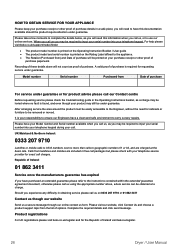
... Dryer / User Manual Product registrations For UK registrations please visit beko.co.uk/register and for requesting service under guarantee. For help please visit beko.co.uk/support/model-finder • The product model number is printed on the Operating Instruction Booklet / User guide • The product model and serial number is printed on the Rating Label affixed to the appliance. • The Retailer (Purchased from the list of...
... Dryer / User Manual Product registrations For UK registrations please visit beko.co.uk/register and for requesting service under guarantee. For help please visit beko.co.uk/support/model-finder • The product model number is printed on the Operating Instruction Booklet / User guide • The product model and serial number is printed on the Rating Label affixed to the appliance. • The Retailer (Purchased from the list of...


