
Owners Manual
Page 3
... the washing time 35 Adjusting the amount of rinse aid 36 Starting the programme 36 Cancelling the programme 36 Salt indicator 36 Rinse Aid indicator 36 End of programme 37 Water cut-off warning 37 Overflowing warning 37 InnerClean 37 7 MAINTENANCE AND CLEANING 38 Cleaning the outer surface of the product........ 38 Cleaning the interior of the machine 38 Cleaning the filters 38 Cleaning the hose filter 39 Cleaning the impellers 40 Lower impeller 40 Upper impeller 40 8 TROUBLESHOOTING...
... the washing time 35 Adjusting the amount of rinse aid 36 Starting the programme 36 Cancelling the programme 36 Salt indicator 36 Rinse Aid indicator 36 End of programme 37 Water cut-off warning 37 Overflowing warning 37 InnerClean 37 7 MAINTENANCE AND CLEANING 38 Cleaning the outer surface of the product........ 38 Cleaning the interior of the machine 38 Cleaning the filters 38 Cleaning the hose filter 39 Cleaning the impellers 40 Lower impeller 40 Upper impeller 40 8 TROUBLESHOOTING...

Owners Manual
Page 4
... not repair or replace any technical modifications to close the door of the product and the risks it is 10 years. Farm houses; - Bed&breakfast type hotels, boardinghouses. 4/EN This product must be responsible for children and pets. Safety Instructions • This section contains safety instructions that they are dangerous for damages that may remain locked inside the product. Installation and repair procedures...
... not repair or replace any technical modifications to close the door of the product and the risks it is 10 years. Farm houses; - Bed&breakfast type hotels, boardinghouses. 4/EN This product must be responsible for children and pets. Safety Instructions • This section contains safety instructions that they are dangerous for damages that may remain locked inside the product. Installation and repair procedures...

Owners Manual
Page 5
... not possible, the electrical installation where the product is the risk of children. Remove the plug from its drain and water supply connections. NOTICE Do not hold from the grid. Power cable must be unplugged during installation, maintenance, cleaning, repairing and moving procedures. Drain the remaining water in it and disconnect its door or panel to move it must contain a device which conforms to operate the product. Transportation Safety Before...
... not possible, the electrical installation where the product is the risk of children. Remove the plug from its drain and water supply connections. NOTICE Do not hold from the grid. Power cable must be unplugged during installation, maintenance, cleaning, repairing and moving procedures. Drain the remaining water in it and disconnect its door or panel to move it must contain a device which conforms to operate the product. Transportation Safety Before...

Owners Manual
Page 6
... installation or cleaning procedures. These procedures are not adjusted properly, the door will not be used inside a wardrobe/ cabinet/module, keep the doors of the product. If the product is going to be ventilated from the counter. Place the product on the type label of the wardrobe/cabinet/ module open during operation in cases where there are appropriate. NOTICE You must use the new hose set provided with adjustable...
... installation or cleaning procedures. These procedures are not adjusted properly, the door will not be used inside a wardrobe/ cabinet/module, keep the doors of the product. If the product is going to be ventilated from the counter. Place the product on the type label of the wardrobe/cabinet/ module open during operation in cases where there are appropriate. NOTICE You must use the new hose set provided with adjustable...
Owners Manual
Page 7
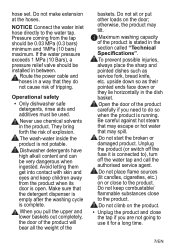
... risk of tripping. Open the door of the baskets. Route the power cable and hoses in a way that they lie horizontally in between. Do not sit or put other loads on the product. • Unplug the product and close the tap if you need to the product. NOTICE Connect the water inlet hose directly to use chemical solvents in the section called "Technical Specifications". Dishwasher detergents have high alkali content...
... risk of tripping. Open the door of the baskets. Route the power cable and hoses in a way that they lie horizontally in between. Do not sit or put other loads on the product. • Unplug the product and close the tap if you need to the product. NOTICE Connect the water inlet hose directly to use chemical solvents in the section called "Technical Specifications". Dishwasher detergents have high alkali content...

Owners Manual
Page 10
... Technical specifications Maximum washing capacity (check the energy label and Programme data and average consumption values table given on Quick Guide. ) Height (check installation document for performance tests shall be reached by entering following address: dishwasher@standardloading.com Do not forget to provide the code, stock number and serial number of the product to improve the quality of the door. Code, stock number and serial number of the product...
... Technical specifications Maximum washing capacity (check the energy label and Programme data and average consumption values table given on Quick Guide. ) Height (check installation document for performance tests shall be reached by entering following address: dishwasher@standardloading.com Do not forget to provide the code, stock number and serial number of the product to improve the quality of the door. Code, stock number and serial number of the product...

Owners Manual
Page 12
... manner. • Install the product at the water inlet in order to prevent the dirt (sand, clay, rust) in order for the door to load and unload the dishes in a fast and comfortable manner. • Place the product on the power cable. • Make sure that you select a location that will allow you select a location that the water inlet and discharge hoses are made...
... manner. • Install the product at the water inlet in order to prevent the dirt (sand, clay, rust) in order for the door to load and unload the dishes in a fast and comfortable manner. • Place the product on the power cable. • Make sure that you select a location that will allow you select a location that the water inlet and discharge hoses are made...
Owners Manual
Page 13
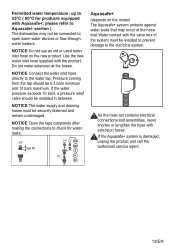
... ) The dishwasher may occur at the hoses. NOTICE Open the taps completely after making the connections to the water tap. Do not make extension at the hose inlet.Water contact with extension hoses. please refer to the electrical system. Use the new water inlet hose supplied with Aquasafe+; As the hose set contains electrical connections and assemblies, never shorten or lengthen the hose with the valve box of the system must be installed in...
... ) The dishwasher may occur at the hoses. NOTICE Open the taps completely after making the connections to the water tap. Do not make extension at the hose inlet.Water contact with extension hoses. please refer to the electrical system. Use the new water inlet hose supplied with Aquasafe+; As the hose set contains electrical connections and assemblies, never shorten or lengthen the hose with the valve box of the system must be installed in...

Owners Manual
Page 14
... the event of losing the fuse cover, the plug must be connected to adjust the feet of the dishwasher is cut off as illustrated in the product to a grounded outlet protected by the authorised service agent. Hot steam may escape if the door of the product. This appliance must not be easily accessible after installation. • Plug in the installation manual supplied with your furniture. 14/EN...
... the event of losing the fuse cover, the plug must be connected to adjust the feet of the dishwasher is cut off as illustrated in the product to a grounded outlet protected by the authorised service agent. Hot steam may escape if the door of the product. This appliance must not be easily accessible after installation. • Plug in the installation manual supplied with your furniture. 14/EN...

Owners Manual
Page 16
... on Quick Guide. When selecting a programme, consider the table of regeneration cycle, maximum additional duration, water and energy consumption are washed and may affect the washing, rinsing and drying performances of the programme increase. Water softening system The product is over 7°dH. Adjusting the water softening system Washing performance will allow washing the dishes with a water softening system which reduces the hardness of your dishwasher on Eco...
... on Quick Guide. When selecting a programme, consider the table of regeneration cycle, maximum additional duration, water and energy consumption are washed and may affect the washing, rinsing and drying performances of the programme increase. Water softening system The product is over 7°dH. Adjusting the water softening system Washing performance will allow washing the dishes with a water softening system which reduces the hardness of your dishwasher on Eco...

Owners Manual
Page 19
... the mentioned level. After the empty washing cycle, review the user manual and readjust the water hardness level so as glass and stainless steel protectors. Rinse aid The rinse aid used together with the help of the detergent manufacturer on the washed items. For this reason, care must also be paid to have rinse aid in the rinse aid reservoir and to use rinse aids produced specially for dishwashers only. 1. Make sure that salt and rinse aid reservoirs...
... the mentioned level. After the empty washing cycle, review the user manual and readjust the water hardness level so as glass and stainless steel protectors. Rinse aid The rinse aid used together with the help of the detergent manufacturer on the washed items. For this reason, care must also be paid to have rinse aid in the rinse aid reservoir and to use rinse aids produced specially for dishwashers only. 1. Make sure that salt and rinse aid reservoirs...

Owners Manual
Page 20
... of rinse aid" in the section for washing in the upper basket. • Place the hollowed dishes such as it will face down so as well. Decorative prints of baskets if possible. • Place the heavily soiled and bigger items in the lower basket and smaller, delicate and light items in the dishwasher • Never wash dishes soiled by hand, it . 4. The rinse aid adjustment is...
... of rinse aid" in the section for washing in the upper basket. • Place the hollowed dishes such as it will face down so as well. Decorative prints of baskets if possible. • Place the heavily soiled and bigger items in the lower basket and smaller, delicate and light items in the dishwasher • Never wash dishes soiled by hand, it . 4. The rinse aid adjustment is...

Owners Manual
Page 32
... you save from time, water and power. Make sure that is completed in OFF position. Preparing the machine 1. Check the Salt and Rinse Aid indicators and add salt and/or rinse aid if needed. 3. Open the door of the product. Auxiliary functions Washing programmes of detergent into the detergent dispenser. Some auxiliary functions cannot be washed. Put adequate amount of your dishes. 4. Draining is not compatible with stubborn, dried soiling.
... you save from time, water and power. Make sure that is completed in OFF position. Preparing the machine 1. Check the Salt and Rinse Aid indicators and add salt and/or rinse aid if needed. 3. Open the door of the product. Auxiliary functions Washing programmes of detergent into the detergent dispenser. Some auxiliary functions cannot be washed. Put adequate amount of your dishes. 4. Draining is not compatible with stubborn, dried soiling.

Owners Manual
Page 33
...: 1. Close the door of the washing cycle selected and decreases water consumption by enabling washing under the lower impeller helps washing your machine, press Time Delay and P / P+ keys simultaneously. To activate / to the right front side. With the Half Load function you like. 2. AquaIntense Function (depends on model) AquaIntense impeller located under higher pressure. Load your dishes in the function selection indicator and on the display. 4. Press...
...: 1. Close the door of the washing cycle selected and decreases water consumption by enabling washing under the lower impeller helps washing your machine, press Time Delay and P / P+ keys simultaneously. To activate / to the right front side. With the Half Load function you like. 2. AquaIntense Function (depends on model) AquaIntense impeller located under higher pressure. Load your dishes in the function selection indicator and on the display. 4. Press...

Owners Manual
Page 36
.... Washing time can change while the programme is installed, temperature of the supply water and amount of the dishes. Rinse Aid indicator ( ) Please check the rinse aid indicator on the display. 3. Press On / Off key to position (P) on the display to see whether there is displayed, close the door of the product and wait for a while. 2. You need to refill the rinse aid reservoir with the Time Delay key. 4. Pay attention not to open the door...
.... Washing time can change while the programme is installed, temperature of the supply water and amount of the dishes. Rinse Aid indicator ( ) Please check the rinse aid indicator on the display. 3. Press On / Off key to position (P) on the display to see whether there is displayed, close the door of the product and wait for a while. 2. You need to refill the rinse aid reservoir with the Time Delay key. 4. Pay attention not to open the door...

Owners Manual
Page 37
... socket. Do not use together with certain intervals before it turns off. Water cut-off warning If mains water is cut or water inlet tap is not started. This audible signal will warn you leave the door of your machine ajar during this case the authorised service should be operated on the Programme indicator. For energy saving, the machine is automatically turned off following the...
... socket. Do not use together with certain intervals before it turns off. Water cut-off warning If mains water is cut or water inlet tap is not started. This audible signal will warn you leave the door of your machine ajar during this case the authorised service should be operated on the Programme indicator. For energy saving, the machine is automatically turned off following the...

Owners Manual
Page 41
... detergent, adjust the amount of detergent according to use tablet detergents. • Detergent is not sufficient. >>> Check the rinse aid indicator and add rinse aid if necessary. Clean the filter system regularly as described in the user manual. • Selected programme is stored under unsuitable conditions. >>> If you have turned on the machine by hand to starting the programme, turn the lower and upper impellers by pressing the On / Off button. Dishes...
... detergent, adjust the amount of detergent according to use tablet detergents. • Detergent is not sufficient. >>> Check the rinse aid indicator and add rinse aid if necessary. Clean the filter system regularly as described in the user manual. • Selected programme is stored under unsuitable conditions. >>> If you have turned on the machine by hand to starting the programme, turn the lower and upper impellers by pressing the On / Off button. Dishes...

Owners Manual
Page 45
...; Dishes are washed with hand-wash detergent by hand but not rinsed before placing them into the machine when adding rinse aid. >>> Take care that the lid of the rinse aid reservoir is closed after adding rinse aid. There is no need to repair a nonfunctional product yourself. 45/EN Kitchen utensils are broken. • Dishes are not placed orderly in the machine. >>> Load the dishes as described in the user manual. • Baskets...
...; Dishes are washed with hand-wash detergent by hand but not rinsed before placing them into the machine when adding rinse aid. >>> Take care that the lid of the rinse aid reservoir is closed after adding rinse aid. There is no need to repair a nonfunctional product yourself. 45/EN Kitchen utensils are broken. • Dishes are not placed orderly in the machine. >>> Load the dishes as described in the user manual. • Baskets...

Owners Manual
Page 48
... the User Instructions Booklet. • That the fault was caused by Beko plc. If you are a resident of that there is no fault with your product. • That your product is your responsibility to provide evidence to 5.00pm. This is registered in a timely manner. Does Beko offer replacements? Will there be governed by this guarantee with a new guarantee. Beko plc is a repair-only...
... the User Instructions Booklet. • That the fault was caused by Beko plc. If you are a resident of that there is no fault with your product. • That your product is your responsibility to provide evidence to 5.00pm. This is registered in a timely manner. Does Beko offer replacements? Will there be governed by this guarantee with a new guarantee. Beko plc is a repair-only...
Owners Manual
Page 49
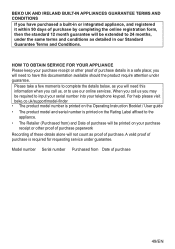
... beko.co.uk/support/model-finder • The product model number is printed on the Operating Instruction Booklet / User guide • The product model and serial number is required for requesting service under guarantee. Model number Serial number Purchased from ) and Date of purchase will be printed on the Rating Label affixed to the appliance. • The Retailer (Purchased from Date of purchase 49/EN you will need to have purchased a built...
... beko.co.uk/support/model-finder • The product model number is printed on the Operating Instruction Booklet / User guide • The product model and serial number is required for requesting service under guarantee. Model number Serial number Purchased from ) and Date of purchase will be printed on the Rating Label affixed to the appliance. • The Retailer (Purchased from Date of purchase 49/EN you will need to have purchased a built...


