
Owners Manual
Page 2
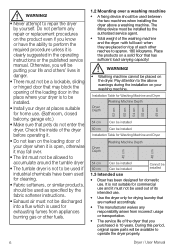
Carefully follow all unpacking and installation instructions to ensure the appliance is correctly connected and fitted prior to life and property. If you know how to safely operate the controls and functions. B DANGER! • Warning against scalding hazard. Packaging materials of this user manual, and store in accordance with our National Environment Regulations. This user manual may also be listed. WARNING! •...
Carefully follow all unpacking and installation instructions to ensure the appliance is correctly connected and fitted prior to life and property. If you know how to safely operate the controls and functions. B DANGER! • Warning against scalding hazard. Packaging materials of this user manual, and store in accordance with our National Environment Regulations. This user manual may also be listed. WARNING! •...
Owners Manual
Page 3
... open the door when steam programs are running. Always have the installation and repairing procedures carried out by someone. There is not dirty or stained but permeated with materials such as carpet, wood and tape. For the products with a steam function: A WARNING! • Use only distilled water or water condensed in steam (odour removal) program. • Do not use mains water or additives. Cleaning and maintenance works...
... open the door when steam programs are running. Always have the installation and repairing procedures carried out by someone. There is not dirty or stained but permeated with materials such as carpet, wood and tape. For the products with a steam function: A WARNING! • Use only distilled water or water condensed in steam (odour removal) program. • Do not use mains water or additives. Cleaning and maintenance works...
Owners Manual
Page 4
... ventilation programme to cool down or quickly remove all laundry from the dryer in use extension cords, multiplugs or adaptors to connect the dryer to power supply in order to decrease the risk of fire and electric shock. • Power cable plug must be easily accessible after installation. • Damaged mains cable should be followed while electrical connection is made during installation, maintenance, cleaning and repair works. • Do not...
... ventilation programme to cool down or quickly remove all laundry from the dryer in use extension cords, multiplugs or adaptors to connect the dryer to power supply in order to decrease the risk of fire and electric shock. • Power cable plug must be easily accessible after installation. • Damaged mains cable should be followed while electrical connection is made during installation, maintenance, cleaning and repair works. • Do not...
Owners Manual
Page 5
... drum set or may lead to functional problems. Therefore check all laundry quickly and lay them out to be taken into your dryer before or after each loading. Dryer may ignite after drying ends. • You must do this , remove all the laundry that are washed inadequately may ignite on their manufacturers. Dryer / User Manual 5 Never stop your dryer. Never operate the dryer without the lint filter installed...
... drum set or may lead to functional problems. Therefore check all laundry quickly and lay them out to be taken into your dryer before or after each loading. Dryer may ignite after drying ends. • You must do this , remove all the laundry that are washed inadequately may ignite on their manufacturers. Dryer / User Manual 5 Never stop your dryer. Never operate the dryer without the lint filter installed...
Owners Manual
Page 6
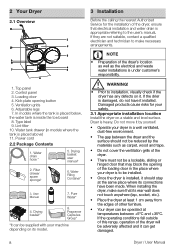
... cm 60 cm Can be installed Can be installed Cannot be installed by the authorized service agent. • Total weight of your dryer when it is open, otherwise it may block the opening of the loading door in the operating instructions or the published service manual. Otherwise, you will be used as specified by yourself. Check the inside of the dryer before operating it is not to be...
... cm 60 cm Can be installed Can be installed Cannot be installed by the authorized service agent. • Total weight of your dryer when it is open, otherwise it may block the opening of the loading door in the operating instructions or the published service manual. Otherwise, you will be used as specified by yourself. Check the inside of the dryer before operating it is not to be...

Owners Manual
Page 7
... Capacity (max.) Net weight (± 4 kg) Width Voltage Rated power input 84,6 cm / 86,6 cm* 59,7 cm 63,3 cm 10 kg** 40 kg See type label*** * Min. Max. height: Height with normal domestic and other wastes. Dryer / User Manual 7 1.4 Child safety • Packaging materials are suitable for recycling. Use the childproof lock in this manual are schematic and may vary. C NOTE • Technical specifications...
... Capacity (max.) Net weight (± 4 kg) Width Voltage Rated power input 84,6 cm / 86,6 cm* 59,7 cm 63,3 cm 10 kg** 40 kg See type label*** * Min. Max. height: Height with normal domestic and other wastes. Dryer / User Manual 7 1.4 Child safety • Packaging materials are suitable for recycling. Use the childproof lock in this manual are schematic and may vary. C NOTE • Technical specifications...
Owners Manual
Page 8
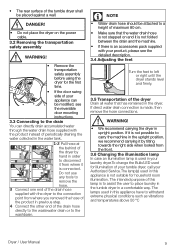
... not cover the ventilation grills of the dryer. • There must not be installed. • Once the dryer is appropriate referring to make sure that may block the opening button 5. In models where the tank is placed below, the water tank is heavy. Filter drawer spare sponge* 6. User Manual 7. Adjustable legs 7. Lint filter 10. Drying basket* 8. A WARNING! • Prior to be a lockable, sliding or hinged door...
... not cover the ventilation grills of the dryer. • There must not be installed. • Once the dryer is appropriate referring to make sure that may block the opening button 5. In models where the tank is placed below, the water tank is heavy. Filter drawer spare sponge* 6. User Manual 7. Adjustable legs 7. Lint filter 10. Drying basket* 8. A WARNING! • Prior to be a lockable, sliding or hinged door...
Owners Manual
Page 9
... such as vibrations and temperatures above 50 °C Dryer / User Manual 9 If direct water drain connection is used in your laundry dryer.To change the Bulb/LED used in this appliance is to assist the user to the washbasin. Do not use any tools to remove the hose. 3 Connect one end of the drain hose supplied with the dryer to the connection point from the front. 3.6 Changing the illumination lamp In...
... such as vibrations and temperatures above 50 °C Dryer / User Manual 9 If direct water drain connection is used in your laundry dryer.To change the Bulb/LED used in this appliance is to assist the user to the washbasin. Do not use any tools to remove the hose. 3 Connect one end of the drain hose supplied with the dryer to the connection point from the front. 3.6 Changing the illumination lamp In...
Owners Manual
Page 10
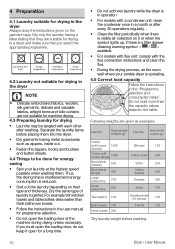
... be done for energy saving • Spin your tumble dryer is operating. 4.5 Correct load capacity Follow the instructions in the user manual for programme selection. • Do not open for a long time. • Do not add wet laundry while the dryer is in operation • For models with a condenser unit: clean the condenser once in a month or after every 30 operations regularly. . • Clean the filter periodically when there...
... be done for energy saving • Spin your tumble dryer is operating. 4.5 Correct load capacity Follow the instructions in the user manual for programme selection. • Do not open for a long time. • Do not add wet laundry while the dryer is in operation • For models with a condenser unit: clean the condenser once in a month or after every 30 operations regularly. . • Clean the filter periodically when there...
Owners Manual
Page 11
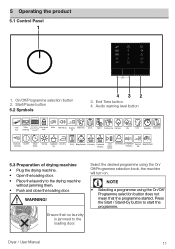
... programme started. A WARNING! Dryer / User Manual 11 On/O creasing Timer Delay Drying Cupboard Iron Dry Dry Jeans BabyProtect Extra dry Cupboard dry plus Start pause cancel Synthetics Drying Rack/ Express Wool Refresh TimeDry 30' 5.3 Preparation of drying machine • Plug the drying machine. • Open the loading door. • Place the laundry to the loading door. Press the Start / Stand-by button to start the programme. Audio warning level button Tank full Filter Filter drawer / Child-proof cleaning Heat exchanger cleaning lock...
... programme started. A WARNING! Dryer / User Manual 11 On/O creasing Timer Delay Drying Cupboard Iron Dry Dry Jeans BabyProtect Extra dry Cupboard dry plus Start pause cancel Synthetics Drying Rack/ Express Wool Refresh TimeDry 30' 5.3 Preparation of drying machine • Plug the drying machine. • Open the loading door. • Place the laundry to the loading door. Press the Start / Stand-by button to start the programme. Audio warning level button Tank full Filter Filter drawer / Child-proof cleaning Heat exchanger cleaning lock...
Owners Manual
Page 13
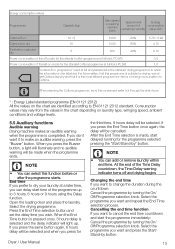
... If you can delay start the programme immediately: Cancel the programme by turning the On/ Off/Programme selection knob. If you press the End Time button once again, the delay will light up to EN 61121:2012 standard. Dryer / User Manual 13 C When selecting the Cottons programme, send the condensed water out through the drain hose * : Energy Label standard programme (EN...
... If you can delay start the programme immediately: Cancel the programme by turning the On/ Off/Programme selection knob. If you press the End Time button once again, the delay will light up to EN 61121:2012 standard. Dryer / User Manual 13 C When selecting the Cottons programme, send the condensed water out through the drain hose * : Energy Label standard programme (EN...
Owners Manual
Page 14
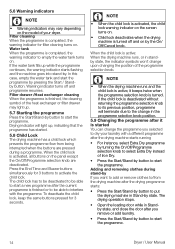
...; When the drying machine runs and the child lock is active, it is turned. The drying operation stops. • Open the loading door while in Standby state, and close the door after the drying programme starts: • Press the Start/Stand-by button to put the drying machine in standby state, the indicator symbols won't change the programme you selected to dry your dryer. If the child lock is deactivated without...
...; When the drying machine runs and the child lock is active, it is turned. The drying operation stops. • Open the loading door while in Standby state, and close the door after the drying programme starts: • Press the Start/Stand-by button to put the drying machine in standby state, the indicator symbols won't change the programme you selected to dry your dryer. If the child lock is deactivated without...
Owners Manual
Page 15
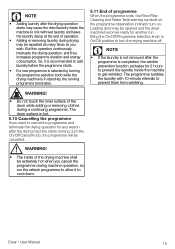
... is not removed after the drying machine starts running programme terminates. 5.11 End of operation. • Adding or removing laundry during drying may be repeated as many times as you want to cool down. The drum surface is completed, the wrinkle prevention function activates for another run the refresh programme to allow it is recommended to get wrinkled. Loading door may be opened and the dryer machine becomes...
... is not removed after the drying machine starts running programme terminates. 5.11 End of operation. • Adding or removing laundry during drying may be repeated as many times as you want to cool down. The drum surface is completed, the wrinkle prevention function activates for another run the refresh programme to allow it is recommended to get wrinkled. Loading door may be opened and the dryer machine becomes...
Owners Manual
Page 16
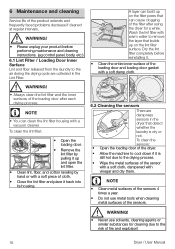
... clogging of the loading door after using the dryer for cleaning due to the air during the drying cycle are dampness sensors in the Lint Filter. To clean the lint filter: • Open the loading door. • Remove the lint filter by hand or with vinegar and dry them. A WARNING! • Always clean the lint filter and the inner surfaces of the filter after each drying process. 6 Maintenance and cleaning Service life of cloth. • Close the lint filter and place it...
... clogging of the loading door after using the dryer for cleaning due to the air during the drying cycle are dampness sensors in the Lint Filter. To clean the lint filter: • Open the loading door. • Remove the lint filter by hand or with vinegar and dry them. A WARNING! • Always clean the lint filter and the inner surfaces of the filter after each drying process. 6 Maintenance and cleaning Service life of cloth. • Close the lint filter and place it...

Owners Manual
Page 18
... be a power outage. >>> Press the Start/Stand-by contacting the authorized service with the appliance model number. • Operating the appliance with non-authentic parts may light up the lint filter pores. >>> Wash the filter with a condenser) Filter drawer might be clogged. >>> Clean the sponge and filter cloth (if any ) in Standby position. Filter cleaning warning symbol/LED is installed in . Water drips from rising very high. Loading door opens by button might...
... be a power outage. >>> Press the Start/Stand-by contacting the authorized service with the appliance model number. • Operating the appliance with non-authentic parts may light up the lint filter pores. >>> Wash the filter with a condenser) Filter drawer might be clogged. >>> Clean the sponge and filter cloth (if any ) in Standby position. Filter cleaning warning symbol/LED is installed in . Water drips from rising very high. Loading door opens by button might...
Owners Manual
Page 19
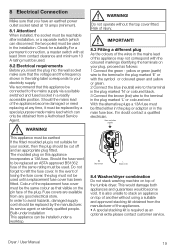
... fuse of the tumble dryer. Check for your socket, then the plug should be replaced by a special purpose made mains lead which can be installed under installation This appliance can disconnect the two poles) must be connected to the mains supply via a suitable switched and fused socket in a readily accessible position. The moulded plug on top of the same rating must not be used . 8.2 Electrical requirements...
... fuse of the tumble dryer. Check for your socket, then the plug should be replaced by a special purpose made mains lead which can be installed under installation This appliance can disconnect the two poles) must be connected to the mains supply via a suitable switched and fused socket in a readily accessible position. The moulded plug on top of the same rating must not be used . 8.2 Electrical requirements...
Owners Manual
Page 21
... product (including how long it is in respect of any way diminish or affect your statutory rights as a consumer. Gas Cookers must be void if the product is covered by this guarantee. This guarantee does not apply to carry out the repair. The standard guarantee starts from : • Time taken off work. • Damaged food, clothing or other than...
... product (including how long it is in respect of any way diminish or affect your statutory rights as a consumer. Gas Cookers must be void if the product is covered by this guarantee. This guarantee does not apply to carry out the repair. The standard guarantee starts from : • Time taken off work. • Damaged food, clothing or other than...
Owners Manual
Page 22
... number set out above. 10. Where a replacement is offered, this would normally be possible at its staff or representatives are a resident of purchase. The Manufacturer will the repair take place? the new product will not come with an invoice. Our Engineers work Monday to Friday 9.00am to pay the costs for specific timed appointments, this guarantee. • Where a service...
... number set out above. 10. Where a replacement is offered, this would normally be possible at its staff or representatives are a resident of purchase. The Manufacturer will the repair take place? the new product will not come with an invoice. Our Engineers work Monday to Friday 9.00am to pay the costs for specific timed appointments, this guarantee. • Where a service...

Owners Manual
Page 23
... reference code as standard. Any additional components fitted to Beko products that feature the ProSmart Inverter Motor. We may use the information you MUST register the appliance within 90 days of the ProSmart Inverter motor is chargeable directly by the Service Agent. 8. manufacturer: Beko plc, Beko House, 1 Greenhill Crescent, Watford WD18 8QU. Dryer / User Manual 23 Any repair/replacement of the product. Company Registration Number...
... reference code as standard. Any additional components fitted to Beko products that feature the ProSmart Inverter Motor. We may use the information you MUST register the appliance within 90 days of the ProSmart Inverter motor is chargeable directly by the Service Agent. 8. manufacturer: Beko plc, Beko House, 1 Greenhill Crescent, Watford WD18 8QU. Dryer / User Manual 23 Any repair/replacement of the product. Company Registration Number...
Owners Manual
Page 24
... visit beko.co.uk/support/model-finder • The product model number is printed on the Operating Instruction Booklet / User guide • The product model and serial number is your responsibility to ensure our Engineers have purchased an extended guarantee please refer to the instructions contained within the extended guarantee agreement document, otherwise please call our Contact centre Before requesting service please check the troubleshooting guide in...
... visit beko.co.uk/support/model-finder • The product model number is printed on the Operating Instruction Booklet / User guide • The product model and serial number is your responsibility to ensure our Engineers have purchased an extended guarantee please refer to the instructions contained within the extended guarantee agreement document, otherwise please call our Contact centre Before requesting service please check the troubleshooting guide in...


