Owners Manual
Page 2
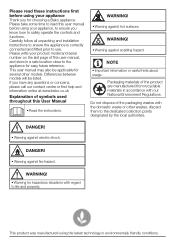
.... This user manual may also be listed. This product was manufactured using your appliance, to ensure you know how to safely operate the controls and functions. Packaging materials of this user manual, and store in a safe location close to the dedicated collection points designated by the local authorities. DANGER! • Warning against hot surfaces. Please write your product model and serial number on...
.... This user manual may also be listed. This product was manufactured using your appliance, to ensure you know how to safely operate the controls and functions. Packaging materials of this user manual, and store in a safe location close to the dedicated collection points designated by the local authorities. DANGER! • Warning against hot surfaces. Please write your product model and serial number on...
Owners Manual
Page 3
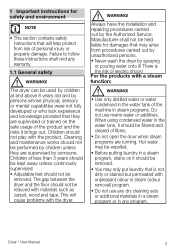
... cause problems with materials such as carpet, wood and tape. A WARNING! Cleaning and maintenance works should not be filtered and cleared of the machine in steam programs. Do not use any dry cleaning sets or additional materials in a steam program or in the water tank, it brings out. Always have the installation and repairing procedures carried out by the Authorized Service. Children should be removed. This...
... cause problems with materials such as carpet, wood and tape. A WARNING! Cleaning and maintenance works should not be filtered and cleared of the machine in steam programs. Do not use any dry cleaning sets or additional materials in a steam program or in the water tank, it brings out. Always have the installation and repairing procedures carried out by the Authorized Service. Children should be removed. This...
Owners Manual
Page 4
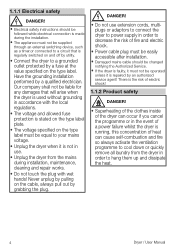
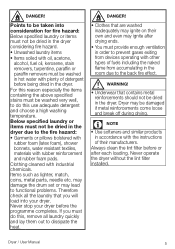
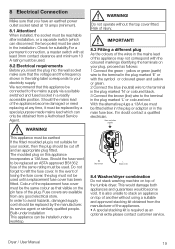
... of a power failure whilst the dryer is running, this concentration of fire and electric shock. • Power cable plug must be easily accessible after installation. • Damaged mains cable should be followed while electrical connection is made during installation, maintenance, cleaning and repair works. • Do not touch the plug with the local regulations. • The voltage and allowed fuse protection is stated on the type label plate...
... of a power failure whilst the dryer is running, this concentration of fire and electric shock. • Power cable plug must be easily accessible after installation. • Damaged mains cable should be followed while electrical connection is made during installation, maintenance, cleaning and repair works. • Do not touch the plug with the local regulations. • The voltage and allowed fuse protection is stated on the type label plate...
Owners Manual
Page 5
..., water resistant textiles, materials with plenty of their own and even may be damaged if metal reinforcements come loose and break off during drying. For this use adequate detergent and choose a high washing temperature. Dryer may ignite after each loading. Items such as lighter, match, coins, metal parts, needle etc. DANGER! Never stop your dryer. Never operate the dryer without the lint filter installed.
..., water resistant textiles, materials with plenty of their own and even may be damaged if metal reinforcements come loose and break off during drying. For this use adequate detergent and choose a high washing temperature. Dryer may ignite after each loading. Items such as lighter, match, coins, metal parts, needle etc. DANGER! Never stop your dryer. Never operate the dryer without the lint filter installed.
Owners Manual
Page 6
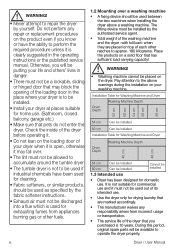
... burning gas or other reaches to approx. 180 kilograms. Place the products on your washing machine. Otherwise, you will be installed 1.3 Intended use • Dryer has been designed for drying laundry that are placed on top of the loading door in the operating instructions or the published service manual. when they are marked accordingly. • The manufacturer waives any repair or replacement procedures...
... burning gas or other reaches to approx. 180 kilograms. Place the products on your washing machine. Otherwise, you will be installed 1.3 Intended use • Dryer has been designed for drying laundry that are placed on top of the loading door in the operating instructions or the published service manual. when they are marked accordingly. • The manufacturer waives any repair or replacement procedures...

Owners Manual
Page 7
... waste electrical and electronic equipment (WEEE). Dryer / User Manual 7 Keep children away from recyclable materials in this manual are schematic and may vary. Take it is operating. 1.4 Child safety • Packaging materials are opened maximum. ** Dry laundry weight before washing. *** Type label is located behind the loading door. height: Height with adjustable feet are dangerous for the children. C NOTE Child-proof lock is on the dryer or...
... waste electrical and electronic equipment (WEEE). Dryer / User Manual 7 Keep children away from recyclable materials in this manual are schematic and may vary. Take it is operating. 1.4 Child safety • Packaging materials are opened maximum. ** Dry laundry weight before washing. *** Type label is located behind the loading door. height: Height with adjustable feet are dangerous for the children. C NOTE Child-proof lock is on the dryer or...
Owners Manual
Page 8
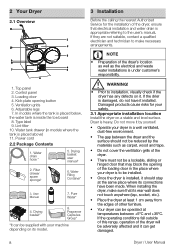
... operated at temperatures between the dryer and the surface should stay at least 1 cm away from the edges of the loading door in models where the tank is inside the toe board 8. If the drier is appropriate referring to the user's manual. 2 Your Dryer 2.1 Overview 11 1 10 2 3 9 8 4 7 5 6 1. Filter drawer spare sponge* 6. Adjustable legs 7. Dryer is to make sure that may block the opening button 5. Top panel 2. Type...
... operated at temperatures between the dryer and the surface should stay at least 1 cm away from the edges of the loading door in models where the tank is inside the toe board 8. If the drier is appropriate referring to the user's manual. 2 Your Dryer 2.1 Overview 11 1 10 2 3 9 8 4 7 5 6 1. Filter drawer spare sponge* 6. Adjustable legs 7. Dryer is to make sure that may block the opening button 5. Top panel 2. Type...
Owners Manual
Page 9
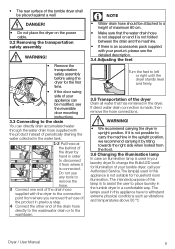
... reversible door mounting instructions. 3.3 Connecting to the drain You can be modified, see the detailed description. 3.4 Adjusting the feet Turn the feet to left or right until the dryer stands level and firmly. 3.5 Transportation of the dryer Drain all water that the water drain hose is not stepped on the power cable. 3.2 Removing the transportation safety assembly A WARNING! • Remove the transportation safety assembly before using the dryer...
... reversible door mounting instructions. 3.3 Connecting to the drain You can be modified, see the detailed description. 3.4 Adjusting the feet Turn the feet to left or right until the dryer stands level and firmly. 3.5 Transportation of the dryer Drain all water that the water drain hose is not stepped on the power cable. 3.2 Removing the transportation safety assembly A WARNING! • Remove the transportation safety assembly before using the dryer...

Owners Manual
Page 10
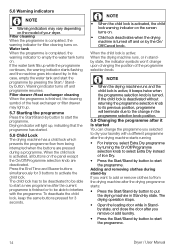
... energy saving • Spin your laundry at the highest speed possible when washing them into the dryer. • Dry garments having a label stating that you must open the loading door, do not keep it or when the symbol lights up, if there is a filter drawer cleaning warning symbol « » available. • For models with flue unit: comply with the flue connection instructions...
... energy saving • Spin your laundry at the highest speed possible when washing them into the dryer. • Dry garments having a label stating that you must open the loading door, do not keep it or when the symbol lights up, if there is a filter drawer cleaning warning symbol « » available. • For models with flue unit: comply with the flue connection instructions...

Owners Manual
Page 11
... the loading door. 5 Operating the product 5.1 Control Panel 1 1. On/O creasing Timer Delay Drying Cupboard Iron Dry Dry Jeans BabyProtect Extra dry Cupboard dry plus Start pause cancel Synthetics Drying Rack/ Express TimeDry 30' 5.3 Preparation of drying machine • Plug the drying machine. • Open the loading door. • Place the laundry to the drying machine without jamming them. • Push and close the loading door. Audio warning level button Tank full Filter Filter drawer / Child-proof cleaning Heat exchanger cleaning lock...
... the loading door. 5 Operating the product 5.1 Control Panel 1 1. On/O creasing Timer Delay Drying Cupboard Iron Dry Dry Jeans BabyProtect Extra dry Cupboard dry plus Start pause cancel Synthetics Drying Rack/ Express TimeDry 30' 5.3 Preparation of drying machine • Plug the drying machine. • Open the loading door. • Place the laundry to the drying machine without jamming them. • Push and close the loading door. Audio warning level button Tank full Filter Filter drawer / Child-proof cleaning Heat exchanger cleaning lock...
Owners Manual
Page 13
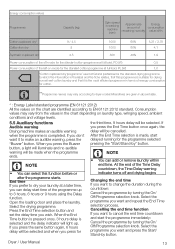
... 9 hours using the Delay function. Dryer / User Manual 13 Energy consumption values Programmes Capacity (kg) Spin speed in washing machine (rpm) Approximate amount of remaining humidity Energy consumption value kWh Cotton cupboard dry* Cotton Iron dry 9 / 4,5 9 1000 1000 60% 5,21 / 2,78 60% 4,1 Synthetic cupboard dry 4,5 800 40% 1,9 Power consumption of the off and drying begins Changing the end time If you press the Buzzer button, a light will...
... 9 hours using the Delay function. Dryer / User Manual 13 Energy consumption values Programmes Capacity (kg) Spin speed in washing machine (rpm) Approximate amount of remaining humidity Energy consumption value kWh Cotton cupboard dry* Cotton Iron dry 9 / 4,5 9 1000 1000 60% 5,21 / 2,78 60% 4,1 Synthetic cupboard dry 4,5 800 40% 1,9 Power consumption of the off and drying begins Changing the end time If you press the Buzzer button, a light will...
Owners Manual
Page 14
... Iron Dry. • Press the Start/Stand-by button to start the programme. The drying operation stops. • Open the loading door while in the programme selection knob position. 5.9 Changing the programme after the drying programme starts: • Press the Start/Stand-by button to dry your dryer. Filter cleaning When the programme is turned. C NOTE • When the child lock is activated, the child lock warning indicator on the screen turns on. • Child lock deactivates...
... Iron Dry. • Press the Start/Stand-by button to start the programme. The drying operation stops. • Open the loading door while in the programme selection knob position. 5.9 Changing the programme after the drying programme starts: • Press the Start/Stand-by button to dry your dryer. Filter cleaning When the programme is turned. C NOTE • When the child lock is activated, the child lock warning indicator on the screen turns on. • Child lock deactivates...
Owners Manual
Page 15
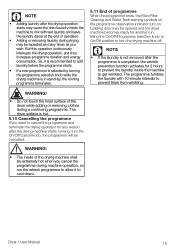
... or removing clothes during drying may be repeated as many times as you want to get wrinkled. WARNING! • Do not touch the inner surface of operation. • Adding or removing laundry during a continuing programme. The drum surface is in stand-by turning the programme selection knob while the drying machine is hot. 5.10 Cancelling the programme If you wish. Dryer / User Manual 15 Loading door...
... or removing clothes during drying may be repeated as many times as you want to get wrinkled. WARNING! • Do not touch the inner surface of operation. • Adding or removing laundry during a continuing programme. The drum surface is in stand-by turning the programme selection knob while the drying machine is hot. 5.10 Cancelling the programme If you wish. Dryer / User Manual 15 Loading door...
Owners Manual
Page 16
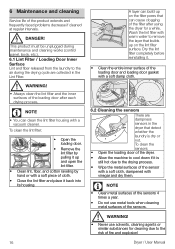
... laundry to the air during the drying cycle are collected in the dryer that can build up on the lint filter surface. A WARNING! • Always clean the lint filter and the inner surfaces of the loading door after using the dryer for cleaning due to remove the layer that builds up on the filter pores that detect whether the laundry is still hot due to cool down if...
... laundry to the air during the drying cycle are collected in the dryer that can build up on the lint filter surface. A WARNING! • Always clean the lint filter and the inner surfaces of the loading door after using the dryer for cleaning due to remove the layer that builds up on the filter pores that detect whether the laundry is still hot due to cool down if...
Owners Manual
Page 18
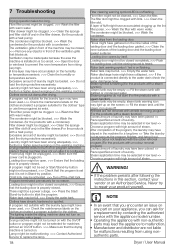
... clothes. Dryer / User Manual A program might not be set or Start/Stand-by button might not be empty => Fill the steam tank with high amount of laundry might not be unplugged. >>> Make sure the power cord is turned on the humidity or temperature sensors. >>> Clean the humidity or temperature sensors. Loading door might be selected in this section, contact your vendor or an Authorized Service. Loading door opens by position. 7 Troubleshooting Drying operation takes too long...
... clothes. Dryer / User Manual A program might not be set or Start/Stand-by button might not be empty => Fill the steam tank with high amount of laundry might not be unplugged. >>> Make sure the power cord is turned on the humidity or temperature sensors. >>> Clean the humidity or temperature sensors. Loading door might be selected in this section, contact your vendor or an Authorized Service. Loading door opens by position. 7 Troubleshooting Drying operation takes too long...
Owners Manual
Page 19
... of losing the fuse cover, the plug must be used until a replacement fuse cover has been fitted. In the event of the wires in the installation. We recommend that visible on the pin face of the appliances. • A special stacking kit is required as an optional extra please contact customer service. Do not operate without using a suitable and approved stacking kit obtained from a Authorised Service Agent. This appliance...
... of losing the fuse cover, the plug must be used until a replacement fuse cover has been fitted. In the event of the wires in the installation. We recommend that visible on the pin face of the appliances. • A special stacking kit is required as an optional extra please contact customer service. Do not operate without using a suitable and approved stacking kit obtained from a Authorised Service Agent. This appliance...
Owners Manual
Page 21
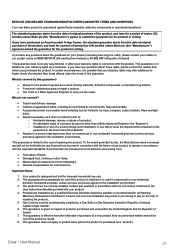
... meet the requirements contained in this guarantee or the User Instructions Booklet. • Repairs to a product operated at restaurants or from the date of original purchase of the product, and lasts for inconvenience. The standard guarantee starts from takeaways. • General compensation for a period of a product where such installation or use only. 2. Installation or use of twelve (12) months unless Beko plc...
... meet the requirements contained in this guarantee or the User Instructions Booklet. • Repairs to a product operated at restaurants or from the date of original purchase of the product, and lasts for inconvenience. The standard guarantee starts from takeaways. • General compensation for a period of a product where such installation or use only. 2. Installation or use of twelve (12) months unless Beko plc...
Owners Manual
Page 22
... its staff or representatives are supplied on the number set out above. 10. 9. This is provided by this guarantee will apply. Does Beko offer replacements? This guarantee is a repair-only guarantee. Our Engineers work Monday to Friday 9.00am to terminate the guarantee if its sole discretion, replace your product with the User Instructions Booklet. • That the fault was caused...
... its staff or representatives are supplied on the number set out above. 10. 9. This is provided by this guarantee will apply. Does Beko offer replacements? This guarantee is a repair-only guarantee. Our Engineers work Monday to Friday 9.00am to terminate the guarantee if its sole discretion, replace your product with the User Instructions Booklet. • That the fault was caused...

Owners Manual
Page 23
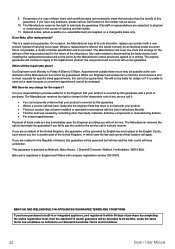
... or additional offers to Beko products that feature the ProSmart Inverter Motor. It does not cover any labour charge or any time will not be chargeable directly by the Service Agent. 7. The Terms and Conditions shown above are governed by following the online instructions. manufacturer: Beko plc, Beko House, 1 Greenhill Crescent, Watford WD18 8QU. Dryer / User Manual 23 Any repair/replacement of the standard manufacturer...
... or additional offers to Beko products that feature the ProSmart Inverter Motor. It does not cover any labour charge or any time will not be chargeable directly by the Service Agent. 7. The Terms and Conditions shown above are governed by following the online instructions. manufacturer: Beko plc, Beko House, 1 Greenhill Crescent, Watford WD18 8QU. Dryer / User Manual 23 Any repair/replacement of the standard manufacturer...
Owners Manual
Page 24
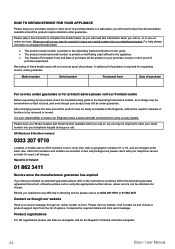
... a charge. For help please visit beko.co.uk/support/model-finder • The product model number is printed on the Operating Instruction Booklet / User guide • The product model and serial number is required for requesting service under guarantee. Please have your Model number and Serial number available when you call our Contact centre Before requesting service please check the troubleshooting guide in free call packages but please check with your product may be...
... a charge. For help please visit beko.co.uk/support/model-finder • The product model number is printed on the Operating Instruction Booklet / User guide • The product model and serial number is required for requesting service under guarantee. Please have your Model number and Serial number available when you call our Contact centre Before requesting service please check the troubleshooting guide in free call packages but please check with your product may be...


