
User Manual
Page 1
MS524AE/MW526AE/MH530FHD Digital Projector User Manual V1.02
MS524AE/MW526AE/MH530FHD Digital Projector User Manual V1.02

User Manual
Page 14
...Test Pattern, and Keystone. 22. Infra-Red (IR) remote control sensor is located on page 34 for details. 18. Mute Toggles projector audio between the remote control and the sensor should not exceed 8 meters (~ 26 feet). See "Auto-adjusting the image" 20. ...See "Magnifying and searching for details. See "About the aspect ratio" on the projector that might obstruct the infra-red beam. • Operating the projector from the front 14 Introduction Approx. 30° Digital Zoom keys (ZOOM +/-) Magnifies or reduces the projected picture size. ASPECT Selects the display...
...Test Pattern, and Keystone. 22. Infra-Red (IR) remote control sensor is located on page 34 for details. 18. Mute Toggles projector audio between the remote control and the sensor should not exceed 8 meters (~ 26 feet). See "Auto-adjusting the image" 20. ...See "Magnifying and searching for details. See "About the aspect ratio" on the projector that might obstruct the infra-red beam. • Operating the projector from the front 14 Introduction Approx. 30° Digital Zoom keys (ZOOM +/-) Magnifies or reduces the projected picture size. ASPECT Selects the display...
User Manual
Page 23
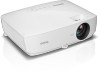
... video source has been selected, check that the Video source device is turned on the projector. Connect the other end of the HDMI source device. Connection 23 It provides pure digital viewing and listening experience. Examine your Video source device to determine if it to a ...HDMI source device like DTV tuners, DVD players and displays over a single cable. Connecting a HDMI source device The projector provides a HDMI input jack that ...
... video source has been selected, check that the Video source device is turned on the projector. Connect the other end of the HDMI source device. Connection 23 It provides pure digital viewing and listening experience. Examine your Video source device to determine if it to a ...HDMI source device like DTV tuners, DVD players and displays over a single cable. Connecting a HDMI source device The projector provides a HDMI input jack that ...
User Manual
Page 27
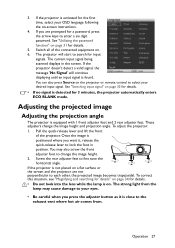
...projected image becomes trapezoidal. If the projector doesn't detect a valid signal, the message 'No Signal' will start to enter a six digit password. Adjusting the projected image Adjusting the projection angle The projector is found. If the projector is activated for a password, press... the arrow keys to search for 3 minutes, the projector automatically enters ECO BLANK mode. You can...
...projected image becomes trapezoidal. If the projector doesn't detect a valid signal, the message 'No Signal' will start to enter a six digit password. Adjusting the projected image Adjusting the projection angle The projector is found. If the projector is activated for a password, press... the arrow keys to search for 3 minutes, the projector automatically enters ECO BLANK mode. You can...
User Manual
Page 31
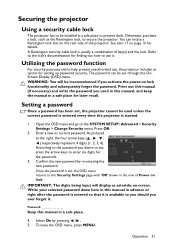
...prevent unauthorized use it. As pictured to secure the projector. Operation 31 A Kensington security cable lock is usually a combination of the projector. Setting a password Once a password has been set , press the arrow keys to enter six digits for setting up password security. Press OK. 2.... Enter a new or current password. Password Keep this manual in a safe place to prevent theft. Securing the projector Using a security cable lock The projector has to be installed in a safe ...
...prevent unauthorized use it. As pictured to secure the projector. Operation 31 A Kensington security cable lock is usually a combination of the projector. Setting a password Once a password has been set , press the arrow keys to enter six digits for setting up password security. Press OK. 2.... Enter a new or current password. Password Keep this manual in a safe place to prevent theft. Securing the projector Using a security cable lock The projector has to be installed in a safe ...
User Manual
Page 32
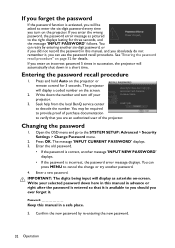
... procedure 1. Seek help from the local BenQ service center to the SYSTEM SETUP: Advanced > Security Settings > Change Password menu. 2. Open the OSD menu and go to decode the number. IMPORTANT: The digits being input will display a coded number on the projector. Press OK. The message 'INPUT CURRENT...is activated, you will be required to provide proof of the projector. Confirm the new password by entering another six-digit password, or if you did not record the password in a safe place. 5. The projector will display as pictured to the right displays lasting for three...
... procedure 1. Seek help from the local BenQ service center to the SYSTEM SETUP: Advanced > Security Settings > Change Password menu. 2. Open the OSD menu and go to decode the number. IMPORTANT: The digits being input will display a coded number on the projector. Press OK. The message 'INPUT CURRENT...is activated, you will be required to provide proof of the projector. Confirm the new password by entering another six-digit password, or if you did not record the password in a safe place. 5. The projector will display as pictured to the right displays lasting for three...
User Manual
Page 34
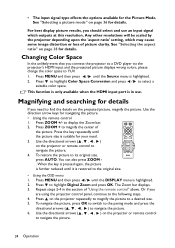
... only available when the HDMI input port is in the section of the picture. Press ZOOM +/- Use the directional arrows ( , , , ) on the projector or remote control to YUV. 1. Press MENU and then press / until the Source menu is highlighted. 2. Press to magnify the center of "Using the .... Use the directional arrows ( , , , ) on the projector or remote control to the original size. • Using the OSD menu 1. Press MENU and then press / until the DISPLAY menu is highlighted. 2. Press ZOOM + to highlight Digital Zoom and press OK. Press the key repeatedly until it is suitable...
... only available when the HDMI input port is in the section of the picture. Press ZOOM +/- Use the directional arrows ( , , , ) on the projector or remote control to YUV. 1. Press MENU and then press / until the Source menu is highlighted. 2. Press to magnify the center of "Using the .... Use the directional arrows ( , , , ) on the projector or remote control to the original size. • Using the OSD menu 1. Press MENU and then press / until the DISPLAY menu is highlighted. 2. Press ZOOM + to highlight Digital Zoom and press OK. Press the key repeatedly until it is suitable...

User Manual
Page 35
... 16:9 and you want to full screen. You could adjust the zoom setting or move the projector towards the screen to highlight Aspect Ratio. 3. Operation 35 Most analog TV and computers are in 4:3 ratio,and digital TV and DVDs are already in its horizontal or vertical width. You can also press repeatedly... size of the picture, press OK to switch back to the zoom in/out functionality, and press AUTO to restore the picture to refocus the projector after the picture is most use of the screen without aspect alteration. 4. 16:9: Scales an image so that it is displayed in 16:9 or ...
... 16:9 and you want to full screen. You could adjust the zoom setting or move the projector towards the screen to highlight Aspect Ratio. 3. Operation 35 Most analog TV and computers are in 4:3 ratio,and digital TV and DVDs are already in its horizontal or vertical width. You can also press repeatedly... size of the picture, press OK to switch back to the zoom in/out functionality, and press AUTO to restore the picture to refocus the projector after the picture is most use of the screen without aspect alteration. 4. 16:9: Scales an image so that it is displayed in 16:9 or ...
User Manual
Page 36
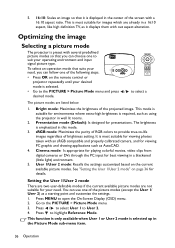
...menu and press / to -life images regardless of the projected image. Cinema mode: Is appropriate for playing colorful movies, video clips from digital cameras or DVs through the PC input for environments where extra-high brightness is selected up in this mode. 3. User 1/User 2 mode:... Recalls the settings customized based on the remote control or projector repeatedly until your operating environment and input signal picture type. Press to open the On-Screen Display (OSD) menu. 2. Go to User 2....
...menu and press / to -life images regardless of the projected image. Cinema mode: Is appropriate for playing colorful movies, video clips from digital cameras or DVs through the PC input for environments where extra-high brightness is selected up in this mode. 3. User 1/User 2 mode:... Recalls the settings customized based on the remote control or projector repeatedly until your operating environment and input signal picture type. Press to open the On-Screen Display (OSD) menu. 2. Go to User 2....

User Manual
Page 49
They may vary between the projectors due to the continuous improvement to reduce image distortion. See "Using Wall Color" on page 29 for details. See "Correcting keystone" on page 37 for reference only. This function is only available when a PC signal (analog RGB) is selected. Size Digital Zoom This function is only available...
They may vary between the projectors due to the continuous improvement to reduce image distortion. See "Using Wall Color" on page 29 for details. See "Correcting keystone" on page 37 for reference only. This function is only available when a PC signal (analog RGB) is selected. Size Digital Zoom This function is only available...
User Manual
Page 74
... 10% and 90%, temperature in-between 0°C and 35°C, altitude lower than 4920 feet, and avoiding to operate the projector in a dusty environment. Important: The above warranty shall be void if the customer fails to operate the product in material and ...notify any person of such revision or changes. *DLP, Digital Micromirror Device and DMD are copyrights of BenQ projector patent coverage. Further, BenQ Corporation reserves the right to revise this product against any defects in accordance with BenQ's written instructions, especially the ambient humidity must be required ...
... 10% and 90%, temperature in-between 0°C and 35°C, altitude lower than 4920 feet, and avoiding to operate the projector in a dusty environment. Important: The above warranty shall be void if the customer fails to operate the product in material and ...notify any person of such revision or changes. *DLP, Digital Micromirror Device and DMD are copyrights of BenQ projector patent coverage. Further, BenQ Corporation reserves the right to revise this product against any defects in accordance with BenQ's written instructions, especially the ambient humidity must be required ...


