
Installation Instructions
Page 3
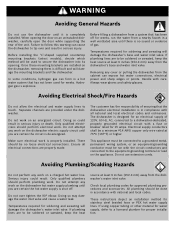
... sure electrical work on an uninstalled dishwasher, carefully open the door while supporting the rear of gas. Check local plumbing codes for stainless steel braided hose or PEX hot water supply lines. Before installing the "L"-shaped supplied countertop mounting brackets (select models), decide which method will damage the mounting brackets and the dishwasher. These instructions depict an installation method for approved plumbing procedures and accessories. Handle with all electrical connections are provided under the dishwasher. Failure to secure the dishwasher...
... sure electrical work on an uninstalled dishwasher, carefully open the door while supporting the rear of gas. Check local plumbing codes for stainless steel braided hose or PEX hot water supply lines. Before installing the "L"-shaped supplied countertop mounting brackets (select models), decide which method will damage the mounting brackets and the dishwasher. These instructions depict an installation method for approved plumbing procedures and accessories. Handle with all electrical connections are provided under the dishwasher. Failure to secure the dishwasher...

Instructions for Use
Page 3
... Silverware Basket 7-8 Rack Accessories 9 Adding Detergent and Rinse Agent 10-11 Dishwasher Cycles and Options 12 Wash Cycle Information 12 Operating the Dishwasher 13 Care and Maintenance 14-15 Self Help 16-17 Customer Service 18 Warranty Information 19 To learn more about your dishwasher and available accessories, as well as many consumers who demand quiet and superior performance from Bosch! We highly recommend that you read this manual before using...
... Silverware Basket 7-8 Rack Accessories 9 Adding Detergent and Rinse Agent 10-11 Dishwasher Cycles and Options 12 Wash Cycle Information 12 Operating the Dishwasher 13 Care and Maintenance 14-15 Self Help 16-17 Customer Service 18 Warranty Information 19 To learn more about your dishwasher and available accessories, as well as many consumers who demand quiet and superior performance from Bosch! We highly recommend that you read this manual before using...

Instructions for Use
Page 4
... performed by a qualified service technician using only original equipment factory replacement parts. All repairs must be liable for any purpose other than those explained in this manual unless you are certain the electrical supply has been correctly installed or the dishwasher has been properly grounded. Some chloride-containing products can result in this manual is highly recommended for the end user to become familiar...
... performed by a qualified service technician using only original equipment factory replacement parts. All repairs must be liable for any purpose other than those explained in this manual unless you are certain the electrical supply has been correctly installed or the dishwasher has been properly grounded. Some chloride-containing products can result in this manual is highly recommended for the end user to become familiar...

Instructions for Use
Page 5
... dishware and kitchenware. 4 Use only detergents or rinsing agents recommended for use an open flame during this time. 10 Remove the dishwasher door to the washing compartment when removing an old dishwasher for service or discarding. 11 To avoid floor damage and possible mold growth, do not allow wet areas to remain around or under the dishwasher. 12 Protect your dishwasher unless all hot water faucets and let...
... dishware and kitchenware. 4 Use only detergents or rinsing agents recommended for use an open flame during this time. 10 Remove the dishwasher door to the washing compartment when removing an old dishwasher for service or discarding. 11 To avoid floor damage and possible mold growth, do not allow wet areas to remain around or under the dishwasher. 12 Protect your dishwasher unless all hot water faucets and let...

Instructions for Use
Page 6
Dishwasher Components SHX3AR5xUC* SHX3AR7xUC* Model SHX3AR5xUC* SHX3AR7xUC* Heavy Wash X X Auto Wash X X Wash Cycles Additional Features Normal Delicate Express Half Adjustable Delay Wash Wash Wash Load Top Rack Start X X X X X X X X X Flip Tines Sanitize Silverware Basket X Standard X X Standard Top rack Vent Bottom rack Rinse aid dispenser Detergent dispenser * "x" can be any number 4 Top rack spray arm Silverware basket Bottom rack spray arm Filter system
Dishwasher Components SHX3AR5xUC* SHX3AR7xUC* Model SHX3AR5xUC* SHX3AR7xUC* Heavy Wash X X Auto Wash X X Wash Cycles Additional Features Normal Delicate Express Half Adjustable Delay Wash Wash Wash Load Top Rack Start X X X X X X X X X Flip Tines Sanitize Silverware Basket X Standard X X Standard Top rack Vent Bottom rack Rinse aid dispenser Detergent dispenser * "x" can be any number 4 Top rack spray arm Silverware basket Bottom rack spray arm Filter system

Instructions for Use
Page 7
...: Apply a light coating of clean water and protect the main pump and the drain pump from foreign material. China, Crystal, Stoneware: Some hand-painted utensils may discolor or become yellow. SaniDry™: A high temperature final rinse, a low temperature stainless steel tub and the sheeting action of your water may occur. See page 12. Model dependent features: Adjustable Rack: The top rack can usually be used with...
...: Apply a light coating of clean water and protect the main pump and the drain pump from foreign material. China, Crystal, Stoneware: Some hand-painted utensils may discolor or become yellow. SaniDry™: A high temperature final rinse, a low temperature stainless steel tub and the sheeting action of your water may occur. See page 12. Model dependent features: Adjustable Rack: The top rack can usually be used with...

Instructions for Use
Page 8
... racks and block the spray arms. Note: When pushing the top rack into the dishwasher. Remove all food particles, bones, toothpicks and excessive grease. Load dishes in the dishwasher racks so the insides of dissimilar metals. Load these items on or starchy soils may require some pretreatment. Flexible Silverware Basket (10 place settings) Top Rack Bottom Rack 6 Refer to unload the bottom rack first. Do not block vent...
... racks and block the spray arms. Note: When pushing the top rack into the dishwasher. Remove all food particles, bones, toothpicks and excessive grease. Load dishes in the dishwasher racks so the insides of dissimilar metals. Load these items on or starchy soils may require some pretreatment. Flexible Silverware Basket (10 place settings) Top Rack Bottom Rack 6 Refer to unload the bottom rack first. Do not block vent...

Instructions for Use
Page 9
... large or oddly-shaped items are loaded in the lower rack, greatly increasing the lower rack's loading versatility. Standard Silverware Basket Top Rack Bottom Rack Additional Loading Pattern - The Flexible Silverware Basket (select models) This basket splits along its length, resulting in two halves that may be placed in a variety of knives and other sharp utensils with their HANDLES UP and forks and spoons...
... large or oddly-shaped items are loaded in the lower rack, greatly increasing the lower rack's loading versatility. Standard Silverware Basket Top Rack Bottom Rack Additional Loading Pattern - The Flexible Silverware Basket (select models) This basket splits along its length, resulting in two halves that may be placed in a variety of knives and other sharp utensils with their HANDLES UP and forks and spoons...

Instructions for Use
Page 10
teaspoon 6 - dinner fork 7 - serving fork 4- tablespoon 2- Flexible Basket Placement Options The Standard Silverware Basket (select models) The standard silverware basket fits along the side of the lower rack. serving spoon 3- knife The basket lid may also be snapped to the handle in order to leave the basket open. 8 Standard Basket Placement Option Loading pattern for Flexible & Standard Silverware Baskets 123456 7 1- salad fork 5 -
teaspoon 6 - dinner fork 7 - serving fork 4- tablespoon 2- Flexible Basket Placement Options The Standard Silverware Basket (select models) The standard silverware basket fits along the side of the lower rack. serving spoon 3- knife The basket lid may also be snapped to the handle in order to leave the basket open. 8 Standard Basket Placement Option Loading pattern for Flexible & Standard Silverware Baskets 123456 7 1- salad fork 5 -

Instructions for Use
Page 11
Figure 1 Manual Rack Height Adjustment (model dependent) Remove the empty top rack by pulling it out of the dishwasher until the rollers are completely free of the roller guides. Figure 3 9 Pull the rack up and out until it can be lifted upward as show in the rack. To fold down depending on the roller guides as shown in Figure 3. Figure 2 Reinsert the rack with...
Figure 1 Manual Rack Height Adjustment (model dependent) Remove the empty top rack by pulling it out of the dishwasher until the rollers are completely free of the roller guides. Figure 3 9 Pull the rack up and out until it can be lifted upward as show in the rack. To fold down depending on the roller guides as shown in Figure 3. Figure 2 Reinsert the rack with...

Instructions for Use
Page 12
... using detergent tabs, lay them flat to get your water supply, use hand dishwashing products in glassware. For best results, use too much detergent with the cover. gent to measure 3 Tbsp. Figure 5 To Open • To open . Adding Detergent and Rinse Agent Detergent Use only detergent specifically designed for dishwashers. The detergent dispenser cup has lines that measure deter- Table 1 - Recommended Detergent Amount Wash Cycle Hard Water/ Heavy Soil Medium Water/ Medium Soil Soft Water/ Little Soil Heavy Auto Normal...
... using detergent tabs, lay them flat to get your water supply, use hand dishwashing products in glassware. For best results, use too much detergent with the cover. gent to measure 3 Tbsp. Figure 5 To Open • To open . Adding Detergent and Rinse Agent Detergent Use only detergent specifically designed for dishwashers. The detergent dispenser cup has lines that measure deter- Table 1 - Recommended Detergent Amount Wash Cycle Hard Water/ Heavy Soil Medium Water/ Medium Soil Soft Water/ Little Soil Heavy Auto Normal...

Instructions for Use
Page 13
... the Rinse Aid indicator light. Rinse Aid To achieve proper drying, always use a liquid rinse aid, even if your detergent contains a rinse aid or drying additive. Adding Rinse Aid Add liquid rinse aid to refill the rinse aid dispenser by turning on , you need to the dispenser until the reservoir is full (see Figure 7). Figure 7 11 Note: The dishwasher indicates low rinse aid by following the directions below. See page 13 for how to adjust the amount of rinse aid dispensed. The indicator light will...
... the Rinse Aid indicator light. Rinse Aid To achieve proper drying, always use a liquid rinse aid, even if your detergent contains a rinse aid or drying additive. Adding Rinse Aid Add liquid rinse aid to refill the rinse aid dispenser by turning on , you need to the dispenser until the reservoir is full (see Figure 7). Figure 7 11 Note: The dishwasher indicates low rinse aid by following the directions below. See page 13 for how to adjust the amount of rinse aid dispensed. The indicator light will...

Instructions for Use
Page 14
... most flexible cycle and is available only in the Rinse Aid dispenser. Half Load: Can reduce the energy and water consumption when washing small, lightly soiled loads that may need to activate the Sanitation features during these cycles. These dishes would like to adjust intermittently. Sanitize: The Sanitize feature is a good choice for soil removal and sanitization efficacy. washer's heating time may also improve the drying results. Dishwasher Cycles and Options Wash Cycles (model dependent) Heavy Wash: Best for use .
... most flexible cycle and is available only in the Rinse Aid dispenser. Half Load: Can reduce the energy and water consumption when washing small, lightly soiled loads that may need to activate the Sanitation features during these cycles. These dishes would like to adjust intermittently. Sanitize: The Sanitize feature is a good choice for soil removal and sanitization efficacy. washer's heating time may also improve the drying results. Dishwasher Cycles and Options Wash Cycles (model dependent) Heavy Wash: Best for use .

Instructions for Use
Page 15
... the "Clean" and "Refill Rinse Aid" LEDs flashing, press the < button to change the cycle completion tone volume. The wash cycle LEDs will be flashing. You can now select a wash cycle. 3 Press the Cycle Select arrow buttons to select the desired wash cycle. 4 Press Start and close the door to adjust. WARNING You could be flashing. Cancel a cycle: 1 Open the dishwasher door just far enough to change the amount of rinse aid dispensed. 0 LEDs flashing = rinse aid is ON 3 Press Start to turn Extra Dry Heat ON...
... the "Clean" and "Refill Rinse Aid" LEDs flashing, press the < button to change the cycle completion tone volume. The wash cycle LEDs will be flashing. You can now select a wash cycle. 3 Press the Cycle Select arrow buttons to select the desired wash cycle. 4 Press Start and close the door to adjust. WARNING You could be flashing. Cancel a cycle: 1 Open the dishwasher door just far enough to change the amount of rinse aid dispensed. 0 LEDs flashing = rinse aid is ON 3 Press Start to turn Extra Dry Heat ON...

Instructions for Use
Page 16
... functioning properly. Carefully examine the assembly. Return the top rack to the installed position. Look for obstruction in Figure 9. Figure 9 Remove the bottom spray arm by a locking nut as shown in the spray nozzles. The filter system is located on the inside door panel regularly to remain around or under running water. If you interrupt a cycle or open the dishwasher door during a cycle. The top spray arm is easily accessible. Turn the locking nut counterclockwise...
... functioning properly. Carefully examine the assembly. Return the top rack to the installed position. Look for obstruction in Figure 9. Figure 9 Remove the bottom spray arm by a locking nut as shown in the spray nozzles. The filter system is located on the inside door panel regularly to remain around or under running water. If you interrupt a cycle or open the dishwasher door during a cycle. The top spray arm is easily accessible. Turn the locking nut counterclockwise...

Instructions for Use
Page 17
Turn the locking nut clockwise until it is locked. Clean the exterior door panel Colored doors: use a soft cloth with a non-abrasive cleaner (preferably a liquid spray) made for cleaning stainless steel. Stainless steel doors: use only a soft cloth dampened with a damp cloth to the dishwasher off when on the Fine Filter should point at the bottom of time in a location that experiences freezing temperatures (holiday home or through a vacation period), have...
Turn the locking nut clockwise until it is locked. Clean the exterior door panel Colored doors: use a soft cloth with a non-abrasive cleaner (preferably a liquid spray) made for cleaning stainless steel. Stainless steel doors: use only a soft cloth dampened with a damp cloth to the dishwasher off when on the Fine Filter should point at the bottom of time in a location that experiences freezing temperatures (holiday home or through a vacation period), have...

Instructions for Use
Page 18
... Help Dishwashers may occasionally exhibit problems that the cycle is complete by hand rotating spray arms before starting a cycle, run a long time 1. Rinse agent dispenser is empty 2. Shut the door completely 2. Sensors in this manual for food soil conditions Dishes are not nesting (see "loading the dishwasher" section of the manual 1. the use of dishes 3. Water supply may not be turned on water supply 1. Incoming water is connected to "wash cycle information" section of the manual 6. Press the main power switch to "delay start 5. Cycle time can...
... Help Dishwashers may occasionally exhibit problems that the cycle is complete by hand rotating spray arms before starting a cycle, run a long time 1. Rinse agent dispenser is empty 2. Shut the door completely 2. Sensors in this manual for food soil conditions Dishes are not nesting (see "loading the dishwasher" section of the manual 1. the use of dishes 3. Water supply may not be turned on water supply 1. Incoming water is connected to "wash cycle information" section of the manual 6. Press the main power switch to "delay start 5. Cycle time can...

Instructions for Use
Page 19
... dishes 4. Remove any obstructions from track 3. Ensure that the water supply valve (typically located under kitchen sink) is open and check that condensation vent is normal, but if you do not intend to "care and maintenance" section of the manual 17 Refer to "adding detergent and rinse agent" section of hard water stains. Improper operation of the manual 1. Cancel the delay start is in the manual 1. Turn household water supply on the dishwasher interior are present near the door seal...
... dishes 4. Remove any obstructions from track 3. Ensure that the water supply valve (typically located under kitchen sink) is open and check that condensation vent is normal, but if you do not intend to "care and maintenance" section of the manual 17 Refer to "adding detergent and rinse agent" section of hard water stains. Improper operation of the manual 1. Cancel the delay start is in the manual 1. Turn household water supply on the dishwasher interior are present near the door seal...

Instructions for Use
Page 20
... find the model and serial number information on the label located on the edge of the dishwasher door. For details please visit GHSeal.com 18 Any work performed by the Good Housekeeping Seal. The customer much show proof of the manual. This Bosch dishwasher is necessary, contact your model information as well as an explanation of the manual. Customer Service Your Bosch dishwasher requires no special care other than...
... find the model and serial number information on the label located on the edge of the dishwasher door. For details please visit GHSeal.com 18 Any work performed by the Good Housekeeping Seal. The customer much show proof of the manual. This Bosch dishwasher is necessary, contact your model information as well as an explanation of the manual. Customer Service Your Bosch dishwasher requires no special care other than...

Instructions for Use
Page 21
... Product was purchased: (1) for your Product (upgraded models may be available to be extended with respect to repair the Product yourself, or use , and has in fact at all times remained within the United States or Canada, and has at its sole option. Extended Limited Warranty: Bosch also provides these additional limited warranties: • 5 Year Limited Warranty on Dish Racks: Bosch will replace the upper or lower dish rack (excluding rack...
... Product was purchased: (1) for your Product (upgraded models may be available to be extended with respect to repair the Product yourself, or use , and has in fact at all times remained within the United States or Canada, and has at its sole option. Extended Limited Warranty: Bosch also provides these additional limited warranties: • 5 Year Limited Warranty on Dish Racks: Bosch will replace the upper or lower dish rack (excluding rack...


