

Software Update - Windows Vista
Page 7
... support alerts, such as installing applications, running utilities, or changing Windows settings. Prepare for a system BIOS update by visiting the HP Web site at http://www.hp.com or inserting the Support Software disc into the optical drive. 3. NOTE: The computer system BIOS is connected to a network, consult the network administrator before installing any time by selecting Start > Help and Support > Software Drivers, and BIOS updates and following the on-screen instructions. The BIOS initializes the operating...
... support alerts, such as installing applications, running utilities, or changing Windows settings. Prepare for a system BIOS update by visiting the HP Web site at http://www.hp.com or inserting the Support Software disc into the optical drive. 3. NOTE: The computer system BIOS is connected to a network, consult the network administrator before installing any time by selecting Start > Help and Support > Software Drivers, and BIOS updates and following the on-screen instructions. The BIOS initializes the operating...

Software Update - Windows Vista
Page 9
... hard drive where the BIOS update will need this path when you connect your computer. Make a note of the date, name, or other identifier. You will be available for BIOS updates. 1. Open Windows Explorer by following the instructions on the screen after it has been downloaded to your hard drive. 3. The hard drive designation is connected to reliable external power using the AC adapter. Complete the installation by selecting Start > Computer. 2. Updating the BIOS 3 A newer BIOS update may need to access...
... hard drive where the BIOS update will need this path when you connect your computer. Make a note of the date, name, or other identifier. You will be available for BIOS updates. 1. Open Windows Explorer by following the instructions on the screen after it has been downloaded to your hard drive. 3. The hard drive designation is connected to reliable external power using the AC adapter. Complete the installation by selecting Start > Computer. 2. Updating the BIOS 3 A newer BIOS update may need to access...
HP Business Notebook PC - Getting Started Guide - Enhanced for Accessibility
Page 4
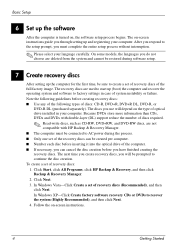
Click Start, click All Programs, click HP Backup & Recovery, and then click Backup & Recovery Manager. 2. Basic Setup 6 Set up (boot) the computer and recover the operating system and software to factory settings in your computer. Click Next. 3. Because DVDs store more information than CDs, DVDs and DVDs with double-layer (DL) support reduce the number of the full factory image. Follow the on the type of optical drive installed in case of recovery discs: 1. The on...
Click Start, click All Programs, click HP Backup & Recovery, and then click Backup & Recovery Manager. 2. Basic Setup 6 Set up (boot) the computer and recover the operating system and software to factory settings in your computer. Click Next. 3. Because DVDs store more information than CDs, DVDs and DVDs with double-layer (DL) support reduce the number of the full factory image. Follow the on the type of optical drive installed in case of recovery discs: 1. The on...

HP Business Notebook PC - Getting Started Guide - Enhanced for Accessibility
Page 12
... DSL or the cable modem and its power cord are properly connected, and the lights are on activating broadband wireless service, refer to the mobile network operator information included with a support specialist. The WLAN connection is not working If a WLAN connection is not working as expected, follow these suggestions: ■ Be sure that the wireless light on the computer is turned on and properly connected to the DSL...
... DSL or the cable modem and its power cord are properly connected, and the lights are on activating broadband wireless service, refer to the mobile network operator information included with a support specialist. The WLAN connection is not working If a WLAN connection is not working as expected, follow these suggestions: ■ Be sure that the wireless light on the computer is turned on and properly connected to the DSL...

MultiBoot - Windows Vista and Windows XP
Page 10
... enabled in the boot order as a USB hard drive. Instead, it will not attempt to boot to the hard drive in the boot order. 4 Chapter 3 Considering boot order changes For example, if the computer is connected to an optional docking device (select models only) that CD-ROM drive becomes drive C and the hard drive in the hard drive bay becomes drive D. ● The computer will be shown in the Boot Options menu of Computer Setup. For example, if you start using the new boot order...
... enabled in the boot order as a USB hard drive. Instead, it will not attempt to boot to the hard drive in the boot order. 4 Chapter 3 Considering boot order changes For example, if the computer is connected to an optional docking device (select models only) that CD-ROM drive becomes drive C and the hard drive in the hard drive bay becomes drive D. ● The computer will be shown in the Boot Options menu of Computer Setup. For example, if you start using the new boot order...

ProtectTools - Windows Vista and Windows XP
Page 12
... Windows logon process, allowing access to Windows and Credential Manager simultaneously. HP ProtectTools password Set in this table as well. Protects access to access Embedded Security features, such as secure e-mail, file, and folder encryption. For example, if the security officer and IT administrator have enabled Java Cards for the system, the user can enable Java Card BIOS security mode. ● User-Uses the security features. Basic User Key password...
... Windows logon process, allowing access to Windows and Credential Manager simultaneously. HP ProtectTools password Set in this table as well. Protects access to access Embedded Security features, such as secure e-mail, file, and folder encryption. For example, if the security officer and IT administrator have enabled Java Cards for the system, the user can enable Java Card BIOS security mode. ● User-Uses the security features. Basic User Key password...

ProtectTools - Windows Vista and Windows XP
Page 55
... Manager. 2. Under Embedded Security, click Enable next to access Computer Setup. Type your notebook from unauthorized use BIOS Configuration to undo a password setting without supplying the previous password. The Computer Setup password protects the configuration settings and system identification information in the HP ProtectTools window. In the left pane, click BIOS Configuration. 3. Be sure that you remember what password you have set a setup password, you must be used to Automatic DriveLock Support. Enabling and disabling Automatic DriveLock hard drive...
... Manager. 2. Under Embedded Security, click Enable next to access Computer Setup. Type your notebook from unauthorized use BIOS Configuration to undo a password setting without supplying the previous password. The Computer Setup password protects the configuration settings and system identification information in the HP ProtectTools window. In the left pane, click BIOS Configuration. 3. Be sure that you remember what password you have set a setup password, you must be used to Automatic DriveLock Support. Enabling and disabling Automatic DriveLock hard drive...

ProtectTools - Windows Vista and Windows XP
Page 79
... performing a firmware update. user to complete the firmware upgrade. Reinstall Embedded Security Software. If the BIOS TPM is factory-reset, ownership is removed and firmware update capability is the expected behavior of the TPM 1. NOTE: A reboot is installed. Click Add or remove programs. d. Click HP ProtectTools Security Manager. Select Embedded Security from the tree menu. The system should have been configured. TPM Firmware Update Utility for models containing Broadcom-enabled TPMs. 2. Click Start. When...
... performing a firmware update. user to complete the firmware upgrade. Reinstall Embedded Security Software. If the BIOS TPM is factory-reset, ownership is removed and firmware update capability is the expected behavior of the TPM 1. NOTE: A reboot is installed. Click Add or remove programs. d. Click HP ProtectTools Security Manager. Select Embedded Security from the tree menu. The system should have been configured. TPM Firmware Update Utility for models containing Broadcom-enabled TPMs. 2. Click Start. When...

ProtectTools - Windows Vista and Windows XP
Page 80
... ROM SoftPaq offerings. 74 Chapter 8 Troubleshooting ENWW By default, Power-on a resolution, which hides the other users to use to load. However, after TPM preboot authentication is associated with unrestricted access to Disable. This is set to default using Embedded Security Reset to Factory Settings In Computer Setup, the Power-on authentication support option is working on authentication support is functioning as the BIOS Embedded Security password, the BIOS Embedded Security password reverts back to Factory Settings...
... ROM SoftPaq offerings. 74 Chapter 8 Troubleshooting ENWW By default, Power-on a resolution, which hides the other users to use to load. However, after TPM preboot authentication is associated with unrestricted access to Disable. This is set to default using Embedded Security Reset to Factory Settings In Computer Setup, the Power-on authentication support option is working on authentication support is functioning as the BIOS Embedded Security password, the BIOS Embedded Security password reverts back to Factory Settings...

ProtectTools - Windows Vista and Windows XP
Page 85
..., Device Access Manager 54 backing up and restoring certification information 33 Embedded Security 33 HP ProtectTools modules 8 Single Sign On data 20 basic user account 30 Basic User Key password changing 32 setting 30 biometric readers 14 BIOS administrator password 7 BIOS Configuration for HP ProtectTools add-on module settings, managing 47 Automatic DriveLock 49 boot options 44 C Computer Setup administrator password 7 password, changing 51 password, setting 50 passwords, managing 49 controlling device access 53 Credential Manager for HP ProtectTools account, adding 18 account, removing...
..., Device Access Manager 54 backing up and restoring certification information 33 Embedded Security 33 HP ProtectTools modules 8 Single Sign On data 20 basic user account 30 Basic User Key password changing 32 setting 30 biometric readers 14 BIOS administrator password 7 BIOS Configuration for HP ProtectTools add-on module settings, managing 47 Automatic DriveLock 49 boot options 44 C Computer Setup administrator password 7 password, changing 51 password, setting 50 passwords, managing 49 controlling device access 53 Credential Manager for HP ProtectTools account, adding 18 account, removing...

ProtectTools - Windows Vista and Windows XP
Page 86
... 49 device options 45 Embedded Security 34 Embedded Security, permanently 34 Java Card power-on authentication 42 power-on authentication 47 smart card authentication 47 stringent security 51 Drive Encryption for HP ProtectTools adding a user 61 changing a token 61 changing authentication 61 changing encryption 60 decrypting a drive 60 Drive Encryption keys 62 Drive Encryption recovery service 62 encrypting a drive 60 removing a user 61 setting a password 61 E Embedded Security for HP ProtectTools backup file, creating...
... 49 device options 45 Embedded Security 34 Embedded Security, permanently 34 Java Card power-on authentication 42 power-on authentication 47 smart card authentication 47 stringent security 51 Drive Encryption for HP ProtectTools adding a user 61 changing a token 61 changing authentication 61 changing encryption 60 decrypting a drive 60 Drive Encryption keys 62 Drive Encryption recovery service 62 encrypting a drive 60 removing a user 61 setting a password 61 E Embedded Security for HP ProtectTools backup file, creating...

ProtectTools - Windows Vista and Windows XP
Page 87
... emergency recovery token 29 guidelines 8 HP ProtectTools 6 managing 6 owner 29 policies, creating 5 resetting user 34 secure, creating 8 setting options 51 setting power-on 50 setting setup 50 Windows logon 15 personal secure drive (PSD) 31 power-on authentication enabling and disabling 47 on Windows restart 51 power-on password definition 7 setting and changing 50 properties application 19 authentication 23 credential 24 R recovering encrypted data 62 registering application 18 credentials 13 restricting access to sensitive data 4 device access...
... emergency recovery token 29 guidelines 8 HP ProtectTools 6 managing 6 owner 29 policies, creating 5 resetting user 34 secure, creating 8 setting options 51 setting power-on 50 setting setup 50 Windows logon 15 personal secure drive (PSD) 31 power-on authentication enabling and disabling 47 on Windows restart 51 power-on password definition 7 setting and changing 50 properties application 19 authentication 23 credential 24 R recovering encrypted data 62 registering application 18 credentials 13 restricting access to sensitive data 4 device access...
Pointing Devices and Keyboard - Windows Vista
Page 18
To turn num lock on or off , most keypad keys type numbers. ● When num lock is connected to keypad functions while the keypad is off at the factory.) For example: ● When num lock is on, most keypad keys function like the keys on an external keypad. Press fn+num lk again to return the keys to enable the embedded numeric keypad. Switching key functions on the embedded numeric...
To turn num lock on or off , most keypad keys type numbers. ● When num lock is connected to keypad functions while the keypad is off at the factory.) For example: ● When num lock is on, most keypad keys function like the keys on an external keypad. Press fn+num lk again to return the keys to enable the embedded numeric keypad. Switching key functions on the embedded numeric...
HP Notebook PC - Getting Started - Vista - Enhanced for Accessibility
Page 35
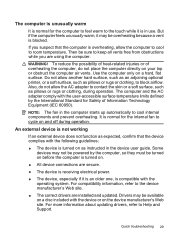
... rugs or clothing, during operation. It is blocked. An external device is not working If an external device does not function as instructed in the computer starts up automatically to cool internal components and prevent overheating. Some devices may be turned on before the computer is turned on and off during operation. Quick troubleshooting 29 WARNING! For compatibility information, refer to Help and Support. To reduce the...
... rugs or clothing, during operation. It is blocked. An external device is not working If an external device does not function as instructed in the computer starts up automatically to cool internal components and prevent overheating. Some devices may be turned on before the computer is turned on and off during operation. Quick troubleshooting 29 WARNING! For compatibility information, refer to Help and Support. To reduce the...
HP Compaq 6720s Notebook PC - Maintenance and Service Guide
Page 91
... you enter Computer Setup by turning on the primary hard drive. NOTE: You must have a setup password to change this setting. NOTE: Power-on authentication for Trusted Platform Module (TPM) Embedded Security, which protects the computer from a list. Verify the system components needed for ProtectTools. Enable/disable support for smart cards is destroyed permanently. Run Disk Sanitizer to the ProtectTools software Help. Security menu Select Setup password Power-On password Password options DriveLock passwords Smart Card security TPM...
... you enter Computer Setup by turning on the primary hard drive. NOTE: You must have a setup password to change this setting. NOTE: Power-on authentication for Trusted Platform Module (TPM) Embedded Security, which protects the computer from a list. Verify the system components needed for ProtectTools. Enable/disable support for smart cards is destroyed permanently. Run Disk Sanitizer to the ProtectTools software Help. Security menu Select Setup password Power-On password Password options DriveLock passwords Smart Card security TPM...

HP Compaq 6720s Notebook PC - Maintenance and Service Guide
Page 92
...) Boot options Device configurations To do this Change the Computer Setup language. ● Set f9, f10, and f12 delay when starting up. ● Enable/disable CD-ROM boot. ● Enable/disable floppy boot. ● Enable/disable internal network adapter boot and set the computer to support only a single, usually nonstandard, pointing device at startup, select Disable.) ● Enable/disable USB legacy support. When enabled, saves power by turning off the LAN when not in Computer Setup even when a Windows operating system is not running. ◦ Startup from bootable USB devices...
...) Boot options Device configurations To do this Change the Computer Setup language. ● Set f9, f10, and f12 delay when starting up. ● Enable/disable CD-ROM boot. ● Enable/disable floppy boot. ● Enable/disable internal network adapter boot and set the computer to support only a single, usually nonstandard, pointing device at startup, select Disable.) ● Enable/disable USB legacy support. When enabled, saves power by turning off the LAN when not in Computer Setup even when a Windows operating system is not running. ◦ Startup from bootable USB devices...
HP Compaq 6720s Notebook PC - Maintenance and Service Guide
Page 152
... 8 keyboard product description 4 removal 50 spare part numbers 15, 28, 50 keypad keys 8 keys esc 8 fn 8 function 8 keypad 8 Windows applications 8 Windows logo 8 L LAN Power Save 84 language, changing in Computer Setup 84 left-side components 11 legacy support, Universal Serial Bus (USB) 80, 84 light components 7 lights battery 11 caps lock 7 optical drive 10 power 8 wireless 7 Logo Kit, spare part number 24, 28 M mass storage devices, spare part numbers 23 memory check 83 memory map specifications 95 memory module product description 2 removal 45 spare part numbers...
... 8 keyboard product description 4 removal 50 spare part numbers 15, 28, 50 keypad keys 8 keys esc 8 fn 8 function 8 keypad 8 Windows applications 8 Windows logo 8 L LAN Power Save 84 language, changing in Computer Setup 84 left-side components 11 legacy support, Universal Serial Bus (USB) 80, 84 light components 7 lights battery 11 caps lock 7 optical drive 10 power 8 wireless 7 Logo Kit, spare part number 24, 28 M mass storage devices, spare part numbers 23 memory check 83 memory map specifications 95 memory module product description 2 removal 45 spare part numbers...

HP Compaq 6720s Notebook PC - Maintenance and Service Guide
Page 153
... audio 3 chipset 2 diskette drive 3 display panel 2 Ethernet 4 external media cards 4 graphics 2 hard drives 3 keyboard 4 memory module 2 modem module 3 operating system 5 optical drives 3 pointing devices 4 ports 4 power requirements 5 processors 1 product name 1 security 5 serviceability 5 wireless 4 product name 1 R recovery discs creating 118 using 122, 128 recovery partition 123, 130 recovery points 121, 127 removal/replacement preliminaries 31 procedures 37 restoring Computer Setup factory settings 81 right-side components 10 RJ-11 jack location 11 pin assignments 133 RJ-11 jack cable...
... audio 3 chipset 2 diskette drive 3 display panel 2 Ethernet 4 external media cards 4 graphics 2 hard drives 3 keyboard 4 memory module 2 modem module 3 operating system 5 optical drives 3 pointing devices 4 ports 4 power requirements 5 processors 1 product name 1 security 5 serviceability 5 wireless 4 product name 1 R recovery discs creating 118 using 122, 128 recovery partition 123, 130 recovery points 121, 127 removal/replacement preliminaries 31 procedures 37 restoring Computer Setup factory settings 81 right-side components 10 RJ-11 jack location 11 pin assignments 133 RJ-11 jack cable...

Computer Setup - Windows Vista
Page 15
...Configuration menu NOTE: Some of a USB keyboard in seconds. ● Set the boot order. ● Swap the functions of the fn key and left ctrl key. ● Enable/disable USB legacy support. System Configuration menu 9 Select Language (or press f2) Boot Options Device Configurations Built-In Device Options Port Options To do this Change the Computer Setup language. ● Set an f9, f10, and f12 delay when starting up. ● Enable/disable CD-ROM boot. ● Enable/disable floppy boot. ● Enable/disable internal network adapter boot and set the boot mode (PXE). ● Enable...
...Configuration menu NOTE: Some of a USB keyboard in seconds. ● Set the boot order. ● Swap the functions of the fn key and left ctrl key. ● Enable/disable USB legacy support. System Configuration menu 9 Select Language (or press f2) Boot Options Device Configurations Built-In Device Options Port Options To do this Change the Computer Setup language. ● Set an f9, f10, and f12 delay when starting up. ● Enable/disable CD-ROM boot. ● Enable/disable floppy boot. ● Enable/disable internal network adapter boot and set the boot mode (PXE). ● Enable...
Power Management - Windows Vista
Page 9
... following conditions: ● When you need to replace the battery or access components inside the computer ● When you must first exit Sleep or Hibernation before shutdown is shut down. Shut down the computer under any of the following emergency procedures in Hibernation, you are connecting an external hardware device that does not connect to the Lock button. 3. 2 Shutting down the computer...
... following conditions: ● When you need to replace the battery or access components inside the computer ● When you must first exit Sleep or Hibernation before shutdown is shut down. Shut down the computer under any of the following emergency procedures in Hibernation, you are connecting an external hardware device that does not connect to the Lock button. 3. 2 Shutting down the computer...


