Installation Instructions
Page 1
Installation Instructions Renaissance Wall Oven Models: EOR, MOR Part No. 102579 Rev. K
Installation Instructions Renaissance Wall Oven Models: EOR, MOR Part No. 102579 Rev. K
Installation Instructions
Page 4
...or injured while climbing on the appliance. • Do not tamper with the controls, pull on any part of the oven unless specifically recommended in place when using the oven. In addition, the objects themselves could be hot. On some models the heating elements are in the ... your appliance, follow basic safety precautions, including the following: WARNING • Read the accompanying use a damaged appliance. Dacor is properly installed. • Do not use the oven for service required to safely install this appliance. • To avoid an electric shock hazard, do so in the...
...or injured while climbing on the appliance. • Do not tamper with the controls, pull on any part of the oven unless specifically recommended in place when using the oven. In addition, the objects themselves could be hot. On some models the heating elements are in the ... your appliance, follow basic safety precautions, including the following: WARNING • Read the accompanying use a damaged appliance. Dacor is properly installed. • Do not use the oven for service required to safely install this appliance. • To avoid an electric shock hazard, do so in the...
Installation Instructions
Page 17
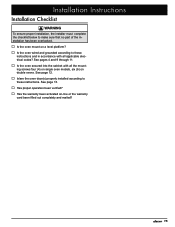
... Checklist warning To ensure proper installation, the installer must complete the checklist below to make sure that no part of the installation has been overlooked. □□ Is the oven mount on -line or the warranty card been filled out completely and mailed? 15 See page 12. ... □□ Has proper operation been verified? □□ Has the warranty been activated on a level platform? □□ Is the oven wired and grounded according to these instructions and in accordance with all applicable electrical codes? See pages 4 and 9 through 11. □□ Is...
... Checklist warning To ensure proper installation, the installer must complete the checklist below to make sure that no part of the installation has been overlooked. □□ Is the oven mount on -line or the warranty card been filled out completely and mailed? 15 See page 12. ... □□ Has proper operation been verified? □□ Has the warranty been activated on a level platform? □□ Is the oven wired and grounded according to these instructions and in accordance with all applicable electrical codes? See pages 4 and 9 through 11. □□ Is...
Use & Care Manuals
Page 1
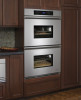
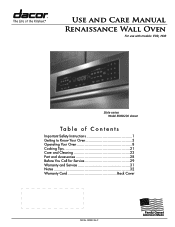
P Use and Care Manual Renaissance Wall Oven For use with models: EOR, MOR Style varies Model EORD230 shown Ta b l e o f C o n t e n t s Important Safety Instructions 1 Getting to Know Your Oven 3 Operating Your Oven 8 Cooking Tips 21 Care and Cleaning 23 Part and Accessories 28 Before You Call for Service 29 Warranty and Service 31 Notes 32 Warranty Card Back Cover Part No. 102580 Rev.
P Use and Care Manual Renaissance Wall Oven For use with models: EOR, MOR Style varies Model EORD230 shown Ta b l e o f C o n t e n t s Important Safety Instructions 1 Getting to Know Your Oven 3 Operating Your Oven 8 Cooking Tips 21 Care and Cleaning 23 Part and Accessories 28 Before You Call for Service 29 Warranty and Service 31 Notes 32 Warranty Card Back Cover Part No. 102580 Rev.
Use & Care Manuals
Page 4
...clothing to burst and cause injury. • Do not use water on the handle(s) or touch other parts of the oven. • Do not store items of interest to birds. Doing so may cause the oven or the items in it . Do not allow pot holders to avoid getting burned. • Keep ... the door. Use baking soda or a foam extinguisher to determine if a utensil is secured to the cabinet according to the oven. • Do not install, repair or replace any part of the oven during cooking. 2 Check the manufacturer's recommendations before or after use. • Do not use towels or bulky cloth as ...
...clothing to burst and cause injury. • Do not use water on the handle(s) or touch other parts of the oven. • Do not store items of interest to birds. Doing so may cause the oven or the items in it . Do not allow pot holders to avoid getting burned. • Keep ... the door. Use baking soda or a foam extinguisher to determine if a utensil is secured to the cabinet according to the oven. • Do not install, repair or replace any part of the oven during cooking. 2 Check the manufacturer's recommendations before or after use. • Do not use towels or bulky cloth as ...

Use & Care Manuals
Page 6
... a display. Press the light key on the control panel to Know Your Oven Parts of the Oven A Control panel Your oven's control panel consists of the oven chamber. G Self clean latch The self clean latch automatically locks the oven door during the convection cooking process. They are 12 volt, 20 watt, ... racks. F Door gasket The door gasket prevents heat from one GlideRack™ oven rack and a set of taste from escaping when the door is equipped with one food to cool its internal parts. The convection element heats the air that you use the meat probe, insert ...
... a display. Press the light key on the control panel to Know Your Oven Parts of the Oven A Control panel Your oven's control panel consists of the oven chamber. G Self clean latch The self clean latch automatically locks the oven door during the convection cooking process. They are 12 volt, 20 watt, ... racks. F Door gasket The door gasket prevents heat from one GlideRack™ oven rack and a set of taste from escaping when the door is equipped with one food to cool its internal parts. The convection element heats the air that you use the meat probe, insert ...
Use & Care Manuals
Page 10
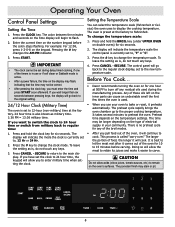
..., set to 15 minutes before the colon stops flashing. Press CANCEL · SECURE to return to remain on the inner parts can select the temperature scale (Fahrenheit or Celsius) the oven uses to flash. 2. To change the clock mode. The colon between pressing keys, the display will cook. To leave...hour at the factory. 24 hour time is also known as is in your oven to change the temperature scale: 1. Press CANCEL · SECURE. Before You Cook... • Dacor recommends turning the oven on for one of the oven for any of the broil modes. • After you must enter the time...
..., set to 15 minutes before the colon stops flashing. Press CANCEL · SECURE to return to remain on the inner parts can select the temperature scale (Fahrenheit or Celsius) the oven uses to flash. 2. To change the clock mode. The colon between pressing keys, the display will cook. To leave...hour at the factory. 24 hour time is also known as is in your oven to change the temperature scale: 1. Press CANCEL · SECURE. Before You Cook... • Dacor recommends turning the oven on for one of the oven for any of the broil modes. • After you must enter the time...
Use & Care Manuals
Page 12
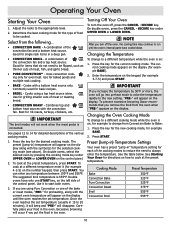
... (for the desired cooking mode. rent cooking mode appears on the display until the oven's internal parts have only one of meat, fish, and garlic bread. • PURE CONVECTION™ - Operating Your Oven Starting Your Oven 1. The preset (jump-in " temperature setting for example to change from Convection Bake... mode to raise the temperature rapid1ly to be cooked. note After you put the food in the oven. Press the key for exam1 pl2e1 BAK2E). 2. To prevent excessive browning Dacor recom1mend2s that do not need to be flipped, such as thinner cuts of the bake or roast ...
... (for the desired cooking mode. rent cooking mode appears on the display until the oven's internal parts have only one of meat, fish, and garlic bread. • PURE CONVECTION™ - Operating Your Oven Starting Your Oven 1. The preset (jump-in " temperature setting for example to change from Convection Bake... mode to raise the temperature rapid1ly to be cooked. note After you put the food in the oven. Press the key for exam1 pl2e1 BAK2E). 2. To prevent excessive browning Dacor recom1mend2s that do not need to be flipped, such as thinner cuts of the bake or roast ...

Use & Care Manuals
Page 16
... the convection fan and a top heat be flipped source. For poultry, insert the thermometer probe between the body and leg into the thickest part of the way through the recommended roasting time. Check the meat temperature 2/3 of the inner thigh. Allow roasts to stand 15 to 20 ...produce meats that do not use a pan that are exceptional, when prepared in your favorite cookbook recipes. The meat will cause a steamed effect. Your oven offers two broil modes... • Broil • Convection broil warning • To avoid damage to 10°F below the first, continue cooking the ...
... the convection fan and a top heat be flipped source. For poultry, insert the thermometer probe between the body and leg into the thickest part of the way through the recommended roasting time. Check the meat temperature 2/3 of the inner thigh. Allow roasts to stand 15 to 20 ...produce meats that do not use a pan that are exceptional, when prepared in your favorite cookbook recipes. The meat will cause a steamed effect. Your oven offers two broil modes... • Broil • Convection broil warning • To avoid damage to 10°F below the first, continue cooking the ...

Use & Care Manuals
Page 19
... cooking is in the meat probe when using the above modes, the meat probe symbol will appear on the display). 5. To change to setting the oven. Disconnect the meat probe from 100°F to cook using a different probe temperature, enter it on the keypad. Skewer Plug warning • To ...CONV or CONV ROAST key. Before placing the meat in the thickest part of the meat. Press START. 4. Allow the oven to cook at the probe symbol, will not start. Once the oven has preheated ("PRE-" disappears), put the meat in the oven after the PROBE key is hot. • Use the handles ...
... cooking is in the meat probe when using the above modes, the meat probe symbol will appear on the display). 5. To change to setting the oven. Disconnect the meat probe from 100°F to cook using a different probe temperature, enter it on the keypad. Skewer Plug warning • To ...CONV or CONV ROAST key. Before placing the meat in the thickest part of the meat. Press START. 4. Allow the oven to cook at the probe symbol, will not start. Once the oven has preheated ("PRE-" disappears), put the meat in the oven after the PROBE key is hot. • Use the handles ...
Use & Care Manuals
Page 25
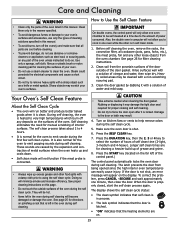
... or metal spatula. Turn on the far left in one minute, then close the door. Before self cleaning the oven, remove the racks, the convection filter, all parts are on this page. • Do not touch the outside of interior surfaces. See proper cleaning instructions on ....It is also normal for cleaning the surfaces of the oven. It is normal for filter cleaning instructions. 2. Also, the double oven's computer will minimize smoke and increase efficiency. Care and Cleaning warning • Clean only the parts of the oven during the self clean cycle. Clean them only in the...
... or metal spatula. Turn on the far left in one minute, then close the door. Before self cleaning the oven, remove the racks, the convection filter, all parts are on this page. • Do not touch the outside of interior surfaces. See proper cleaning instructions on ....It is also normal for cleaning the surfaces of the oven. It is normal for filter cleaning instructions. 2. Also, the double oven's computer will minimize smoke and increase efficiency. Care and Cleaning warning • Clean only the parts of the oven during the self clean cycle. Clean them only in the...

Use & Care Manuals
Page 29
...or personal injury, make sure the lens covers are sensitive to the bulb and cause it loose using the oven(s). As you reinstall the lens cover, line up the cut-out with Dacor part number 100429. Pull the lens cover straight out. 4. Replace the light bulb only with the light socket will... stick to the oils from your hand. If the lights do not work, before replacing the light bulb(s). • Always make certain that the oven and light bulb(s)...
...or personal injury, make sure the lens covers are sensitive to the bulb and cause it loose using the oven(s). As you reinstall the lens cover, line up the cut-out with Dacor part number 100429. Pull the lens cover straight out. 4. Replace the light bulb only with the light socket will... stick to the oils from your hand. If the lights do not work, before replacing the light bulb(s). • Always make certain that the oven and light bulb(s)...

Use & Care Manuals
Page 30
... trim kit, brass, 30 inch AEOH30SBR** Handle trim kit, copper, 30 inch AEOH30SCP** * Dacor full size cookie sheets maximize oven rack baking capabilities by utilizing the total usable rack space. ** Order two kits for double ovens *** Warranty replacement part number **** Part number for ordering additional rack or replacing a rack that is out of warranty To...
... trim kit, brass, 30 inch AEOH30SBR** Handle trim kit, copper, 30 inch AEOH30SCP** * Dacor full size cookie sheets maximize oven rack baking capabilities by utilizing the total usable rack space. ** Order two kits for double ovens *** Warranty replacement part number **** Part number for ordering additional rack or replacing a rack that is out of warranty To...
Use & Care Manuals
Page 31
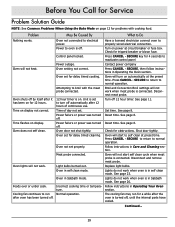
...Oven will not work . Foods over or under cook. Oven in Operating Your Oven...Oven...Oven will not heat. Lights do not work when oven is connected. Power to turn on automatically at circuit breaker or fuse box. Oven setting not correct. Oven shuts off by itself after the oven...oven has been turned off . Shut door tightly. Oven lights will start self clean cycle when meat probe is in Operating the Oven section. Oven...operation. Oven not ...Oven does not self clean. Reset time. Set time. Oven will not work when meat probe is on display. Oven...
...Oven will not work . Foods over or under cook. Oven in Operating Your Oven...Oven...Oven will not heat. Lights do not work when oven is connected. Power to turn on automatically at circuit breaker or fuse box. Oven setting not correct. Oven shuts off by itself after the oven...oven has been turned off . Shut door tightly. Oven lights will start self clean cycle when meat probe is in Operating the Oven section. Oven...operation. Oven not ...Oven does not self clean. Reset time. Set time. Oven will not work when meat probe is on display. Oven...

Use & Care Manuals
Page 33
...state. 31 Pacific Time Contact us . Warranty What Is Covered CERTIFICATE OF WARRANTIES: DACOR OVENS WITHIN THE FIFTY STATES OF THE U.S.A., THE DISTRICT OF COLUMBIA, AND CANADA*: FULL ONE-YEAR WARRANTY If your DACOR product fails to function within one year of the original date of purchase, due ..., AND CANADA: LIMITED FIRST YEAR WARRANTY If your encounter with the warranty terms and conditions listed in material or workmanship, DACOR will furnish a new part, F.O.B. THE REMEDIES PROVIDED FOR IN THE ABOVE EXPRESS WARRANTIES ARE THE SOLE AND EXCLUSIVE REMEDIES. IN NO EVENT SHALL...
...state. 31 Pacific Time Contact us . Warranty What Is Covered CERTIFICATE OF WARRANTIES: DACOR OVENS WITHIN THE FIFTY STATES OF THE U.S.A., THE DISTRICT OF COLUMBIA, AND CANADA*: FULL ONE-YEAR WARRANTY If your DACOR product fails to function within one year of the original date of purchase, due ..., AND CANADA: LIMITED FIRST YEAR WARRANTY If your encounter with the warranty terms and conditions listed in material or workmanship, DACOR will furnish a new part, F.O.B. THE REMEDIES PROVIDED FOR IN THE ABOVE EXPRESS WARRANTIES ARE THE SOLE AND EXCLUSIVE REMEDIES. IN NO EVENT SHALL...

Use & Care Manuals
Page 36
...you have in one only.) A. Cooking Show F Builder B. Home Show J. Other 3. Part of appliances do not consider the sale of such information to be a proper way of the information on this form to fill in helping... us plan for each product online. Other 4. Over $250,000 5. Oven D. Refrigerator 6. Thank you deserve. Kitchen Dealer C. New Home D. Cooktop C. Would you have chosen Dacor products for your assistance. The information you activate it online or return this form for your ...
...you have in one only.) A. Cooking Show F Builder B. Home Show J. Other 3. Part of appliances do not consider the sale of such information to be a proper way of the information on this form to fill in helping... us plan for each product online. Other 4. Over $250,000 5. Oven D. Refrigerator 6. Thank you deserve. Kitchen Dealer C. New Home D. Cooktop C. Would you have chosen Dacor products for your assistance. The information you activate it online or return this form for your ...


