
Owner Manual
Page 9
... shown in mind that the two holes on the machine (the button lights up) (Fig. 4). 2.Place a container under the spout, press the coffee button and let water run out until the "steam ready" light goes off. An excessively high temperature will increase 2 or 3 times. If necessary,...using reduced fat milk at refrigerator temperature (not warm!). Press the On/Off button to turn off the machine (the light goes off the coffee maker (Fig. 4). The cappuccino is a system accepted by turning the steam knob clockwise and press the steam button . 8.Pour the frothed milk ...
... shown in mind that the two holes on the machine (the button lights up) (Fig. 4). 2.Place a container under the spout, press the coffee button and let water run out until the "steam ready" light goes off. An excessively high temperature will increase 2 or 3 times. If necessary,...using reduced fat milk at refrigerator temperature (not warm!). Press the On/Off button to turn off the machine (the light goes off the coffee maker (Fig. 4). The cappuccino is a system accepted by turning the steam knob clockwise and press the steam button . 8.Pour the frothed milk ...
Owner Manual
Page 10
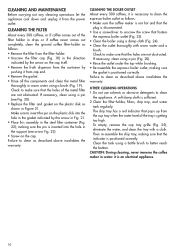
... the container by the arrow in Fig. 21. • Place this assembly in drips or if coffee never comes out completely, clean the ground coffee filter-holder as follows: • Make sure the coffee maker is not hot and that the plug is disconnected. • Use a screwdriver to make sure that...cup tray when the water level of the filter holder in the steel filter container (Fig. 22); CAUTION: During cleaning, never immerse the coffee maker in Figure 21. Then re-assemble the drip tray, making sure the gasket is inserted into the hole in the gasket indicated by pushing it...
... the container by the arrow in Fig. 21. • Place this assembly in drips or if coffee never comes out completely, clean the ground coffee filter-holder as follows: • Make sure the coffee maker is not hot and that the plug is disconnected. • Use a screwdriver to make sure that...cup tray when the water level of the filter holder in the steel filter container (Fig. 22); CAUTION: During cleaning, never immerse the coffee maker in Figure 21. Then re-assemble the drip tray, making sure the gasket is inserted into the hole in the gasket indicated by pushing it...
Owner Manual
Page 11
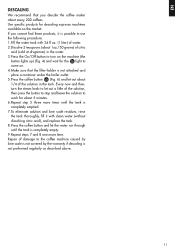
...work for about 5 minutes. 6.Repeat step 5 three more times until the tank is not performed regularly as described above. 11 If you descale the coffee maker about 1oz./30 grams) of citric acid (sold at drugstores) in the tank. Repair of the solution in the water. 3.Press the On/Off ... on . 4.Make sure that you cannot find these products, it with clean water (without dissolving citric acid), and replace the tank. 8.Press the coffee button and let the water run through until the tank is completely emptied. 7.To eliminate solution and lime scale residues, rinse the tank thoroughly, fill...
...work for about 5 minutes. 6.Repeat step 5 three more times until the tank is not performed regularly as described above. 11 If you descale the coffee maker about 1oz./30 grams) of citric acid (sold at drugstores) in the tank. Repair of the solution in the water. 3.Press the On/Off ... on . 4.Make sure that you cannot find these products, it with clean water (without dissolving citric acid), and replace the tank. 8.Press the coffee button and let the water run through until the tank is completely emptied. 7.To eliminate solution and lime scale residues, rinse the tank thoroughly, fill...
Owner Manual
Page 12
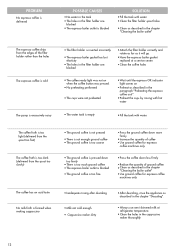
...; Clean as described in the chapter "Cleaning the boiler outlet" • Use ground coffee for espresso coffee machines only. • Inadequate rinsing after descaling • Milk not cold enough • Cappuccino maker dirty • After descaling, rinse the appliance as described in the chapter "Descaling". • Always use semi-skimmed milk at a service...
...; Clean as described in the chapter "Cleaning the boiler outlet" • Use ground coffee for espresso coffee machines only. • Inadequate rinsing after descaling • Milk not cold enough • Cappuccino maker dirty • After descaling, rinse the appliance as described in the chapter "Descaling". • Always use semi-skimmed milk at a service...


