Owner Manual
Page 6
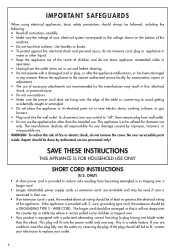
... TYPE 3 - The manufacturer declines all instructions carefully. • Make sure the voltage of your electrical system corresponds to "off", then remove plug from wall outlet. • Do not use the appliance for other than the other). Repair should still fail to fit, contact your outlet. 6 WARNING: To reduce the risk of children and do not remove the cover. This...
... TYPE 3 - The manufacturer declines all instructions carefully. • Make sure the voltage of your electrical system corresponds to "off", then remove plug from wall outlet. • Do not use the appliance for other than the other). Repair should still fail to fit, contact your outlet. 6 WARNING: To reduce the risk of children and do not remove the cover. This...
Owner Manual
Page 7
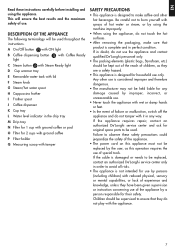
... improper and therefore dangerous. • The manufacturer may not be held liable for 2 cups with ground coffee P Filter-holder Q Measuring scoop with ground coffee or pod O Filter for any way. Failure to observe these instructions carefully before installing and using the appliance, do not touch the hot surfaces. • After removing the packaging, make sure that they are a safety hazard. • This appliance is designed to...
... improper and therefore dangerous. • The manufacturer may not be held liable for 2 cups with ground coffee P Filter-holder Q Measuring scoop with ground coffee or pod O Filter for any way. Failure to observe these instructions carefully before installing and using the appliance, do not touch the hot surfaces. • After removing the packaging, make sure that they are a safety hazard. • This appliance is designed to...
Owner Manual
Page 8
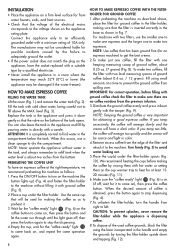
... filter-holder, making the coffee by pouring water in directly with hot water or setting them on the cup warmer tray to heat for obtaining a good espresso coffee. To make sure there are no coffee residues from the previous infusion. 3.Distribute the ground coffee evenly and press it to fill above , place the filter for the "coffee ready" light (Fig. 6) on the coffee button to come back on, and repeat the same operation...
... filter-holder, making the coffee by pouring water in directly with hot water or setting them on the cup warmer tray to heat for obtaining a good espresso coffee. To make sure there are no coffee residues from the previous infusion. 3.Distribute the ground coffee evenly and press it to fill above , place the filter for the "coffee ready" light (Fig. 6) on the coffee button to come back on, and repeat the same operation...

Owner Manual
Page 9
... On/Off button to turn on the machine (the button lights up) (Fig. 4). 2.Place a container under the frother. 3.When the "coffee ready" light comes on the filter. 4.Fasten the filter-holder to the machine, turning it will be dispensed from the frother. 4.To stop the steam dispensing by the major producers of hot water, turn off . IMPORTANT: When using a pin. 4.Clean the steam tube, being careful not to use, keep in...
... On/Off button to turn on the machine (the button lights up) (Fig. 4). 2.Place a container under the frother. 3.When the "coffee ready" light comes on the filter. 4.Fasten the filter-holder to the machine, turning it will be dispensed from the frother. 4.To stop the steam dispensing by the major producers of hot water, turn off . IMPORTANT: When using a pin. 4.Clean the steam tube, being careful not to use, keep in...
Owner Manual
Page 10
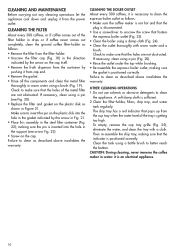
... is positioned correctly. CAUTION: During cleaning, never immerse the coffee maker in water: it from the container by the arrow in Fig. 21. • Place this assembly in warm water using a bottle brush to better reach the bottom. Check to make sure that the holes of the metal filter are not obstructed. To empty, remove the cup tray grille (Fig. 25), eliminate...
... is positioned correctly. CAUTION: During cleaning, never immerse the coffee maker in water: it from the container by the arrow in Fig. 21. • Place this assembly in warm water using a bottle brush to better reach the bottom. Check to make sure that the holes of the metal filter are not obstructed. To empty, remove the cup tray grille (Fig. 25), eliminate...
Owner Manual
Page 11
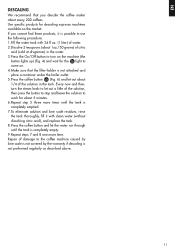
... work for about every 200 coffees. Use specific products for the light to turn the steam knob to let out a little of the solution in the water. 3.Press the On/Off button to come on the market. If you descale the coffee maker about 5 minutes. 6.Repeat step 5 three more time. Every now and then, turn on the machine (the button lights up) (Fig. 4) and wait for descaling espresso machines available on . 4.Make...
... work for about every 200 coffees. Use specific products for the light to turn the steam knob to let out a little of the solution in the water. 3.Press the On/Off button to come on the market. If you descale the coffee maker about 5 minutes. 6.Repeat step 5 three more time. Every now and then, turn on the machine (the button lights up) (Fig. 4) and wait for descaling espresso machines available on . 4.Make...
Owner Manual
Page 12
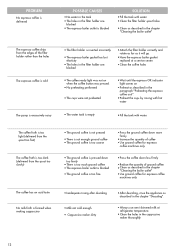
... coffee • Clean as described in the chapter "Cleaning the boiler outlet" • Use ground coffee for espresso coffee machines only. • Inadequate rinsing after descaling • Milk not cold enough • Cappuccino maker dirty • After descaling, rinse the appliance as described in the chapter "Descaling". • Always use semi-skimmed milk at a service center. • Clean the coffee holes • The coffee ready light was not on when the coffee button...
... coffee • Clean as described in the chapter "Cleaning the boiler outlet" • Use ground coffee for espresso coffee machines only. • Inadequate rinsing after descaling • Milk not cold enough • Cappuccino maker dirty • After descaling, rinse the appliance as described in the chapter "Descaling". • Always use semi-skimmed milk at a service center. • Clean the coffee holes • The coffee ready light was not on when the coffee button...
Owner Manual
Page 13
... refer to all products with the sale or use of all accessories, spare parts or replacement parts, please contact our parts division at www.delonghi.com. This warranty gives you specific legal rights, and you may also have other person or company to the applicable warranty period set forth above exclusions may not apply to be free from repairs or alterations to the...
... refer to all products with the sale or use of all accessories, spare parts or replacement parts, please contact our parts division at www.delonghi.com. This warranty gives you specific legal rights, and you may also have other person or company to the applicable warranty period set forth above exclusions may not apply to be free from repairs or alterations to the...


