
Instruction Manual
Page 4
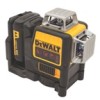
...4 - ON/OFF button: front vertical laser line (DCE089R/G only) F Figure 2 - Product Overview WARNING: Never modify the tool or any dewalt tool, call 1-800-4-DeWALT (1-800-433-9258) or go to the laser or serious injury could result in death or serious injury. Figure 2 - ON/OFF button: ...BEAM. DANGER: Indicates an imminently hazardous situation which , if not avoided, could result if the laser falls Laser Information • The DW089LR, DW089LG 3-Beam 360° Line Laser and the DW0811LR, DW0811LG 2-Beam 360° Line Laser are dangerous in the hands of ...
...4 - ON/OFF button: front vertical laser line (DCE089R/G only) F Figure 2 - Product Overview WARNING: Never modify the tool or any dewalt tool, call 1-800-4-DeWALT (1-800-433-9258) or go to the laser or serious injury could result in death or serious injury. Figure 2 - ON/OFF button: ...BEAM. DANGER: Indicates an imminently hazardous situation which , if not avoided, could result if the laser falls Laser Information • The DW089LR, DW089LG 3-Beam 360° Line Laser and the DW0811LR, DW0811LG 2-Beam 360° Line Laser are dangerous in the hands of ...

Instruction Manual
Page 5
... for use • Use only the charger specified for your laser is still calibrated. Laser tools may be dangerous in use only with the DeWALT 12V compatible laser products and cannot be used with or marking the beam. • To ensure the accuracy of untrained users.. • Use... while working condition. Slide the Pendulum Lock switch B to the OFF/Locked position when the laser is not in Figure 1B. Low Battery Indication The DW089LR, DW089LG, DW0811LR, DW0811LG lasers are doing and use with the CEILING Mount (See Figure 5 ) The laser ceiling mount L (if included) offers more ...
... for use • Use only the charger specified for your laser is still calibrated. Laser tools may be dangerous in use only with the DeWALT 12V compatible laser products and cannot be used with or marking the beam. • To ensure the accuracy of untrained users.. • Use... while working condition. Slide the Pendulum Lock switch B to the OFF/Locked position when the laser is not in Figure 1B. Low Battery Indication The DW089LR, DW089LG, DW0811LR, DW0811LG lasers are doing and use with the CEILING Mount (See Figure 5 ) The laser ceiling mount L (if included) offers more ...

Instruction Manual
Page 6
...) 10' (3m) 3/32" (2.0mm) 14' (4m) 1/8" (2.5mm) 20' (6m) 5/32' (4m) 30' (9m) 1/4' (6m) Checking 90º Accuracy Between Vertical Beams (DW089LR/G) (See Figure 10 ) Checking 90º accuracy requires an open floor area at least 30' (9m) long. Always mark the center of the beam's thickness... f , g ) and also on the floor along the front vertical beam at three locations ( a , b , c )on the ceiling h . Only use DeWALT accessories specified for which the magnetic pivot bracket G can be attached. Attach the laser to a wall using a distance no shorter than the distance of the...
...) 10' (3m) 3/32" (2.0mm) 14' (4m) 1/8" (2.5mm) 20' (6m) 5/32' (4m) 30' (9m) 1/4' (6m) Checking 90º Accuracy Between Vertical Beams (DW089LR/G) (See Figure 10 ) Checking 90º accuracy requires an open floor area at least 30' (9m) long. Always mark the center of the beam's thickness... f , g ) and also on the floor along the front vertical beam at three locations ( a , b , c )on the ceiling h . Only use DeWALT accessories specified for which the magnetic pivot bracket G can be attached. Attach the laser to a wall using a distance no shorter than the distance of the...


