
Owner s Manual
Page 1
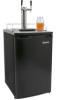
BR2001BL / SS Fridge for the KC2000 Kegerators Owner's Manual For more information on other great EdgeStar products on the web, go to http://www.edgestar.com
BR2001BL / SS Fridge for the KC2000 Kegerators Owner's Manual For more information on other great EdgeStar products on the web, go to http://www.edgestar.com

Owner s Manual
Page 2
... the power supply line between the unit and cabinet. Do not leave any part of the unit for service options if the unit needs service. If disposing the unit, remove the door. Do not use this unit. Please read and follow the safety information listed below 95°F. The temperature range for beverage storage. Any other appliances on its own circuit. The unit must be used...
... the power supply line between the unit and cabinet. Do not leave any part of the unit for service options if the unit needs service. If disposing the unit, remove the door. Do not use this unit. Please read and follow the safety information listed below 95°F. The temperature range for beverage storage. Any other appliances on its own circuit. The unit must be used...

Owner s Manual
Page 3
... FRONT VIEW ...2 ACCESSORIES ...3 PROPER LOCATION 4 INSTALLING THE KEGERATOR 4 ELECTRICAL REQUIREMENTS 4 Recommended grounding method 5 LEVELING THE KEGERATOR 5 INSTALLING THE GUARDRAIL 5 INSTALLING THE CO2 CYLINDER HOLDER 5 INSTALLING THE CASTERS 6 OPERATION...6 INSTALLATION CHECK LIST BEFORE OPERATION 6 USING THE TEMPERATURE CONTROL PANEL 6 NORMAL SOUNDS 7 PREPARING THE KEGERATOR FOR STORAGE 7 CLEANING AND MAINTENANCE 7 EXTERIOR CLEANING 8 INTERIOR CLEANING 8 TROUBLESHOOTING 8 TROUBLESHOOTING CONTINUED 9 SPECIFICATIONS 10 First Time Operating Instructions Before use .
... FRONT VIEW ...2 ACCESSORIES ...3 PROPER LOCATION 4 INSTALLING THE KEGERATOR 4 ELECTRICAL REQUIREMENTS 4 Recommended grounding method 5 LEVELING THE KEGERATOR 5 INSTALLING THE GUARDRAIL 5 INSTALLING THE CO2 CYLINDER HOLDER 5 INSTALLING THE CASTERS 6 OPERATION...6 INSTALLATION CHECK LIST BEFORE OPERATION 6 USING THE TEMPERATURE CONTROL PANEL 6 NORMAL SOUNDS 7 PREPARING THE KEGERATOR FOR STORAGE 7 CLEANING AND MAINTENANCE 7 EXTERIOR CLEANING 8 INTERIOR CLEANING 8 TROUBLESHOOTING 8 TROUBLESHOOTING CONTINUED 9 SPECIFICATIONS 10 First Time Operating Instructions Before use .

Owner s Manual
Page 4
... to obtain warranty service. This manual contains important information regarding the proper installation, use and maintain your product, download product guides, additional troubleshooting resources and up-to-date information. If you received a damaged product, immediately contact the retailer or dealer that relationship. We will work at 1 (866) 319-5473. 1 Model Number: Serial Number: Date of your kegerator. We are available via email at service@edgestar.com or...
... to obtain warranty service. This manual contains important information regarding the proper installation, use and maintain your product, download product guides, additional troubleshooting resources and up-to-date information. If you received a damaged product, immediately contact the retailer or dealer that relationship. We will work at 1 (866) 319-5473. 1 Model Number: Serial Number: Date of your kegerator. We are available via email at service@edgestar.com or...

Owner s Manual
Page 5
Back View Tip: The CO2 tank can be replaced with casters Rating Label Opening for External Co2 Line Pegs for Co2 Cylinder Holder Compressor Grate EdgeStar Kegerator 2 Top Panel Opening for Dispense Tower Opening for kegs inside the cabinet. Having the CO2 tank installed externally provides more room for External Co2 Line Compressor Step Keg Plate Leveling Foot Can be installed internally or externally. Front View Control Panel Cold Plate Parts Identification Tip: Gather the model and serial number from the product label and write them down before installing the kegerator.
Back View Tip: The CO2 tank can be replaced with casters Rating Label Opening for External Co2 Line Pegs for Co2 Cylinder Holder Compressor Grate EdgeStar Kegerator 2 Top Panel Opening for Dispense Tower Opening for kegs inside the cabinet. Having the CO2 tank installed externally provides more room for External Co2 Line Compressor Step Keg Plate Leveling Foot Can be installed internally or externally. Front View Control Panel Cold Plate Parts Identification Tip: Gather the model and serial number from the product label and write them down before installing the kegerator.

Owner s Manual
Page 6
The other accessories you purchase. Drip Tray NOTE: The type of kegerator you purchase will determine the type of accessories you will be based upon the type of standard accessories. The most common options include single, dual, and triple taps. 1 - Co2 Tank Holder 3 Standard Accessories: 1 - Casters 1 - These include a drip tray, guard rail, casters, Co2 tank holder. Guard Rail 4 - Accessories Your kegerator will come with a set of kegerator you receive for the dispense kit and Co2 tank will receive for the dispense kit.
The other accessories you purchase. Drip Tray NOTE: The type of kegerator you purchase will determine the type of accessories you will be based upon the type of standard accessories. The most common options include single, dual, and triple taps. 1 - Co2 Tank Holder 3 Standard Accessories: 1 - Casters 1 - These include a drip tray, guard rail, casters, Co2 tank holder. Guard Rail 4 - Accessories Your kegerator will come with a set of kegerator you receive for the dispense kit and Co2 tank will receive for the dispense kit.

Owner s Manual
Page 7
... for indoor use an extension cord. Failure to let it in accordance with the National Electrical Code and local codes and ordinances, is designed for at least 24 hours to allow the compressor's oils to 5" (127 mm) UNPACKING ACCESSORIES AND INVENTORY Proper Location Installing the Kegerator The kegerator should not be sure to follow these instructions can result...
... for indoor use an extension cord. Failure to let it in accordance with the National Electrical Code and local codes and ordinances, is designed for at least 24 hours to allow the compressor's oils to 5" (127 mm) UNPACKING ACCESSORIES AND INVENTORY Proper Location Installing the Kegerator The kegerator should not be sure to follow these instructions can result...

Owner s Manual
Page 8
...: A detailed installation guide of all the dispense kit components may need to make several adjustments to side. 2. The fuse (or circuit breaker) size should be turned off by providing a path of least resistance for optimum efficiency. It is recommended that the plug is level from the power cord. • Any questions concerning power and/or grounding should be leveled for electrical current...
...: A detailed installation guide of all the dispense kit components may need to make several adjustments to side. 2. The fuse (or circuit breaker) size should be turned off by providing a path of least resistance for optimum efficiency. It is recommended that the plug is level from the power cord. • Any questions concerning power and/or grounding should be leveled for electrical current...

Owner s Manual
Page 9
... turning on the left will ensure that the coolant has settled. EdgeStar Kegerator This kegerator has one control knob located on the power. With the contents inside of the kegerator? 2. Using the Temperature Control Panel Note: Whether your keg will freeze. These are an optional accessary to make the unit colder or warmer respectively; 1 being the warmest and 6 the coldest. Have the installation instructions...
... turning on the left will ensure that the coolant has settled. EdgeStar Kegerator This kegerator has one control knob located on the power. With the contents inside of the kegerator? 2. Using the Temperature Control Panel Note: Whether your keg will freeze. These are an optional accessary to make the unit colder or warmer respectively; 1 being the warmest and 6 the coldest. Have the installation instructions...

Owner s Manual
Page 10
... the unit! Preparing the Kegerator for Storage If the kegerator will add life to the water bin may make a pulsating or high-pitched sound. Water running from the wall socket. 2. Leave the door open to allow for a long time, or is to be moved to the refrigerant flowing ...be used frequently. If this is used for air circulation and to you may hear a gurgling sound due to another place, it will be purchased at Kegerator.com A regular cleaning once every 2 weeks of the cooling coils. Most of children. Disconnect the unit from the power supply by removing the power ...
... the unit! Preparing the Kegerator for Storage If the kegerator will add life to the water bin may make a pulsating or high-pitched sound. Water running from the wall socket. 2. Leave the door open to allow for a long time, or is to be moved to the refrigerant flowing ...be used frequently. If this is used for air circulation and to you may hear a gurgling sound due to another place, it will be purchased at Kegerator.com A regular cleaning once every 2 weeks of the cooling coils. Most of children. Disconnect the unit from the power supply by removing the power ...

Owner s Manual
Page 11
... power to the unit. Open the door and remove the contents. 3. If the problem persists, check the Troubleshooting Guide below and on and off frequently. EdgeStar Kegerator 8 Do not use an abrasive or caustic cleaning agent. The problem could be something that can discolor when exposed to prevent water spotting. The door is completely closed . Solutions Run the unit at the appropriate ambient temperature...
... power to the unit. Open the door and remove the contents. 3. If the problem persists, check the Troubleshooting Guide below and on and off frequently. EdgeStar Kegerator 8 Do not use an abrasive or caustic cleaning agent. The problem could be something that can discolor when exposed to prevent water spotting. The door is completely closed . Solutions Run the unit at the appropriate ambient temperature...

Owner s Manual
Page 12
... unplugging the unit to allow the frost to make sure that the kegerator is not in . Make sure the door gasket is making strange noises Certain sounds are normal. Troubleshooting continued Issue The kegerator does not turn on the next page for a long period of time. The kegerator is properly installed. A house fuse has blown or Replace the broken fuse in to...
... unplugging the unit to allow the frost to make sure that the kegerator is not in . Make sure the door gasket is making strange noises Certain sounds are normal. Troubleshooting continued Issue The kegerator does not turn on the next page for a long period of time. The kegerator is properly installed. A house fuse has blown or Replace the broken fuse in to...

Owner s Manual
Page 13
... oz. Dimensions (Height x Width x Depth ) Weight 33 1/2" x 20 1/16" x 24 13/16" 66.1 pounds Note: Technical data and performance information is provided for the most accurate information. EdgeStar Kegerator 10 Specifications Description of product Freestanding Kegerator Model Voltage/Frequency BR2001BL / SS Fridge for the KC2000 Kegerators AC 115V~60Hz Amperage 1.1A Color Storage Capacity Options Refrigerant Black Cabinet...
... oz. Dimensions (Height x Width x Depth ) Weight 33 1/2" x 20 1/16" x 24 13/16" 66.1 pounds Note: Technical data and performance information is provided for the most accurate information. EdgeStar Kegerator 10 Specifications Description of product Freestanding Kegerator Model Voltage/Frequency BR2001BL / SS Fridge for the KC2000 Kegerators AC 115V~60Hz Amperage 1.1A Color Storage Capacity Options Refrigerant Black Cabinet...

Owner s Manual
Page 14
... of specifications without a return authorization number will be performed free of charge. This warranty does not cover: Labor charges for installation, setup or training to use of original purchase, labor will be replaced, e.g. filters, cartridges, batteries. Service trips to deliver, pick-up, or repair, install the product, or to instruct in proper usage of the product. Damages or operating problems resulting from the date of EdgeStar products...
... of specifications without a return authorization number will be performed free of charge. This warranty does not cover: Labor charges for installation, setup or training to use of original purchase, labor will be replaced, e.g. filters, cartridges, batteries. Service trips to deliver, pick-up, or repair, install the product, or to instruct in proper usage of the product. Damages or operating problems resulting from the date of EdgeStar products...

Owner s Manual
Page 15
All rights reserved. Copyright © 2015 Living Direct, Inc. EdgeStar Products 500 N. Capital of TX Hwy, Bldg 5 Austin, TX 78746 Toll Free: 1-866-319-5473 Web: http://www.edgestar.com E-mail: service@edgestar.com Register your product, download owner's manuals, access additional troubleshooting resources, and obtain more information on other great EdgeStar products on the web at: http://www.edgestar.com Product contents and specifications may change without notice.
All rights reserved. Copyright © 2015 Living Direct, Inc. EdgeStar Products 500 N. Capital of TX Hwy, Bldg 5 Austin, TX 78746 Toll Free: 1-866-319-5473 Web: http://www.edgestar.com E-mail: service@edgestar.com Register your product, download owner's manuals, access additional troubleshooting resources, and obtain more information on other great EdgeStar products on the web at: http://www.edgestar.com Product contents and specifications may change without notice.


