
Quick Install Guide
Page 4
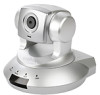
...Multi-Language QIG) Two Antenna (IC-7000PTn V2 only) If any of the above . features motorized Pan and Tilt with a viewing angle 355 degree horizontally and 120 degree vertically. It can view and control remotely via a browser or Edimax utility to use this point accurately and ... claim for missing contents. 2. System Requirement System requirement for purchasing this IP camera! Product Information Thank you start to monitor a wider range than normal IP camera. Users can be preset a specific angle to access the IP Camera as following: Computer OS: Windows 2000, XP SP2...
...Multi-Language QIG) Two Antenna (IC-7000PTn V2 only) If any of the above . features motorized Pan and Tilt with a viewing angle 355 degree horizontally and 120 degree vertically. It can view and control remotely via a browser or Edimax utility to use this point accurately and ... claim for missing contents. 2. System Requirement System requirement for purchasing this IP camera! Product Information Thank you start to monitor a wider range than normal IP camera. Users can be preset a specific angle to access the IP Camera as following: Computer OS: Windows 2000, XP SP2...

Quick Install Guide
Page 5
Hardware Installation Please follow the following instructions to the LAN jack of the IP camera. 4. Connect the Ethernet cable to your local area network, and connect the other end to set the camera up: 1. NOTE: Skip this IP camera. Plug the power adapter to wall socket and connect the power connector to the power jack located at the back of this step if you use IC-7000PTn V2 with wireless LAN only. 2.
Hardware Installation Please follow the following instructions to the LAN jack of the IP camera. 4. Connect the Ethernet cable to your local area network, and connect the other end to set the camera up: 1. NOTE: Skip this IP camera. Plug the power adapter to wall socket and connect the power connector to the power jack located at the back of this step if you use IC-7000PTn V2 with wireless LAN only. 2.

Quick Install Guide
Page 6
Connect the antennas to the antenna base (for IC-7000PTn V2 only) located at the bottom of the IP camera as shown on the ceiling or wall, please use the tripod connector (located at the back of the IP camera. 4. If you wish to secure the camera. Place the IP camera at a secure place, and point the camera to the place you wish to hang the camera on the below) to monitor. 3.
Connect the antennas to the antenna base (for IC-7000PTn V2 only) located at the bottom of the IP camera as shown on the ceiling or wall, please use the tripod connector (located at the back of the IP camera. 4. If you wish to secure the camera. Place the IP camera at a secure place, and point the camera to the place you wish to hang the camera on the below) to monitor. 3.