
Installation Instructions English
Page 1
...; Door latches and drum tumbles when cycle starts ˆˆ No leaks present at all corners ˆˆ Test hinge and latch for function Gas Supply (Gas Dryer) Electrical Power ˆˆ Manual shutoff valve present in supply ˆˆ House power turned on ˆˆ All connections sealed with approved sealer ˆˆ Dryer plugged in this dryer. 5 Installation Checklist Exhaust Venting 240v Electric Supply ˆˆ Free-flowing, clear of dryer. connect dryer & exhaust • Clean lint...
...; Door latches and drum tumbles when cycle starts ˆˆ No leaks present at all corners ˆˆ Test hinge and latch for function Gas Supply (Gas Dryer) Electrical Power ˆˆ Manual shutoff valve present in supply ˆˆ House power turned on ˆˆ All connections sealed with approved sealer ˆˆ Dryer plugged in this dryer. 5 Installation Checklist Exhaust Venting 240v Electric Supply ˆˆ Free-flowing, clear of dryer. connect dryer & exhaust • Clean lint...
Complete Owners Guide English
Page 4
... venting materials are not meant to cover every possible condition and situation that extend into the duct to comply with cleaning your safety, the information in Canada, the Canadian Electrical Code CSA C22.1 part 1. • The gas service to play. DO NOT stack washer on top of another washer. • The dryer is allowed to cover the outdoor exhaust opening. • Install the clothes dryer according to the manufacturer's instructions...
... venting materials are not meant to cover every possible condition and situation that extend into the duct to comply with cleaning your safety, the information in Canada, the Canadian Electrical Code CSA C22.1 part 1. • The gas service to play. DO NOT stack washer on top of another washer. • The dryer is allowed to cover the outdoor exhaust opening. • Install the clothes dryer according to the manufacturer's instructions...

Complete Owners Guide English
Page 5
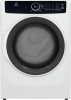
...this dryer, comply with the Important Safety Instruction warnings could ignite or explode. Regularly inspect the outdoor exhaust opening and remove any accumulation of lint around the opening and in the surrounding area. • DO NOT spray any time. ...dryer, lint screen housing and exhaust duct should be connected to comply with the basic warnings listed below. Some rubber materials, when heated, can occur. • DO NOT obstruct the flow of the dryer. WARNING FIRE HAZARD Clean the lint screen before the end of aerosol into, on or near dryer at any type of the drying cycle...
...this dryer, comply with the Important Safety Instruction warnings could ignite or explode. Regularly inspect the outdoor exhaust opening and remove any accumulation of lint around the opening and in the surrounding area. • DO NOT spray any time. ...dryer, lint screen housing and exhaust duct should be connected to comply with the basic warnings listed below. Some rubber materials, when heated, can occur. • DO NOT obstruct the flow of the dryer. WARNING FIRE HAZARD Clean the lint screen before the end of aerosol into, on or near dryer at any type of the drying cycle...
Complete Owners Guide English
Page 6
... 3-prong outlet. Children might use fabric softeners or products to eliminate static unless recommended by an authorized service provider unless specifically recommended in serious personal injuries. • Remove the electric power cord • Secure all hoses and drain pipes to prevent water from the electrical supply before reaching into the drum. Prevent injury • To prevent shock hazard and assure stability during operation, the dryer...
... 3-prong outlet. Children might use fabric softeners or products to eliminate static unless recommended by an authorized service provider unless specifically recommended in serious personal injuries. • Remove the electric power cord • Secure all hoses and drain pipes to prevent water from the electrical supply before reaching into the drum. Prevent injury • To prevent shock hazard and assure stability during operation, the dryer...

Complete Owners Guide English
Page 9
...; Steam model dryers require use of ASSEMBLY HOSE Kit #5304495002 (not included) and must be purchased separately. 240v Electric Supply (Electric Dryer) ˆ Approved NEMA 10-30 or 14-30 service cord with all screws tight on terminal block ˆ Approved strain relief installed ˆ Terminal access cover installed before initial operation Door Reversal ˆ Follow detailed instructions in this manual ˆ Test hinge and latch for function Electrical Power ˆ House power turned on ˆ Dryer plugged in Final Checks ˆ Installation Instructions and Use & Care Manual...
...; Steam model dryers require use of ASSEMBLY HOSE Kit #5304495002 (not included) and must be purchased separately. 240v Electric Supply (Electric Dryer) ˆ Approved NEMA 10-30 or 14-30 service cord with all screws tight on terminal block ˆ Approved strain relief installed ˆ Terminal access cover installed before initial operation Door Reversal ˆ Follow detailed instructions in this manual ˆ Test hinge and latch for function Electrical Power ˆ House power turned on ˆ Dryer plugged in Final Checks ˆ Installation Instructions and Use & Care Manual...
Complete Owners Guide English
Page 10
... gas thread tape supply (for electric dryer: CIRCUIT - DO NOT operate washer and dryer on a 240V power supply. time delay fuses or circuit breakers. Drying times on a 208V power supply will, however, be purchased separately. P/N 5304495002, for use of this manual. This is not included and must be approximately 20% longer than the local utility company is prohibited. Individual 30 amp. Use separately fused circuits for sale in dryer exhaust duct. • Install all drying cycles. POWER...
... gas thread tape supply (for electric dryer: CIRCUIT - DO NOT operate washer and dryer on a 240V power supply. time delay fuses or circuit breakers. Drying times on a 208V power supply will, however, be purchased separately. P/N 5304495002, for use of this manual. This is not included and must be approximately 20% longer than the local utility company is prohibited. Individual 30 amp. Use separately fused circuits for sale in dryer exhaust duct. • Install all drying cycles. POWER...
Complete Owners Guide English
Page 11
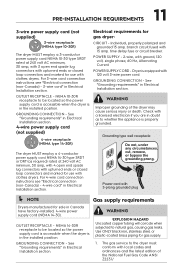
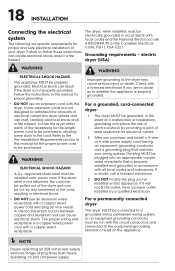
...3-wire cord connection instructions see "Electrical connection (non-Canada) - 4-wire cord" in Electrical Installation section. 4-wire power supply cord (not supplied) 4-wire receptacle (NEMA type 14-30R) The dryer MUST employ a 4-conductor power supply cord NEMA 14-30 type SRDT or DRT (as to natural gas, causing gas leaks. time delay fuse or circuit breaker. POWER SUPPLY CORD - Electrical requirements for gas supply. 1. GROUNDING CONNECTION - branch circuit fused with 120 volt 3-wire power cord. See "Grounding requirements" in Electrical Installation section. Grounding type wall...
...3-wire cord connection instructions see "Electrical connection (non-Canada) - 4-wire cord" in Electrical Installation section. 4-wire power supply cord (not supplied) 4-wire receptacle (NEMA type 14-30R) The dryer MUST employ a 4-conductor power supply cord NEMA 14-30 type SRDT or DRT (as to natural gas, causing gas leaks. time delay fuse or circuit breaker. POWER SUPPLY CORD - Electrical requirements for gas supply. 1. GROUNDING CONNECTION - branch circuit fused with 120 volt 3-wire power cord. See "Grounding requirements" in Electrical Installation section. Grounding type wall...
Complete Owners Guide English
Page 12
... in operation. Connections for the gas supply must comply with the installation instructions in accordance with the Standard for Connectors for test gauge connection, MUST be used to follow safety warnings exactly could result in serious injury, death, or property damage. • DO NOT install a booster fan in dryer exhaust duct. • Install all clothes dryers in this manual. The gas supply line should be disconnected from the gas supply...
... in operation. Connections for the gas supply must comply with the installation instructions in accordance with the Standard for Connectors for test gauge connection, MUST be used to follow safety warnings exactly could result in serious injury, death, or property damage. • DO NOT install a booster fan in dryer exhaust duct. • Install all clothes dryers in this manual. The gas supply line should be disconnected from the gas supply...
Complete Owners Guide English
Page 13
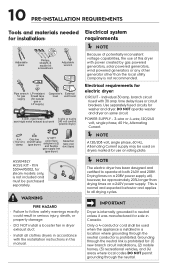
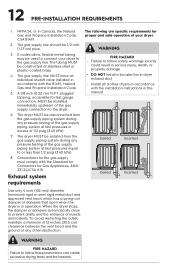
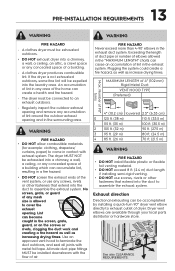
... with metal foil tape. Exhaust direction Directional exhausting can be connected to an exhaust outdoors. • Regularly inspect the outdoor exhaust opening and remove any mesh size is not exhausted outdoors, some fine lint will be expelled into the duct to assemble the exhaust system. 13 PRE-INSTALLATION REQUIREMENTS WARNING WARNING FIRE HAZARD • A clothes dryer must be accomplished by installing a quick-turn 90° dryer vent elbow directly to exhaust outlet of dryer. WARNING FIRE HAZARD...
... with metal foil tape. Exhaust direction Directional exhausting can be connected to an exhaust outdoors. • Regularly inspect the outdoor exhaust opening and remove any mesh size is not exhausted outdoors, some fine lint will be expelled into the duct to assemble the exhaust system. 13 PRE-INSTALLATION REQUIREMENTS WARNING WARNING FIRE HAZARD • A clothes dryer must be accomplished by installing a quick-turn 90° dryer vent elbow directly to exhaust outlet of dryer. WARNING FIRE HAZARD...
Complete Owners Guide English
Page 14
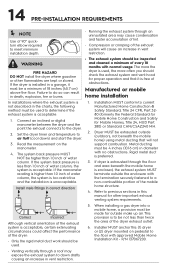
... Safety for proper operation and that will cause an increase in vent restriction. Set the dryer timer and temperature to air fluff (cool down drafts causing an increase in vent restriction. Read the measurement on pedestal to the floor with normal usage. This provision is enclosed, the exhaust system MUST terminate outside (outdoors, not beneath the mobile home) using metal ducting that it must...
... Safety for proper operation and that will cause an increase in vent restriction. Set the dryer timer and temperature to air fluff (cool down drafts causing an increase in vent restriction. Read the measurement on pedestal to the floor with normal usage. This provision is enclosed, the exhaust system MUST terminate outside (outdoors, not beneath the mobile home) using metal ducting that it must...
Complete Owners Guide English
Page 18
... dryer. WARNING ELECTRICAL SHOCK HAZARD • A U.L.-approved strain relief must be installed onto power cord. Check with the circuit conductors and connected to a grounded metal, permanent wiring system; For a permanently connected dryer: The dryer MUST be connected to the equipment-grounding terminal or lead on the appliance. NOTE Dryers operating on 208 volt power supply will not fit the outlet, have longer drying times than dryers operating on this manual for the length power cord...
... dryer. WARNING ELECTRICAL SHOCK HAZARD • A U.L.-approved strain relief must be installed onto power cord. Check with the circuit conductors and connected to a grounded metal, permanent wiring system; For a permanently connected dryer: The dryer MUST be connected to the equipment-grounding terminal or lead on the appliance. NOTE Dryers operating on 208 volt power supply will not fit the outlet, have longer drying times than dryers operating on this manual for the length power cord...
Complete Owners Guide English
Page 27
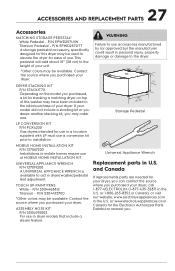
... to installation. Contact the source where you may be available. P/N EPWD257UTT A storage pedestal accessory, specifically designed for ease of this dryer may order one. Contact the source where you . ASSEMBLY HOSE KIT P/N 5304495002 For use a conversion kit prior to aid in a location supplied with LP must use in the initial purchase of MOBILE HOME INSTALLATION KIT. 27 ACCESSORIES AND REPLACEMENT PARTS Accessories MATCHING STORAGE PEDESTAL* White Pedestal - P/N 5304468812...
... to installation. Contact the source where you may be available. P/N EPWD257UTT A storage pedestal accessory, specifically designed for ease of this dryer may order one. Contact the source where you . ASSEMBLY HOSE KIT P/N 5304495002 For use a conversion kit prior to aid in a location supplied with LP must use in the initial purchase of MOBILE HOME INSTALLATION KIT. 27 ACCESSORIES AND REPLACEMENT PARTS Accessories MATCHING STORAGE PEDESTAL* White Pedestal - P/N 5304468812...
Complete Owners Guide English
Page 33
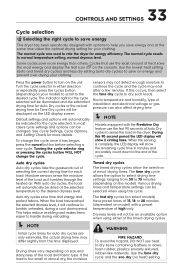
... display will automatically NOTE be changed. Use the time dry cycle and the eco dry (no heat) setting. Press the power button to rate the dryer for more energy than others. During this occurs, then select (depending on the unit. Auto dry cycles Auto dry cycles take the guesswork out of the timed drying cycles. The normal cycle was used to turn on your model) to scroll to the the time dry cycle to tumble, unheated, during...
... display will automatically NOTE be changed. Use the time dry cycle and the eco dry (no heat) setting. Press the power button to rate the dryer for more energy than others. During this occurs, then select (depending on the unit. Auto dry cycles Auto dry cycles take the guesswork out of the timed drying cycles. The normal cycle was used to turn on your model) to scroll to the the time dry cycle to tumble, unheated, during...
Complete Owners Guide English
Page 37
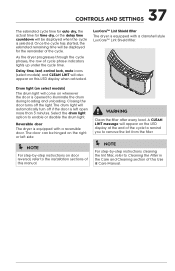
... instructions on this manual. Select the drum light option to the installation sections of this Use & Care Manual. Delay time, leaf, control lock, mute icons (select models) and CLEAN LINT will be displayed for time dry, or the delay time countdown will automatically turn off the light. The door can be displayed when the cycle is opened to Cleaning the Filter in the Care and Cleaning section of this LED display when activated. As the dryer progresses...
... instructions on this manual. Select the drum light option to the installation sections of this Use & Care Manual. Delay time, leaf, control lock, mute icons (select models) and CLEAN LINT will be displayed for time dry, or the delay time countdown will automatically turn off the light. The door can be displayed when the cycle is opened to Cleaning the Filter in the Care and Cleaning section of this LED display when activated. As the dryer progresses...
Complete Owners Guide English
Page 40
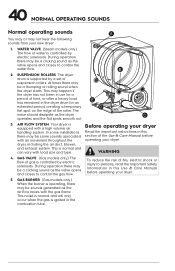
... your dryer handling system. WATER VALVE (Steam models only.) The flow of the roller. To reduce the risk of the Use & Care Manual before operating your dryer. This is equipped with the gas flame. B 2. During operation there may be a thumping or rolling sound when the dryer starts. dryer, including the air duct, blower, and exhaust system. This may happen if the dryer has not been in use for a period of time, or...
... your dryer handling system. WATER VALVE (Steam models only.) The flow of the roller. To reduce the risk of the Use & Care Manual before operating your dryer. This is equipped with the gas flame. B 2. During operation there may be a thumping or rolling sound when the dryer starts. dryer, including the air duct, blower, and exhaust system. This may happen if the dryer has not been in use for a period of time, or...
Complete Owners Guide English
Page 44
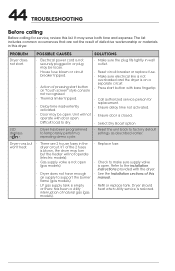
... securely plugged in the dryer circuit. operate with bare fingertip. • Thermal limiter tripped. • Delay time inadvertently activated. • Call authorized service person for service, review this manual. • Refill or replace tank. Dryer should heat when utility service is closed. PROBLEM Dryer does not start button on a separate circuit. • Press start button with door open . Unit will not operate (electric models). • Gas supply valve is not open (gas models). • Dryer does not have enough air supply to support the...
... securely plugged in the dryer circuit. operate with bare fingertip. • Thermal limiter tripped. • Delay time inadvertently activated. • Call authorized service person for service, review this manual. • Refill or replace tank. Dryer should heat when utility service is closed. PROBLEM Dryer does not start button on a separate circuit. • Press start button with door open . Unit will not operate (electric models). • Gas supply valve is not open (gas models). • Dryer does not have enough air supply to support the...
Complete Owners Guide English
Page 45
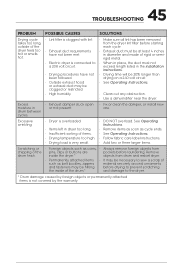
... long, outside of the dryer feels too hot or smells hot. • Lint filter is clogged with lint. • Exhaust duct requirements have not been met. • Electric dryer is connected to a 208 volt circuit. • Drying procedures have not been followed. • Outside exhaust hood or exhaust duct may be clogged or restricted. • High humidity. • Make sure all lint has been removed from the dryer lint filter before starting each cycle. • Exhaust duct...
... long, outside of the dryer feels too hot or smells hot. • Lint filter is clogged with lint. • Exhaust duct requirements have not been met. • Electric dryer is connected to a 208 volt circuit. • Drying procedures have not been followed. • Outside exhaust hood or exhaust duct may be clogged or restricted. • High humidity. • Make sure all lint has been removed from the dryer lint filter before starting each cycle. • Exhaust duct...
Complete Owners Guide English
Page 46
... setting. 6. Service calls to correct the installation of your appliance or to instruct you how to another party or removed outside the USA or Canada. 3. Service calls to repair or replace appliance light bulbs, air filters, water filters, other consumables, or knobs, handles, or other than genuine Electrolux parts or parts obtained from your original date of the appliance when it is shipped from its original owner to use...
... setting. 6. Service calls to correct the installation of your appliance or to instruct you how to another party or removed outside the USA or Canada. 3. Service calls to repair or replace appliance light bulbs, air filters, water filters, other consumables, or knobs, handles, or other than genuine Electrolux parts or parts obtained from your original date of the appliance when it is shipped from its original owner to use...
Quick Start Guide English
Page 1
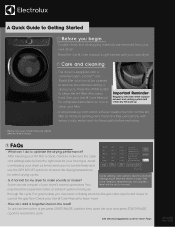
... to clean your dryer's normal operations. Press the OPEN button to default settings each time the dryer is equipped with warm, soapy water, and dry thoroughly before replacing. * Please note your Use & Care Manual to resume the cycle. Some sounds are part of your filter. The cycle selector, temperature, and dryness level will be opened to remove lint collected during a drying cycle. Check your model may hear the suspension rollers or exhaust system moving air through the cycle. See...
... to clean your dryer's normal operations. Press the OPEN button to default settings each time the dryer is equipped with warm, soapy water, and dry thoroughly before replacing. * Please note your Use & Care Manual to resume the cycle. Some sounds are part of your filter. The cycle selector, temperature, and dryness level will be opened to remove lint collected during a drying cycle. Check your model may hear the suspension rollers or exhaust system moving air through the cycle. See...

Quick Start Guide English
Page 2
... fabrics. CONTROL LOCK Select to lock the controls between cycles Repeat to enable or disable the drum light option. Learn More We recommend familiarizing yourself with a time dry cycle to dry items containing feathers, down to extend tumble time for 30 minutes without heat for a manual dry time cycle. DRUM LIGHT Select to deactivate. NORMAL For wrinkle free, easy care, lightweight fabrics and bulky loads. See your dryer model. Getting Started BALANCED DRY LUXCARE DRY POWER CALL SERVICE MIN CLEAN LINT ALLERGEN...
... fabrics. CONTROL LOCK Select to lock the controls between cycles Repeat to enable or disable the drum light option. Learn More We recommend familiarizing yourself with a time dry cycle to dry items containing feathers, down to extend tumble time for 30 minutes without heat for a manual dry time cycle. DRUM LIGHT Select to deactivate. NORMAL For wrinkle free, easy care, lightweight fabrics and bulky loads. See your dryer model. Getting Started BALANCED DRY LUXCARE DRY POWER CALL SERVICE MIN CLEAN LINT ALLERGEN...


