
Owners Manual
Page 1
COMPACT DISC PLAYER with STEREO CLOCK RADIO OWNER’S MANUAL CKD9907 Visit our web site at www.emersonradio.com CKD9907_ib.p65 16 2001/4/17, PM 12:19
COMPACT DISC PLAYER with STEREO CLOCK RADIO OWNER’S MANUAL CKD9907 Visit our web site at www.emersonradio.com CKD9907_ib.p65 16 2001/4/17, PM 12:19
Owners Manual
Page 2
... music timer that may be found on compact disc. The battery back up to the radio or CD player and then switches the power off automatically. The serial number of your favorite artists on the bottom of electric shock to the manual. NO USER SERVICEABLE PARTS INSIDE. ATTENTION The Owner's Manual contains important operating and maintenance instructions. DANGEROUS VOLTAGE Uninsulated Dangerous Voltage, that lulls you up system maintains the correct time...
... music timer that may be found on compact disc. The battery back up to the radio or CD player and then switches the power off automatically. The serial number of your favorite artists on the bottom of electric shock to the manual. NO USER SERVICEABLE PARTS INSIDE. ATTENTION The Owner's Manual contains important operating and maintenance instructions. DANGEROUS VOLTAGE Uninsulated Dangerous Voltage, that lulls you up system maintains the correct time...
Owners Manual
Page 3
... manual. • Store your CDs in a cool area to provide reasonable protection against harmful interference in accordance with the limits for help. Use a clean dry cloth. • Operate controls and switches as this unit with Part 15 of the FCC Rules. However, there is connected. • Consult the dealer or an experienced radio/TV technician for a Class B digital device, pursuant to clean...
... manual. • Store your CDs in a cool area to provide reasonable protection against harmful interference in accordance with the limits for help. Use a clean dry cloth. • Operate controls and switches as this unit with Part 15 of the FCC Rules. However, there is connected. • Consult the dealer or an experienced radio/TV technician for a Class B digital device, pursuant to clean...

Owners Manual
Page 4
... is used to prevent the laser pick up system that will not operate. However the battery will maintain the time and alarm settings, and when the power is interrupted the clock display goes off and the unit will maintain the time and alarm settings in the event of the cabinet. • Press the CD Open button to its full length. • Place the radio on...
... is used to prevent the laser pick up system that will not operate. However the battery will maintain the time and alarm settings, and when the power is interrupted the clock display goes off and the unit will maintain the time and alarm settings in the event of the cabinet. • Press the CD Open button to its full length. • Place the radio on...

Owners Manual
Page 5
Replace the battery with one wide blade and one and reset both the time and alarm settings. Do not connect this plug will return to electric shock. This unit has a polarized AC plug with a new one narrow blade. If this unit to make the plug fit into a matching polarized AC outlet. Do not file the wide blade on the plug, or use is always...
Replace the battery with one wide blade and one and reset both the time and alarm settings. Do not connect this plug will return to electric shock. This unit has a polarized AC plug with a new one narrow blade. If this unit to make the plug fit into a matching polarized AC outlet. Do not file the wide blade on the plug, or use is always...
Owners Manual
Page 6
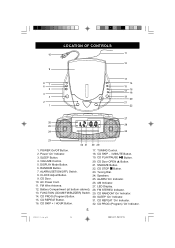
... Button. 3. CD PLAY/PAUSE Button. 4. SNOOZE Button. 6. CD STOP Button. 7. Speakers. 9. AC Power Cord. 26. CD REPEAT ‘On’ Indicator. 16. LED Display. 12. ALARM (SET/ON/OFF) Switch. 23. CLOCK Adjust Button. 24. ALARM ‘On’ Indicator. 10. FUNCTION (CD/AM/FM/BUZZER) Switch. 29. TUNING Control. 2. Battery Compartment (at bottom cabinet). 28. CD PROG (Program) Button. 30. CD SKIP + / HOUR Button. 32. CD RANDOM ‘On’ Indicator. 14. SLEEP ‘On’ Indicator. 15. VOLUME Control. 20. CD Door OPEN Button...
... Button. 3. CD PLAY/PAUSE Button. 4. SNOOZE Button. 6. CD STOP Button. 7. Speakers. 9. AC Power Cord. 26. CD REPEAT ‘On’ Indicator. 16. LED Display. 12. ALARM (SET/ON/OFF) Switch. 23. CLOCK Adjust Button. 24. ALARM ‘On’ Indicator. 10. FUNCTION (CD/AM/FM/BUZZER) Switch. 29. TUNING Control. 2. Battery Compartment (at bottom cabinet). 28. CD PROG (Program) Button. 30. CD SKIP + / HOUR Button. 32. CD RANDOM ‘On’ Indicator. 14. SLEEP ‘On’ Indicator. 15. VOLUME Control. 20. CD Door OPEN Button...
Owners Manual
Page 7
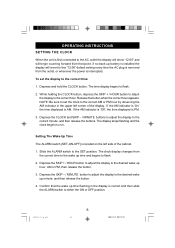
... cabinet. 1. Setting The Wake Up Time The ALARM switch (SET-ON-OFF) is PM. 3. Depress the SKIP + / HOUR button to adjust the display to the SET position. OPERATING INSTRUCTIONS SETTING THE CLOCK When the unit is first connected to the AC outlet the display will show “12:00” and will revert to this “12:00” default setting every time the AC plug is...
... cabinet. 1. Setting The Wake Up Time The ALARM switch (SET-ON-OFF) is PM. 3. Depress the SKIP + / HOUR button to adjust the display to the SET position. OPERATING INSTRUCTIONS SETTING THE CLOCK When the unit is first connected to the AC outlet the display will show “12:00” and will revert to this “12:00” default setting every time the AC plug is...
Owners Manual
Page 8
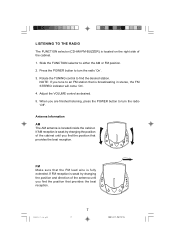
... lead wire is weak try changing the position of the cabinet until you tune to an FM station that provides the best reception. Adjust the VOLUME control as desired. 5. FM Make sure that provides the best reception. Antenna Information AM The AM antenna is located on the right side of the antenna until you are finished listening, press the POWER button to turn the radio...
... lead wire is weak try changing the position of the cabinet until you tune to an FM station that provides the best reception. Adjust the VOLUME control as desired. 5. FM Make sure that provides the best reception. Antenna Information AM The AM antenna is located on the right side of the antenna until you are finished listening, press the POWER button to turn the radio...
Owners Manual
Page 9
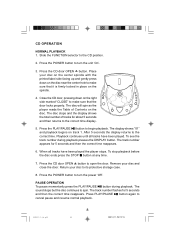
... the correct time reappears. Press the CD door OPEN button to the CD position. 2. PAUSE OPERATION To pause momentarily press the PLAY/PAUSE button during playback presses the DISPLAY button. The track number flashes for 5 seconds and then the correct time reappears. 6. Slide the FUNCTION selector to open the door. The disc will spin as the player reads the Table of tracks for about 5 seconds and then returns to make sure...
... the correct time reappears. Press the CD door OPEN button to the CD position. 2. PAUSE OPERATION To pause momentarily press the PLAY/PAUSE button during playback presses the DISPLAY button. The track number flashes for 5 seconds and then the correct time reappears. 6. Slide the FUNCTION selector to open the door. The disc will spin as the player reads the Table of tracks for about 5 seconds and then returns to make sure...
Owners Manual
Page 10
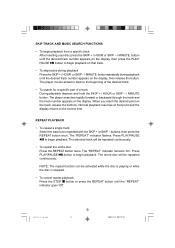
... repeat function can be repeated continuously. • To repeat the entire disc Press the REPEAT button twice. SKIP TRACK AND MUSIC SEARCH FUNCTIONS • To begin playback from a specific track After inserting your disc press the SKIP + / HOUR or SKIP – / MINUTE button until the desired track number appears on the display, then press the PLAY/ PAUSE button to begin playback on that point and the display returns to the correct time. Normal playback...
... repeat function can be repeated continuously. • To repeat the entire disc Press the REPEAT button twice. SKIP TRACK AND MUSIC SEARCH FUNCTIONS • To begin playback from a specific track After inserting your disc press the SKIP + / HOUR or SKIP – / MINUTE button until the desired track number appears on the display, then press the PLAY/ PAUSE button to begin playback on that point and the display returns to the correct time. Normal playback...
Owners Manual
Page 11
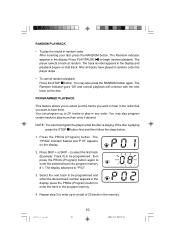
... in random order the player stops. • To cancel random playback Press the STOP button. The track number appears in the display and playback begins on that you want to play in the memory. NOTE: You cannot program the player while the disc is playing press the STOP button first and then follow the steps below. 1. Repeat step 3 to enter up to 20 tracks to hear them. You...
... in random order the player stops. • To cancel random playback Press the STOP button. The track number appears in the display and playback begins on that you want to play in the memory. NOTE: You cannot program the player while the disc is playing press the STOP button first and then follow the steps below. 1. Repeat step 3 to enter up to 20 tracks to hear them. You...
Owners Manual
Page 12
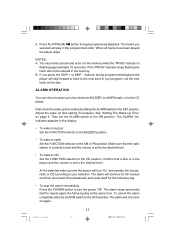
... day at the same time. The alarm will turn the power ‘Off’. Confirm that the radio station is correctly tuned and the volume is set to the desired level. • To wake to CD Set the FUNCTION selector to your program, not the next track on the disc. At the selected wake up time setting by sliding the ALARM switch to begin programmed playback. To cancel the...
... day at the same time. The alarm will turn the power ‘Off’. Confirm that the radio station is correctly tuned and the volume is set to the desired level. • To wake to CD Set the FUNCTION selector to your program, not the next track on the disc. At the selected wake up time setting by sliding the ALARM switch to begin programmed playback. To cancel the...
Owners Manual
Page 13
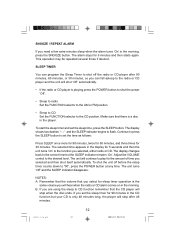
... CD. Make sure that the CD player will hear when the radio or CD alarm comes on in the display for 30 minutes. Adjust the VOLUME control to the correct time but your CD is playing press the POWER button to shut the power ‘Off’. • Sleep to radio Set the FUNCTION selector to the AM or FM position. • Sleep to CD Set the FUNCTION selector to play for sleep timer operation is a disc...
... CD. Make sure that the CD player will hear when the radio or CD alarm comes on in the display for 30 minutes. Adjust the VOLUME control to the correct time but your CD is playing press the POWER button to shut the power ‘Off’. • Sleep to radio Set the FUNCTION selector to the AM or FM position. • Sleep to CD Set the FUNCTION selector to play for sleep timer operation is a disc...
Owners Manual
Page 14
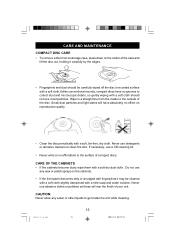
... in a straight line from its storage case, press down on the center of the case and lift the disc out, holding it may be carefully wiped off the disc’s recorded surface with a soft, lint-free, dry cloth. CARE AND MAINTENANCE COMPACT DISC CARE • To remove a disc from the inside the unit while cleaning. If necessary, use any water or...
... in a straight line from its storage case, press down on the center of the case and lift the disc out, holding it may be carefully wiped off the disc’s recorded surface with a soft, lint-free, dry cloth. CARE AND MAINTENANCE COMPACT DISC CARE • To remove a disc from the inside the unit while cleaning. If necessary, use any water or...
Owners Manual
Page 15
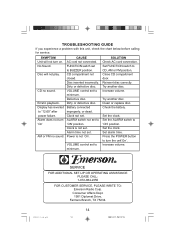
...; position. Power is not set . Clean or replace disc. Set the clock. Set the clock. Increase volume. SERVICE FOR ADDITIONAL SET-UP OR OPERATING ASSISTANCE PLEASE CALL: 1-972-884-2350 FOR CUSTOMER SERVICE, PLEASE WRITE TO: Emerson Radio Corp. SYMPTOM CAUSE Unit will not play. Clock not set . Clock is not ‘On’. Try another disc. TROUBLESHOOTING GUIDE If you experience a problem with this unit, check the chart below before calling for service. FUNCTION switch set to...
...; position. Power is not set . Clean or replace disc. Set the clock. Set the clock. Increase volume. SERVICE FOR ADDITIONAL SET-UP OR OPERATING ASSISTANCE PLEASE CALL: 1-972-884-2350 FOR CUSTOMER SERVICE, PLEASE WRITE TO: Emerson Radio Corp. SYMPTOM CAUSE Unit will not play. Clock not set . Clock is not ‘On’. Try another disc. TROUBLESHOOTING GUIDE If you experience a problem with this unit, check the chart below before calling for service. FUNCTION switch set to...

Owners Manual
Page 16
... ONLY IN THE UNITED STATES OF AMERICA. Your warranty does not cover the following : · Damage from the date of original purchase in the owner’s manual. · Signal reception problems caused by external antenna or cable systems. · Products purchased, used, serviced, or damaged outside of a Depot Repair Facility by dialing 1-800-695-0098. If it becomes necessary to compact discs or cassettes.
... ONLY IN THE UNITED STATES OF AMERICA. Your warranty does not cover the following : · Damage from the date of original purchase in the owner’s manual. · Signal reception problems caused by external antenna or cable systems. · Products purchased, used, serviced, or damaged outside of a Depot Repair Facility by dialing 1-800-695-0098. If it becomes necessary to compact discs or cassettes.