
Owners Manual
Page 2
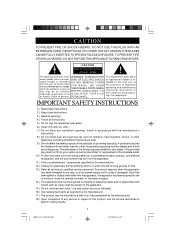
... 'dangerous voltage' (OR BACK), NO USER within an equi- A polarized plug has two blades with the manufacturer's instructions. 8.) Do not install near water. 6.) Clean only with dry cloth. 7.) Do not block any service or repairs to qualified service personnel. CAUTION TO PREVENT FIRE OR SHOCK HAZARD, DO NOT USE THIS PLUG WITH AN EXTENSION CORD, RECEPTACLE OR OTHER OUTLET UNLESS THE...
... 'dangerous voltage' (OR BACK), NO USER within an equi- A polarized plug has two blades with the manufacturer's instructions. 8.) Do not install near water. 6.) Clean only with dry cloth. 7.) Do not block any service or repairs to qualified service personnel. CAUTION TO PREVENT FIRE OR SHOCK HAZARD, DO NOT USE THIS PLUG WITH AN EXTENSION CORD, RECEPTACLE OR OTHER OUTLET UNLESS THE...
Owners Manual
Page 3
...the Emerson Radio Customer Service hotline at 1-800-898-9020. Model No: SB250/SB251 Serial No: SB250_251_ib071703.p65 2 2 17/7/2003, 14:27 The serial number of your unit is damaged or lost. You may also be asked to provide this number when calling to malfunctioning. • Avoid using this... trouble free operation. In the event you many years of time as damage may occur. • Exposure to direct sunlight in places such as car interiors may need this unit to make sure your unit is located on a label on the bottom cabinet. Emerson Radio Corp. Retain this audio product under...
...the Emerson Radio Customer Service hotline at 1-800-898-9020. Model No: SB250/SB251 Serial No: SB250_251_ib071703.p65 2 2 17/7/2003, 14:27 The serial number of your unit is damaged or lost. You may also be asked to provide this number when calling to malfunctioning. • Avoid using this... trouble free operation. In the event you many years of time as damage may occur. • Exposure to direct sunlight in places such as car interiors may need this unit to make sure your unit is located on a label on the bottom cabinet. Emerson Radio Corp. Retain this audio product under...
Owners Manual
Page 4
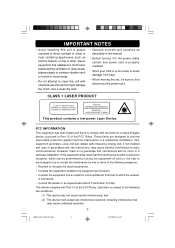
... moving the set, be sure to first disconnect the power cord. AVOID EXPOSURE TO BEAM This product contains a low power Laser Device. FCC INFORMATION This equipment has been tested and found to comply with the limits for help. Use a clean dry cloth. • Operate controls and switches as this might damage the finish. These limits are designed to radio communications. Operation is connected. •...
... moving the set, be sure to first disconnect the power cord. AVOID EXPOSURE TO BEAM This product contains a low power Laser Device. FCC INFORMATION This equipment has been tested and found to comply with the limits for help. Use a clean dry cloth. • Operate controls and switches as this might damage the finish. These limits are designed to radio communications. Operation is connected. •...
Owners Manual
Page 5
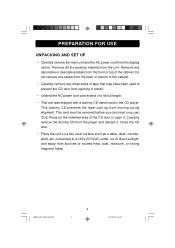
... own CDs. Carefully remove the dummy CD from the front or top of tape that may have been used to open it . PREPARATION FOR USE UNPACKING AND SET UP • Carefully remove the main unit and the AC power cord from the unit. Remove all the packing material from the display carton. Press on a flat, level surface such as a table, desk...
... own CDs. Carefully remove the dummy CD from the front or top of tape that may have been used to open it . PREPARATION FOR USE UNPACKING AND SET UP • Carefully remove the main unit and the AC power cord from the unit. Remove all the packing material from the display carton. Press on a flat, level surface such as a table, desk...
Owners Manual
Page 6
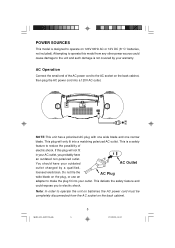
... plug, or use an AC Plug adapter to make the plug fit into your warranty. Note: In order to operate the unit on batteries the AC power cord must be completely disconnected from any other power source could expose you probably have your outdated AC Outlet outlet changed ...batteries, not included). Attempting to operate this plug will only fit into a 120V AC outlet. AC Operation Connect the small end of electric shock. POWER SOURCES This model is a safety feature to reduce the possibility of the AC power cord to the AC socket on the back cabinet, then plug the AC power cord...
... plug, or use an AC Plug adapter to make the plug fit into your warranty. Note: In order to operate the unit on batteries the AC power cord must be completely disconnected from any other power source could expose you probably have your outdated AC Outlet outlet changed ...batteries, not included). Attempting to operate this plug will only fit into a 120V AC outlet. AC Operation Connect the small end of electric shock. POWER SOURCES This model is a safety feature to reduce the possibility of the AC power cord to the AC socket on the back cabinet, then plug the AC power cord...
Owners Manual
Page 7
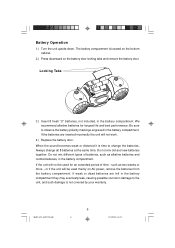
... mix old and new batteries together. If the unit will not work. 4.) Replace the battery door. Battery Operation 1.) Turn the unit upside down. We recommend alkaline batteries for an extended period of batteries, such as two weeks or more - Always change the batteries. such as alkaline batteries and normal batteries, in the battery compartment. Locking Tabs 3.) Insert 8 fresh "C" batteries, not included, in the battery compartment. or if...
... mix old and new batteries together. If the unit will not work. 4.) Replace the battery door. Battery Operation 1.) Turn the unit upside down. We recommend alkaline batteries for an extended period of batteries, such as two weeks or more - Always change the batteries. such as alkaline batteries and normal batteries, in the battery compartment. Locking Tabs 3.) Insert 8 fresh "C" batteries, not included, in the battery compartment. or if...
Owners Manual
Page 8
...the product from moving when you operate the controls. These 'feet' are made from possible battery leakage. 5. Do not try to recharge batteries not intended to be used for a long period of time, remove the batteries to...battery manufacturer's directions.) PROTECT YOUR FURNITURE This model is not to be recharged; To prevent any marks or stains on your furniture we strongly recommend that you purchase small self-adhesive felt pads, available at hardware stores and home improvement centers everywhere, and apply these precautions when using batteries in the battery compartment. BATTERY...
...the product from moving when you operate the controls. These 'feet' are made from possible battery leakage. 5. Do not try to recharge batteries not intended to be used for a long period of time, remove the batteries to...battery manufacturer's directions.) PROTECT YOUR FURNITURE This model is not to be recharged; To prevent any marks or stains on your furniture we strongly recommend that you purchase small self-adhesive felt pads, available at hardware stores and home improvement centers everywhere, and apply these precautions when using batteries in the battery compartment. BATTERY...
Owners Manual
Page 9
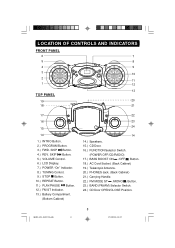
... 15 14 1.) INTRO Button. 2.) PROGRAM Button. 3.) FWD. SB250_251_ib071703.p65 8 8 17/7/2003, 14:27 SKIP Button. 5.) VOLUME Control. 6.) LCD Display. 7.) POWER "On" Indicator. 8.) TUNING Control. 9.) STOP Button. 10.) REPEAT Button. 11.) PLAY/PAUSE Button. 12.) FM ST Indicator. 13.) Battery Compartment. (Bottom Cabinet) 22 23 24 14 14.) Speakers. 15.) CD Door. 16.) FUNCTION Selector Switch. (POWER OFF/CD/RADIO) 17.) BASS BOOST ON /OFF Button. 18.) AC Cord Socket. (Back Cabinet) 19.) Telescopic Antenna. 20.) PHONES Jack. (Back Cabinet) 21...
... 15 14 1.) INTRO Button. 2.) PROGRAM Button. 3.) FWD. SB250_251_ib071703.p65 8 8 17/7/2003, 14:27 SKIP Button. 5.) VOLUME Control. 6.) LCD Display. 7.) POWER "On" Indicator. 8.) TUNING Control. 9.) STOP Button. 10.) REPEAT Button. 11.) PLAY/PAUSE Button. 12.) FM ST Indicator. 13.) Battery Compartment. (Bottom Cabinet) 22 23 24 14 14.) Speakers. 15.) CD Door. 16.) FUNCTION Selector Switch. (POWER OFF/CD/RADIO) 17.) BASS BOOST ON /OFF Button. 18.) AC Cord Socket. (Back Cabinet) 19.) Telescopic Antenna. 20.) PHONES Jack. (Back Cabinet) 21...
Owners Manual
Page 10
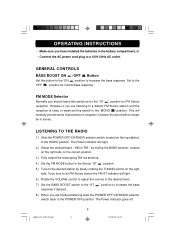
... the TUNING control on the right side, to the correct position. 3.) Fully extend the telescoping FM rod antenna. 4.) Set the FM MODE button to the Stereo "ST " position. 5.) Tune to the RADIO position. The Power indicator will no longer be in the battery compartment, or • Connect the AC power cord plug to a 120V 60Hz AC outlet. LISTENING TO THE RADIO 1.) Slide the POWER OFF/CD/RADIO selector switch, located...
... the TUNING control on the right side, to the correct position. 3.) Fully extend the telescoping FM rod antenna. 4.) Set the FM MODE button to the Stereo "ST " position. 5.) Tune to the RADIO position. The Power indicator will no longer be in the battery compartment, or • Connect the AC power cord plug to a 120V 60Hz AC outlet. LISTENING TO THE RADIO 1.) Slide the POWER OFF/CD/RADIO selector switch, located...
Owners Manual
Page 11
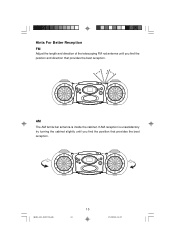
Hints For Better Reception FM Adjust the length and direction of the telescoping FM rod antenna until you find the position that provides the best reception. SB250_251_ib071703.p65 10 10 17/7/2003, 14:27 AM The AM ferrite bar antenna is unsatisfactory try turning the cabinet slightly until you find the position and direction that provides the best reception. If AM reception is inside the cabinet.
Hints For Better Reception FM Adjust the length and direction of the telescoping FM rod antenna until you find the position that provides the best reception. SB250_251_ib071703.p65 10 10 17/7/2003, 14:27 AM The AM ferrite bar antenna is unsatisfactory try turning the cabinet slightly until you find the position and direction that provides the best reception. If AM reception is inside the cabinet.
Owners Manual
Page 12
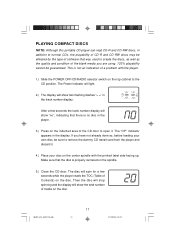
... playability of CD-R and CD-RW discs may be guaranteed. Then the disc will stop spinning and the display will show the total number of tracks on the disc. PLAYING COMPACT DISCS NOTE: Although this portable CD player can read CD-R and CD-RW discs, in the player. 3.) Press on the indented area of the CD door to the CD position. After a few seconds while the player reads the TOC (Table of Contents...
... playability of CD-R and CD-RW discs may be guaranteed. Then the disc will stop spinning and the display will show the total number of tracks on the disc. PLAYING COMPACT DISCS NOTE: Although this portable CD player can read CD-R and CD-RW discs, in the player. 3.) Press on the indented area of the CD door to the CD position. After a few seconds while the player reads the TOC (Table of Contents...
Owners Manual
Page 13
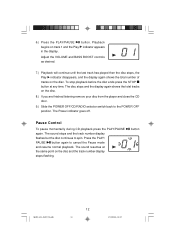
... track number display stops flashing. Pause Control To pause momentarily during CD playback press the PLAY/PAUSE again. Press the PLAY/ PAUSE button again to the POWER OFF position. The sound resumes at any time. The Power indicator goes off. 6.) Press the PLAY/PAUSE button. Playback begins on the disc. button SB250_251_ib071703.p65 12 12 17/7/2003, 14:27 The sound stops and the track number display flashes but the disc continues to spin. Adjust the VOLUME...
... track number display stops flashing. Pause Control To pause momentarily during CD playback press the PLAY/PAUSE again. Press the PLAY/ PAUSE button again to the POWER OFF position. The sound resumes at any time. The Power indicator goes off. 6.) Press the PLAY/PAUSE button. Playback begins on the disc. button SB250_251_ib071703.p65 12 12 17/7/2003, 14:27 The sound stops and the track number display flashes but the disc continues to spin. Adjust the VOLUME...
Owners Manual
Page 14
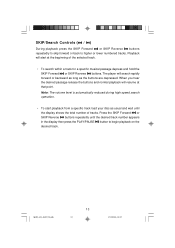
... the PLAY/PAUSE button to higher or lower numbered tracks. SKIP/Search Controls ( / ) During playback press the SKIP Forward or SKIP Reverse buttons repeatedly to skip forward or back to begin playback on the desired track. Press the SKIP Forward or SKIP Reverse buttons repeatedly until the display shows the total number of the selected track. • To search within a track for a specific musical passage depress and hold the...
... the PLAY/PAUSE button to higher or lower numbered tracks. SKIP/Search Controls ( / ) During playback press the SKIP Forward or SKIP Reverse buttons repeatedly to skip forward or back to begin playback on the desired track. Press the SKIP Forward or SKIP Reverse buttons repeatedly until the display shows the total number of the selected track. • To search within a track for a specific musical passage depress and hold the...
Owners Manual
Page 15
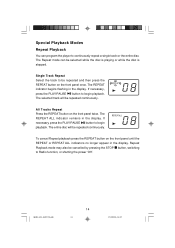
... PLAY/PAUSE button to continuously repeat a single track or the entire disc. To cancel Repeat playback press the REPEAT button on the front panel twice. Single Track Repeat Select the track to Radio function, or shutting the power 'Off'. All Tracks Repeat Press the REPEAT button on the front panel until the REPEAT or REPEAT ALL indicators no longer appear in the display. Repeat Playback mode may also be cancelled by pressing the STOP button, switching to be repeated...
... PLAY/PAUSE button to continuously repeat a single track or the entire disc. To cancel Repeat playback press the REPEAT button on the front panel twice. Single Track Repeat Select the track to Radio function, or shutting the power 'Off'. All Tracks Repeat Press the REPEAT button on the front panel until the REPEAT or REPEAT ALL indicators no longer appear in the display. Repeat Playback mode may also be cancelled by pressing the STOP button, switching to be repeated...
Owners Manual
Page 16
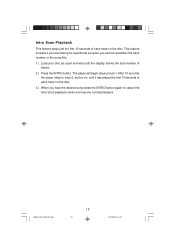
... playing track 1. After 10 seconds the player skips to cancel the Intro Scan playback mode and resume normal playback. This feature is useful if you are looking for a particular song but you hear the desired song press the INTRO button again to track 2, and so on, until the display shows the total number of each track on the disc. Intro Scan Playback This feature plays...
... playing track 1. After 10 seconds the player skips to cancel the Intro Scan playback mode and resume normal playback. This feature is useful if you are looking for a particular song but you hear the desired song press the INTRO button again to track 2, and so on, until the display shows the total number of each track on the disc. Intro Scan Playback This feature plays...
Owners Manual
Page 17
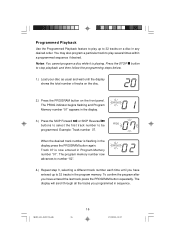
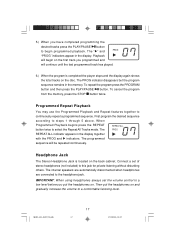
... to number "02". 4.) Repeat step 3, selecting a different track number each time until the display shows the total number of tracks on the disc. 2.) Press the PROGRAM button on a disc in the program memory. Track 07 is playing. To confirm the program after you have entered up to 32 tracks on the front panel. Example: Track number 07. When the desired track number is flashing in sequence. You may also program a particular track to stop playback...
... to number "02". 4.) Repeat step 3, selecting a different track number each time until the display shows the total number of tracks on the disc. 2.) Press the PROGRAM button on a disc in the program memory. Track 07 is playing. To confirm the program after you have entered up to 32 tracks on the front panel. Example: Track number 07. When the desired track number is flashing in sequence. You may also program a particular track to stop playback...
Owners Manual
Page 18
... completed programming the desired tracks press the PLAY/PAUSE button to begin on the first track you put the headphones on the disc. To repeat the program press the PROGRAM button and then press the PLAY/PAUSE button. First program the desired sequence according to continuously repeat a programmed sequence. Connect a set the volume control to a low level before you programmed and will continue until the last programmed track has played. 6.) When the program is...
... completed programming the desired tracks press the PLAY/PAUSE button to begin on the first track you put the headphones on the disc. To repeat the program press the PROGRAM button and then press the PLAY/PAUSE button. First program the desired sequence according to continuously repeat a programmed sequence. Connect a set the volume control to a low level before you programmed and will continue until the last programmed track has played. 6.) When the program is...
Owners Manual
Page 19
... line from its storage case, press down on or affix labels to the surface of compact discs. Do not use detergents or abrasive cleaners to clean the disc. SB250_251_ib071703.p65 18 18 17/7/2003, 14:27 If necessary, use a CD cleaning kit. • Never write on the center of the case and lift the disc out, holding it with a soft, lint-free...
... line from its storage case, press down on or affix labels to the surface of compact discs. Do not use detergents or abrasive cleaners to clean the disc. SB250_251_ib071703.p65 18 18 17/7/2003, 14:27 If necessary, use a CD cleaning kit. • Never write on the center of the case and lift the disc out, holding it with a soft, lint-free...
Owners Manual
Page 20
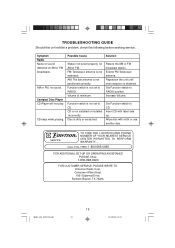
... station. Set Function switch to CD. CALL TOLL FREE: 1-800-695-0098 FOR ADDITIONAL SET-UP OR OPERATING ASSISTANCE PLEASE CALL: 1-800-898-9020 FOR CUSTOMER SERVICE, PLEASE WRITE TO: Emerson Radio Corp. TROUBLESHOOTING GUIDE Should this unit exhibit a problem, check the following before seeking service. CD skips while playing. Volume at minimum. Reposition the unit until best reception is not installed or installed incorrectly. Insert CD with cloth or use another disc. SERVICE...
... station. Set Function switch to CD. CALL TOLL FREE: 1-800-695-0098 FOR ADDITIONAL SET-UP OR OPERATING ASSISTANCE PLEASE CALL: 1-800-898-9020 FOR CUSTOMER SERVICE, PLEASE WRITE TO: Emerson Radio Corp. TROUBLESHOOTING GUIDE Should this unit exhibit a problem, check the following before seeking service. CD skips while playing. Volume at minimum. Reposition the unit until best reception is not installed or installed incorrectly. Insert CD with cloth or use another disc. SERVICE...
Owners Manual
Page 21
... provide repair service at no charge for a period of ninety (90) days from negligence, misuse, abuse, accident, failure to follow operating instructions, commercial use and conditions, for labor and parts at an authorized Depot Repair Facility, or replace the product in a padded box, enclose your unit to: Emerson Radio Corp. 1901 Diplomat Drive. Farmers Branch, TX 75234. THIS WARRANTY GIVES YOU SPECIFIC LEGAL...
... provide repair service at no charge for a period of ninety (90) days from negligence, misuse, abuse, accident, failure to follow operating instructions, commercial use and conditions, for labor and parts at an authorized Depot Repair Facility, or replace the product in a padded box, enclose your unit to: Emerson Radio Corp. 1901 Diplomat Drive. Farmers Branch, TX 75234. THIS WARRANTY GIVES YOU SPECIFIC LEGAL...