
Datasheet
Page 1
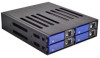
... design MR-SA1041 Install 9.5mm height (HDD not included) Install 15mm height * Interface: Support SAS(dual channel) & SATA * Support 4x 2.5" SAS, SATA & SDD Hard Disks (SAS support primary + secondary channel) * All aluminum material solid contruction * Tri-angle keylock tray design for HDD tray * Anti-shock protection HDD tray design * Cableless HDD connection * Support Windows/Mac/Linux * Support 2.5" HDD thickness from 9.5 upto 15mm * Indication : 4x twin color LEDs for Power on & HDD access * Support...
... design MR-SA1041 Install 9.5mm height (HDD not included) Install 15mm height * Interface: Support SAS(dual channel) & SATA * Support 4x 2.5" SAS, SATA & SDD Hard Disks (SAS support primary + secondary channel) * All aluminum material solid contruction * Tri-angle keylock tray design for HDD tray * Anti-shock protection HDD tray design * Cableless HDD connection * Support Windows/Mac/Linux * Support 2.5" HDD thickness from 9.5 upto 15mm * Indication : 4x twin color LEDs for Power on & HDD access * Support...
Manual
Page 1
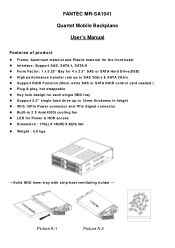
.../s & SATA 3Gb/s Support RAID Function (Note: extra SAS or SATA RAID control card needed ) Plug & play, hot swappable Key lock design for each single HDD tray Support 2.5" single hard drive up to 15mm thickness in height With 15Pin Power connector and 7Pin Signal connector Built-in 2 X 4cm(4020) cooling fan LED for Power & HDD access Dimension : 175(L) X 146(W) X 42(H) mm Weight : 0.8 kgs ---Solid HDD Inner tray with...
.../s & SATA 3Gb/s Support RAID Function (Note: extra SAS or SATA RAID control card needed ) Plug & play, hot swappable Key lock design for each single HDD tray Support 2.5" single hard drive up to 15mm thickness in height With 15Pin Power connector and 7Pin Signal connector Built-in 2 X 4cm(4020) cooling fan LED for Power & HDD access Dimension : 175(L) X 146(W) X 42(H) mm Weight : 0.8 kgs ---Solid HDD Inner tray with...

Manual
Page 2
... and use the provided screws to lock the HDD tray onto the unit one by one (see Picture A-2.). b) For 2.5" SAS HDD or HDD's thickness is more than 10.5mm: Loose the cover-mounting screw and remove the top cover. HDD Installation: a) For 2.5" SATA HDD (SSD): Put HDD onto the tray as shown on Picture A-1 ...and use the key to secure HDD on the tray one by one . Mount the SAS HDD or the thick HDD on the open tray. (Note: after SAS HDD installed, do not put back the top...
... and use the provided screws to lock the HDD tray onto the unit one by one (see Picture A-2.). b) For 2.5" SAS HDD or HDD's thickness is more than 10.5mm: Loose the cover-mounting screw and remove the top cover. HDD Installation: a) For 2.5" SATA HDD (SSD): Put HDD onto the tray as shown on Picture A-1 ...and use the key to secure HDD on the tray one by one . Mount the SAS HDD or the thick HDD on the open tray. (Note: after SAS HDD installed, do not put back the top...

Manual
Page 3
... SAS HDD data ports & advanced users. *Note for Connections: a) For SATA HDDs, they are needed if both Primary & Secondary channels. b) When it is set to "X" position, the front LED does NOT blink while HDD is being accessed. In this case, the hard drives will spin up until the SATA initial signal is received. (c) The default setting for D18 (HDD LED Switch) is to "O" position (HDD LED Enable). D18: HDD LED Switch...
... SAS HDD data ports & advanced users. *Note for Connections: a) For SATA HDDs, they are needed if both Primary & Secondary channels. b) When it is set to "X" position, the front LED does NOT blink while HDD is being accessed. In this case, the hard drives will spin up until the SATA initial signal is received. (c) The default setting for D18 (HDD LED Switch) is to "O" position (HDD LED Enable). D18: HDD LED Switch...