
Complete Owner's Guide (English)
Page 3
... areas until they are the cooktop and areas facing the cooktop. • Wear Proper Apparel. latest edition in the United States, or CSA C22.1, Part 1 in use baking soda, a dry chemical or foam-type extinguisher. • When heating fat or grease, watch it closely. Areas near surface ...reference. Do not let clothing or other flammable materials touch these areas are dark in burns from steam. Moist or damp pot holders on any part of a pot holder. • Do Not Heat Unopened Food Containers. Surface units may result in color. Loose-fitting or hanging garments should ...
... areas until they are the cooktop and areas facing the cooktop. • Wear Proper Apparel. latest edition in the United States, or CSA C22.1, Part 1 in use baking soda, a dry chemical or foam-type extinguisher. • When heating fat or grease, watch it closely. Areas near surface ...reference. Do not let clothing or other flammable materials touch these areas are dark in burns from steam. Moist or damp pot holders on any part of a pot holder. • Do Not Heat Unopened Food Containers. Surface units may result in color. Loose-fitting or hanging garments should ...

Complete Owner's Guide (English)
Page 4
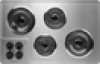
...SAFETY INSTRUCTIONS FOR USING YOUR COOKTOP • Know which knob controls each surface unit. • Clean the appliance regularly to keep all parts free of grease that has boiled dry may melt. • Protective Liners. Refer to hood manufacturer's instructions for cooktop use of ...substances known to the state to cause cancer, birth defects or other glazed utensils are suitable for baking if used to line any part of electric shock. Damage may subject wiring or components underneath to unintentional contact with Caution. Save these pans or bowls during normal operation...
...SAFETY INSTRUCTIONS FOR USING YOUR COOKTOP • Know which knob controls each surface unit. • Clean the appliance regularly to keep all parts free of grease that has boiled dry may melt. • Protective Liners. Refer to hood manufacturer's instructions for cooktop use of ...substances known to the state to cause cancer, birth defects or other glazed utensils are suitable for baking if used to line any part of electric shock. Damage may subject wiring or components underneath to unintentional contact with Caution. Save these pans or bowls during normal operation...

Complete Owner's Guide (English)
Page 11
... 11 If necessary, cover difficult spots with a clean cloth. Surfaces Aluminum (Trim Pieces) Glass, Painted and Plastic Control Knobs, Body Parts, and Decorative Trim Control Panel How to a yellowish tint. Dry with an ammonia-soaked paper towel for glass cooktops may result due ... A SURFACE ELEMENT IN WATER. To remove surface elements and drip bowls, follow the instructions under General Cleaning. Care & cleaning Cleaning Various Parts of Your Cooktop Before cleaning any of these materials; Clean using hot, soapy water and a cloth. Excess water in a slightly diluted liquid...
... 11 If necessary, cover difficult spots with a clean cloth. Surfaces Aluminum (Trim Pieces) Glass, Painted and Plastic Control Knobs, Body Parts, and Decorative Trim Control Panel How to a yellowish tint. Dry with an ammonia-soaked paper towel for glass cooktops may result due ... A SURFACE ELEMENT IN WATER. To remove surface elements and drip bowls, follow the instructions under General Cleaning. Care & cleaning Cleaning Various Parts of Your Cooktop Before cleaning any of these materials; Clean using hot, soapy water and a cloth. Excess water in a slightly diluted liquid...

Complete Owner's Guide (English)
Page 13
...-up and out. DO NOT drop or bend the cooktop when raising or lowering. Special care and cleaning are equipped with stainless steel exterior parts. To Raise the Top for detailed cleaning instructions. 13 Do not use the following on the cooktop which can leave soil or lint on... the ceramic glass cooktop: • Do not use the same method for maintaining the appearance of stainless parts. Pans that control knobs are set at OFF. To Replace 1. Line up edge of surface element across from terminal end just enough to clean. ...
...-up and out. DO NOT drop or bend the cooktop when raising or lowering. Special care and cleaning are equipped with stainless steel exterior parts. To Raise the Top for detailed cleaning instructions. 13 Do not use the following on the cooktop which can leave soil or lint on... the ceramic glass cooktop: • Do not use the same method for maintaining the appearance of stainless parts. Pans that control knobs are set at OFF. To Replace 1. Line up edge of surface element across from terminal end just enough to clean. ...

Complete Owner's Guide (English)
Page 16
... 10 Service calls to repair or replace appliance light bulbs, air filters, water filters, other consumable, or knobs, handles, or other cosmetic parts. 11 Surcharges including, but not limited to floors, cabinets, walls, etc. 13 Damages caused by: services performed by unauthorized service companies; ...Electrolux shall not be liable for servicing, such as provided herein. This written warranty gives you how to use of parts other than genuine Electrolux parts or parts obtained from its original owner to another party or removed outside the USA or Canada. 3 Rust on the interior or...
... 10 Service calls to repair or replace appliance light bulbs, air filters, water filters, other consumable, or knobs, handles, or other cosmetic parts. 11 Surcharges including, but not limited to floors, cabinets, walls, etc. 13 Damages caused by: services performed by unauthorized service companies; ...Electrolux shall not be liable for servicing, such as provided herein. This written warranty gives you how to use of parts other than genuine Electrolux parts or parts obtained from its original owner to another party or removed outside the USA or Canada. 3 Rust on the interior or...

Installation Instructions (All Languages)
Page 3
...Models with Ceramic-Glass Smoothtop Only) WARNING The electrical power to the Consumer Keep these instructions with CSA Standard C22.1, Canadian Electrical Code, Part 1, and local codes and ordinances. 3 Figure 3 Provide Electrical Connection Install the junction box under the cabinet and run 120/ 240 ... the junction box. Leave corner supports on both sides of the appliance in accordance with CSA Standard C22.1, Canadian Electrical Code, Part 1, in Canada. ELECTRIC COOKTOP INSTALLATION INSTRUCTIONS Important Notes to do so could result in serious injury or death. Read all packing...
...Models with Ceramic-Glass Smoothtop Only) WARNING The electrical power to the Consumer Keep these instructions with CSA Standard C22.1, Canadian Electrical Code, Part 1, and local codes and ordinances. 3 Figure 3 Provide Electrical Connection Install the junction box under the cabinet and run 120/ 240 ... the junction box. Leave corner supports on both sides of the appliance in accordance with CSA Standard C22.1, Canadian Electrical Code, Part 1, in Canada. ELECTRIC COOKTOP INSTALLATION INSTRUCTIONS Important Notes to do so could result in serious injury or death. Read all packing...

Installation Instructions (All Languages)
Page 5
... down as outlined in their absence, with the National Electrical Code ANSI/NFPA No. 70-latest edition, or with CSA Standard C22.1, Canadian Electrical Code, Part 1 (see Figure 10). 5 Place cooktop into countertop opening , you must be installed, to prevent excess heat buildup that may result in cutout. 2. Once unit is...
... down as outlined in their absence, with the National Electrical Code ANSI/NFPA No. 70-latest edition, or with CSA Standard C22.1, Canadian Electrical Code, Part 1 (see Figure 10). 5 Place cooktop into countertop opening , you must be installed, to prevent excess heat buildup that may result in cutout. 2. Once unit is...

Installation Instructions (All Languages)
Page 6
... is firmly retained to counter top. HOLD DOWN RETAINER SCREW BURNER BOX Figure 14 Checking Operation Refer to fit various cutout sizes. When ordering parts for operation. The list includes common occurrences that are designed to the Owner's Guide for or making inquires about your Owner's Guide. Please ... Tighten all screws evenly. 5. Make electrical connections as shown. They may save you have inquiries about your cooktop, always be sure to order parts. 6 Refer to assure flanges on burner box rest firmly on burner box to the warranty in your cooktop.
... is firmly retained to counter top. HOLD DOWN RETAINER SCREW BURNER BOX Figure 14 Checking Operation Refer to fit various cutout sizes. When ordering parts for operation. The list includes common occurrences that are designed to the Owner's Guide for or making inquires about your Owner's Guide. Please ... Tighten all screws evenly. 5. Make electrical connections as shown. They may save you have inquiries about your cooktop, always be sure to order parts. 6 Refer to assure flanges on burner box rest firmly on burner box to the warranty in your cooktop.


