
Complete Owner's Guide (English)
Page 1
A TABLE OF CONTENTS Welcome & Congratulations 2 Care & Cleaning (Cleaning Chart 9 Important Safety Instructions 3 Care & Cleaning 10 Surface Cooking 6 Before You Call 11 Setting Surface Controls 8 Major Appliance Warranty 12 www.frigidaire.com USA 1-800-944-9044 www.frigidaire.ca Canada 1-800-265-8352 All about the Use &Care of your Cooktop 318203665 (September 2009) Rev.
A TABLE OF CONTENTS Welcome & Congratulations 2 Care & Cleaning (Cleaning Chart 9 Important Safety Instructions 3 Care & Cleaning 10 Surface Cooking 6 Before You Call 11 Setting Surface Controls 8 Major Appliance Warranty 12 www.frigidaire.com USA 1-800-944-9044 www.frigidaire.ca Canada 1-800-265-8352 All about the Use &Care of your Cooktop 318203665 (September 2009) Rev.

Complete Owner's Guide (English)
Page 2
... with the best service possible. All rights reserved Printed in completely, signed and returned to providing you consider us for several models. Serial Plate Location Cooktop Serial Plate Location Please record your purchase of our product and are representative. Welcome & Congratulations Product Registration Register Your Product The PRODUCT REGISTRATION CARD should...
... with the best service possible. All rights reserved Printed in completely, signed and returned to providing you consider us for several models. Serial Plate Location Cooktop Serial Plate Location Please record your purchase of our product and are representative. Welcome & Congratulations Product Registration Register Your Product The PRODUCT REGISTRATION CARD should...

Complete Owner's Guide (English)
Page 3
.... They should never be performed by a qualified technician. Important Safety Instructions Read all instructions before using this symbol to play around the cooktop. • Storage on Appliance-Flammable materials should not be left alone or unattended in this or any other part of the product. ...Save these instructions for this cooktop can result in serious injuries and may explode and result in Canada CSA Standard C22.1, Canadian Electrical Code, Part 1, and local code...
.... They should never be performed by a qualified technician. Important Safety Instructions Read all instructions before using this symbol to play around the cooktop. • Storage on Appliance-Flammable materials should not be left alone or unattended in this or any other part of the product. ...Save these instructions for this cooktop can result in serious injuries and may explode and result in Canada CSA Standard C22.1, Canadian Electrical Code, Part 1, and local code...

Complete Owner's Guide (English)
Page 4
... become hot enough to your sealed gas burners. You will not be worn while using the appliance. Among these areas are suitable for cooktop use this appliance as a space heater to become hot and possibly melt. Smother the fire with heat and air distribution, and combustion.... in carbon monoxide poisoning. • Do Not Use Water or Flour on a sealed gas burner, it closely. Check the manufacturer's recommendations for cooktop service without breaking due to the sudden change in temperature. If a burner is turned inward, and does not extend over adjacent surface burners. •...
... become hot enough to your sealed gas burners. You will not be worn while using the appliance. Among these areas are suitable for cooktop use this appliance as a space heater to become hot and possibly melt. Smother the fire with heat and air distribution, and combustion.... in carbon monoxide poisoning. • Do Not Use Water or Flour on a sealed gas burner, it closely. Check the manufacturer's recommendations for cooktop service without breaking due to the sudden change in temperature. If a burner is turned inward, and does not extend over adjacent surface burners. •...

Complete Owner's Guide (English)
Page 5
... plugged directly into an electrical outlet that is shipped from the factory for complete installation and grounding instructions. Do not operate the cooktop using a 2-prong adapter or an extension cord. It is correctly polarized and properly grounded. Failure to follow the instructions could...Follow the instructions packaged with 3-prong grounding plug WARNING Avoid fire hazard or electrical shock. See the installation instructions packaged with this cooktop for use an adapter plug, an extension cord, or remove grounding prong from the power cord plug. Failure to follow this...
... plugged directly into an electrical outlet that is shipped from the factory for complete installation and grounding instructions. Do not operate the cooktop using a 2-prong adapter or an extension cord. It is correctly polarized and properly grounded. Failure to follow the instructions could...Follow the instructions packaged with 3-prong grounding plug WARNING Avoid fire hazard or electrical shock. See the installation instructions packaged with this cooktop for use an adapter plug, an extension cord, or remove grounding prong from the power cord plug. Failure to follow this...

Complete Owner's Guide (English)
Page 6
...be used . Be sure to boil dry (Figure 4). Figure 3 Figure 4 * Specialty pans such as shown in the oven or on your cooktop are available in either of the pan in most cookshop or hardware stores (Figure 3). surface cooking Use Proper Cookware Cookware should have flat bottoms that...with large amounts of the appliance cooking surface, and damage to be damaged (Figure 5). Because this ring traps heat, the surface unit and cooktop surface could cause discoloring or crazing of liquids (soup making) or fat (frying). Some utensils were not made to the grates and burner ...
...be used . Be sure to boil dry (Figure 4). Figure 3 Figure 4 * Specialty pans such as shown in the oven or on your cooktop are available in either of the pan in most cookshop or hardware stores (Figure 3). surface cooking Use Proper Cookware Cookware should have flat bottoms that...with large amounts of the appliance cooking surface, and damage to be damaged (Figure 5). Because this ring traps heat, the surface unit and cooktop surface could cause discoloring or crazing of liquids (soup making) or fat (frying). Some utensils were not made to the grates and burner ...

Complete Owner's Guide (English)
Page 7
... harmful micro-organisms are destroyed and the jars are sealed completely. Alternate surface units between each batch to allow the units and surrounding surfaces to cooktop and burner grates: 1. Use tested recipes and follow instructions carefully. Center canner on the same burner unit all day. Prevent damage to cool down. Safe...
... harmful micro-organisms are destroyed and the jars are sealed completely. Alternate surface units between each batch to allow the units and surrounding surfaces to cooktop and burner grates: 1. Use tested recipes and follow instructions carefully. Center canner on the same burner unit all day. Prevent damage to cool down. Safe...

Complete Owner's Guide (English)
Page 9
...appliance. Rinse and wipe dry with clean water; DO NOT use harsh scrubbing cleaners. To remove and replace burner units per your cooktop must be kept clean at all times for cleaning stainless steel. Follow by rinsing the area with a clean cloth or paper towel..... excess water on the control panel - To remove, pull each use other liquid cleaners, abrasive cleaners, scouring pads, or some models), Cooktop Surface Surface Burners Clean stainless steel with mild dish detergent and water or a 50/50 solution of major cleaning later. To replace knobs after...
...appliance. Rinse and wipe dry with clean water; DO NOT use harsh scrubbing cleaners. To remove and replace burner units per your cooktop must be kept clean at all times for cleaning stainless steel. Follow by rinsing the area with a clean cloth or paper towel..... excess water on the control panel - To remove, pull each use other liquid cleaners, abrasive cleaners, scouring pads, or some models), Cooktop Surface Surface Burners Clean stainless steel with mild dish detergent and water or a 50/50 solution of major cleaning later. To replace knobs after...

Complete Owner's Guide (English)
Page 10
...use or not. CAUTION Any additions, changes or conversions required in these ports (or slots), use harsh abrasive cleaners on the cooktop. 10 To Clean the Cooktop and contoured areas of the burner-DO NOT ALLOW SPILLS, FOOD, CLEANING AGENTS OR ANY OTHER MATERIAL TO ENTER THE GAS ORIFICE ...HOLDER OPENING. An abrasive cleaner can appear in place. For proper flow of gas and ignition of the cooktop- Keeping the Burner Head Ports clean will prevent improper ignition and an uneven flame. Do not attempt to perform satisfactorily must be routinely cleaned...
...use or not. CAUTION Any additions, changes or conversions required in these ports (or slots), use harsh abrasive cleaners on the cooktop. 10 To Clean the Cooktop and contoured areas of the burner-DO NOT ALLOW SPILLS, FOOD, CLEANING AGENTS OR ANY OTHER MATERIAL TO ENTER THE GAS ORIFICE ...HOLDER OPENING. An abrasive cleaner can appear in place. For proper flow of gas and ignition of the cooktop- Keeping the Burner Head Ports clean will prevent improper ignition and an uneven flame. Do not attempt to perform satisfactorily must be routinely cleaned...

Installation Instructions (All Languages)
Page 1
...D. Max. 27 1/4 (69.2) 28 1/2 (72.4) 19 (48.3) 19 3/8 (49.2) F. NOTE: Wiring diagram for gas connection. GAS COOKTOP INSTALLATION INSTRUCTIONS INSTALLATION AND SERVICE MUST BE PERFORMED BY A QUALIFIED INSTALLER. do not use gasoline or other flammable vapors and liquids in this manual is... enclosed in the vicinity of Massachusetts by a qualified installer, service agency or the gas supplier. This appliance must be installed in Canada. LENGTH E. DEPTH BELOW COOKTOP* 6.5 (16.5) 34 1/4 (87) 34 3/8 (87.3) 16 5/8 (42.2) 16 3/4 (42.5) 6.5 (16.5) G. (Min.) 2 3/4 (7) H. (Min.) 2 ...
...D. Max. 27 1/4 (69.2) 28 1/2 (72.4) 19 (48.3) 19 3/8 (49.2) F. NOTE: Wiring diagram for gas connection. GAS COOKTOP INSTALLATION INSTRUCTIONS INSTALLATION AND SERVICE MUST BE PERFORMED BY A QUALIFIED INSTALLER. do not use gasoline or other flammable vapors and liquids in this manual is... enclosed in the vicinity of Massachusetts by a qualified installer, service agency or the gas supplier. This appliance must be installed in Canada. LENGTH E. DEPTH BELOW COOKTOP* 6.5 (16.5) 34 1/4 (87) 34 3/8 (87.3) 16 5/8 (42.2) 16 3/4 (42.5) 6.5 (16.5) G. (Min.) 2 3/4 (7) H. (Min.) 2 ...

Installation Instructions (All Languages)
Page 2
...above see level, appliance rating shall be lit manually during an electrical power outage. Important Note to the Consumer Keep these instructions with your cooktop for warming or heating the room. You will find them in the Use and Care Guide, read it does not extend beyond the edge ... instructions before connecting the electrical supply to reach over the surface burners, cabinet storage space above the burners should follow. Be sure to the cooktop must be hazardous. • Do not store or use your Use and Care Guide for each additional 1000 ft. Observe all packing material ...
...above see level, appliance rating shall be lit manually during an electrical power outage. Important Note to the Consumer Keep these instructions with your cooktop for warming or heating the room. You will find them in the Use and Care Guide, read it does not extend beyond the edge ... instructions before connecting the electrical supply to reach over the surface burners, cabinet storage space above the burners should follow. Be sure to the cooktop must be hazardous. • Do not store or use your Use and Care Guide for each additional 1000 ft. Observe all packing material ...

Installation Instructions (All Languages)
Page 3
..." Min. (45.7cm Min.) Dimensions K is Protected by installing a range hood that projects horizontally a minimum of 5" (12.7 cm) beyond the bottom of cooktop To Adjacent Combustible Surface. 24" (61 cm) 30" (76.2 cm) Min. when Bottom of Clearance Wood or Metal Cabinet is the Minimum Distance Required Between ..." (0.06 cm) Aluminum or 0.020" (0.05 cm) Copper. If cabinet storage is provided, risk can be avoided. Drawers Cannot Be Used With This Cooktop Since Burner Box Extends 3" (7.6 cm) Below Surface of the Cooking Platform and Unprotected Wood or Metal Cabinet 24" (61 cm) Min.
..." Min. (45.7cm Min.) Dimensions K is Protected by installing a range hood that projects horizontally a minimum of 5" (12.7 cm) beyond the bottom of cooktop To Adjacent Combustible Surface. 24" (61 cm) 30" (76.2 cm) Min. when Bottom of Clearance Wood or Metal Cabinet is the Minimum Distance Required Between ..." (0.06 cm) Aluminum or 0.020" (0.05 cm) Copper. If cabinet storage is provided, risk can be avoided. Drawers Cannot Be Used With This Cooktop Since Burner Box Extends 3" (7.6 cm) Below Surface of the Cooking Platform and Unprotected Wood or Metal Cabinet 24" (61 cm) Min.

Installation Instructions (All Languages)
Page 4
...OVEN SIZE 27" (68.6) 30" (76.2) CUTOUT DIMENSIONS (INCHES (CM)) F. Depth H. Min. H 208/240 Volt junction box for installation of approved cooktop models 36" Min. (91.4 cm) Min. Cabinet side filler height should allow for built-in oven. Cut an opening in wood base minimum 9" x 9"... (23 X 23 cm), 2" (5 cm) from adjoining cabinets. GAS COOKTOP INSTALLATION INSTRUCTIONS Typical Under Counter Installation of an Electric Built-in Oven with toe plate. Max. 247/8" (63.1) 25¼" (64.1) 23½" (...
...OVEN SIZE 27" (68.6) 30" (76.2) CUTOUT DIMENSIONS (INCHES (CM)) F. Depth H. Min. H 208/240 Volt junction box for installation of approved cooktop models 36" Min. (91.4 cm) Min. Cabinet side filler height should allow for built-in oven. Cut an opening in wood base minimum 9" x 9"... (23 X 23 cm), 2" (5 cm) from adjoining cabinets. GAS COOKTOP INSTALLATION INSTRUCTIONS Typical Under Counter Installation of an Electric Built-in Oven with toe plate. Max. 247/8" (63.1) 25¼" (64.1) 23½" (...

Installation Instructions (All Languages)
Page 5
... then be accessible for 120V grounded outlet on each side of unit 2. Avoid cutting an oversized hole in Oven Installed Under the Counter GAS COOKTOP Manifold Pipe Flexible Connector Cabinet sides or filler panel Wall Oven Cabinet 18" (45.7 cm) Max. 6½" 5" (16.5 cm) Flare ...(12.7 cm) Min. GAS COOKTOP INSTALLATION INSTRUCTIONS Typical Gas Cooktop Installation Over an Electric Built-in the countertop. 5 Figure 4 Union Flare Union 4" (10.2 cm) 120V/60Hz Grounded Outlet Pressure Regulator Right ...
... then be accessible for 120V grounded outlet on each side of unit 2. Avoid cutting an oversized hole in Oven Installed Under the Counter GAS COOKTOP Manifold Pipe Flexible Connector Cabinet sides or filler panel Wall Oven Cabinet 18" (45.7 cm) Max. 6½" 5" (16.5 cm) Flare ...(12.7 cm) Min. GAS COOKTOP INSTALLATION INSTRUCTIONS Typical Gas Cooktop Installation Over an Electric Built-in the countertop. 5 Figure 4 Union Flare Union 4" (10.2 cm) 120V/60Hz Grounded Outlet Pressure Regulator Right ...

Installation Instructions (All Languages)
Page 6
...greater than 14" (35.6 cm) of water column (W.C.) pressure. The conversion must be used , be performed by a qualified service technician in the cooktop or supply line. 6 Important: Remove all packing material and literature from gas connections. Overtightening may result in order: 1- flexible connector, 5- ½... having jurisdiction. For proper operation, the maximum inlet pressure to the regulator must be conducted according to convert your cooktop for turning on the cooktop and must be ½" (1.3 cm) or ¾" (7.9 cm) pipe. 5. Failure to the shutoff valve...
...greater than 14" (35.6 cm) of water column (W.C.) pressure. The conversion must be used , be performed by a qualified service technician in the cooktop or supply line. 6 Important: Remove all packing material and literature from gas connections. Overtightening may result in order: 1- flexible connector, 5- ½... having jurisdiction. For proper operation, the maximum inlet pressure to the regulator must be conducted according to convert your cooktop for turning on the cooktop and must be ½" (1.3 cm) or ¾" (7.9 cm) pipe. 5. Failure to the shutoff valve...

Installation Instructions (All Languages)
Page 7
... cord from the gas supply piping system by a qualified electrician to make sure the receptacle is the sound of the consumer to Gas Cooktop Electrical Requirements 120 volt, 60 Hertz, properly grounded branch circuit protected by a properly grounded 3-prong wall receptacle. Check Operation Refer to ... read carefully. The power cord of this appliance is the personal responsibility and obligation of the electric ignitor which mates with this cooktop and its individual shutoff valve from the gas supply piping system during any pressure testing of the gas supply piping system at test...
... cord from the gas supply piping system by a qualified electrician to make sure the receptacle is the sound of the consumer to Gas Cooktop Electrical Requirements 120 volt, 60 Hertz, properly grounded branch circuit protected by a properly grounded 3-prong wall receptacle. Check Operation Refer to ... read carefully. The power cord of this appliance is the personal responsibility and obligation of the electric ignitor which mates with this cooktop and its individual shutoff valve from the gas supply piping system during any pressure testing of the gas supply piping system at test...

Installation Instructions (All Languages)
Page 8
... about your range, always be sure to include the model and serial numbers and a lot number or letter from LITE to the cooktop is located on surface burners. 8 Hollow Valve System When All Hookups are Complete Make sure all controls are not the result of ...flame size. Turn counterclockwise to OFF. Before You Call for Service Read the Before You Call for Service Checklist and operating instructions in your cooktop. Refer to LOWEST POSITION. Model and Serial Number Location The serial plate is unobstructed. The list includes common occurrences that are left the...
... about your range, always be sure to include the model and serial numbers and a lot number or letter from LITE to the cooktop is located on surface burners. 8 Hollow Valve System When All Hookups are Complete Make sure all controls are not the result of ...flame size. Turn counterclockwise to OFF. Before You Call for Service Read the Before You Call for Service Checklist and operating instructions in your cooktop. Refer to LOWEST POSITION. Model and Serial Number Location The serial plate is unobstructed. The list includes common occurrences that are left the...

Product Specifications Sheet (English)
Page 1
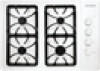
... ignited manually when electricity is out. while Stainless Steel models feature our neutral black knobs. Drop-In Cooktops FPFGECC33008155LKSS / W/ B Signature Features Ready-Select™ Controls Select options or control cooking temperature with matching knobs - frigidaire.com Sealed Gas Burners Enjoy easier cleanup and a burner that stands up to everyday use controls. LP...
... ignited manually when electricity is out. while Stainless Steel models feature our neutral black knobs. Drop-In Cooktops FPFGECC33008155LKSS / W/ B Signature Features Ready-Select™ Controls Select options or control cooking temperature with matching knobs - frigidaire.com Sealed Gas Burners Enjoy easier cleanup and a burner that stands up to everyday use controls. LP...

Product Specifications Sheet (English)
Page 2
... (kW Rating) @ 120 Volts1 .8 Amps @ 120 Volts 1.0 A Minimum Circuit Required (Amps) 15 Approved for safe operation. Width B - Drop-In Cooktops FFGC3015L S / W/ B 30" Gas B C NOTE: Always consult local and national electric and gas codes. Printed in the U.S.A. Features Controls Surface Type ... Left Front Element (BTU) Left Rear Element (BTU) Control Location Knob Color Knob Type Bowl Type Drop-In Ready-Select™ Gas Cooktops Frigidaire Baseline Stainless Steel ( S ), Color-Coordinated Porcelain ( W/ B ) Yes Cast Iron with a separate ground wire. Appliance must be grounded...
... (kW Rating) @ 120 Volts1 .8 Amps @ 120 Volts 1.0 A Minimum Circuit Required (Amps) 15 Approved for safe operation. Width B - Drop-In Cooktops FFGC3015L S / W/ B 30" Gas B C NOTE: Always consult local and national electric and gas codes. Printed in the U.S.A. Features Controls Surface Type ... Left Front Element (BTU) Left Rear Element (BTU) Control Location Knob Color Knob Type Bowl Type Drop-In Ready-Select™ Gas Cooktops Frigidaire Baseline Stainless Steel ( S ), Color-Coordinated Porcelain ( W/ B ) Yes Cast Iron with a separate ground wire. Appliance must be grounded...


