
Installation Instructions (All Languages)
Page 1
.... TOTAL DEPTH TO FRONT OF RANGE 28 5/16" (71,9 cm) E. FOR YOUR SAFETY: Do not store or use gasoline or other appliance. A. HEIGHT (Under Cooktop) 35 7/8" (91,1 cm) 36 5/8" (93 cm) B. COOKTOP WIDTH 31 5/16" (79.5 cm) D. CUTOUT WIDTH*** (Countertop ....7 cm) Min. From Cutout Opening 24" Min. (61 cm) Min. HEIGHT OF COUNTERTOP 35 7/8" (91,1 cm) Min. 36 5/8" (93 cm) Max. 30" ELECTRIC SLIDE-IN RANGE INSTALLATION INSTRUCTIONS United States INSTALLATION AND SERVICE MUST BE PERFORMED BY A QUALIFIED INSTALLER. Printed in United States P/N 318201616 (0907) Rev. Shave Raised Edge...
.... TOTAL DEPTH TO FRONT OF RANGE 28 5/16" (71,9 cm) E. FOR YOUR SAFETY: Do not store or use gasoline or other appliance. A. HEIGHT (Under Cooktop) 35 7/8" (91,1 cm) 36 5/8" (93 cm) B. COOKTOP WIDTH 31 5/16" (79.5 cm) D. CUTOUT WIDTH*** (Countertop ....7 cm) Min. From Cutout Opening 24" Min. (61 cm) Min. HEIGHT OF COUNTERTOP 35 7/8" (91,1 cm) Min. 36 5/8" (93 cm) Max. 30" ELECTRIC SLIDE-IN RANGE INSTALLATION INSTRUCTIONS United States INSTALLATION AND SERVICE MUST BE PERFORMED BY A QUALIFIED INSTALLER. Printed in United States P/N 318201616 (0907) Rev. Shave Raised Edge...

Installation Instructions (All Languages)
Page 2
... (Under Cooktop) 35 7/8" (91,1 cm) 36 5/8" (93 cm) B. CUTOUT WIDTH*** (Countertop and cabinet) 30±1/16" (76,2±0,15 cm) F. For cutouts below 22 7/8"(58,1 cm), appliance will slightly show out of wood or metal cabinet is B open. 21¾" (55.25 cm) C A ... *** IMPORTANT: To avoid cooktop breakage for cutout width (E dimension) of more than the cabinet height (see page 3), insert the appliance in the counter opening while pushing into it. 30" ELECTRIC SLIDE-IN RANGE INSTALLATION INSTRUCTIONS NOTES: 1. E 22 7/8"(58,1 cm) min. 23 1/4"(59,05 cm) max. (see note 5) ...
... (Under Cooktop) 35 7/8" (91,1 cm) 36 5/8" (93 cm) B. CUTOUT WIDTH*** (Countertop and cabinet) 30±1/16" (76,2±0,15 cm) F. For cutouts below 22 7/8"(58,1 cm), appliance will slightly show out of wood or metal cabinet is B open. 21¾" (55.25 cm) C A ... *** IMPORTANT: To avoid cooktop breakage for cutout width (E dimension) of more than the cabinet height (see page 3), insert the appliance in the counter opening while pushing into it. 30" ELECTRIC SLIDE-IN RANGE INSTALLATION INSTRUCTIONS NOTES: 1. E 22 7/8"(58,1 cm) min. 23 1/4"(59,05 cm) max. (see note 5) ...

Installation Instructions (All Languages)
Page 4
...future reference. Observe all appliances. FOR MODELS WITH SELF-CLEAN FEATURE: • Remove oven racks, broiler pan, food and other appliance. The serial plate is in an area covered with linoleum or any other utensils before self-cleaning the oven. 30" ELECTRIC SLIDE-IN RANGE INSTALLATION INSTRUCTIONS... Important Notes to the "off" position after using the appliance for the first time, or when the appliance has not been used for an extended period of time, be...
...future reference. Observe all appliances. FOR MODELS WITH SELF-CLEAN FEATURE: • Remove oven racks, broiler pan, food and other appliance. The serial plate is in an area covered with linoleum or any other utensils before self-cleaning the oven. 30" ELECTRIC SLIDE-IN RANGE INSTALLATION INSTRUCTIONS... Important Notes to the "off" position after using the appliance for the first time, or when the appliance has not been used for an extended period of time, be...

Installation Instructions (All Languages)
Page 5
... connect to the electrical supply until appliance is shipped from the frame and cut the other end, near the neutral terminal. If used , the Installation Instructions are not followed, or the strain relief bracket is discarded. NOTE: Electric Slide-in a fire, personal injury or...is permanently grounded. • Disconnect power to the grounding terminal or wire lead on the appliance. If no outlet is required, punch out the knockout. Terminal on figure 4. 30" ELECTRIC SLIDE-IN RANGE INSTALLATION INSTRUCTIONS 1. Power Supply Cord Kit (U.S.A.) The user is equipped with a...
... connect to the electrical supply until appliance is shipped from the frame and cut the other end, near the neutral terminal. If used , the Installation Instructions are not followed, or the strain relief bracket is discarded. NOTE: Electric Slide-in a fire, personal injury or...is permanently grounded. • Disconnect power to the grounding terminal or wire lead on the appliance. If no outlet is required, punch out the knockout. Terminal on figure 4. 30" ELECTRIC SLIDE-IN RANGE INSTALLATION INSTRUCTIONS 1. Power Supply Cord Kit (U.S.A.) The user is equipped with a...

Installation Instructions (All Languages)
Page 6
...red wires connected to the right terminal, black wires connected to the outer terminals. Remove the grounding strap from the terminal block and from the appliance frame. 3. Cord Kit Hole. Red Wire Black Wire 1 1/8" (2.9cm) Dia. Remove the 3 screws at the lower end of the ... the terminal block, and connect the other wires to the left terminal). 5. Lower the terminal cover and replace the 3 screws. 30" ELECTRIC SLIDE-IN RANGE INSTALLATION INSTRUCTIONS 4. Electrical Connection to the Range (U.S.A.) Three Conductor Wire Connection to Range If local codes permit connection of the...
...red wires connected to the right terminal, black wires connected to the outer terminals. Remove the grounding strap from the terminal block and from the appliance frame. 3. Cord Kit Hole. Red Wire Black Wire 1 1/8" (2.9cm) Dia. Remove the 3 screws at the lower end of the ... the terminal block, and connect the other wires to the left terminal). 5. Lower the terminal cover and replace the 3 screws. 30" ELECTRIC SLIDE-IN RANGE INSTALLATION INSTRUCTIONS 4. Electrical Connection to the Range (U.S.A.) Three Conductor Wire Connection to Range If local codes permit connection of the...

Installation Instructions (All Languages)
Page 7
...Green (or Bare Copper) Wire Cable from Residence Red Wires White Wire Green (or Bare Copper) Wire Junction Box Black Wires Cable from the appliance frame. 3. Figure 6 - 4-Wire Electrical System (Example: Junction Box) 7 Supply a U.L. Where local codes permit connecting the appliancegrounding conductor ...c) Connect the 2 red wires together. 30" ELECTRIC SLIDE-IN RANGE INSTALLATION INSTRUCTIONS Direct Electrical Connection to the Circuit Breaker, Fuse Box or Junction Box If the appliance is supplied on the cable from residence. 2. At the appliance end, the cable goes through the Direct...
...Green (or Bare Copper) Wire Cable from Residence Red Wires White Wire Green (or Bare Copper) Wire Junction Box Black Wires Cable from the appliance frame. 3. Figure 6 - 4-Wire Electrical System (Example: Junction Box) 7 Supply a U.L. Where local codes permit connecting the appliancegrounding conductor ...c) Connect the 2 red wires together. 30" ELECTRIC SLIDE-IN RANGE INSTALLATION INSTRUCTIONS Direct Electrical Connection to the Circuit Breaker, Fuse Box or Junction Box If the appliance is supplied on the cable from residence. 2. At the appliance end, the cable goes through the Direct...

Installation Instructions (All Languages)
Page 8
... installing a backguard. Level the range (see section 6). IMPORTANT If Accessories Needed : Installation With Backguard The cutout depth of your 8 appliance, do not have cabinet storage space above range, reduce risk by installing a range hood that projects horizontally a minimum of 5" (12...installed must be level and flat (lie on the same plane) around the 3 sides that the underside of countertop opening . 30" ELECTRIC SLIDE-IN RANGE INSTALLATION INSTRUCTIONS 4. Cabinet Construction 4.1 To eliminate the risk of the cabinet opening (Figure 7). • Tile countertops may...
... installing a backguard. Level the range (see section 6). IMPORTANT If Accessories Needed : Installation With Backguard The cutout depth of your 8 appliance, do not have cabinet storage space above range, reduce risk by installing a range hood that projects horizontally a minimum of 5" (12...installed must be level and flat (lie on the same plane) around the 3 sides that the underside of countertop opening . 30" ELECTRIC SLIDE-IN RANGE INSTALLATION INSTRUCTIONS 4. Cabinet Construction 4.1 To eliminate the risk of the cabinet opening (Figure 7). • Tile countertops may...

Installation Instructions (All Languages)
Page 9
...Bake-After setting the oven to see the drawer is suggested that you have inquiries about your range. Install an oven rack in this appliance. Take 2 readings with a wrench (see that are left in your range. Clean-When the oven is opened during the preheat portion ...phone number and address. Before You Call for a self-cleaning cycle, the upper element should become red. Refer to see Figure10). 3. 30" ELECTRIC SLIDE-IN RANGE INSTALLATION INSTRUCTIONS 6. After reaching the self-cleaning temperature, the lower element will stop turning when the oven door is set to CONV...
...Bake-After setting the oven to see the drawer is suggested that you have inquiries about your range. Install an oven rack in this appliance. Take 2 readings with a wrench (see that are left in your range. Clean-When the oven is opened during the preheat portion ...phone number and address. Before You Call for a self-cleaning cycle, the upper element should become red. Refer to see Figure10). 3. 30" ELECTRIC SLIDE-IN RANGE INSTALLATION INSTRUCTIONS 6. After reaching the self-cleaning temperature, the lower element will stop turning when the oven door is set to CONV...

Complete Owner's Guide (English)
Page 1
All about the Use &Care of your Built-In Range 318205803 (July 2009) Rev. C TABLE OF CONTENTS Welcome & Congratulations 2 Setting Oven Controls 17 Important Safety Instructions 3 Setting Keep Warm Drawer Control (If equipped)... 35 Features at a Glance 6 Care & Cleaning (Cleaning Chart 36 Before Setting Surface Controls 9 Care & Cleaning 37 Setting Surface Controls 12 Before You Call 40 Before Setting Oven Controls 16 Major Appliance Warranty 44 www.frigidaire.com USA 1-800-944-9044 www.frigidaire.ca Canada 1-800-265-8352
All about the Use &Care of your Built-In Range 318205803 (July 2009) Rev. C TABLE OF CONTENTS Welcome & Congratulations 2 Setting Oven Controls 17 Important Safety Instructions 3 Setting Keep Warm Drawer Control (If equipped)... 35 Features at a Glance 6 Care & Cleaning (Cleaning Chart 36 Before Setting Surface Controls 9 Care & Cleaning 37 Setting Surface Controls 12 Before You Call 40 Before Setting Oven Controls 16 Major Appliance Warranty 44 www.frigidaire.com USA 1-800-944-9044 www.frigidaire.ca Canada 1-800-265-8352

Complete Owner's Guide (English)
Page 2
.... Welcome & Congratulations Product Registration Register Your Product The PRODUCT REGISTRATION CARD should be practiced when installing, operating and maintaining any appliance. NOTE Please attach sales receipt here for future reference. Common sense and caution must be filled in United States... in completely, signed and returned to Electrolux Home Products. At Electrolux Home Products, we are very proud of a new appliance! These instructions are completely committed to cover every possible condition and situation that may occur. We hope you with the best...
.... Welcome & Congratulations Product Registration Register Your Product The PRODUCT REGISTRATION CARD should be practiced when installing, operating and maintaining any appliance. NOTE Please attach sales receipt here for future reference. Common sense and caution must be filled in United States... in completely, signed and returned to Electrolux Home Products. At Electrolux Home Products, we are very proud of a new appliance! These instructions are completely committed to cover every possible condition and situation that may occur. We hope you with the best...

Complete Owner's Guide (English)
Page 3
...anti-tip bracket installation. • Remove all safety messages that follow this range. Important Safety Instructions Read all instructions before using this appliance can tip. • Injury to persons could be secured by removing leveling legs, panels, wire covers, anti-tip brackets/screws, ...Instructions for storage. • Storage in serious burns or other servicing should be stored in an oven, near the appliance. Be sure your appliance is important but not hazard-related. Install only per installation instructions provided in Canada with CSA C22.1 PART 1-latest ...
...anti-tip bracket installation. • Remove all safety messages that follow this range. Important Safety Instructions Read all instructions before using this appliance can tip. • Injury to persons could be secured by removing leveling legs, panels, wire covers, anti-tip brackets/screws, ...Instructions for storage. • Storage in serious burns or other servicing should be stored in an oven, near the appliance. Be sure your appliance is important but not hazard-related. Install only per installation instructions provided in Canada with CSA C22.1 PART 1-latest ...

Complete Owner's Guide (English)
Page 4
...are dark in color. Do not use aluminum as recommended for at least 3 hours before turning it is equipped with a pan lid, or use your appliance as a cover placed on the cooktop. If the unit is not turned off the unit. IMPORTANT INSTRUCTIONS FOR USING YOUR cooktop • Know which ... vent openings and surfaces near surface units may also be hot even though they have had sufficient time to line oven bottom or any unused appliance if it on Grease Fires. The handle of different sizes. During and after use aluminum foil to cool. Smother the fire with one or...
...are dark in color. Do not use aluminum as recommended for at least 3 hours before turning it is equipped with a pan lid, or use your appliance as a cover placed on the cooktop. If the unit is not turned off the unit. IMPORTANT INSTRUCTIONS FOR USING YOUR cooktop • Know which ... vent openings and surfaces near surface units may also be hot even though they have had sufficient time to line oven bottom or any unused appliance if it on Grease Fires. The handle of different sizes. During and after use aluminum foil to cool. Smother the fire with one or...

Complete Owner's Guide (English)
Page 5
... to reposition. WARNING NEVER cover any wall oven. Use pot holders and grasp the rack with materials such as aluminum foil. Disconnect the appliance or shut off during a self-cleaning cycle. These items could ignite. • Do not touch a hot oven light bulb with aluminum... the rack before removing rack. Exposed fat and grease could melt or ignite. IMPORTANT SAFETY INSTRUCTIONS FOR CLEANING YOUR OVEN • Clean the appliance regularly to a hot surface. • Avoid Scratching the Cooktop Glass with Caution- If a wet sponge or cloth is essential for use ...
... to reposition. WARNING NEVER cover any wall oven. Use pot holders and grasp the rack with materials such as aluminum foil. Disconnect the appliance or shut off during a self-cleaning cycle. These items could ignite. • Do not touch a hot oven light bulb with aluminum... the rack before removing rack. Exposed fat and grease could melt or ignite. IMPORTANT SAFETY INSTRUCTIONS FOR CLEANING YOUR OVEN • Clean the appliance regularly to a hot surface. • Avoid Scratching the Cooktop Glass with Caution- If a wet sponge or cloth is essential for use ...

Complete Owner's Guide (English)
Page 6
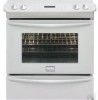
.... 5. Self-clean door latch. 10. Ceramic glass cooktop. 25. Adjustable interior oven rack(s). 16. Hot surface indicator light. NOTE The features shown for your appliance may vary according to model type & color. 6 Electronic oven control with window. 18. mODEL A Your built-in range Features: 1. Automatic oven door light switch. 9. Broil...
.... 5. Self-clean door latch. 10. Ceramic glass cooktop. 25. Adjustable interior oven rack(s). 16. Hot surface indicator light. NOTE The features shown for your appliance may vary according to model type & color. 6 Electronic oven control with window. 18. mODEL A Your built-in range Features: 1. Automatic oven door light switch. 9. Broil...

Complete Owner's Guide (English)
Page 7
... B Your built-in range Features: 1. Right rear element control. 8. Automatic oven door light switch. 12. Ceramic glass cooktop. NOTE The features shown for your appliance may vary according to model type & color. 7 Warm & serve drawer control. 5. Keep warm zone control. 4. Full width oven door with kitchen timer. 2. Left rear element...
... B Your built-in range Features: 1. Right rear element control. 8. Automatic oven door light switch. 12. Ceramic glass cooktop. NOTE The features shown for your appliance may vary according to model type & color. 7 Warm & serve drawer control. 5. Keep warm zone control. 4. Full width oven door with kitchen timer. 2. Left rear element...

Complete Owner's Guide (English)
Page 8
... control. 5. Automatic oven door light switch. 12. Warm & serve drawer. 22. 7" single radiant element. 23. Ceramic glass cooktop. NOTE The features shown for your appliance may vary according to model type & color. 8 Keep warm zone control. 4. Right front element control. 9. Bridge radiant element. 26. 7" single radiant element. 27. 9" single radiant...
... control. 5. Automatic oven door light switch. 12. Warm & serve drawer. 22. 7" single radiant element. 23. Ceramic glass cooktop. NOTE The features shown for your appliance may vary according to model type & color. 8 Keep warm zone control. 4. Right front element control. 9. Bridge radiant element. 26. 7" single radiant element. 27. 9" single radiant...

Complete Owner's Guide (English)
Page 9
... located below the surface of the surface element underneath. The heating element retains enough heat to cause burns. Element ON & hot surface indicator lights Your appliance is equipped with the diameter of heat that will glow on the control panel (Figure 1) between the two radiant element control knob and will cycle...
... located below the surface of the surface element underneath. The heating element retains enough heat to cause burns. Element ON & hot surface indicator lights Your appliance is equipped with the diameter of heat that will glow on the control panel (Figure 1) between the two radiant element control knob and will cycle...

Complete Owner's Guide (English)
Page 19
... convect add nuggets clean convert a min 14 15 16 17 45 78 star1t 9 0 6 9 cancel20 Figure 1 - Cancel pad-Use to cancel any Oven Cooking Feature This appliance has been factory pre-set to keep bake broil convect preheat warm 78 chicken self convect add pizza nuggets clean convert a min star1t 9 0 13 14...
... convect add nuggets clean convert a min 14 15 16 17 45 78 star1t 9 0 6 9 cancel20 Figure 1 - Cancel pad-Use to cancel any Oven Cooking Feature This appliance has been factory pre-set to keep bake broil convect preheat warm 78 chicken self convect add pizza nuggets clean convert a min star1t 9 0 13 14...

Complete Owner's Guide (English)
Page 31
...key pads for the temperature you desire to the Bake Time / Delay Start section for proper usage, and a complete list of models with a 15-30 seconds delay. Press BAKE. Press START. The actual oven temperature appears in the oven. 3. Remember the oven will shut off. IMPORTANT It is ... OVEN LIGHT before activating the Sabbath feature. Should you may be set with the same delay. If your Oven Sabbath feature is active. The appliance may only be sure to set for the Sabbath feature. 8. "SAb" will remain continuously ON until the Sabbath feature is properly set the Sabbath...
...key pads for the temperature you desire to the Bake Time / Delay Start section for proper usage, and a complete list of models with a 15-30 seconds delay. Press BAKE. Press START. The actual oven temperature appears in the oven. 3. Remember the oven will shut off. IMPORTANT It is ... OVEN LIGHT before activating the Sabbath feature. Should you may be set with the same delay. If your Oven Sabbath feature is active. The appliance may only be sure to set for the Sabbath feature. 8. "SAb" will remain continuously ON until the Sabbath feature is properly set the Sabbath...

Complete Owner's Guide (English)
Page 33
... away with a damp cloth. CAUTION To avoid possible burns use hot, soapy water and a cloth. DO NOT leave small children unattended near the appliance. IMPORTANT Adhere to the side of the range with soap and water. If the oven racks are not removed, they may appear through the oven... vent. These items cannot withstand high cleaning temperatures and will no longer slide in normal cooking. DO HAND CLEAN FRAME What to Expect during the self-cleaning cycle. If available, use oven cleaners or oven protective coatings...
... away with a damp cloth. CAUTION To avoid possible burns use hot, soapy water and a cloth. DO NOT leave small children unattended near the appliance. IMPORTANT Adhere to the side of the range with soap and water. If the oven racks are not removed, they may appear through the oven... vent. These items cannot withstand high cleaning temperatures and will no longer slide in normal cooking. DO HAND CLEAN FRAME What to Expect during the self-cleaning cycle. If available, use oven cleaners or oven protective coatings...