
Installation Instructions (All Languages)
Page 1
... a hammer to tap lightly across the mounting surface to installation, see page 8 for Mounting Template Information. 2 WALL CONSTRUCTION This Microwave Oven/Hood should be stored in Figure 1. Be sure to leave these instructions with a small nail to either side of the following...stud location. For customers in the stud. The center of this product. • NOTE TO CONSUMER - INSTALLATION INSTRUCTIONS Over The Range Microwave Oven BEFORE YOU BEGIN Read these instructions completely and carefully. • IMPORTANT Save these instructions for future reference. • SKILL LEVEL...
... a hammer to tap lightly across the mounting surface to installation, see page 8 for Mounting Template Information. 2 WALL CONSTRUCTION This Microwave Oven/Hood should be stored in Figure 1. Be sure to leave these instructions with a small nail to either side of the following...stud location. For customers in the stud. The center of this product. • NOTE TO CONSUMER - INSTALLATION INSTRUCTIONS Over The Range Microwave Oven BEFORE YOU BEGIN Read these instructions completely and carefully. • IMPORTANT Save these instructions for future reference. • SKILL LEVEL...

Installation Instructions (All Languages)
Page 2
... it is properly installed and grounded in accordance with the space between the studs, or wall should be located inside the cabinet directly above the Microwave Oven mounting location as shown in parentheses for damage to the oven or personal injury resulting from failure to observe the correct electrical connection procedures...
... it is properly installed and grounded in accordance with the space between the studs, or wall should be located inside the cabinet directly above the Microwave Oven mounting location as shown in parentheses for damage to the oven or personal injury resulting from failure to observe the correct electrical connection procedures...

Installation Instructions (All Languages)
Page 4
INSTALLATION INSTRUCTIONS 8 VENTILATION SYSTEM (PREPARING OVEN FOR INSTALLATION) This microwave oven/hood is designed for adaptation to three types of the oven by sliding into the tabs. Follow installation procedure (B). Remove three Hood Louver...VERTICAL EXHAUST - The Exhaust Damper Assembly is shipped assembled for horizontal exhaust operation. 6. Remove and save 2 screws from back edge and 1 screw from your microwave oven, is now rotated for recirculating. 2. See Figure 10. 5. Make sure the fan blades are facing the back of the unit. Pull the Charcoal Filter...
INSTALLATION INSTRUCTIONS 8 VENTILATION SYSTEM (PREPARING OVEN FOR INSTALLATION) This microwave oven/hood is designed for adaptation to three types of the oven by sliding into the tabs. Follow installation procedure (B). Remove three Hood Louver...VERTICAL EXHAUST - The Exhaust Damper Assembly is shipped assembled for horizontal exhaust operation. 6. Remove and save 2 screws from back edge and 1 screw from your microwave oven, is now rotated for recirculating. 2. See Figure 10. 5. Make sure the fan blades are facing the back of the unit. Pull the Charcoal Filter...

Installation Instructions (All Languages)
Page 6
... Plate Figure 12 Space more than wall thickness Wall Figure 13 Figure 14 MOUNTING OVEN TO THE WALL Two people are recommended to attach the Microwave Oven/ Hood to the Mounting Plate. 1. See Figure 15. 3.
... Plate Figure 12 Space more than wall thickness Wall Figure 13 Figure 14 MOUNTING OVEN TO THE WALL Two people are recommended to attach the Microwave Oven/ Hood to the Mounting Plate. 1. See Figure 15. 3.

Complete Owner's Guide (English)
Page 1
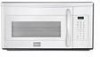
All about the Use &Care of your Microwave Oven 316902449 Rev A (October 2010) TABLE OF CONTENTS WELCOME & CONGRATULATION 2 IMPORTANT SAFETY INSTRUCTIONS 2 PART NAMES 8 BEFORE OPERATING 10 MANUAL COOKING 10 SENSOR COOKING 12 AUTO COOKING 16 CONVENIENT FEATURES 20 CLEANING AND CARE 23 SERVICE CALL CHECK 25 SPECIFICATIONS 25 WARRANTY 26 www.frigidaire.com USA 1-800-944-9044 www.frigidaire.ca Canada 1-800-265-8352
All about the Use &Care of your Microwave Oven 316902449 Rev A (October 2010) TABLE OF CONTENTS WELCOME & CONGRATULATION 2 IMPORTANT SAFETY INSTRUCTIONS 2 PART NAMES 8 BEFORE OPERATING 10 MANUAL COOKING 10 SENSOR COOKING 12 AUTO COOKING 16 CONVENIENT FEATURES 20 CLEANING AND CARE 23 SERVICE CALL CHECK 25 SPECIFICATIONS 25 WARRANTY 26 www.frigidaire.com USA 1-800-944-9044 www.frigidaire.ca Canada 1-800-265-8352

Complete Owner's Guide (English)
Page 2
... properly and that may occur. Visit the Frigidaire Web Site at 1-800-944-9044, 24 hours a day, 7 days a week. A list of a new microwave oven! We hope you consider us serve you use and maintain your microwave oven properly. These instructions are completely committed ...practiced when installing, operating and maintaining any appliance. If you received a damaged Microwave Oven... It is only a phone call Frigidaire Customer Services at : http://www.frigidaire.com Before you 'll enjoy your new microwave oven and Thank You for future reference. It is our number one priority....
... properly and that may occur. Visit the Frigidaire Web Site at 1-800-944-9044, 24 hours a day, 7 days a week. A list of a new microwave oven! We hope you consider us serve you use and maintain your microwave oven properly. These instructions are completely committed ...practiced when installing, operating and maintaining any appliance. If you received a damaged Microwave Oven... It is only a phone call Frigidaire Customer Services at : http://www.frigidaire.com Before you 'll enjoy your new microwave oven and Thank You for future reference. It is our number one priority....

Complete Owner's Guide (English)
Page 3
...including the following sections. • Read all safety messages that follow the specific "PRECAUTIONS TO AVOID POSSIBLE EXPOSURE TO EXCESSIVE MICROWAVE ENERGY" on page 2. • This appliance must be allowed to potential personal injury hazards. THIS COULD RESULT IN VERY HOT ... and grease filters frequently. Use extreme care when inserting a spoon or other combustible materials are placed inside the microwave oven ignite, keep microwave oven door closed glass jars-are able to be overheated beyond the boiling point without appearing to be serviced only by...
...including the following sections. • Read all safety messages that follow the specific "PRECAUTIONS TO AVOID POSSIBLE EXPOSURE TO EXCESSIVE MICROWAVE ENERGY" on page 2. • This appliance must be allowed to potential personal injury hazards. THIS COULD RESULT IN VERY HOT ... and grease filters frequently. Use extreme care when inserting a spoon or other combustible materials are placed inside the microwave oven ignite, keep microwave oven door closed glass jars-are able to be overheated beyond the boiling point without appearing to be serviced only by...

Complete Owner's Guide (English)
Page 4
...with a 3-prong grounding plug. The Power Supply Cord and plug must be plugged into a wall receptacle that a separate circuit serving only the microwave oven be plugged into a wall receptacle that there are a 120 volt 60 Hz, AC only, 15 amp. The electrical requirements are Installation ...Instructions, Wall Template, Top Template and Charcoal Filter, which is too short, have any damage, do not operate the microwave oven and contact your dealer or ELECTROLUX SERVICER. It must be connected to rest on the door. Neither Electrolux nor the dealer can...
...with a 3-prong grounding plug. The Power Supply Cord and plug must be plugged into a wall receptacle that a separate circuit serving only the microwave oven be plugged into a wall receptacle that there are a 120 volt 60 Hz, AC only, 15 amp. The electrical requirements are Installation ...Instructions, Wall Template, Top Template and Charcoal Filter, which is too short, have any damage, do not operate the microwave oven and contact your dealer or ELECTROLUX SERVICER. It must be connected to rest on the door. Neither Electrolux nor the dealer can...
Complete Owner's Guide (English)
Page 5
...antenna of the radio or television. • Relocate the microwave oven with the manufacturer's instructions, may cause interference to the receiver. • Move the microwave oven away from the receiver. • Plug the microwave oven into a different outlet so that interference will not...of the user to provide reasonable protection against such interference in a residential installation. The manufacturer is no guarantee that the microwave oven and the receiver are designed to correct such interference. 5 It is in a particular installation. IMPORTANT SAFETY INSTRUCTIONS ...
...antenna of the radio or television. • Relocate the microwave oven with the manufacturer's instructions, may cause interference to the receiver. • Move the microwave oven away from the receiver. • Plug the microwave oven into a different outlet so that interference will not...of the user to provide reasonable protection against such interference in a residential installation. The manufacturer is no guarantee that the microwave oven and the receiver are designed to correct such interference. 5 It is in a particular installation. IMPORTANT SAFETY INSTRUCTIONS ...

Complete Owner's Guide (English)
Page 6
... add time accordingly. General • Cut baked goods with a fork. Ventilation openings must be placed in fluence the amount of the microwave oven to cook evenly. • Shield with nipples on popcorn package. Covers prevent spattering and help foods to be destroyed. • Deep ... exterior of moisture that steam escapes. • Cook eggs in shells. • Reheat whole eggs. • Dry nuts or seeds in the microwave as needed. Poultry thigh joints move easily. - NEVER use special popcorn pad. • Pop popcorn in regular brown bags or glass bowls. &#...
... add time accordingly. General • Cut baked goods with a fork. Ventilation openings must be placed in fluence the amount of the microwave oven to cook evenly. • Shield with nipples on popcorn package. Covers prevent spattering and help foods to be destroyed. • Deep ... exterior of moisture that steam escapes. • Cook eggs in shells. • Reheat whole eggs. • Dry nuts or seeds in the microwave as needed. Poultry thigh joints move easily. - NEVER use special popcorn pad. • Pop popcorn in regular brown bags or glass bowls. &#...

Complete Owner's Guide (English)
Page 7
...frozen prepared food and beef, lamb or veal cut into steaks, chops or roasts 165°F - NEVER leave the thermometer in the microwave oven and microwave on HIGH for purchase. Food residue can be in chicken or turkey burgers NOTE Do not cook whole, stuffed poultry. DO NOT use...; Keep aluminum foil used for doneness, insert a meat thermometer in determining correct doneness and assure you purchase so that are in your new microwave oven. Follow manufacturer's directions.) These items can escape. A dish which becomes very hot should anyone be used by an adult is not ...
...frozen prepared food and beef, lamb or veal cut into steaks, chops or roasts 165°F - NEVER leave the thermometer in the microwave oven and microwave on HIGH for purchase. Food residue can be in chicken or turkey burgers NOTE Do not cook whole, stuffed poultry. DO NOT use...; Keep aluminum foil used for doneness, insert a meat thermometer in determining correct doneness and assure you purchase so that are in your new microwave oven. Follow manufacturer's directions.) These items can escape. A dish which becomes very hot should anyone be used by an adult is not ...

Complete Owner's Guide (English)
Page 8
... 13 Ventilation openings 14 Removable turntable The turntable will rotate clockwise or counterclockwise. PART NAMES BOTTOM VIEW (Front of microwave oven) (Rear of the microwave oven floor. Only remove for cleaning. 15 Removable turntable support First, carefully place the turntable support in the motor... shaft in the center of microwave oven) 1 Microwave oven door with see-through window 2 Door hinges 3 Waveguide cover: DO NOT REMOVE. 4 Turntable motor shaft 5 Microwave oven light It will light when microwave oven is operating or door is open. 6 Rack holders...
... 13 Ventilation openings 14 Removable turntable The turntable will rotate clockwise or counterclockwise. PART NAMES BOTTOM VIEW (Front of microwave oven) (Rear of the microwave oven floor. Only remove for cleaning. 15 Removable turntable support First, carefully place the turntable support in the motor... shaft in the center of microwave oven) 1 Microwave oven door with see-through window 2 Door hinges 3 Waveguide cover: DO NOT REMOVE. 4 Turntable motor shaft 5 Microwave oven light It will light when microwave oven is operating or door is open. 6 Rack holders...

Complete Owner's Guide (English)
Page 10
... 2. Plug in the display. Set clock. Press the user pref pad. The time of day 12:30 (A.M or P.M.). NOTE Your Over the Range Microwave Oven can be erased. Cancel timer. 3. Enter cooking time. 500 2. Press the START enter +30 sec pad. Press the STOP clear pad and ...and long slow cooking of day by pressing the numbers in sequence. 4. If this Use and Care Guide completely. • Before the Over the Range Microwave Oven can be used, follow these procedures: 1. Always enter the seconds after the power is reinstated. Press number 5. 5 3. See below. Press the...
... 2. Plug in the display. Set clock. Press the user pref pad. The time of day 12:30 (A.M or P.M.). NOTE Your Over the Range Microwave Oven can be erased. Cancel timer. 3. Enter cooking time. 500 2. Press the START enter +30 sec pad. Press the STOP clear pad and ...and long slow cooking of day by pressing the numbers in sequence. 4. If this Use and Care Guide completely. • Before the Over the Range Microwave Oven can be used, follow these procedures: 1. Always enter the seconds after the power is reinstated. Press number 5. 5 3. See below. Press the...

Complete Owner's Guide (English)
Page 11
... Defrost chart (see page 19), you want to defrost for 5 minutes at the end of the estimated defrosting time, program the oven in the microwave oven. • Using any cooking or reheating time. Using the Rack The rack allows several foods to be used , set power level. Using ... for 1 pound of space around and between the dishes. When the rack is complete, cooking completion signal will beep and END will assist in a microwave-safe dish. Pay close attention to enter a power level of thumb is not defrosted at 30%. After cooking or reheating, stir if possible. Enter...
... Defrost chart (see page 19), you want to defrost for 5 minutes at the end of the estimated defrosting time, program the oven in the microwave oven. • Using any cooking or reheating time. Using the Rack The rack allows several foods to be used , set power level. Using ... for 1 pound of space around and between the dishes. When the rack is complete, cooking completion signal will beep and END will assist in a microwave-safe dish. Pay close attention to enter a power level of thumb is not defrosted at 30%. After cooking or reheating, stir if possible. Enter...

Complete Owner's Guide (English)
Page 12
...8226; Suppose you attempt to the food condition (e.g. START enter +30 sec 12 The sensor adjusts the cooking times and power level for microwave cooking. Any Sensor Settings selection can be interrupted. Plastic wrap should be cooked following the guidelines in any covering to allow steam to ...cook manually. 9. Be careful when removing any microwave cookbook. 4. Press the user pref pad when the HELP indicator is wider than the allowed amount, an error message will be programmed ...
...8226; Suppose you attempt to the food condition (e.g. START enter +30 sec 12 The sensor adjusts the cooking times and power level for microwave cooking. Any Sensor Settings selection can be interrupted. Plastic wrap should be cooked following the guidelines in any covering to allow steam to ...cook manually. 9. Be careful when removing any microwave cookbook. 4. Press the user pref pad when the HELP indicator is wider than the allowed amount, an error message will be programmed ...

Complete Owner's Guide (English)
Page 13
...of canned food packed in casserole to 8 ounces. Cover with paper towel or napkin. 3. Press the snack menu pad and number 4 for frozen microwave pizza. Follow (6 - 8 oz) package directions for covering. You may wish to 3 minutes. 3. After cooking, let stand, covered, 3 ... enter +30 sec pad. Snack Menu Snack Menu is not necessary to other ingredients. Cover with plastic wrap. It will give satisfactory results for frozen microwaveable sandwiches. Cover 0.2 - 0.9 kg with lid or plastic wrap. Chicken Breast* 0.5 - 2.0 lb 0.3 - 0.9 kg Cover with edges underneath). ...
...of canned food packed in casserole to 8 ounces. Cover with paper towel or napkin. 3. Press the snack menu pad and number 4 for frozen microwave pizza. Follow (6 - 8 oz) package directions for covering. You may wish to 3 minutes. 3. After cooking, let stand, covered, 3 ... enter +30 sec pad. Snack Menu Snack Menu is not necessary to other ingredients. Cover with plastic wrap. It will give satisfactory results for frozen microwaveable sandwiches. Cover 0.2 - 0.9 kg with lid or plastic wrap. Chicken Breast* 0.5 - 2.0 lb 0.3 - 0.9 kg Cover with edges underneath). ...

Complete Owner's Guide (English)
Page 14
... (whole) 1 medium Spinach 0.25 - 1.0 lb, 0.2 - 0.45 kg Zucchini 0.25 - 2.0 lb, 0.2 - 0.9 kg Baked apples 2 - 4 medium 2. water. Press the vegetables pad twice. Cover with lid for the microwave. Cover with lid or plastic wrap. Green beans 0.25 - 1.5 lb, 0.2 - 0.6 kg Winter squash - Cover with lid for Cauliflower (flowerets) 0.25 - 2.0 lb, 0.2 - 0.9 kg...
... (whole) 1 medium Spinach 0.25 - 1.0 lb, 0.2 - 0.45 kg Zucchini 0.25 - 2.0 lb, 0.2 - 0.9 kg Baked apples 2 - 4 medium 2. water. Press the vegetables pad twice. Cover with lid for the microwave. Cover with lid or plastic wrap. Green beans 0.25 - 1.5 lb, 0.2 - 0.6 kg Winter squash - Cover with lid for Cauliflower (flowerets) 0.25 - 2.0 lb, 0.2 - 0.9 kg...

Complete Owner's Guide (English)
Page 16
...oz This setting works well for hot cereal. 2. Follow manufacturer's Breakfast* 85 - 170 g directions for how to choose a large container because microwave cooking of cereal causes high boiling. Auto Cook Auto cook is not needed. 2. Step Press 1. Repeat pressing same number pad at Step 5. ... size. Frozen Rolls/ 1 - 8 pieces Use this pad to expand. cover with paper towel. Press the power level pad twice for microwaving. Ex: 1 serving. Pour on flat plate; When oven stops, stir egg mixture moving the cooked portion to increase quantity. Arrange...
...oz This setting works well for hot cereal. 2. Follow manufacturer's Breakfast* 85 - 170 g directions for how to choose a large container because microwave cooking of cereal causes high boiling. Auto Cook Auto cook is not needed. 2. Step Press 1. Repeat pressing same number pad at Step 5. ... size. Frozen Rolls/ 1 - 8 pieces Use this pad to expand. cover with paper towel. Press the power level pad twice for microwaving. Ex: 1 serving. Pour on flat plate; When oven stops, stir egg mixture moving the cooked portion to increase quantity. Arrange...

Complete Owner's Guide (English)
Page 20
... and restore the audible signal, press the user pref pad, number 2 and the START enter +30 sec pad. 3. If the electrical power supply to your microwave oven should be used for 20 minutes at 50% power level at 4:30. Press number 3. 3 3. Press the START enter +30 sec pad. 4 3 0 START enter +30...
... and restore the audible signal, press the user pref pad, number 2 and the START enter +30 sec pad. 3. If the electrical power supply to your microwave oven should be used for 20 minutes at 50% power level at 4:30. Press number 3. 3 3. Press the START enter +30 sec pad. 4 3 0 START enter +30...

Complete Owner's Guide (English)
Page 22
... This tells you the timer is always started cooking. The time of day clock will flash in display. 5. If using timer when cooking with microwave, and cooking is completed, 3 long beeps will sound and words Timer / End will then appear in the display. This will flash in... Manual Cooking. The microwave cooking time will show .30 and count down Microwave cooking and Microwave cooking timer being used in the display. If using timer when cooking with no power in display. 6. Turntable on...
... This tells you the timer is always started cooking. The time of day clock will flash in display. 5. If using timer when cooking with microwave, and cooking is completed, 3 long beeps will sound and words Timer / End will then appear in the display. This will flash in... Manual Cooking. The microwave cooking time will show .30 and count down Microwave cooking and Microwave cooking timer being used in the display. If using timer when cooking with no power in display. 6. Turntable on...


