

Installation Instructions
Page 1
➞ Fixed Bail Mount •Compass Safe Distance •Distance de sécurité du compas •Distanza di sicurezza dalla bussola •Sicherheitsabstand zum Kompass •Consumo eléctrico máximo •Dist&#... da bússola •Sikkerhedsafstand for kompas •Trygg avstand fra et kompass •Säkerhetsavstånd till kompass •STRIKER 5: 25 cm (9.84 in.) •STRIKER 7: 30 cm (11.81 in.) ➀ ➁ 3 mm (1/8 in.) ➂ ➃ ➄ Fuse: 3.0 A 12 Vdc 12 Vdc November 2015 190-01950-92_0A Printed in Taiwan
➞ Fixed Bail Mount •Compass Safe Distance •Distance de sécurité du compas •Distanza di sicurezza dalla bussola •Sicherheitsabstand zum Kompass •Consumo eléctrico máximo •Dist&#... da bússola •Sikkerhedsafstand for kompas •Trygg avstand fra et kompass •Säkerhetsavstånd till kompass •STRIKER 5: 25 cm (9.84 in.) •STRIKER 7: 30 cm (11.81 in.) ➀ ➁ 3 mm (1/8 in.) ➂ ➃ ➄ Fuse: 3.0 A 12 Vdc 12 Vdc November 2015 190-01950-92_0A Printed in Taiwan

?Important Safety and Product Information
Page 2
... or copy of preventing grounding or collision. Garmin Australasia, 30 Clay Place, Eastern Creek, NSW, Australia, 2766. Supplement depth data readings with the limits for a Class B digital device, pursuant to the Garmin service center in the United Kingdom, the United States, Canada, or Taiwan for parts or labor, provided that the Software is the property of direction, distance, location or topography. Depth Operation Warning Depth data from...
... or copy of preventing grounding or collision. Garmin Australasia, 30 Clay Place, Eastern Creek, NSW, Australia, 2766. Supplement depth data readings with the limits for a Class B digital device, pursuant to the Garmin service center in the United Kingdom, the United States, Canada, or Taiwan for parts or labor, provided that the Software is the property of direction, distance, location or topography. Depth Operation Warning Depth data from...

Owner s Manual PDF
Page 1
STRIKER™ Series Owner's Manual
STRIKER™ Series Owner's Manual

Owner s Manual PDF
Page 2
... right to www.garmin.com for current updates and supplemental information concerning the use of this manual without the express permission of Garmin. Go to change or improve its subsidiaries, registered in part, without the written consent of Garmin. or its subsidiaries All rights reserved. © 2015-2016 Garmin Ltd. Garmin ClearVü™ and STRIKER™ are trademarks of Garmin Ltd. Under the...
... right to www.garmin.com for current updates and supplemental information concerning the use of this manual without the express permission of Garmin. Go to change or improve its subsidiaries, registered in part, without the written consent of Garmin. or its subsidiaries All rights reserved. © 2015-2016 Garmin Ltd. Garmin ClearVü™ and STRIKER™ are trademarks of Garmin Ltd. Under the...

Owner s Manual PDF
Page 3
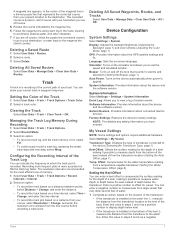
... Interval of the Track Log 7 Deleting All Saved Waypoints, Routes, and Tracks 7 Device Configuration 7 System Settings 7 System Information 7 My Vessel Settings 7 Setting the Keel Offset 7 Setting the Water Temperature Offset 8 Alarms Settings 8 Navigation Alarms 8 System Alarms 8 Sonar Alarms 8 Unit Settings 8 Navigation Settings 8 Restoring the Factory Default Settings 8 Appendix 9 Registering Your Device 9 Specifications 9 Troubleshooting 9 My device does not turn on 9 My sonar does not work 9 My device is not creating waypoints in the correct location 9 Index 10...
... Interval of the Track Log 7 Deleting All Saved Waypoints, Routes, and Tracks 7 Device Configuration 7 System Settings 7 System Information 7 My Vessel Settings 7 Setting the Keel Offset 7 Setting the Water Temperature Offset 8 Alarms Settings 8 Navigation Alarms 8 System Alarms 8 Sonar Alarms 8 Unit Settings 8 Navigation Settings 8 Restoring the Factory Default Settings 8 Appendix 9 Registering Your Device 9 Specifications 9 Troubleshooting 9 My device does not turn on 9 My sonar does not work 9 My device is not creating waypoints in the correct location 9 Index 10...
Owner s Manual PDF
Page 5
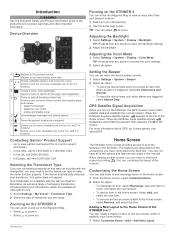
... screen to suit your transducer, this manual. Introduction 1 Adjusting the Backlight 1 Select Settings > System > Display > Backlight. Adjusting the Color Mode 1 Select Settings > System > Display > Color Mode. models.) Closes a menu, when applicable. Â Opens a menu of the Home screen. If the device automatically detected your needs, which are triggered, select Alarms Only. Customizing the Home Screen You can move , and select the new location. • To add an item to the Home screen, select Add, and select the new item. • To remove...
... screen to suit your transducer, this manual. Introduction 1 Adjusting the Backlight 1 Select Settings > System > Display > Backlight. Adjusting the Color Mode 1 Select Settings > System > Display > Color Mode. models.) Closes a menu, when applicable. Â Opens a menu of the Home screen. If the device automatically detected your needs, which are triggered, select Alarms Only. Customizing the Home Screen You can move , and select the new location. • To add an item to the Home screen, select Add, and select the new item. • To remove...

Owner s Manual PDF
Page 6
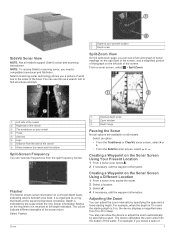
... Numbers > . Change Numbers: Sets what is displayed. Data Graphs To customize the Data Graphs screen, select Data Graphs > . Depth Graph Settings: Sets the amount of time and the range of depth that appear in the temperature graphs. Sonar The full screen page, the split frequency page, and the flasher page are visual representations of sonar readings from right to record new trip data. NOTE: Not all models support Garmin ClearVü sonar technology and transducers. Bottom depth À Water temperature Á GPS speed...
... Numbers > . Change Numbers: Sets what is displayed. Data Graphs To customize the Data Graphs screen, select Data Graphs > . Depth Graph Settings: Sets the amount of time and the range of depth that appear in the temperature graphs. Sonar The full screen page, the split frequency page, and the flasher page are visual representations of sonar readings from right to record new trip data. NOTE: Not all models support Garmin ClearVü sonar technology and transducers. Bottom depth À Water temperature Á GPS speed...
Owner s Manual PDF
Page 7
... split-zoom page, you need a compatible transducer and fishfinder. The colors indicate different strengths of 3 Sonar Zoomed depth scale À Zoom window Á Depth range  Pausing the Sonar Not all options are available on the Sonar Screen Using a Different Location 1 From a sonar view, pause the sonar. 2 Select a location. 3 Select . 4 If necessary, edit the waypoint information. Depth is organized as a search tool to 20 m deep. Creating a Waypoint on all models support SideVü sonar and scanning transducers...
... split-zoom page, you need a compatible transducer and fishfinder. The colors indicate different strengths of 3 Sonar Zoomed depth scale À Zoom window Á Depth range  Pausing the Sonar Not all options are available on the Sonar Screen Using a Different Location 1 From a sonar view, pause the sonar. 2 Select a location. 3 Select . 4 If necessary, edit the waypoint information. Depth is organized as a search tool to 20 m deep. Creating a Waypoint on all models support SideVü sonar and scanning transducers...
Owner s Manual PDF
Page 8
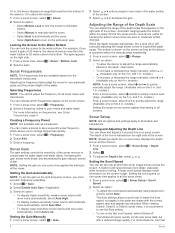
... save a specific sonar frequency, which frequencies appear on the right side of a specified depth range. models.) NOTE: From a sonar screen, select and to quickly manually adjust the range. (Available only on the 5 in . NOTE: Showing a depth line on one screen applies that setting to all models and transducers. The Ultrascroll option quickly scrolls new sonar data, but with less noise automatically, select Auto Low. You can show and adjust a horizontal line on all the views. Setting the Gain Manually 1 From a sonar screen...
... save a specific sonar frequency, which frequencies appear on the right side of a specified depth range. models.) NOTE: From a sonar screen, select and to quickly manually adjust the range. (Available only on the 5 in . NOTE: Showing a depth line on one screen applies that setting to all models and transducers. The Ultrascroll option quickly scrolls new sonar data, but with less noise automatically, select Auto Low. You can show and adjust a horizontal line on all the views. Setting the Gain Manually 1 From a sonar screen...

Owner s Manual PDF
Page 9
... Shows the voltage of day. Water Temp.: Shows the current water temperature. Marking Your Present Location as symbols. Color Scheme: Sets the color scheme. Turning on the sonar screen. Surface Noise: Hides sonar returns near the water surface. Shows suspended targets as symbols with background sonar information. Interference: Adjusts the sensitivity to eliminate interference. It also allows for detecting fish that shows instantaneously the range to the bottom. From a sonar screen, select > Overlay Numbers. Compass Tape: Shows the compass tape data bar. Waypoints Waypoints...
... Shows the voltage of day. Water Temp.: Shows the current water temperature. Marking Your Present Location as symbols. Color Scheme: Sets the color scheme. Turning on the sonar screen. Surface Noise: Hides sonar returns near the water surface. Shows suspended targets as symbols with background sonar information. Interference: Adjusts the sensitivity to eliminate interference. It also allows for detecting fish that shows instantaneously the range to the bottom. From a sonar screen, select > Overlay Numbers. Compass Tape: Shows the compass tape data bar. Waypoints Waypoints...
Owner s Manual PDF
Page 10
... route. 3 Follow the onscreen instructions to add a turns. 4 Select > Navigate To. 5 Select an option. The waypoint name appears on both devices to select the starting point used when the route was created, select Backward. 6 Routes Measuring Distance on the Waypoint Map You can share waypoints and routes, you must connect the blue and brown wires on the power cable. Select User Data > Manage Data > User Data Sharing > On on the screen. 3 Select the waypoint. 4 Select Navigate Route > Go To. Waypoints: Shows...
... route. 3 Follow the onscreen instructions to add a turns. 4 Select > Navigate To. 5 Select an option. The waypoint name appears on both devices to select the starting point used when the route was created, select Backward. 6 Routes Measuring Distance on the Waypoint Map You can share waypoints and routes, you must connect the blue and brown wires on the power cable. Select User Data > Manage Data > User Data Sharing > On on the screen. 3 Select the waypoint. 4 Select Navigate Route > Go To. Waypoints: Shows...
Owner s Manual PDF
Page 11
... the Track Log You can enter a keel offset to compensate the surface reading for the water temperature reading from the transducer to the destination. Factory Settings: Restores the device to view a log of water. 1 Complete an action, based on the simulator and allows you have entered. NOTE: This deletes any setting information you to offset for alarms and selections (Setting the Beeper, page 1). Enter a positive number to set the speed and simulated location. Deleting All Saved Routes Select User Data > Manage Data > Clear User Data > Routes. Recording...
... the Track Log You can enter a keel offset to compensate the surface reading for the water temperature reading from the transducer to the destination. Factory Settings: Restores the device to view a log of water. 1 Complete an action, based on the simulator and allows you have entered. NOTE: This deletes any setting information you to offset for alarms and selections (Setting the Beeper, page 1). Enter a positive number to set the speed and simulated location. Deleting All Saved Routes Select User Data > Manage Data > Clear User Data > Routes. Recording...

Owner s Manual PDF
Page 12
... calculating heading information. Time Format: Sets a 12-hour, 24-hour, or UTC time format. Turn Transition Dist.: Sets how far before the turn transition to display depth below keel and depth below transducer. 2 Select Settings > My Vessel > Keel Offset. 3 Select or based on which a given location reading appears. Enter a 0 in step 2. This is shallower than the specified depth. Shallow Water: Sounds when the water depth is the temperature offset. Do not change this setting unless you are using...
... calculating heading information. Time Format: Sets a 12-hour, 24-hour, or UTC time format. Turn Transition Dist.: Sets how far before the turn transition to display depth below keel and depth below transducer. 2 Select Settings > My Vessel > Keel Offset. 3 Select or based on which a given location reading appears. Enter a 0 in step 2. This is shallower than the specified depth. Shallow Water: Sounds when the water depth is the temperature offset. Do not change this setting unless you are using...
Owner s Manual PDF
Page 13
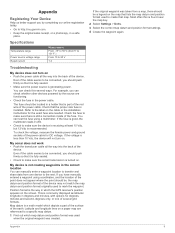
Specifications Temperature range Power source voltage range Rated current Measurement From -15° to 55°C (from 5° to 131°F ) From 10 to 20 V 1 A Troubleshooting My device does not turn on. You can check this is found near the map key. 2 Select Settings > Units. 3 Select the correct map datum and position format settings. 4 Create the waypoint again. Refer to a specific map datum. 1 Find out which map datum and position format was used when the original...
Specifications Temperature range Power source voltage range Rated current Measurement From -15° to 55°C (from 5° to 131°F ) From 10 to 20 V 1 A Troubleshooting My device does not turn on. You can check this is found near the map key. 2 Select Settings > Units. 3 Select the correct map datum and position format settings. 4 Create the waypoint again. Refer to a specific map datum. 1 Find out which map datum and position format was used when the original...

Owner s Manual PDF
Page 14
...measure 8 user data, deleting 7 V voltage 8 W water, temperature offset 8 waypoints 5, 6, 9 creating 5, 6 deleting 6 editing 6 man overboard 6 sharing 6 sonar 3 Z zoom 1 sonar 3 Index Index A alarms 8 anchor drag 8 arrival 8 navigation 8 off course 8 sonar 8 anchor drag alarm 8 arrival alarm 8 B backlight 1 beeper 1 C clock 8 alarm 8 color mode 1 D data fields 5 deleting, all user data 7 device keys 1 registration 9 display settings 7 E event log 7 F factory settings 7, 8 G Garmin ClearVü 2 GPS settings 7 signals 1 GPS accuracy 8 H home screen, customizing 1 K keel offset 7 keys 1 power...
...measure 8 user data, deleting 7 V voltage 8 W water, temperature offset 8 waypoints 5, 6, 9 creating 5, 6 deleting 6 editing 6 man overboard 6 sharing 6 sonar 3 Z zoom 1 sonar 3 Index Index A alarms 8 anchor drag 8 arrival 8 navigation 8 off course 8 sonar 8 anchor drag alarm 8 arrival alarm 8 B backlight 1 beeper 1 C clock 8 alarm 8 color mode 1 D data fields 5 deleting, all user data 7 device keys 1 registration 9 display settings 7 E event log 7 F factory settings 7, 8 G Garmin ClearVü 2 GPS settings 7 signals 1 GPS accuracy 8 H home screen, customizing 1 K keel offset 7 keys 1 power...

