
User Guide
Page 1
FPD1975W 19-INCH WIDESCREEN LCD MONITOR USERGUIDE ®
FPD1975W 19-INCH WIDESCREEN LCD MONITOR USERGUIDE ®
User Guide
Page 8
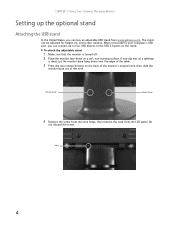
...monitor face-down over the edge of the table. 3 Press the two release buttons on the stand. Release Button Release Button 4 Remove the screw from the neck hinge, then remove the neck from www.gateway....com. To attach the adjustable stand: 1 Make sure that the monitor is ideal. When connected to the USB 2.0 ports on the back of the monitor's original neck, then slide the monitor...for height, tilt, and screen rotation. Let the monitor base hang down on a soft, non-marring surface. CHAPTER 1: Using Your Gateway Flat-panel Monitor Setting up to four USB devices to your computer...
...monitor face-down over the edge of the table. 3 Press the two release buttons on the stand. Release Button Release Button 4 Remove the screw from the neck hinge, then remove the neck from www.gateway....com. To attach the adjustable stand: 1 Make sure that the monitor is ideal. When connected to the USB 2.0 ports on the back of the monitor's original neck, then slide the monitor...for height, tilt, and screen rotation. Let the monitor base hang down on a soft, non-marring surface. CHAPTER 1: Using Your Gateway Flat-panel Monitor Setting up to four USB devices to your computer...
User Guide
Page 10
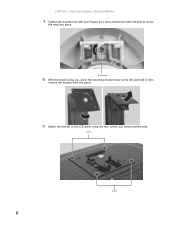
CHAPTER 1: Using Your Gateway Flat-panel Monitor 9 Tighten the thumbscrew with your fingers (or a flat screwdriver) under the base to the LCD panel using the four screws you , press the mounting bracket lever to the left and hold it, then remove the bracket from the stand. 11 Attach the bracket to secure the neck into place. Thumbscrew 10 With the stand facing you removed previously. Screws Screws 6
CHAPTER 1: Using Your Gateway Flat-panel Monitor 9 Tighten the thumbscrew with your fingers (or a flat screwdriver) under the base to the LCD panel using the four screws you , press the mounting bracket lever to the left and hold it, then remove the bracket from the stand. 11 Attach the bracket to secure the neck into place. Thumbscrew 10 With the stand facing you removed previously. Screws Screws 6
User Guide
Page 24
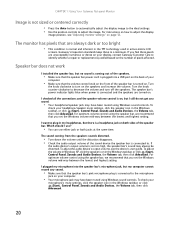
... checked all the connections and the speaker volume control is normal and inherent in the TFT technology used in active-matrix LCD screens. The speaker bar's power indicator lights blue when power is connected to identify whether a repair or replacement is ...display image position, see the device's user guide. The sound coming out of the speakers. • Make sure that the speaker bar power cord is plugged into the speaker bar's microphone jack, but I plugged my microphone into a USB port on the number of the speaker bar. CHAPTER 1: Using Your Gateway Flat-panel Monitor...
... checked all the connections and the speaker volume control is normal and inherent in the TFT technology used in active-matrix LCD screens. The speaker bar's power indicator lights blue when power is connected to identify whether a repair or replacement is ...display image position, see the device's user guide. The sound coming out of the speakers. • Make sure that the speaker bar power cord is plugged into the speaker bar's microphone jack, but I plugged my microphone into a USB port on the number of the speaker bar. CHAPTER 1: Using Your Gateway Flat-panel Monitor...


