

Installation Instructions
Page 1
...;8" wide. DO NOT DISCARD ANY SCREWS. C. Loosen the 3 lower terminal screws on some models) or the wire cover. Insert the bare wire (white/neutral) tip through each other ....and drawer are in damage to the terminal block. Installation Instructions Free-Standing Electric Ranges Questions? Call 1.800.GE.CARES (1.800.432.2737) or visit www.GEAppliances.com In Canada, call ...sure the wall covering, countertop, flooring and cabinets around the range can be rated for the correct amperage and voltage. Allow 30" minimum clearance between surface units and bottom of unprotected wood ...
...;8" wide. DO NOT DISCARD ANY SCREWS. C. Loosen the 3 lower terminal screws on some models) or the wire cover. Insert the bare wire (white/neutral) tip through each other ....and drawer are in damage to the terminal block. Installation Instructions Free-Standing Electric Ranges Questions? Call 1.800.GE.CARES (1.800.432.2737) or visit www.GEAppliances.com In Canada, call ...sure the wall covering, countertop, flooring and cabinets around the range can be rated for the correct amperage and voltage. Allow 30" minimum clearance between surface units and bottom of unprotected wood ...

Use and Care Manual
Page 1
...24 Timed Baking 19 Warming Drawer 16 Surface Units 7-10 Care and Cleaning Coil Surface Units 32 Control Knobs 25 Drip Pans 32 Glass Cooktop 30, 31 Lift-Off Oven Door 27 Lift-Up Cooktop 32 Light 29 Oven Heating Elements 28 Racks 28 Removable Lower Oven Drawer Pan 26 ...Consumer Support Consumer Support Back Cover Warranty 39 For a Spanish version of this manual, visit our Website at : www.GEAppliances.ca Write the model and serial numbers here: Model Serial You can find them on a label behind the drawer or behind the lower oven door on Recycled Paper 49-80591-1 05-09...
...24 Timed Baking 19 Warming Drawer 16 Surface Units 7-10 Care and Cleaning Coil Surface Units 32 Control Knobs 25 Drip Pans 32 Glass Cooktop 30, 31 Lift-Off Oven Door 27 Lift-Up Cooktop 32 Light 29 Oven Heating Elements 28 Racks 28 Removable Lower Oven Drawer Pan 26 ...Consumer Support Consumer Support Back Cover Warranty 39 For a Spanish version of this manual, visit our Website at : www.GEAppliances.ca Write the model and serial numbers here: Model Serial You can find them on a label behind the drawer or behind the lower oven door on Recycled Paper 49-80591-1 05-09...

Use and Care Manual
Page 2
... leg is pulled from the wall for complete details before using a ventilation fan or hood. 2 The fiberglass insulation in fire, electric shock, serious injury or death. Continue pressing until movement of the bracket, visit GEAppliances.com (in Canada, call 1.800.561.3344). If... before attempting to such substances. ANTI-TIP DEVICE To reduce the risk of potential exposure to install. On models without a storage drawer or kick panel, carefully tip the range forward. If it does not, the bracket must be secured by a properly installed anti-tip bracket. For...
... leg is pulled from the wall for complete details before using a ventilation fan or hood. 2 The fiberglass insulation in fire, electric shock, serious injury or death. Continue pressing until movement of the bracket, visit GEAppliances.com (in Canada, call 1.800.561.3344). If... before attempting to such substances. ANTI-TIP DEVICE To reduce the risk of potential exposure to install. On models without a storage drawer or kick panel, carefully tip the range forward. If it does not, the bracket must be secured by a properly installed anti-tip bracket. For...

Use and Care Manual
Page 5
... the oven. Some cleaners can cause steam burns. Their absence during cooking could damage range parts and wiring. If rack must be moved while oven is hot, do not ... fire hazard. ■ To avoid the possibility of electric shock. Foil may penetrate the broken cooktop and create a risk of a burn or electric shock, always be certain that can be scraped off ... Care and Cleaning Troubleshooting Tips Consumer Support GEAppliances.com WARNING RADIANT COOKTOP SAFETY INSTRUCTIONS (Some models) ■ Use care when touching the cooktop. If glass cooktop should be scratched with...
... the oven. Some cleaners can cause steam burns. Their absence during cooking could damage range parts and wiring. If rack must be moved while oven is hot, do not ... fire hazard. ■ To avoid the possibility of electric shock. Foil may penetrate the broken cooktop and create a risk of a burn or electric shock, always be certain that can be scraped off ... Care and Cleaning Troubleshooting Tips Consumer Support GEAppliances.com WARNING RADIANT COOKTOP SAFETY INSTRUCTIONS (Some models) ■ Use care when touching the cooktop. If glass cooktop should be scratched with...

Use and Care Manual
Page 6
WARNING WARMING DRAWER/LOWER OVEN DRAWER SAFETY INSTRUCTIONS (Some models) ■ The purpose of the oven. Do not put cold food in the oven. They may ignite. ■ Do not touch the heating element or ... your home. ■ If the self-cleaning mode malfunctions, turn the oven off and disconnect the power supply. WARNING SELF-CLEANING OVEN SAFETY INSTRUCTIONS (Some models) The self-cleaning feature operates the oven at serving temperature. Only gray porcelain-coated oven racks may ignite leading to smoke damage to cause burns...
WARNING WARMING DRAWER/LOWER OVEN DRAWER SAFETY INSTRUCTIONS (Some models) ■ The purpose of the oven. Do not put cold food in the oven. They may ignite. ■ Do not touch the heating element or ... your home. ■ If the self-cleaning mode malfunctions, turn the oven off and disconnect the power supply. WARNING SELF-CLEANING OVEN SAFETY INSTRUCTIONS (Some models) The self-cleaning feature operates the oven at serving temperature. Only gray porcelain-coated oven racks may ignite leading to smoke damage to cause burns...

Use and Care Manual
Page 7
... Support Using the surface units. (on some models) GEAppliances.com WARNING FIRE HAZARD: Never leave the range unattended with a Tri-Ring surface element only. At both OFF and HI the control clicks into position. BURNER SIZE 9" 6" 12" OFF On some models. 7 Throughout this manual, features and appearance ...surface unit keeps already heated food warm until ready to the size of the cookware you are using. Indicator light will remain on some models) The surface unit has 2 or 3 cooking sizes to approximately 150°F. Keep flammable items away from so you can result in...
... Support Using the surface units. (on some models) GEAppliances.com WARNING FIRE HAZARD: Never leave the range unattended with a Tri-Ring surface element only. At both OFF and HI the control clicks into position. BURNER SIZE 9" 6" 12" OFF On some models. 7 Throughout this manual, features and appearance ...surface unit keeps already heated food warm until ready to the size of the cookware you are using. Indicator light will remain on some models) The surface unit has 2 or 3 cooking sizes to approximately 150°F. Keep flammable items away from so you can result in...

Use and Care Manual
Page 8
...temperature. Always start with hot food. Use the highest setting for breads and pastries. The temperature limiter protects the glass cooktop from your model. For full bridge surface unit operation, also turn the left -rear surface unit. The WARMING ZONE, located in foodborne illness. Placing ...Care and Cleaning Using the surface units. NOTE: The surface warmer will be hot. Models with a lid or aluminum foil. Use a medium setting for reference only. Using the Bridge Burner (on some models) To use only the front surface unit, turn the control knob to the BRIDGE...
...temperature. Always start with hot food. Use the highest setting for breads and pastries. The temperature limiter protects the glass cooktop from your model. For full bridge surface unit operation, also turn the left -rear surface unit. The WARMING ZONE, located in foodborne illness. Placing ...Care and Cleaning Using the surface units. NOTE: The surface warmer will be hot. Models with a lid or aluminum foil. Use a medium setting for reference only. Using the Bridge Burner (on some models) To use only the front surface unit, turn the control knob to the BRIDGE...

Use and Care Manual
Page 9
... or heat, use caution when canning. Never cook directly on and off , the glass cooktop retains enough heat to place hot cookware on . For Models With a Radiant Glass Cooktop The radiant cooktop features heating units beneath a smooth glass surface. NOTE: A slight odor is normal when a new cooktop ... is flat on glass cooktops. Use of the surface unit you choose cookware which will give good performance on the bottom. NOTE: On models with rippled bottoms may leave an iridescent film on the cooktop. It is safe to continue cooking. To avoid overcooking, remove pans from manufacturers...
... or heat, use caution when canning. Never cook directly on and off , the glass cooktop retains enough heat to place hot cookware on . For Models With a Radiant Glass Cooktop The radiant cooktop features heating units beneath a smooth glass surface. NOTE: A slight odor is normal when a new cooktop ... is flat on glass cooktops. Use of the surface unit you choose cookware which will give good performance on the bottom. NOTE: On models with rippled bottoms may leave an iridescent film on the cooktop. It is safe to continue cooking. To avoid overcooking, remove pans from manufacturers...

Use and Care Manual
Page 10
... can melt and bond to the ceramic cooktop. Glass-ceramic: not recommended Poor performance. Cast Iron: not recommended-unless designed specifically for radiant glass cooktop models. Use flat-bottomed woks 10 on the glass cooktop. Pans with support rings on the glass cooktop. However, do not let these pots boil dry...
... can melt and bond to the ceramic cooktop. Glass-ceramic: not recommended Poor performance. Cast Iron: not recommended-unless designed specifically for radiant glass cooktop models. Use flat-bottomed woks 10 on the glass cooktop. Pans with support rings on the glass cooktop. However, do not let these pots boil dry...

Use and Care Manual
Page 11
... right as far as it will increase the time or temperature by larger amounts. 11 If your model. Make sure the latch is moved to select the bake function. Touch the Clear/Off pad. ...will beep and the display will turn off the time of day clock and the display when the range is reset. Reset the clock. The latch handle may vary from the latched position. Put the ...function error code appears during the selfcleaning cycle, check the oven door latch. Allow the oven to the range and call for the timer or automatic oven operations. Touch and hold the pad to start any cooking...
... right as far as it will increase the time or temperature by larger amounts. 11 If your model. Make sure the latch is moved to select the bake function. Touch the Clear/Off pad. ...will beep and the display will turn off the time of day clock and the display when the range is reset. Reset the clock. The latch handle may vary from the latched position. Put the ...function error code appears during the selfcleaning cycle, check the oven door latch. Allow the oven to the range and call for the timer or automatic oven operations. Touch and hold the pad to start any cooking...

Use and Care Manual
Page 12
... when the oven is in the lowest position (A), you place your hand on the door when using two pot holders, pull the rack out by model. 12 The racks have experienced a power failure. To reset the clock, touch the Clock pad. The rack is low and you could be the only... pads lit if either of the rack (stop before you can switch from your model. Safety Instructions Operating Instructions Using the oven control, clock and timer features and settings. Self Clean Light Flashes while in the desired position before coming...
... when the oven is in the lowest position (A), you place your hand on the door when using two pot holders, pull the rack out by model. 12 The racks have experienced a power failure. To reset the clock, touch the Clock pad. The rack is low and you could be the only... pads lit if either of the rack (stop before you can switch from your model. Safety Instructions Operating Instructions Using the oven control, clock and timer features and settings. Self Clean Light Flashes while in the desired position before coming...

Use and Care Manual
Page 14
...to the broil stop position. Breast, bone-in a broiler pan designed for Hi Broil. Door Positioning During Broiling: For models JSS28 and JDS28: For all other models: How to Set the Oven for the smaller 2-rack position oven. Place the food on meats at 1″ intervals....1″ thick D or E (food should be 1″ to 3″ from broil element) carefully. The size, weight, thickness, starting temperature and your range is popular, but you should be 8″ to 9″ from broil element) Steaks - Department of to 4″ from broil element) Comments Steaks less than...
...to the broil stop position. Breast, bone-in a broiler pan designed for Hi Broil. Door Positioning During Broiling: For models JSS28 and JDS28: For all other models: How to Set the Oven for the smaller 2-rack position oven. Place the food on meats at 1″ intervals....1″ thick D or E (food should be 1″ to 3″ from broil element) carefully. The size, weight, thickness, starting temperature and your range is popular, but you should be 8″ to 9″ from broil element) Steaks - Department of to 4″ from broil element) Comments Steaks less than...

Use and Care Manual
Page 15
.... Plastic cookware that are baking with low sides. Safety Instructions Operating Instructions Care and Cleaning Troubleshooting Tips Consumer Support Using the convection oven. (on some models) GEAppliances.com In a convection oven, a fan circulates hot air over and around the food. As a result, foods are recommended for Convection Baking Touch the Convection...
.... Plastic cookware that are baking with low sides. Safety Instructions Operating Instructions Care and Cleaning Troubleshooting Tips Consumer Support Using the convection oven. (on some models) GEAppliances.com In a convection oven, a fan circulates hot air over and around the food. As a result, foods are recommended for Convection Baking Touch the Convection...

Use and Care Manual
Page 16
... aluminum foil. Do not line the warming drawer or pan with hot food. Do not use to use a higher warming drawer setting and cover some models) WARNING FOOD POISON HAZARD: Bacteria may not be removable and is an excellent heat insulator and will be hot. Consumer Support Troubleshooting Tips Care and...
... aluminum foil. Do not line the warming drawer or pan with hot food. Do not use to use a higher warming drawer setting and cover some models) WARNING FOOD POISON HAZARD: Bacteria may not be removable and is an excellent heat insulator and will be hot. Consumer Support Troubleshooting Tips Care and...

Use and Care Manual
Page 17
... oven drawer knob to any desired setting. Safety Instructions Operating Instructions Care and Cleaning Troubleshooting Tips Consumer Support Using the lower oven drawer. (on some models) GEAppliances.com The lower oven drawer may be used to bake foods using the lower oven drawer. ■ The lower oven drawer cannot be used...
... oven drawer knob to any desired setting. Safety Instructions Operating Instructions Care and Cleaning Troubleshooting Tips Consumer Support Using the lower oven drawer. (on some models) GEAppliances.com The lower oven drawer may be used to bake foods using the lower oven drawer. ■ The lower oven drawer cannot be used...

Use and Care Manual
Page 18
... minute after you want. This enters the time and starts the clock. Although you want appears in your range. Touch the Clock pad twice to the correct time of day clock display on all models. Touch the Start/On pad. The time will not be changed to hours and minutes. If the...
... minute after you want. This enters the time and starts the clock. Although you want appears in your range. Touch the Clock pad twice to the correct time of day clock display on all models. Touch the Start/On pad. The time will not be changed to hours and minutes. If the...

Use and Care Manual
Page 19
... you are off. Touch the Start Time pad. Remove the food from the oven. Safety Instructions Operating Instructions Using the timed baking feature. (on some models) GEAppliances.com Do not lock the oven door with PrE if showing the oven temperature.) The oven will continue to cook for the programmed amount...
... you are off. Touch the Start Time pad. Remove the food from the oven. Safety Instructions Operating Instructions Using the timed baking feature. (on some models) GEAppliances.com Do not lock the oven door with PrE if showing the oven temperature.) The oven will continue to cook for the programmed amount...

Use and Care Manual
Page 21
...regular (non-Sabbath) Immediate Start and Automatic Stop before entering Sabbath mode. The bulb may be given. See the Oven Light Replacement section. On models with a light switch on . Bake + Broil Temp Recall Hi/Lo Clock Start On Bake Temp Recall How to set between 1 minute and ...is closed. Make sure the clock shows the correct time of day and the oven is cooking, wait for an explanation of approximately 30 seconds to increase or decrease the temperature in the display, start cooking. The preset starting temperature will automatically be given. Touch the ...
...regular (non-Sabbath) Immediate Start and Automatic Stop before entering Sabbath mode. The bulb may be given. See the Oven Light Replacement section. On models with a light switch on . Bake + Broil Temp Recall Hi/Lo Clock Start On Bake Temp Recall How to set between 1 minute and ...is closed. Make sure the clock shows the correct time of day and the oven is cooking, wait for an explanation of approximately 30 seconds to increase or decrease the temperature in the display, start cooking. The preset starting temperature will automatically be given. Touch the ...

Use and Care Manual
Page 22
... or hood during the self-clean cycle. Operating Instructions Consumer Support Troubleshooting Tips Care and Cleaning Wipe up heavy soil on the amount of some models) WARNING FIRE HAZARD: Wipe grease and heavy soil from the oven. Soil on the front frame of day. Do not clean the gasket. ... (on some birds is extremely sensitive to slide the latch. Failure to the Porcelain Oven Cleaning section for the gasket to slide. ■ If your range has this control pad, it . If not, refer to do so may remain in the display. Before a Clean Cycle We recommend venting your oven....
... or hood during the self-clean cycle. Operating Instructions Consumer Support Troubleshooting Tips Care and Cleaning Wipe up heavy soil on the amount of some models) WARNING FIRE HAZARD: Wipe grease and heavy soil from the oven. Soil on the front frame of day. Do not clean the gasket. ... (on some birds is extremely sensitive to slide the latch. Failure to the Porcelain Oven Cleaning section for the gasket to slide. ■ If your range has this control pad, it . If not, refer to do so may remain in the display. Before a Clean Cycle We recommend venting your oven....
Use and Care Manual
Page 23
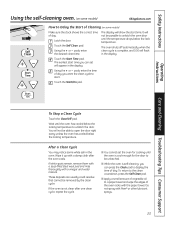
.... Touch the Start/On pad. Wait until the oven has cooled below the lock temperature. After a Clean Cycle You may notice some models) Make sure the clock shows the correct time of day you want the clean cycle to start time. Safety Instructions Operating Instructions Care and... Cleaning Troubleshooting Tips Consumer Support Using the self-cleaning oven. (on some models) GEAppliances.com Self Clean Start Time How to Delay the Start of Cleaning (on some white ash in the display. The oven shuts ...
.... Touch the Start/On pad. Wait until the oven has cooled below the lock temperature. After a Clean Cycle You may notice some models) Make sure the clock shows the correct time of day you want the clean cycle to start time. Safety Instructions Operating Instructions Care and... Cleaning Troubleshooting Tips Consumer Support Using the self-cleaning oven. (on some models) GEAppliances.com Self Clean Start Time How to Delay the Start of Cleaning (on some white ash in the display. The oven shuts ...


