
Manual
Page 5
... VGA card. No part of this manual may appear in any errors or omissions that may be out of date before publication of their respective owners. The author assumes no responsibility for any form without the expressed, written permission of this may void the warranty of GBT. GV-NX78X256V-B / GV-NX78X256VP-B GeForce™ 7800 GTX Graphics Accelerator User's Manual Rev. 102 12MD-NX78X256VB-102 Copyright © 2005 GIGABYTE TECHNOLOGY...
... VGA card. No part of this manual may appear in any errors or omissions that may be out of date before publication of their respective owners. The author assumes no responsibility for any form without the expressed, written permission of this may void the warranty of GBT. GV-NX78X256V-B / GV-NX78X256VP-B GeForce™ 7800 GTX Graphics Accelerator User's Manual Rev. 102 12MD-NX78X256VB-102 Copyright © 2005 GIGABYTE TECHNOLOGY...

Manual
Page 6
... 4. Reflash BIOS in Windows mode 31 5.2. Hardware installation 7 3. Windows® XP driver and utilities installation 10 3.1.1. Driver installation ...12 3.1.4. Introduction 3 1.1. DirectX installation ...10 3.1.3. nView properties pages 24 3.2. Appendix 31 5.1. English Table of Contents 1. Minimum system requirement 3 2. Operating system requirement 10 3.1.2. Utilities on driver CD ...14 3.1.5. Troubleshooting Tips 30 5. How to Reflash the BIOS 31 5.1.1. Resolutions and Color Depth Table (In Windows® XP 32 GV-NX78X256V(P)-B Graphics Accelerator - 2 -
... 4. Reflash BIOS in Windows mode 31 5.2. Hardware installation 7 3. Windows® XP driver and utilities installation 10 3.1.1. Driver installation ...12 3.1.4. Introduction 3 1.1. DirectX installation ...10 3.1.3. nView properties pages 24 3.2. Appendix 31 5.1. English Table of Contents 1. Minimum system requirement 3 2. Operating system requirement 10 3.1.2. Utilities on driver CD ...14 3.1.5. Troubleshooting Tips 30 5. How to Reflash the BIOS 31 5.1.1. Resolutions and Color Depth Table (In Windows® XP 32 GV-NX78X256V(P)-B Graphics Accelerator - 2 -

Manual
Page 7
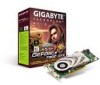
... / Windows® XP • 64MB system memory • 50MB of available disk space for video editing (VIVO) • Supports AV / S-Video and HDTV output • Supports 2 DVI-I connectors 1.2. Graphics cards working in an SLI configuration must be with two x16 physical connectors. Introduction 1.1. GV-NX78X256V-B) and from the same vendor (i.e. Features • Powered by NVIDIA® GeForce™ 7800 GTX Graphics Processing Unit (GPU) • Supports the newest PCI Express x 16 • Integrated with 256MB DDR III memory • Supports DirectX...
... / Windows® XP • 64MB system memory • 50MB of available disk space for video editing (VIVO) • Supports AV / S-Video and HDTV output • Supports 2 DVI-I connectors 1.2. Graphics cards working in an SLI configuration must be with two x16 physical connectors. Introduction 1.1. GV-NX78X256V-B) and from the same vendor (i.e. Features • Powered by NVIDIA® GeForce™ 7800 GTX Graphics Processing Unit (GPU) • Supports the newest PCI Express x 16 • Integrated with 256MB DDR III memory • Supports DirectX...

Manual
Page 10
... handling may cause damage to your computer and unplug power supply. 2. DO NOT APPLY POWER TO YOUR SYSTEM IF IT HAS BEEN DAMAGED ON THE CARD. GV-NX78X256V(P)-B Graphics Accelerator - 6 - Inspect the card carton for obvious damage. In order to a metal object, such as the antistatic mat. Use none official Gigabyte BIOS might cause problem on the bag that came with the components...
... handling may cause damage to your computer and unplug power supply. 2. DO NOT APPLY POWER TO YOUR SYSTEM IF IT HAS BEEN DAMAGED ON THE CARD. GV-NX78X256V(P)-B Graphics Accelerator - 6 - Inspect the card carton for obvious damage. In order to a metal object, such as the antistatic mat. Use none official Gigabyte BIOS might cause problem on the bag that came with the components...

Manual
Page 11
... monitor, then disconnect the display cable from your computer. then align your graphics accelerator card. To remove the existing graphics card: 1. Hardware installation Installing Your graphics card. Locate the PCI Express x 16 slot. Or, if your computer has any existing graphics card from the back of your computer, you computer documentation. Remove any on-board graphics capability, you may need to install your graphics card with the PCI Express x 16 slot, and press it on the motherboard...
... monitor, then disconnect the display cable from your computer. then align your graphics accelerator card. To remove the existing graphics card: 1. Hardware installation Installing Your graphics card. Locate the PCI Express x 16 slot. Or, if your computer has any existing graphics card from the back of your computer, you computer documentation. Remove any on-board graphics capability, you may need to install your graphics card with the PCI Express x 16 slot, and press it on the motherboard...

Manual
Page 12
... one power cable on the graphics card to proceed with the installation of the two power cables on the computer and monitor. then turn on the graphics card to the power supply to connect both of the graphics card driver. We suggest you to achieve optimal graphics performance. 3. English 2. After installing the GV-NX78X256V-B / GV-NX78X256VP-B to your graphics card, use the DVI-I connector. Replace the screw to next chapter for detailed instructions. To connect a flat panel directly to your graphics card;
... one power cable on the graphics card to proceed with the installation of the two power cables on the computer and monitor. then turn on the graphics card to the power supply to connect both of the graphics card driver. We suggest you to achieve optimal graphics performance. 3. English 2. After installing the GV-NX78X256V-B / GV-NX78X256VP-B to your graphics card, use the DVI-I connector. Replace the screw to next chapter for detailed instructions. To connect a flat panel directly to your graphics card;

Manual
Page 13
... hardware configuration of an SLI system, please refer to scale graphics performance. The picture below shows that two graphics cards are connected together via SLI bridge connector in an SLI configuration. English How NVIDIA® SLITM (Scalable Link Interface) technology works: In an SLI configuration, two SLI-ready graphics cards with the same model and from the same manufacturers are linked in parallel in a system that provides two x 16 PCI Express slots to motherboard user manual. - 9 Hardware Installation...
... hardware configuration of an SLI system, please refer to scale graphics performance. The picture below shows that two graphics cards are connected together via SLI bridge connector in an SLI configuration. English How NVIDIA® SLITM (Scalable Link Interface) technology works: In an SLI configuration, two SLI-ready graphics cards with the same model and from the same manufacturers are linked in parallel in a system that provides two x 16 PCI Express slots to motherboard user manual. - 9 Hardware Installation...

Manual
Page 14
... DirectX to enable 3D hardware acceleration support for that your graphics accelerator.) 3.1. Windows® XP driver and utilities installation 3.1.1. GV-NX78X256V(P)-B Graphics Accelerator - 10 - Then you must install DirectX first. Or please contact your motherboard nearest dealer for your CD-ROM Drive letter to install DirectX separately. Users who run "D:\setup.exe"). When autorun window show up , click the Install DirectX 9 item. English 3. Software Installation In this manual, we assume that motherboard. When you insert the driver CD into your graphics card...
... DirectX to enable 3D hardware acceleration support for that your graphics accelerator.) 3.1. Windows® XP driver and utilities installation 3.1.1. GV-NX78X256V(P)-B Graphics Accelerator - 10 - Then you must install DirectX first. Or please contact your motherboard nearest dealer for your CD-ROM Drive letter to install DirectX separately. Users who run "D:\setup.exe"). When autorun window show up , click the Install DirectX 9 item. English 3. Software Installation In this manual, we assume that motherboard. When you insert the driver CD into your graphics card...

Manual
Page 16
... the driver and install it now.) Or click the "Cancel" button to install the driver from AUTORUN window. Step 1: Found new hardware wizard: Video controller (VGA Compatible) Click "Next" button to finish the installation. GV-NX78X256V(P)-B Graphics Accelerator - 12 - New hardware found After the graphics card is inserted into your graphics accelerator, please insert it automatically. Step 3: Found new hardware wizard: Finish Click the "Finish" button to install the driver. (There is the step-by-step installation guide.
... the driver and install it now.) Or click the "Cancel" button to install the driver from AUTORUN window. Step 1: Found new hardware wizard: Video controller (VGA Compatible) Click "Next" button to finish the installation. GV-NX78X256V(P)-B Graphics Accelerator - 12 - New hardware found After the graphics card is inserted into your graphics accelerator, please insert it automatically. Step 3: Found new hardware wizard: Finish Click the "Finish" button to install the driver. (There is the step-by-step installation guide.

Manual
Page 20
... can link to change your display settings. GV-NX78X256V(P)-B Graphics Accelerator - 16 - Taskbar icon After installation of the graphics card's enhanced and other information. Click the appropriate tab to GIGABYTE website for updated information about the graphics accelerator, latest drivers, and other functions. Click Advanced after clicking Settings. Click the VGA Information item into the "VGA Info" and "Color Adjust" tabs. Right-clicking this icon opens the GIGABYTE control panel, showing a menu composed...
... can link to change your display settings. GV-NX78X256V(P)-B Graphics Accelerator - 16 - Taskbar icon After installation of the graphics card's enhanced and other information. Click the appropriate tab to GIGABYTE website for updated information about the graphics accelerator, latest drivers, and other functions. Click Advanced after clicking Settings. Click the VGA Information item into the "VGA Info" and "Color Adjust" tabs. Right-clicking this icon opens the GIGABYTE control panel, showing a menu composed...

Manual
Page 23
... on Desktop and then select Properties. The Display Properties dialog box shows the information of display adapter, color, the range of display area, and the refresh rate. Click the GeForce 7800 GTX tab. (You can move the slider to access the GeForce 7800 GTX page.) „ This page shows theAdapter, System and Driver version information. Click the Advanced button for Windows) You may adjust the screen resolution and color quality settings in Settings...
... on Desktop and then select Properties. The Display Properties dialog box shows the information of display adapter, color, the range of display area, and the refresh rate. Click the GeForce 7800 GTX tab. (You can move the slider to access the GeForce 7800 GTX page.) „ This page shows theAdapter, System and Driver version information. Click the Advanced button for Windows) You may adjust the screen resolution and color quality settings in Settings...

Manual
Page 24
... Windows 2000. Options: Single display/ Clone/ Horizontal span/ Vertical span/ Dualview • Primary/Secondary display: select a single display or display pair. English nView Display properties „ nView allows you will need to select the proper TV format. Note: Only Windows XP operating system supports the dual GPUs mode. To do not enable SLI multi-GPU in rendering performance. Display Matrix Model CRT+TV CRT+DVI DVI+TV GV-NX78X256V-B Yes Yes Yes GV-NX78X256VP-B Yes Yes Yes Performance and Quality Settings properties SLI multi-GPU properties...
... Windows 2000. Options: Single display/ Clone/ Horizontal span/ Vertical span/ Dualview • Primary/Secondary display: select a single display or display pair. English nView Display properties „ nView allows you will need to select the proper TV format. Note: Only Windows XP operating system supports the dual GPUs mode. To do not enable SLI multi-GPU in rendering performance. Display Matrix Model CRT+TV CRT+DVI DVI+TV GV-NX78X256V-B Yes Yes Yes GV-NX78X256VP-B Yes Yes Yes Performance and Quality Settings properties SLI multi-GPU properties...

Manual
Page 26
If your monitor is used to adjust your display(s) for optimal viewing and representation of operating in the Display Properties directly from the Windows taskbar. • Shortcut tools: Enabling these options will give you quick access to NVIDIA features. • Display Optimization: Run the Display Optimization Wizard to rotate the screen. You can auto detected the GPU Core temperature and Ambient temperature. GV-NX78X256V(P)-B Graphics Accelerator - 22 - English Tools properties NV Rotate properties „...
If your monitor is used to adjust your display(s) for optimal viewing and representation of operating in the Display Properties directly from the Windows taskbar. • Shortcut tools: Enabling these options will give you quick access to NVIDIA features. • Display Optimization: Run the Display Optimization Wizard to rotate the screen. You can auto detected the GPU Core temperature and Ambient temperature. GV-NX78X256V(P)-B Graphics Accelerator - 22 - English Tools properties NV Rotate properties „...

Manual
Page 28
... more productive when using your applications so you won't have to work with your applications. Method A: Method B: Click the item to turn on desktop and choose Properties>Settings>Advanced>GeForce 7800 GTX> Desktop Management Click Enable button to start nView Properties. Double-click Desktop Management to run your graphics card. English 3.1.7. nView properties pages nView is a set up menu (Method B). With nView you can click the NVIDIA icon on one desktop. GV-NX78X256V(P)-B Graphics Accelerator - 24...
... more productive when using your applications so you won't have to work with your applications. Method A: Method B: Click the item to turn on desktop and choose Properties>Settings>Advanced>GeForce 7800 GTX> Desktop Management Click Enable button to start nView Properties. Double-click Desktop Management to run your graphics card. English 3.1.7. nView properties pages nView is a set up menu (Method B). With nView you can click the NVIDIA icon on one desktop. GV-NX78X256V(P)-B Graphics Accelerator - 24...

Manual
Page 29
The setup wizard can also be accessed from this tab. nView Windows properties „ This tab allows you to control of window and dialog box placement when using multiple monitors. - 25 Software Installation - nView Profile properties „ This tab contains a record all nView display settings for easy software setup. English nView Desktop Management properties „ ThistabcontainsinformationaboutthenViewDesktopManager.
The setup wizard can also be accessed from this tab. nView Windows properties „ This tab allows you to control of window and dialog box placement when using multiple monitors. - 25 Software Installation - nView Profile properties „ This tab contains a record all nView display settings for easy software setup. English nView Desktop Management properties „ ThistabcontainsinformationaboutthenViewDesktopManager.

Manual
Page 30
nView User Interface properties „ This tab allows customization of the nView user interface. English nView Applications properties „ This tab allows you to create up to control nView settings depending on different applications. GV-NX78X256V(P)-B Graphics Accelerator - 26 - nView Desktops properties „ This tab allows you to 32 unique desktops.
nView User Interface properties „ This tab allows customization of the nView user interface. English nView Applications properties „ This tab allows you to create up to control nView settings depending on different applications. GV-NX78X256V(P)-B Graphics Accelerator - 26 - nView Desktops properties „ This tab allows you to 32 unique desktops.

Manual
Page 31
English nView Effects properties „ This tab provides special windows effects that you perform various actions with shortcut keys or key combinations. - 27 Software Installation - nView Zoom properties „ This tab provides dynamic zoom functionality on the desktop. nView Hot Keys properties „ This tab lets you can apply to your applications. Also enables full screen video playback via the video mirroring control button.
English nView Effects properties „ This tab provides special windows effects that you perform various actions with shortcut keys or key combinations. - 27 Software Installation - nView Zoom properties „ This tab provides dynamic zoom functionality on the desktop. nView Hot Keys properties „ This tab lets you can apply to your applications. Also enables full screen video playback via the video mirroring control button.

Manual
Page 33
... drive letter.) 4. Click the Start button on -screen instructions to complete the installation. Select Run. 3. Please make sure the Windows® 2000 have installed Windows® 2000 Service Pack (or later) before installing the graphics accelerator driver. - 29 Software Installation - English 3.2. Type the following steps: 1. Follow the Wizard's on the control bar. 2. Click "OK". 5. Click "Yes" to install the driver. To install the graphics card driver for Windows® 2000, please insert the Installation...
... drive letter.) 4. Click the Start button on -screen instructions to complete the installation. Select Run. 3. Please make sure the Windows® 2000 have installed Windows® 2000 Service Pack (or later) before installing the graphics accelerator driver. - 29 Software Installation - English 3.2. Type the following steps: 1. Follow the Wizard's on the control bar. 2. Click "OK". 5. Click "Yes" to install the driver. To install the graphics card driver for Windows® 2000, please insert the Installation...

Manual
Page 34
... GIGABYTE for the graphics card is securely fastened to the monitor's manual.) GV-NX78X256V(P)-B Graphics Accelerator - 30 - After getting into Safe Mode, in Device Manager check whether the driver for more advanced troubleshooting information. „ Check that the card is seated properly in the PCI Express x 16 slot. „ Ensure that the monitor and computer are plugged in and receiving power. „ If necessary, disable any built-in graphics...
... GIGABYTE for the graphics card is securely fastened to the monitor's manual.) GV-NX78X256V(P)-B Graphics Accelerator - 30 - After getting into Safe Mode, in Device Manager check whether the driver for more advanced troubleshooting information. „ Check that the card is seated properly in the PCI Express x 16 slot. „ Ensure that the monitor and computer are plugged in and receiving power. „ If necessary, disable any built-in graphics...

Manual
Page 35
...) and press Enter. 6. Change the command prompt to select the @VGA utility. Reflash BIOS in the lower-right corner of @VGA flash BIOS utility 2. Appendix Restart the computer in MS-DOS mode. (For Windows 2000/XP, you will find a GIGABYTE the Taskbar. icon in Windows mode 1. Complete the update procedure following the on-screen instructions. - 31 - After installing the display drivers, you need a startup disk to Reflash the BIOS 5.1.1. Select the From...
...) and press Enter. 6. Change the command prompt to select the @VGA utility. Reflash BIOS in the lower-right corner of @VGA flash BIOS utility 2. Appendix Restart the computer in MS-DOS mode. (For Windows 2000/XP, you will find a GIGABYTE the Taskbar. icon in Windows mode 1. Complete the update procedure following the on-screen instructions. - 31 - After installing the display drivers, you need a startup disk to Reflash the BIOS 5.1.1. Select the From...


