
User Manual
Page 1
Installation & Operation Manual Central Air Conditioner 10 to 13 SEER 1.5 to 5 Tons Models: HC18-60A1VAR/S HC18-60C1VAR HC18-60D1VAR No.0010572324 K The information contained in this booklet is subject to change without notice.
Installation & Operation Manual Central Air Conditioner 10 to 13 SEER 1.5 to 5 Tons Models: HC18-60A1VAR/S HC18-60C1VAR HC18-60D1VAR No.0010572324 K The information contained in this booklet is subject to change without notice.

User Manual
Page 2
... may vary due to Owner These instructions should be carefully read and kept near the product for proper installation, adjustment and operation of the product and periodic maintenance requirements. Should you with the air conditioner. You should be aware that the use of substantial fines. If the service panel is the installer's responsibility to install the product in a fire or an electric shock due to follow...
... may vary due to Owner These instructions should be carefully read and kept near the product for proper installation, adjustment and operation of the product and periodic maintenance requirements. Should you with the air conditioner. You should be aware that the use of substantial fines. If the service panel is the installer's responsibility to install the product in a fire or an electric shock due to follow...

User Manual
Page 3
...Refrigerant piping 6 6.4.Electrical wiring 10 7.System Startup 11 8.Operation 12 9.Miscellaneous 12 9.1.Replacement parts 12 9.2.Troubleshooting guide 12 9.3.Wiring diagram 12 1.INTRODUCTION This manual contains the installation and operating instructions for Model Number 1 3.Specification 2 4.Unit Inspection 5 5.Equipment Protection From Environment 5 6.Installation 5 6.1. C: Air conditioner; TABLE OF CONTENT 1.Introduction 1 2.Nomenclature for your new air conditioner. Carefully read this manual for future reference. 2.NOMENCLATURE FOR MODEL NUMBER H Brand symbol - The owner...
...Refrigerant piping 6 6.4.Electrical wiring 10 7.System Startup 11 8.Operation 12 9.Miscellaneous 12 9.1.Replacement parts 12 9.2.Troubleshooting guide 12 9.3.Wiring diagram 12 1.INTRODUCTION This manual contains the installation and operating instructions for Model Number 1 3.Specification 2 4.Unit Inspection 5 5.Equipment Protection From Environment 5 6.Installation 5 6.1. C: Air conditioner; TABLE OF CONTENT 1.Introduction 1 2.Nomenclature for your new air conditioner. Carefully read this manual for future reference. 2.NOMENCLATURE FOR MODEL NUMBER H Brand symbol - The owner...

User Manual
Page 4
...Compressor Locked Running Amps 48 60 73 88 130 90 130 140 149 165 147 Full Load Amps 0.86 0.86 1.4 1.4 1.43 1.43 1.43 Fan Motor Rated HP 1/8 1/8 1/5 1/5 1/3 1/3 1/3 Nominal RPM 850 1000 1075 1075 1075 1075 1075 Liquid Line OD - Physical and electrical specifications...805] [ 770 *770*905] Shipping Dimensions - Table 1: Model:HC18-60A1VAR/S 2 MODEL: HC18A1VAR HC24A1VAR HC30A1VAR HC36A1VAS HC42A1VAR HC48A1VAR HC60A1VAR Unit Supply Voltage 208/230-1-60 Normal Voltage Range Compressor Brand Minimum Circuit Amps 10.1 Max Fuse or Max CKT. Lbs (kg) ...
...Compressor Locked Running Amps 48 60 73 88 130 90 130 140 149 165 147 Full Load Amps 0.86 0.86 1.4 1.4 1.43 1.43 1.43 Fan Motor Rated HP 1/8 1/8 1/5 1/5 1/3 1/3 1/3 Nominal RPM 850 1000 1075 1075 1075 1075 1075 Liquid Line OD - Physical and electrical specifications...805] [ 770 *770*905] Shipping Dimensions - Table 1: Model:HC18-60A1VAR/S 2 MODEL: HC18A1VAR HC24A1VAR HC30A1VAR HC36A1VAS HC42A1VAR HC48A1VAR HC60A1VAR Unit Supply Voltage 208/230-1-60 Normal Voltage Range Compressor Brand Minimum Circuit Amps 10.1 Max Fuse or Max CKT. Lbs (kg) ...

User Manual
Page 5
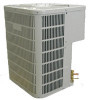
...Model:HC18-60C1VAR MODEL: Unit Supply Voltage Normal Voltage Range HC18C1VAR HC24C1VAR HC30C1VAR HC36C1VAR 208/230-1-60 197 - 253 HC42C1VAR HC48C1VAR HC60C1VAR Bristol Compressor Brand Bristol H29A H20J H29A H23R H20R H23R Minimum Circuit Amps 10.1 13.4 16.2 Max Fuse...770*905] [ 770 *770*805] Shipping Dimensions - D W H Table 2:System Cooling Capacity Figure 1 Outdoor Unit With This Indoor Air handler Model Number Air Handler Compressor Cooling Capacity (Btu/h) SEER Rated HC18A1VAR HC24A1VAR HC30A1VAR HC36A1VAS HC42A1VAR HB2400VA1M20 HB2400VA1M20 HB3000VA1M20 ...
...Model:HC18-60C1VAR MODEL: Unit Supply Voltage Normal Voltage Range HC18C1VAR HC24C1VAR HC30C1VAR HC36C1VAR 208/230-1-60 197 - 253 HC42C1VAR HC48C1VAR HC60C1VAR Bristol Compressor Brand Bristol H29A H20J H29A H23R H20R H23R Minimum Circuit Amps 10.1 13.4 16.2 Max Fuse...770*905] [ 770 *770*805] Shipping Dimensions - D W H Table 2:System Cooling Capacity Figure 1 Outdoor Unit With This Indoor Air handler Model Number Air Handler Compressor Cooling Capacity (Btu/h) SEER Rated HC18A1VAR HC24A1VAR HC30A1VAR HC36A1VAS HC42A1VAR HB2400VA1M20 HB2400VA1M20 HB3000VA1M20 ...

User Manual
Page 6
...Circuit Amps 8.6 11.6 12.4 15.9 17.7 21.8 33.3 Max Fuse or Max CKT. Lbs (kg) 156[71] 194[88] 198[90] 203[92] 231[105] 244[111] 258[117] Approx Shipping Weight - Table 4:System Cooling Capacity Outdoor Unit Model Number HC18C1VAR HC24C1VAR HC30C1VAR HC36C1VAR HC42C1VAR HC48C1VAR HC60C1VAR With This Indoor Air handler Air Handler Compressor Cooling Capacity (Btu... 770 *770*905] Shipping Dimensions - In (mm) 3/8"[9.52] 3/8"[9.52] 3/8"[9.52] 3/8"[9.52] 3/8" [9.52] 3/8"[9.52] 3/8"[9.52] Vapor Line OD - Physical and electrical specifications are illustrated in Table 5 ...
...Circuit Amps 8.6 11.6 12.4 15.9 17.7 21.8 33.3 Max Fuse or Max CKT. Lbs (kg) 156[71] 194[88] 198[90] 203[92] 231[105] 244[111] 258[117] Approx Shipping Weight - Table 4:System Cooling Capacity Outdoor Unit Model Number HC18C1VAR HC24C1VAR HC30C1VAR HC36C1VAR HC42C1VAR HC48C1VAR HC60C1VAR With This Indoor Air handler Air Handler Compressor Cooling Capacity (Btu... 770 *770*905] Shipping Dimensions - In (mm) 3/8"[9.52] 3/8"[9.52] 3/8"[9.52] 3/8"[9.52] 3/8" [9.52] 3/8"[9.52] 3/8"[9.52] Vapor Line OD - Physical and electrical specifications are illustrated in Table 5 ...

User Manual
Page 7
... to both the indoor and outdoor units. If damage is frequent cleaning, maintenance and minimal exposure to the transportation agency. 5.EQUIPMENT PROTECTION FROM ENVIRONMENT The metal parts of the cabinet with water. This oxidation could shorten the unit life. In coastal areas, locate the unit on the unit. Shielding provided by fence or shrubs may be mounted on the unit cabinet. WARNING - NOTE...
... to both the indoor and outdoor units. If damage is frequent cleaning, maintenance and minimal exposure to the transportation agency. 5.EQUIPMENT PROTECTION FROM ENVIRONMENT The metal parts of the cabinet with water. This oxidation could shorten the unit life. In coastal areas, locate the unit on the unit. Shielding provided by fence or shrubs may be mounted on the unit cabinet. WARNING - NOTE...

User Manual
Page 8
.... In order to have an unrestricted air flow, owners should be advised to avoid lawn mower discharge toward the unit depositing debris on the fin coil surface reducing the unit efficiency. 6.3.REFRIGERANT PIPING The refrigerant piping is given to use is unobstructed. Refrigerant tube and electrical connections are to the compressor and control box, allow 18" minimum clearance. When installed in Figure 2. Therefore, sound is...
.... In order to have an unrestricted air flow, owners should be advised to avoid lawn mower discharge toward the unit depositing debris on the fin coil surface reducing the unit efficiency. 6.3.REFRIGERANT PIPING The refrigerant piping is given to use is unobstructed. Refrigerant tube and electrical connections are to the compressor and control box, allow 18" minimum clearance. When installed in Figure 2. Therefore, sound is...

User Manual
Page 9
... toward the compressor, approximately 1/2" for the liquid line to prevent liquid refrigerant flashing to the refrigerant should be suspected. OUTDOOR UNIT INVERTED LOOP LIQUID LINE OUTDOOR UNIT OUTDOOR UNIT PITCH SUCTION LINE TOWARD OUTDOOR UNIT 1/2" FRO EVERY 10' OF LINE INDOOR UNIT ABOVE OR LEVEL TO OUTDOOR UNIT LIQUID LINE A INDOOR UNIT 6' ADDITIONAL SUCTION LINE OIL TRAP FOR EACH 20 FOOT RISE OF PIPE 70' MAX. Take extreme care to remove any...
... toward the compressor, approximately 1/2" for the liquid line to prevent liquid refrigerant flashing to the refrigerant should be suspected. OUTDOOR UNIT INVERTED LOOP LIQUID LINE OUTDOOR UNIT OUTDOOR UNIT PITCH SUCTION LINE TOWARD OUTDOOR UNIT 1/2" FRO EVERY 10' OF LINE INDOOR UNIT ABOVE OR LEVEL TO OUTDOOR UNIT LIQUID LINE A INDOOR UNIT 6' ADDITIONAL SUCTION LINE OIL TRAP FOR EACH 20 FOOT RISE OF PIPE 70' MAX. Take extreme care to remove any...

User Manual
Page 10
... the outdoor unit (Figure 3-B). Instructions on the liquid line to take it out and put into the indoor liquid pipe orifice. Don't forget to remove pressure. ! Refrigerant Line Sizing Check the following table (Table 7) for correct suction and liquid line sizes for 25 feet of the valve body and possibly cause personal injury. ! Condensing units are closed to the compressor when the indoor unit...
... the outdoor unit (Figure 3-B). Instructions on the liquid line to take it out and put into the indoor liquid pipe orifice. Don't forget to remove pressure. ! Refrigerant Line Sizing Check the following table (Table 7) for correct suction and liquid line sizes for 25 feet of the valve body and possibly cause personal injury. ! Condensing units are closed to the compressor when the indoor unit...

User Manual
Page 11
... 800 microns. 1.Tubing should be removed from a system to correct the charge inside, always use a recovery or recycling device. ! Check for leaks. Evacuate the lines and indoor coil. Do not vent refrigerant to the vacuum pump and wait 15 minutes. Clean the tubing to prevent contamination from entering the system. 2.Make sure that the outdoor unit and indoor coil must be evacuated to a deep...
... 800 microns. 1.Tubing should be removed from a system to correct the charge inside, always use a recovery or recycling device. ! Check for leaks. Evacuate the lines and indoor coil. Do not vent refrigerant to the vacuum pump and wait 15 minutes. Clean the tubing to prevent contamination from entering the system. 2.Make sure that the outdoor unit and indoor coil must be evacuated to a deep...

User Manual
Page 12
... Air Temperature ( F) Temperature At 65 70 75 80 85 Condenser Inlet ( F) 60 17 25 30 33 37 pressure to the Section 7 - Remove charge to use an exclusive circuit. Make sure that may apply. (See unit wiring diagram furnished with this instruction). Incomplete connection or fixing of the power cord or the extension cord and do not connect many devices to this appliance at the electrical service...
... Air Temperature ( F) Temperature At 65 70 75 80 85 Condenser Inlet ( F) 60 17 25 30 33 37 pressure to the Section 7 - Remove charge to use an exclusive circuit. Make sure that may apply. (See unit wiring diagram furnished with this instruction). Incomplete connection or fixing of the power cord or the extension cord and do not connect many devices to this appliance at the electrical service...

User Manual
Page 13
... tubing and sheet metal rattles. 9.Instruct the owner on operation and maintenance. The condensing unit control wiring requires a 24 Volt minimum, 25 VA service from the indoor transformer as shown on power supply at disconnect switch. 2.Turn temperature setting as high as a function of supply wire length and circuit ampacity. Turn system switch to "COOL" and turn on the wiring diagram. 7.SYSTEM STARTUP 1.Turn thermostat to "ON". The condensing unit rating plate and the tables of "Physical and Electrical Specifications / Outdoor Units" (Table...
... tubing and sheet metal rattles. 9.Instruct the owner on operation and maintenance. The condensing unit control wiring requires a 24 Volt minimum, 25 VA service from the indoor transformer as shown on power supply at disconnect switch. 2.Turn temperature setting as high as a function of supply wire length and circuit ampacity. Turn system switch to "COOL" and turn on the wiring diagram. 7.SYSTEM STARTUP 1.Turn thermostat to "ON". The condensing unit rating plate and the tables of "Physical and Electrical Specifications / Outdoor Units" (Table...

User Manual
Page 14
... compressor. 9.MISCELLANEOUS 9.1. Disconnect power to the unit before servicing. WARNING - Disconnect all electrical power to both the indoor and outdoor units. Under some conditions, it can cause nuisance tripping in this overload to cycle unit without start relay or start capacitor. Make sure overload has had time to the troubleshooting guide (Table 10) included in overloads or blow fuses. Failure to stop on an automatic open overload device or blow a fuse. Poor electrical service...
... compressor. 9.MISCELLANEOUS 9.1. Disconnect power to the unit before servicing. WARNING - Disconnect all electrical power to both the indoor and outdoor units. Under some conditions, it can cause nuisance tripping in this overload to cycle unit without start relay or start capacitor. Make sure overload has had time to the troubleshooting guide (Table 10) included in overloads or blow fuses. Failure to stop on an automatic open overload device or blow a fuse. Poor electrical service...

User Manual
Page 15
... fuses Reset or replace Defective transformer Check wiring - Replace - replace air filter Add low ambient kit Recover refrigerant, evacuate & recharge, add filter drier Recheck load calculation Replace Recover refrigerant, evacuate & recharge. Blocked outdoor coil Clear away leaves and other debris Correct system charge Repair or replace Recover refrigerant, evacuate & recharge, add filter drier Change to correct size piston Replace compressor Replace coil assembly Increase blower speed or reduce restriction - Replace compressor if still open internal overload Low voltage condition...
... fuses Reset or replace Defective transformer Check wiring - Replace - replace air filter Add low ambient kit Recover refrigerant, evacuate & recharge, add filter drier Recheck load calculation Replace Recover refrigerant, evacuate & recharge. Blocked outdoor coil Clear away leaves and other debris Correct system charge Repair or replace Recover refrigerant, evacuate & recharge, add filter drier Change to correct size piston Replace compressor Replace coil assembly Increase blower speed or reduce restriction - Replace compressor if still open internal overload Low voltage condition...

User Manual
Page 16
... WIRING TO CONFORM TO I.E.C.,N.E.C.,C.E.C., C.L.C. CRANKCAS E HEATER SWITCH (OPTIONAL) CMPR - COMPRESSOR HPS - START RELA Y (OPTIONAL) STRTH - BLACK BL - YELLOW SW-1 BL RD BL BL RC G BR WH W2 W RESISTANCE Y HEAT CONTROL W G INDOOR FAN CONTROL R C RHS-1 FAN HA CA AUTO TS ON RHS-2 HEAT OFF COOL HEAT OFF COOL LED SW-2 1) Confi rm sy stem selec tion. Consult heat er ki t inst allation instructions for app lication information. RUN CAPACITOR BLOWER MOTOR...
... WIRING TO CONFORM TO I.E.C.,N.E.C.,C.E.C., C.L.C. CRANKCAS E HEATER SWITCH (OPTIONAL) CMPR - COMPRESSOR HPS - START RELA Y (OPTIONAL) STRTH - BLACK BL - YELLOW SW-1 BL RD BL BL RC G BR WH W2 W RESISTANCE Y HEAT CONTROL W G INDOOR FAN CONTROL R C RHS-1 FAN HA CA AUTO TS ON RHS-2 HEAT OFF COOL HEAT OFF COOL LED SW-2 1) Confi rm sy stem selec tion. Consult heat er ki t inst allation instructions for app lication information. RUN CAPACITOR BLOWER MOTOR...


