Use & Care
Page 2
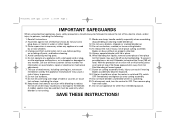
Read all instructions. 2. Do not let cord hang over edge of severe injury to persons or damage to the blender. Keep hands and utensils out of jar while blending to OFF. Keep exposed skin away from wall outlet. 21. Do not use , before cleaning. 5. To prevent...of fire, electric shock, and/or injury to persons. 8. handle carefully-especially when assembling, disassembling or cleaning inside blender jar. 12. Do not use outdoors. 9. Always operate blender with a damaged cord or plug, or after appliance malfunctions, or is used by the appliance manufacturer may be used...
Read all instructions. 2. Do not let cord hang over edge of severe injury to persons or damage to the blender. Keep hands and utensils out of jar while blending to OFF. Keep exposed skin away from wall outlet. 21. Do not use , before cleaning. 5. To prevent...of fire, electric shock, and/or injury to persons. 8. handle carefully-especially when assembling, disassembling or cleaning inside blender jar. 12. Do not use outdoors. 9. Always operate blender with a damaged cord or plug, or after appliance malfunctions, or is used by the appliance manufacturer may be used...
Use & Care
Page 3
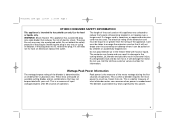
... . If cutting blades lock and do not move, it will damage the motor. Peak power is needed most power to the cutting blades, jar, blender and possibly result in damage to crush ice, frozen fruit, etc. This is a measure of input wattage/amperes after 30 seconds of electric ...Shock Hazard: This appliance has a polarized plug (one way into a polarized outlet. Do not place blender jar in any way or using an adaptor. This is when a blender requires the most . The blender as provided may result in personal injury. Use for information. Do not defeat the safety purpose of the...
... . If cutting blades lock and do not move, it will damage the motor. Peak power is needed most power to the cutting blades, jar, blender and possibly result in damage to crush ice, frozen fruit, etc. This is a measure of input wattage/amperes after 30 seconds of electric ...Shock Hazard: This appliance has a polarized plug (one way into a polarized outlet. Do not place blender jar in any way or using an adaptor. This is when a blender requires the most . The blender as provided may result in personal injury. Use for information. Do not defeat the safety purpose of the...
Use & Care
Page 4
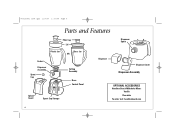
840156401 nv04.qxd 11/7/07 1:39 PM Page 4 Parts and Features Filler Cap Lid Plastic Jar Glass Jar OR Gasket Dispenser Assembly Spout Cap Cutting Assembly Base Control Panel Splash Guard Spout Cap Storage Dispenser Spout Dispenser Dispenser Lever Dispenser Assembly OPTIONAL ACCESSORIES Hamilton Beach Milkshake Mixes Vanilla Chocolate To order visit: hamiltonbeach.com 4
840156401 nv04.qxd 11/7/07 1:39 PM Page 4 Parts and Features Filler Cap Lid Plastic Jar Glass Jar OR Gasket Dispenser Assembly Spout Cap Cutting Assembly Base Control Panel Splash Guard Spout Cap Storage Dispenser Spout Dispenser Dispenser Lever Dispenser Assembly OPTIONAL ACCESSORIES Hamilton Beach Milkshake Mixes Vanilla Chocolate To order visit: hamiltonbeach.com 4
Use & Care
Page 8
...from cover to allow steam to dispense the liquid. • Do not store food or liquids in the blender jar. Remove jar from container lid and add ingredients through the opening. • When dispensing thin liquids, it may not be necessary to turn blender ON to escape. Cover with ...recommended amount of chunks in blender jar. Blend for 10 seconds or until blended. ...
...from cover to allow steam to dispense the liquid. • Do not store food or liquids in the blender jar. Remove jar from container lid and add ingredients through the opening. • When dispensing thin liquids, it may not be necessary to turn blender ON to escape. Cover with ...recommended amount of chunks in blender jar. Blend for 10 seconds or until blended. ...
Use & Care
Page 9
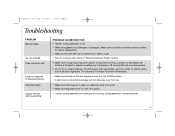
... UP position. • Loosen cutting assembly by holding jar and turning cutting assembly counterclockwise. 9 A minimum of 8 ounces (250 ml) is in "Blending Specific Foods" section. • Make sure enough liquid has been added. Cannot remove cutting assembly. Does not dispense or dispenses slowly. The blender is not made to perform these tasks. • Make...
... UP position. • Loosen cutting assembly by holding jar and turning cutting assembly counterclockwise. 9 A minimum of 8 ounces (250 ml) is in "Blending Specific Foods" section. • Make sure enough liquid has been added. Cannot remove cutting assembly. Does not dispense or dispenses slowly. The blender is not made to perform these tasks. • Make...


