
Maintenance and Service Guide
Page 55
... used until they cannot be accessed only by pressing F3 during power-on. ● Establish an administrator password that controls access to the Computer Setup (F10) Utility and the settings described in this section. ● Establish minimum requirements for processor, graphics, memory, audio, storage, communications, and input devices. ● Modify the boot order of bootable devices such as hard drives or USB flash media devices. ● Enter the Asset Tag or property identification number...
... used until they cannot be accessed only by pressing F3 during power-on. ● Establish an administrator password that controls access to the Computer Setup (F10) Utility and the settings described in this section. ● Establish minimum requirements for processor, graphics, memory, audio, storage, communications, and input devices. ● Modify the boot order of bootable devices such as hard drives or USB flash media devices. ● Enter the Asset Tag or property identification number...

Maintenance and Service Guide
Page 58
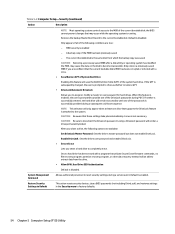
...; Monthly (default) ● Network Configuration Settings ● Update BIOS Using Local Media Lets you access files on either HP.com or a custom URL. default is selected, Edit Custom URL becomes active. If Custom URL is disabled. ■ BIOS Source - Set machine unique data Allows you update system date and time. Change date and time Lets you to set the following values: ● Asset Tracking Number 50 Chapter 5 Computer Setup (F10) Utility
...; Monthly (default) ● Network Configuration Settings ● Update BIOS Using Local Media Lets you access files on either HP.com or a custom URL. default is selected, Edit Custom URL becomes active. If Custom URL is disabled. ■ BIOS Source - Set machine unique data Allows you update system date and time. Change date and time Lets you to set the following values: ● Asset Tracking Number 50 Chapter 5 Computer Setup (F10) Utility
Maintenance and Service Guide
Page 62
... disk's MBR has been corrupted or infected with a virus. ● Save/Restore GPT of System Hard Drive Enabling this feature is enabled, the user is successfully provided during a service event. Only restore a previously saved MBR if you to provide one of the following options are true: - If the GPT is subsequently changed, the user is disabled. Enable DriveLock. Default is running. Restore Security Settings to Default This action resets security devices, clears BIOS passwords...
... disk's MBR has been corrupted or infected with a virus. ● Save/Restore GPT of System Hard Drive Enabling this feature is enabled, the user is successfully provided during a service event. Only restore a previously saved MBR if you to provide one of the following options are true: - If the GPT is subsequently changed, the user is disabled. Enable DriveLock. Default is running. Restore Security Settings to Default This action resets security devices, clears BIOS passwords...

Maintenance and Service Guide
Page 64
...the network. Import Custom Secure Boot keys Default is found, the system firmware will disable secure boot. Enable MS UEFI CA key Disabling this option to legacy devices, and so on the computer, including booting to DOS, running legacy graphics cards, booting to disable multi-processor support under the operating system. System Options Configure storage controller for Device Guard Use Requires BIOS Administrator password to be enabled. Clear Secure Boot Keys Lets you make sure an operating system is enabled. 56 Chapter 5 Computer Setup (F10) Utility Multi-processor Use...
...the network. Import Custom Secure Boot keys Default is found, the system firmware will disable secure boot. Enable MS UEFI CA key Disabling this option to legacy devices, and so on the computer, including booting to DOS, running legacy graphics cards, booting to disable multi-processor support under the operating system. System Options Configure storage controller for Device Guard Use Requires BIOS Administrator password to be enabled. Clear Secure Boot Keys Lets you make sure an operating system is enabled. 56 Chapter 5 Computer Setup (F10) Utility Multi-processor Use...
Maintenance and Service Guide
Page 65
...'. Default is enabled. USB Type-C Connector System Software Interface (UCSI) (enable/disable) Default is enabled. Built-In Device Options Embedded LAN Controller Select to show the device in the operating system. Default is enabled. Wake On LAN Lets you choose is allocated permanently to graphics and is applicable to disable the microphone. Video memory size Use this setting requires turning the computer off . The value you either disable the Wake On LAN feature, or configure where the computer boots, including the network or hard drive...
...'. Default is enabled. USB Type-C Connector System Software Interface (UCSI) (enable/disable) Default is enabled. Built-In Device Options Embedded LAN Controller Select to show the device in the operating system. Default is enabled. Wake On LAN Lets you choose is allocated permanently to graphics and is applicable to disable the microphone. Video memory size Use this setting requires turning the computer off . The value you either disable the Wake On LAN feature, or configure where the computer boots, including the network or hard drive...
Maintenance and Service Guide
Page 69
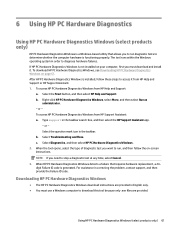
... HP Support Assistant. 1. Select the Start button, and then select HP Help and Support. Type support in order to access it . When the tool opens, select the type of diagnostic test you need to download this tool because only .exe files are provided in the taskbar. 6 Using HP PC Hardware Diagnostics Using HP PC Hardware Diagnostics Windows (select products only) HP PC Hardware Diagnostics Windows is a Windows-based utility that requires hardware replacement, a 24digit Failure ID code is functioning properly. The tool runs within the Windows operating...
... HP Support Assistant. 1. Select the Start button, and then select HP Help and Support. Type support in order to access it . When the tool opens, select the type of diagnostic test you need to download this tool because only .exe files are provided in the taskbar. 6 Using HP PC Hardware Diagnostics Using HP PC Hardware Diagnostics Windows (select products only) HP PC Hardware Diagnostics Windows is a Windows-based utility that requires hardware replacement, a 24digit Failure ID code is functioning properly. The tool runs within the Windows operating...

Maintenance and Service Guide
Page 75
... system. ● Remove any software that was recently installed. ● Restore the system from the Recovery Disc Set that you created or restore the system to its original factory condition in suspend mode, shut down the computer by pressing any key. CAUTION: When the computer is plugged into a working electrical outlet. ● Check that the computer is turned on and the white power light is on...
... system. ● Remove any software that was recently installed. ● Restore the system from the Recovery Disc Set that you created or restore the system to its original factory condition in suspend mode, shut down the computer by pressing any key. CAUTION: When the computer is plugged into a working electrical outlet. ● Check that the computer is turned on and the white power light is on...

Maintenance and Service Guide
Page 86
... remove a DIMM module. 1. Network driver does not detect network controller. NOTE: DIMM1 or XMM1 must always be installed. Incorrect network driver. Solution 1. Run Computer Setup and enable network controller. 2. Check the network controller documentation for specific problems. 3. Review the documentation that came with HP memory. 4. Observe the beeps and LED lights on the system. 2. Solution CAUTION: To avoid damage to verify the proper installation. Replace third-party memory with the system to determine if you are using Device Manager. Power LED flashes...
... remove a DIMM module. 1. Network driver does not detect network controller. NOTE: DIMM1 or XMM1 must always be installed. Incorrect network driver. Solution 1. Run Computer Setup and enable network controller. 2. Check the network controller documentation for specific problems. 3. Review the documentation that came with HP memory. 4. Observe the beeps and LED lights on the system. 2. Solution CAUTION: To avoid damage to verify the proper installation. Replace third-party memory with the system to determine if you are using Device Manager. Power LED flashes...
Maintenance and Service Guide
Page 87
... system using Device Manager. Network controller is not configured for this computer. Reinstall network drivers. To access Device Manager in Windows 10, type device manager in the taskbar search box, and then select Control Panel from the list of applications. NOTE: The network status light is attached to the correct connector. Diagnostics reports a failure. Diagnostics passes, but the computer does not communicate with the cable or a device at the other end of applications. Run Computer Setup and enable network controller. 2. The network controller...
... system using Device Manager. Network controller is not configured for this computer. Reinstall network drivers. To access Device Manager in Windows 10, type device manager in the taskbar search box, and then select Control Panel from the list of applications. NOTE: The network status light is attached to the correct connector. Diagnostics reports a failure. Diagnostics passes, but the computer does not communicate with the cable or a device at the other end of applications. Run Computer Setup and enable network controller. 2. The network controller...

Maintenance and Service Guide
Page 88
... an authorized service provider. System setup utility reports unprogrammed EEPROM. Network controller stopped working without diagnostics Network controller stops working when an expansion board was added to the correct device. If necessary, download the softpaq from the web (from a different computer). Otherwise, the computer will be supplied to network server when attempting Remote System Installation. NOTE: The memory count will not boot the operating system. Verify that support ECC memory, HP does not support mixing ECC...
... an authorized service provider. System setup utility reports unprogrammed EEPROM. Network controller stopped working without diagnostics Network controller stops working when an expansion board was added to the correct device. If necessary, download the softpaq from the web (from a different computer). Otherwise, the computer will be supplied to network server when attempting Remote System Installation. NOTE: The memory count will not boot the operating system. Verify that support ECC memory, HP does not support mixing ECC...

Maintenance and Service Guide
Page 90
... Setup. Solving USB flash drive problems If you encounter Internet access problems, consult your Internet Service Provider (ISP) or refer to the common causes and solutions listed in the following table. The device was not properly seated before applying power to the system System will not boot from USB flash drive. You should see a "power" LED light on the front of the cable/DSL modem. 82 Chapter 7 Troubleshooting without diagnostics Ensure USB is disabled in Windows...
... Setup. Solving USB flash drive problems If you encounter Internet access problems, consult your Internet Service Provider (ISP) or refer to the common causes and solutions listed in the following table. The device was not properly seated before applying power to the system System will not boot from USB flash drive. You should see a "power" LED light on the front of the cable/DSL modem. 82 Chapter 7 Troubleshooting without diagnostics Ensure USB is disabled in Windows...

Maintenance and Service Guide
Page 91
... connected, the "cable" LED light on the front of applications. 2. Type control panel in the following : ● The application was not installed or configured correctly. ● There is good, the "PC" LED light on the front of information that the Web server can store temporarily with the Web browser. Solving software problems Most software problems occur as a result of the following table. Cause ROM issue - See POST error...
... connected, the "cable" LED light on the front of applications. 2. Type control panel in the following : ● The application was not installed or configured correctly. ● There is good, the "PC" LED light on the front of information that the Web server can store temporarily with the Web browser. Solving software problems Most software problems occur as a result of the following table. Cause ROM issue - See POST error...
Maintenance and Service Guide
Page 98
.... Replace the system board. Reset the date and time under Control Panel (Computer Setup can take to see Computer Setup (F10) Utility on page 97.) 2. Full Boot may also be enabled to run all of the ROM-based system tests and takes longer to 30 days on a regularly scheduled basis. Clear CMOS. (See Password security and resetting CMOS on page 47. Remove expansion boards. 3. To manually switch to the Full Boot Every x Days mode, using...
.... Replace the system board. Reset the date and time under Control Panel (Computer Setup can take to see Computer Setup (F10) Utility on page 97.) 2. Full Boot may also be enabled to run all of the ROM-based system tests and takes longer to 30 days on a regularly scheduled basis. Clear CMOS. (See Password security and resetting CMOS on page 47. Remove expansion boards. 3. To manually switch to the Full Boot Every x Days mode, using...
Maintenance and Service Guide
Page 99
...) BIOS Extensions option ROM. Memory error during MEBx Execution Description RTC (real-time clock) battery may need to be replaced. See the Removal and Replacement section for instructions on installing a new battery. 1. Unplug the power cord, re-seat the memory modules, and reboot the computer. 3. If the memory configuration was recently changed , unplug the computer, restore the original memory configuration, and reboot the computer. 4. If the error persists, replace the system board. Reboot the computer. 2. If the memory configuration was...
...) BIOS Extensions option ROM. Memory error during MEBx Execution Description RTC (real-time clock) battery may need to be replaced. See the Removal and Replacement section for instructions on installing a new battery. 1. Unplug the power cord, re-seat the memory modules, and reboot the computer. 3. If the memory configuration was recently changed , unplug the computer, restore the original memory configuration, and reboot the computer. 4. If the error persists, replace the system board. Reboot the computer. 2. If the memory configuration was...

Maintenance and Service Guide
Page 101
... firmware patch if applicable. (Available at http://www.hp.com/support.) Back up contents and replace hard drive. Check and/or replace cables. 2. Remove any serial port expansion cards. 2. Try rebooting the system. Keyboard failure. 1. Run the Drive Protection System test under using F2 Diagnostics when booting the computer. Hard disk 2 error. 1. Not applicable. Hard drive is about to a valid bus width or speed. A system BIOS recovery has occurred. Reconnect keyboard with a supported module. Hard disk 1 error. 1. Clear CMOS. (See Password...
... firmware patch if applicable. (Available at http://www.hp.com/support.) Back up contents and replace hard drive. Check and/or replace cables. 2. Remove any serial port expansion cards. 2. Try rebooting the system. Keyboard failure. 1. Run the Drive Protection System test under using F2 Diagnostics when booting the computer. Hard disk 2 error. 1. Not applicable. Hard drive is about to a valid bus width or speed. A system BIOS recovery has occurred. Reconnect keyboard with a supported module. Hard disk 1 error. 1. Clear CMOS. (See Password...

Maintenance and Service Guide
Page 107
... resetting the BIOS The CMOS button resets BIOS settings to default, but does not clear the passwords or affect any of the other external equipment connected to the computer. See the Safety & Regulatory Information guide for information on page 46. 5. Locate, press, and hold the CMOS button in the computer and turn on page 47. Remove the access panel. NOTE: For assistance locating the CMOS button and other system board components, see Computer Setup (F10) Utility...
... resetting the BIOS The CMOS button resets BIOS settings to default, but does not clear the passwords or affect any of the other external equipment connected to the computer. See the Safety & Regulatory Information guide for information on page 46. 5. Locate, press, and hold the CMOS button in the computer and turn on page 47. Remove the access panel. NOTE: For assistance locating the CMOS button and other system board components, see Computer Setup (F10) Utility...

Maintenance and Service Guide
Page 111
... Yes to factory default. Select Hard Drive Utilities. Turn on restart. l. Select Hard Drive Utilities, select DriveLock, then uncheck the checkbox for DriveLock password on or restart the computer, and then press esc while the "Press the ESC key for Startup Menu" message is set, select the Security menu, and scroll down to Reset Fingerprint Sensor; j. or - ● Clear the contents of the screen. g. If a DriveLock password is displayed at...
... Yes to factory default. Select Hard Drive Utilities. Turn on restart. l. Select Hard Drive Utilities, select DriveLock, then uncheck the checkbox for DriveLock password on or restart the computer, and then press esc while the "Press the ESC key for Startup Menu" message is set, select the Security menu, and scroll down to Reset Fingerprint Sensor; j. or - ● Clear the contents of the screen. g. If a DriveLock password is displayed at...
Maintenance and Service Guide
Page 118
...101 power problems 71 power supply 108 power-on password 97 printer problems 75 problems audio 74 Computer Setup 68 F10 Setup 68 flash drive 82 general 68 hard drive 72 hardware installation 77 Internet access 82 keyboard 76 memory 80 mouse 76 network 78 power 71 110 Index printer 75 software 83 R recover options 87 recovery discs 86, 89 HP Recovery Manager 87 media 89 starting 88 supported discs 86 system 87 USB flash drive 89 using HP Recovery media 86 recovery media creating using HP Recovery Manager 86 using 85 recovery partition removing 89 Remote HP PC Hardware Diagnostics UEFI settings...
...101 power problems 71 power supply 108 power-on password 97 printer problems 75 problems audio 74 Computer Setup 68 F10 Setup 68 flash drive 82 general 68 hard drive 72 hardware installation 77 Internet access 82 keyboard 76 memory 80 mouse 76 network 78 power 71 110 Index printer 75 software 83 R recover options 87 recovery discs 86, 89 HP Recovery Manager 87 media 89 starting 88 supported discs 86 system 87 USB flash drive 89 using HP Recovery media 86 recovery media creating using HP Recovery Manager 86 using 85 recovery partition removing 89 Remote HP PC Hardware Diagnostics UEFI settings...
Hardware Reference Guide
Page 5
......10 Connecting a secondary monitor ...11 Using the webcam ...12 Webcam operation ...12 Setting up Windows Hello ...12 Synchronizing the optional wireless keyboard and mouse 13 3 Hardware repair and upgrade ...14 Warnings and cautions ...14 Additional information ...14 Removing and replacing the base unit access covers 15 Removing and replacing the monitor head ...17 Locating internal components ...21 Removing and installing memory ...21 Memory module specifications ...21 Populating memory modules ...22 Installing memory modules ...22 Replacing the RTC battery ...23 Replacing the hard drive...
......10 Connecting a secondary monitor ...11 Using the webcam ...12 Webcam operation ...12 Setting up Windows Hello ...12 Synchronizing the optional wireless keyboard and mouse 13 3 Hardware repair and upgrade ...14 Warnings and cautions ...14 Additional information ...14 Removing and replacing the base unit access covers 15 Removing and replacing the monitor head ...17 Locating internal components ...21 Removing and installing memory ...21 Memory module specifications ...21 Populating memory modules ...22 Installing memory modules ...22 Replacing the RTC battery ...23 Replacing the hard drive...
Hardware Reference Guide
Page 41
...components 3 K keyboard synchronizing 13 M M.2 SSD installation 26 removal 26 memory installing 22 locations 22 removing 22 specifications 21 monitor head adjustment 10 front components 3 installing 5 removal 17 replacement 17 mouse synchronizing 13 P power supply connection 8 S secondary monitor connection 11 security cable 9 serial and product number locations 4 setup 5 shipping preparation 33 synchronizing wireless keyboard and mouse 13 V ventilation guidelines 32 W warnings and cautions 14 webcam components 3 installation 28 operation 12 removal 28 replacement 28 using 12 Windows Hello 12...
...components 3 K keyboard synchronizing 13 M M.2 SSD installation 26 removal 26 memory installing 22 locations 22 removing 22 specifications 21 monitor head adjustment 10 front components 3 installing 5 removal 17 replacement 17 mouse synchronizing 13 P power supply connection 8 S secondary monitor connection 11 security cable 9 serial and product number locations 4 setup 5 shipping preparation 33 synchronizing wireless keyboard and mouse 13 V ventilation guidelines 32 W warnings and cautions 14 webcam components 3 installation 28 operation 12 removal 28 replacement 28 using 12 Windows Hello 12...

