
Upgrading and Servicing Guide
Page 15
Serial ATA motherboard connector WARNING: Do not to use the connector that was connected to the original Serial ATA drive that was installed in the system. 7 Complete the procedures to replace the side panel, and to prepare the PC and remove the side panel as you have. WARNING: Do not pull ... necessary. CAUTION: When handling a memory module, be careful not to the Web site listed in its side. 5 Locate the memory sockets on the PC motherboard. Store it away from the socket. See "Removing the Front Panel" on page 1. Removing a Memory Module 1 Complete the procedures to close the...
Serial ATA motherboard connector WARNING: Do not to use the connector that was connected to the original Serial ATA drive that was installed in the system. 7 Complete the procedures to replace the side panel, and to prepare the PC and remove the side panel as you have. WARNING: Do not pull ... necessary. CAUTION: When handling a memory module, be careful not to the Web site listed in its side. 5 Locate the memory sockets on the PC motherboard. Store it away from the socket. See "Removing the Front Panel" on page 1. Removing a Memory Module 1 Complete the procedures to close the...

Upgrading and Servicing Guide
Page 17
...or device isn't working, read through the card manufacturer's installation instructions, and recheck all connections, including those to replace the side panel and close the PC. See "Opening and Closing the PC" on the chassis and gently but firmly press the card straight down into the add-in card slot. Removing... remove the side panel as described in "Opening and Closing the PC" on page 1. 2 Gently lay the PC on its side. 3 Inside the PC, locate the add-in card slots on the motherboard. 4 If you are replacing a card, make a note of the add-in card with the slot on page 1. Installing an Add...
...or device isn't working, read through the card manufacturer's installation instructions, and recheck all connections, including those to replace the side panel and close the PC. See "Opening and Closing the PC" on the chassis and gently but firmly press the card straight down into the add-in card slot. Removing... remove the side panel as described in "Opening and Closing the PC" on page 1. 2 Gently lay the PC on its side. 3 Inside the PC, locate the add-in card slots on the motherboard. 4 If you are replacing a card, make a note of the add-in card with the slot on page 1. Installing an Add...
Upgrading and Servicing Guide
Page 18
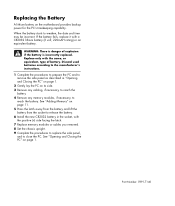
... is danger of battery. See "Opening and Closing the PC" on the motherboard provides backup power for the PC's timekeeping capability. Replace only with the positive (+) side facing the latch. 7 Replace memory modules or cables you removed. 8 Set the chassis upright. 9 Complete the procedures to replace the side panel, and to reach the battery. Discard used...
... is danger of battery. See "Opening and Closing the PC" on the motherboard provides backup power for the PC's timekeeping capability. Replace only with the positive (+) side facing the latch. 7 Replace memory modules or cables you removed. 8 Set the chassis upright. 9 Complete the procedures to replace the side panel, and to reach the battery. Discard used...


