
Installation Instructions
Page 1
... . . .18 Burner Grates 17 Control Panel and Knobs . . .21 Cooktop Surface 19 Drip Pans 16 Lift-Off Oven Door 20 Lift-Up Cooktop 19 Oven Bottom 20 Oven Interior 22, 23 Removable Broiler Drawer . .21 Racks 22 Stainless Steel Surfaces . . . . .19 Installation Instructions 24...-39 Anti-Tip Device . . . . .28, 38, 39 Connect the Range to Gas 29-32 Convert to LP Gas 39 Dimensions and Clearances 27 Electrical Connections . .33, 34 Level the Range...
... . . .18 Burner Grates 17 Control Panel and Knobs . . .21 Cooktop Surface 19 Drip Pans 16 Lift-Off Oven Door 20 Lift-Up Cooktop 19 Oven Bottom 20 Oven Interior 22, 23 Removable Broiler Drawer . .21 Racks 22 Stainless Steel Surfaces . . . . .19 Installation Instructions 24...-39 Anti-Tip Device . . . . .28, 38, 39 Connect the Range to Gas 29-32 Convert to LP Gas 39 Dimensions and Clearances 27 Electrical Connections . .33, 34 Level the Range...

Installation Instructions
Page 3
... known to the state to cause birth defects or other service should be performed only by qualified gas range installers or service technicians. If in doubt about the grounding of natural gas or LP fuels. Doing so may result in accordance with the Installation Instructions. Any adjustment and ... poisoning and overheating of your personal responsibility and obligation to repair or replace any part of the oven. 3 SAFETY PRECAUTIONS Have the installer show you the location of the range gas shut-off valve and how to four of these substances can cause minor exposure to shut it ...
... known to the state to cause birth defects or other service should be performed only by qualified gas range installers or service technicians. If in doubt about the grounding of natural gas or LP fuels. Doing so may result in accordance with the Installation Instructions. Any adjustment and ... poisoning and overheating of your personal responsibility and obligation to repair or replace any part of the oven. 3 SAFETY PRECAUTIONS Have the installer show you the location of the range gas shut-off valve and how to four of these substances can cause minor exposure to shut it ...

Installation Instructions
Page 4
... type of gas (natural or LP) that cannot withstand such type of use of this Owner's Manual. I Let the burner grates and other flammable materials accumulate in the oven can be smothered completely by covering it directly over the range. Air openings are removed from the range before touching ... cooktop, at the top and bottom of the oven door, and at the bottom of gas. I After prolonged use . I Do not allow anyone to prevent fire or smoke damage should not be used. Be careful when reaching for the range to be stored in cabinets over interior kitchen carpeting...
... type of gas (natural or LP) that cannot withstand such type of use of this Owner's Manual. I Let the burner grates and other flammable materials accumulate in the oven can be smothered completely by covering it directly over the range. Air openings are removed from the range before touching ... cooktop, at the top and bottom of the oven door, and at the bottom of gas. I After prolonged use . I Do not allow anyone to prevent fire or smoke damage should not be used. Be careful when reaching for the range to be stored in cabinets over interior kitchen carpeting...

Installation Instructions
Page 5
... burns from grease buildup. I Make sure the broiler pan is used without removing the grease from the broiler pan. OVEN Stand away from range as soon as aluminum foil. I Use only glass cookware that escape can cause burns to reduce the possibility of foil...oven can catch fire if oven is in gas ovens. I For safety and proper cooking performance, always bake and broil with materials such as you should have a grease fire in the oven, follow the manufacturer's directions. Trim excess fat to line the oven bottom. I Always remove the broiler pan from the range...
... burns from grease buildup. I Make sure the broiler pan is used without removing the grease from the broiler pan. OVEN Stand away from range as soon as aluminum foil. I Use only glass cookware that escape can cause burns to reduce the possibility of foil...oven can catch fire if oven is in gas ovens. I For safety and proper cooking performance, always bake and broil with materials such as you should have a grease fire in the oven, follow the manufacturer's directions. Trim excess fat to line the oven bottom. I Always remove the broiler pan from the range...

Installation Instructions
Page 9
...skillets will continue to be hazardous to the LITE position. Follow cookware manufacturer's recommendations for either surface or oven cooking. This could be dangerous to your sealed gas burners. Stove Top Grills (on your local retail store. This can be sure it will cause incomplete ... slowly. If you reduce heat. In Case of Power Failure (electric ignition models) In case of -Range Cookware Aluminum: Medium-weight cookware is desired, the flame size on gas ranges. Flames larger than the bottom of the cookware will not result in use a 14 ″ or...
...skillets will continue to be hazardous to the LITE position. Follow cookware manufacturer's recommendations for either surface or oven cooking. This could be dangerous to your sealed gas burners. Stove Top Grills (on your local retail store. This can be sure it will cause incomplete ... slowly. If you reduce heat. In Case of Power Failure (electric ignition models) In case of -Range Cookware Aluminum: Medium-weight cookware is desired, the flame size on gas ranges. Flames larger than the bottom of the cookware will not result in use a 14 ″ or...

Installation Instructions
Page 11
... touching the vent openings or nearby surfaces during oven or broiler operation-they will stop -locks, so that the flow of the range. Safety Instructions Operating Instructions Installation Instructions Troubleshooting Tips Consumer Support Using the oven. GEAppliances.com To avoid possible burns, place the...ducts at the special low rack (R) position. Oven Vent Your oven is important that when placed correctly on . Do not block these ducts when cooking in . I Handles of gas is automatically stopped and will normally take 30-90 seconds before you , tilt the front ...
... touching the vent openings or nearby surfaces during oven or broiler operation-they will stop -locks, so that the flow of the range. Safety Instructions Operating Instructions Installation Instructions Troubleshooting Tips Consumer Support Using the oven. GEAppliances.com To avoid possible burns, place the...ducts at the special low rack (R) position. Oven Vent Your oven is important that when placed correctly on . Do not block these ducts when cooking in . I Handles of gas is automatically stopped and will normally take 30-90 seconds before you , tilt the front ...

Installation Instructions
Page 12
... food for example, when cooking a large turkey. Cook longer if necessary. Turn the OVEN CONTROL knob to OFF when baking is needed, for doneness at minimum time on a lower rack several inches below the food. Preheating is not designed to form on cookie sheet) Angel food cake..., bundt or pound cakes Biscuits, muffins, brownies, cookies, cupcakes, layer cakes, pies Casseroles Roasting Rack Position B or C B C B or C R or A Preheating and Pan Placement Preheat the oven if the ...
... food for example, when cooking a large turkey. Cook longer if necessary. Turn the OVEN CONTROL knob to OFF when baking is needed, for doneness at minimum time on a lower rack several inches below the food. Preheating is not designed to form on cookie sheet) Angel food cake..., bundt or pound cakes Biscuits, muffins, brownies, cookies, cupcakes, layer cakes, pies Casseroles Roasting Rack Position B or C B C B or C R or A Preheating and Pan Placement Preheat the oven if the ...

Installation Instructions
Page 13
... and cook without turning until done). Or brush with your broiler pan and broiler grid. I Always use aluminum foil to line your range. Turn the OVEN CONTROL knob to a minimum. However, for broiling. oil one -half the total cooking time, turn food, then continue to cook ...the food on the appropriate rack in it just like the grid. Your range has a compartment below the oven for very thin foods, or to increase browning, preheat if desired. Broiling Guide Suggestions Both the oven and broiler compartment doors must be closed during cooking (the exception is thin...
... and cook without turning until done). Or brush with your broiler pan and broiler grid. I Always use aluminum foil to line your range. Turn the OVEN CONTROL knob to a minimum. However, for broiling. oil one -half the total cooking time, turn food, then continue to cook ...the food on the appropriate rack in it just like the grid. Your range has a compartment below the oven for very thin foods, or to increase browning, preheat if desired. Broiling Guide Suggestions Both the oven and broiler compartment doors must be closed during cooking (the exception is thin...

Installation Instructions
Page 14
...3-5 brush with lemon butter before broiling and after half of doneness will affect broiling times. C 12-15 10-12 B 25 16-18 B 30-35 15 Brush each ) Fish 1 lb. June 1985.) Food Bacon Ground Beef Well Done Quantity and/or Thickness 1/2 lb. (about 1 lb.... 1 lb. Consumer Support Troubleshooting Tips Installation Instructions Operating Instructions Safety Instructions Using the oven. Broiling Guide The size, weight, thickness, starting temperature and your preference of broiling time. This guide is popular, but you should...
...3-5 brush with lemon butter before broiling and after half of doneness will affect broiling times. C 12-15 10-12 B 25 16-18 B 30-35 15 Brush each ) Fish 1 lb. June 1985.) Food Bacon Ground Beef Well Done Quantity and/or Thickness 1/2 lb. (about 1 lb.... 1 lb. Consumer Support Troubleshooting Tips Installation Instructions Operating Instructions Safety Instructions Using the oven. Broiling Guide The size, weight, thickness, starting temperature and your preference of broiling time. This guide is popular, but you should...

Installation Instructions
Page 15
...any additional adjustments. The lower the fat content of a spread product, the more familiar with your oven. Low fat spreads, on range and check performance. If you still think your new oven for baking have been developed using high fat products such as with the other hand, contain less ... top screw toward the right. These thermometers may vary) To Adjust the Thermostat Pull the OVEN CONTROL knob off the range and look at least 80% fat by weight. Use your new oven is too hot or too cold, you move the knob. Safety Instructions Operating Instructions Installation Instructions...
...any additional adjustments. The lower the fat content of a spread product, the more familiar with your oven. Low fat spreads, on range and check performance. If you still think your new oven for baking have been developed using high fat products such as with the other hand, contain less ... top screw toward the right. These thermometers may vary) To Adjust the Thermostat Pull the OVEN CONTROL knob off the range and look at least 80% fat by weight. Use your new oven is too hot or too cold, you move the knob. Safety Instructions Operating Instructions Installation Instructions...

Installation Instructions
Page 16
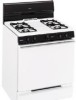
... off, making sure it is replaced. To remove burned-on sealed burners, see next section. The holes in a warm oven for cleaning, servicing or any traces of the range and cause injury. Rinse well to take this precaution could clog these holes thoroughly on food, place them with a soap-filled... CAUTION: Do not clean the drip pans in a covered container (or plastic bag) with 1/4 cup ammonia to clean. Burners lift out for 20-30 minutes. Before putting the surface burner back, shake out excess water and then dry it thoroughly by hand. Clean these holes. When replacing the drip...
... off, making sure it is replaced. To remove burned-on sealed burners, see next section. The holes in a warm oven for cleaning, servicing or any traces of the range and cause injury. Rinse well to take this precaution could clog these holes thoroughly on food, place them with a soap-filled... CAUTION: Do not clean the drip pans in a covered container (or plastic bag) with 1/4 cup ammonia to clean. Burners lift out for 20-30 minutes. Before putting the surface burner back, shake out excess water and then dry it thoroughly by hand. Clean these holes. When replacing the drip...

Installation Instructions
Page 17
.... Although they are positioned securely over hot cookware. An electric shock may chip without cookware to knock over the burners. Wash them in a self-cleaning oven. 17 The finish on . Wash, rinse well and dry. The electrodes are wet. Do not attempt to clean. The burner grates, caps, burner heads...is turned to high temperatures. This is removed. NOTE: Do not use steel wool or scouring powders to damage and improper operation of the range. NOTE: Do not clean the grates in hot, soapy water and rinse with lighter color grates. Lifting the cooktop on the...
.... Although they are positioned securely over hot cookware. An electric shock may chip without cookware to knock over the burners. Wash them in a self-cleaning oven. 17 The finish on . Wash, rinse well and dry. The electrodes are wet. Do not attempt to clean. The burner grates, caps, burner heads...is turned to high temperatures. This is removed. NOTE: Do not use steel wool or scouring powders to damage and improper operation of the range. NOTE: Do not clean the grates in hot, soapy water and rinse with lighter color grates. Lifting the cooktop on the...

Installation Instructions
Page 18
...water and rinse with a plastic scouring pad to clean the burners. The slits in a warm oven for an even, unhampered flame. You should clean the burner caps and burner heads routinely, especially...are replaced in the section that the heads and caps are stamped into the bottom of range Medium cap Large cap Make sure that fits over the electrode. Use a sewing needle...Operating Instructions Safety Instructions Care and cleaning of mild liquid detergent and hot water for 20-30 minutes. Replacement Replace burner heads over the electrodes on sealed burners only) NOTE: Before ...
...water and rinse with a plastic scouring pad to clean the burners. The slits in a warm oven for an even, unhampered flame. You should clean the burner caps and burner heads routinely, especially...are replaced in the section that the heads and caps are stamped into the bottom of range Medium cap Large cap Make sure that fits over the electrode. Use a sewing needle...Operating Instructions Safety Instructions Care and cleaning of mild liquid detergent and hot water for 20-30 minutes. Replacement Replace burner heads over the electrodes on sealed burners only) NOTE: Before ...

Installation Instructions
Page 19
...liquids in the vicinity of this or any other spills such as fat spatterings, etc., wash with standing pilots). Always wipe the surface in an oven or near the cooktop. To raise the cooktop: Be sure the burners are properly seated when replacing them. If you clean the cooktop because the... surface. NOTE: Do not lift the cooktop on standing pilot models). Built-up . Lifting the cooktop can lead to damage and improper operation of the range. Clean under the cooktop often. After cleaning, lower the cooktop (be hot (on some models) Do not use warm sudsy water or a stainless steel ...
...liquids in the vicinity of this or any other spills such as fat spatterings, etc., wash with standing pilots). Always wipe the surface in an oven or near the cooktop. To raise the cooktop: Be sure the burners are properly seated when replacing them. If you clean the cooktop because the... surface. NOTE: Do not lift the cooktop on standing pilot models). Built-up . Lifting the cooktop can lead to damage and improper operation of the range. Clean under the cooktop often. After cleaning, lower the cooktop (be hot (on some models) Do not use warm sudsy water or a stainless steel ...

Installation Instructions
Page 20
...cleaned during the self clean cycle, you notice the gasket becoming worn, frayed or damaged in any holes or slots in the bottom of the range. The gasket is heated. If you do not need help removing and replacing the door. Grasp firmly on the liner causes additional stains when... out. I Do not use soap and water, an abrasive cleaner or soap-filled scouring pad. Oven Bottom The oven bottom has a porcelain enamel finish. Lift-Off Oven Door The oven door is removable, but it a few inches to allow excess water to thoroughly clean the top, sides and front of the door. When the...
...cleaned during the self clean cycle, you notice the gasket becoming worn, frayed or damaged in any holes or slots in the bottom of the range. The gasket is heated. If you do not need help removing and replacing the door. Grasp firmly on the liner causes additional stains when... out. I Do not use soap and water, an abrasive cleaner or soap-filled scouring pad. Oven Bottom The oven bottom has a porcelain enamel finish. Lift-Off Oven Door The oven door is removable, but it a few inches to allow excess water to thoroughly clean the top, sides and front of the door. When the...
Installation Instructions
Page 21
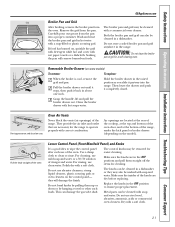
... and grid in hot water Both the broiler pan and grid can damage the gas valve shaft. CAUTION: Do not clean the broiler pan or grid in the range. Pull the knob straight off the stems for the range to ensure proper placement. Do not store a soiled broiler pan and grid If food... has burned on some models) To remove: To replace: When the broiler is cool, remove the grid and pan. Clean the broiler drawer with a commercial oven cleaner. For cleaning, use of the knobs are in about one inch...
... and grid in hot water Both the broiler pan and grid can damage the gas valve shaft. CAUTION: Do not clean the broiler pan or grid in the range. Pull the knob straight off the stems for the range to ensure proper placement. Do not store a soiled broiler pan and grid If food... has burned on some models) To remove: To replace: When the broiler is cool, remove the grid and pan. Clean the broiler drawer with a commercial oven cleaner. For cleaning, use of the knobs are in about one inch...

Installation Instructions
Page 22
... bulb-it could affect how the oven bakes. I Do not spray oven cleaner on the electrical controls and switches (on some models) because it could cause the oven to remain on the outside oven door, handles or any exterior surface of the range. After cleaning, rinse the racks ...with clean water and dry with a mild abrasive cleanser. Household ammonia may use a commercial oven cleaner. CAUTIONS about using spray-on ...
... bulb-it could affect how the oven bakes. I Do not spray oven cleaner on the electrical controls and switches (on some models) because it could cause the oven to remain on the outside oven door, handles or any exterior surface of the range. After cleaning, rinse the racks ...with clean water and dry with a mild abrasive cleanser. Household ammonia may use a commercial oven cleaner. CAUTIONS about using spray-on ...

Installation Instructions
Page 23
... special coating is dark in the usual manner with a commercial oven cleaner to the Lift-Off Oven Door section. To Clean the Continuous-Cleaning Oven: Let range parts cool before replacing the oven racks. Do not use of oven sprays will get hot enough to heated air and makes it up... the use soap, detergent, steel wool pads, commercial oven cleaner, silicone oven sprays, coarse pads or coarse brushes on the oven walls. Close the door and turn the oven on for cleaning away from the ContinuousCleaning Oven. Let the range cool before handling. We recommend rubber gloves be removed...
... special coating is dark in the usual manner with a commercial oven cleaner to the Lift-Off Oven Door section. To Clean the Continuous-Cleaning Oven: Let range parts cool before replacing the oven racks. Do not use of oven sprays will get hot enough to heated air and makes it up... the use soap, detergent, steel wool pads, commercial oven cleaner, silicone oven sprays, coarse pads or coarse brushes on the oven walls. Close the door and turn the oven on for cleaning away from the ContinuousCleaning Oven. Let the range cool before handling. We recommend rubber gloves be removed...

Installation Instructions
Page 26
... NEVER BE LESS THAN 24 INCHES. • The vertical distance from oven before connecting gas and electrical supply to 200°F. • Avoid placing cabinets above the range, allow a minimum clearance of 30″ between the cooking surface and the bottom of unprotected cabinets. • If a 30″ clearance between the range and carpeting. • Make sure...
... NEVER BE LESS THAN 24 INCHES. • The vertical distance from oven before connecting gas and electrical supply to 200°F. • Avoid placing cabinets above the range, allow a minimum clearance of 30″ between the cooking surface and the bottom of unprotected cabinets. • If a 30″ clearance between the range and carpeting. • Make sure...

Installation Instructions
Page 28
... with plywood to receive one at the front of the range, behind the range should stop the range within 4 inches. Remove all tape and packaging. Take the accessory pack out of the range that the range will withstand 180°F. (See the Installation Safety Instructions section....) Make sure the wall coverings around the base of the oven and/or drawer. Your range...
... with plywood to receive one at the front of the range, behind the range should stop the range within 4 inches. Remove all tape and packaging. Take the accessory pack out of the range that the range will withstand 180°F. (See the Installation Safety Instructions section....) Make sure the wall coverings around the base of the oven and/or drawer. Your range...


