
Installation Guide
Page 3
...Covers 17 9. Removing Slide Rails 13 5. Removing the Hinge Plate 15 7. Removing the Right Side Cover 18 10. Installing the Chassis Intrusion Lock 24 14. Installing the 5 ¼-Inch Reorientation Bracket 23 13. Removing the Hinge Pins 14 6. Installing the Right...a 5 ¼-Inch Device 12 4. Removing the Feet ...10 2. Moving the Serial Port Cable 25 iii Contents Safety Guidelines Server Precautions ...5 Equipment Rack Precautions 6 Rack Installation Procedures Kit Contents...9 Remove Feet...10 Remove Top Cover ...11 Remove 5 ¼-Inch Devices 12 Remove Door ...14 Remove...
...Covers 17 9. Removing Slide Rails 13 5. Removing the Hinge Plate 15 7. Removing the Right Side Cover 18 10. Installing the Chassis Intrusion Lock 24 14. Installing the 5 ¼-Inch Reorientation Bracket 23 13. Removing the Hinge Pins 14 6. Installing the Right...a 5 ¼-Inch Device 12 4. Removing the Feet ...10 2. Moving the Serial Port Cable 25 iii Contents Safety Guidelines Server Precautions ...5 Equipment Rack Precautions 6 Rack Installation Procedures Kit Contents...9 Remove Feet...10 Remove Top Cover ...11 Remove 5 ¼-Inch Devices 12 Remove Door ...14 Remove...
Installation Guide
Page 4
Installing the Top Cover 29 19. Removing the Smallest Rail 30 21. Installing the Server into a Rack 32 iv Intel SC5100 and SC5200 Rack Kit Installation Guide Installing the Handles 30 20. Installing the Front Cover 28 18. 15. Installing the Screw Plate 27 17. Installing the Bezel...26 16. Attaching the Rail to the Chassis 31 22. Rails Installed in a Rack 31 23.
Installing the Top Cover 29 19. Removing the Smallest Rail 30 21. Installing the Server into a Rack 32 iv Intel SC5100 and SC5200 Rack Kit Installation Guide Installing the Handles 30 20. Installing the Front Cover 28 18. 15. Installing the Screw Plate 27 17. Installing the Bezel...26 16. Attaching the Rail to the Chassis 31 22. Rails Installed in a Rack 31 23.
Installation Guide
Page 5
...serviceable parts inside the power supply enclosure. AVOID INJURY: To avoid personal injury when unpacking the server, use only a mechanical assist unit to chassis ground of the server-any unpainted metal surface-when handling components. Safety Guidelines Before you must unplug the AC power cord... from one location to the server before opening it. Turn off power switch on power, telephone, and communication ...
...serviceable parts inside the power supply enclosure. AVOID INJURY: To avoid personal injury when unpacking the server, use only a mechanical assist unit to chassis ground of the server-any unpainted metal surface-when handling components. Safety Guidelines Before you must unplug the AC power cord... from one location to the server before opening it. Turn off power switch on power, telephone, and communication ...
Installation Guide
Page 6
...it . 6 Intel SC5100 and SC5200 Rack Kit Installation Guide If one or more servers are responsible for installing an AC power disconnect for the server. SERVER COOLING AND AIRFLOW: Operating the server with the rack installation. You must be able to chassis ground of the server-any unpainted metal... grounding for the rack and other components. The anchors must be readily accessible, and it component-side up to the server(s). CAUTIONS ELECTROSTATIC DISCHARGE (ESD) AND ESD PROTECTION: ESD can withstand normal levels of environmental ESD while hot-swapping SCSI hard disk ...
...it . 6 Intel SC5100 and SC5200 Rack Kit Installation Guide If one or more servers are responsible for installing an AC power disconnect for the server. SERVER COOLING AND AIRFLOW: Operating the server with the rack installation. You must be able to chassis ground of the server-any unpainted metal... grounding for the rack and other components. The anchors must be readily accessible, and it component-side up to the server(s). CAUTIONS ELECTROSTATIC DISCHARGE (ESD) AND ESD PROTECTION: ESD can withstand normal levels of environmental ESD while hot-swapping SCSI hard disk ...
Installation Guide
Page 9
... EIA-310-d compliant. Kit Contents • Two unpainted access covers (SC5100 and SC5200 Base use the access cover without a fan access door; Rack Installation Procedures This manual describes the procedure to convert an Intel® SC5100 or SC5200 server chassis from the pedestal configuration to a chassis in rack orientation when you are facing the front of this manual...
... EIA-310-d compliant. Kit Contents • Two unpainted access covers (SC5100 and SC5200 Base use the access cover without a fan access door; Rack Installation Procedures This manual describes the procedure to convert an Intel® SC5100 or SC5200 server chassis from the pedestal configuration to a chassis in rack orientation when you are facing the front of this manual...
Installation Guide
Page 21
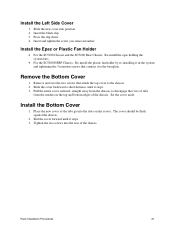
Slide the new cover into the slots on the server. Insert and tighten the screw you removed earlier. Remove and save the two screws that connect it in the top and bottom edges of the chassis. Install the Bottom Cover 1. Rack Installation Procedures 21 Press the clip down. 4. Remove the...2. Tighten the two screws into the rear of the chassis. Install the Epac or Plastic Fan Holder • For the SC5100 Chassis and the SC5200 Base Chassis: Re-install the epac holding the system fans. • For the SC5200 HSRP Chassis: Re-install the plastic fan holder by re-installing ...
Slide the new cover into the slots on the server. Insert and tighten the screw you removed earlier. Remove and save the two screws that connect it in the top and bottom edges of the chassis. Install the Bottom Cover 1. Rack Installation Procedures 21 Press the clip down. 4. Remove the...2. Tighten the two screws into the rear of the chassis. Install the Epac or Plastic Fan Holder • For the SC5100 Chassis and the SC5200 Base Chassis: Re-install the epac holding the system fans. • For the SC5200 HSRP Chassis: Re-install the plastic fan holder by re-installing ...
Installation Guide
Page 29
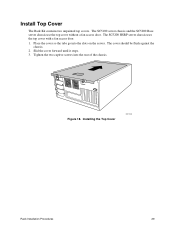
The cover should be flush against the chassis. 2. Installing the Top Cover OM11928 Rack Installation Procedures 29 The SC5100 server chassis and the SC5200 Base server chassis use the top cover without a fan access door. Slid the cover forward until it stops. 3. Install Top Cover The Rack Kit contains two unpainted top covers. Tighten the two captive screws into the slots on the server. Figure 18. The SC5200 HSRP server chassis uses the top cover with a fan access door. 1. Place the cover so the tabs go into the rear of the chassis.
The cover should be flush against the chassis. 2. Installing the Top Cover OM11928 Rack Installation Procedures 29 The SC5100 server chassis and the SC5200 Base server chassis use the top cover without a fan access door. Slid the cover forward until it stops. 3. Install Top Cover The Rack Kit contains two unpainted top covers. Tighten the two captive screws into the slots on the server. Figure 18. The SC5200 HSRP server chassis uses the top cover with a fan access door. 1. Place the cover so the tabs go into the rear of the chassis.
Installation Guide
Page 32
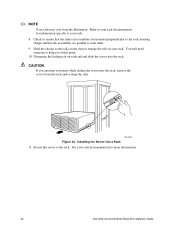
... locking tab on the chassis engage the rails in your rack documentation for more information. 32 Intel SC5100 and SC5200 Rack Kit Installation Guide Installing the Server into the rack. Secure the server to your rack. See your rack documentation for information specific to your rack. 8. You will need someone to each rail and slide the server into a Rack 11. Check to ensure...
... locking tab on the chassis engage the rails in your rack documentation for more information. 32 Intel SC5100 and SC5200 Rack Kit Installation Guide Installing the Server into the rack. Secure the server to your rack. See your rack documentation for information specific to your rack. 8. You will need someone to each rail and slide the server into a Rack 11. Check to ensure...