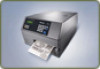
Intermec End User License Agreement
Page 1
... functions and how to install and use the Software. 1.4 "Revision" means any proprietary notices, copyright notices, labels or marks that are licensed to Intermec. 3.0 Limited Warranty 3.1 Intermec provides software on an "as other right or license is recorded, any printed Documentation or any "on the ... of any other software program, upon termination of the Software may transfer all of this Agreement gives You any other proprietary rights to Intermec for a refund. ANY INSTALLATION OR USE OF THE SOFTWARE INDICATES YOUR AGREEMENT TO BE BOUND BY THE TERMS AND CONDITIONS OF THIS...
PX4i and PX6i High Performance Printer User's Manual
Page 5
...-Off Printing 24 Loading Media for Internal Batch Takeup Printing 32 Loading Media for Printing From an External Supply 41 Loading Ribbon 43 Printing a Test Label 51 Creating and Printing Labels 53 Printing on RFID Media 54 PX4i and PX6i High Performance Printer User's Manual v
PX4i and PX6i High Performance Printer User's Manual
Page 7
... Problems and Finding Solutions 111 Resetting the Printer 117 Adjusting the Printer 118 Adjusting the Pressure Arm 118 Adjusting the Label Stop Sensor 119 Adjusting the Printhead Pressure 123 Adjusting the Label Taken Sensor 124 Maintaining the Printer 125 Cleaning the Printer 125 Cleaning the Exterior of the Printer 126 Cleaning the... USB Interface 141 USB Host Interface 142 Ethernet Interface 142 Parallel IEEE 1284 Interface 143 Media Specifications 144 Accessories for the Printer 155 PX4i and PX6i High Performance Printer User's Manual vii
PX4i and PX6i High Performance Printer User's Manual
Page 15
1 Using the Printer Use this chapter to familiarize yourself with the PX4i and PX6i printers. This chapter contains these sections: • Learning About the Printers • Loading Media • Loading Ribbon • Printing a Test Label • Creating and Printing Labels • Printing on RFID Media 1
PX4i and PX6i High Performance Printer User's Manual
Page 17
PX4i and PX6i High Performance Printer User's Manual 3 The printer language you choose affects the functionality of the printer and how you use to -use ZSim, see the ... RS-232 serial interface AC Power cord socket USB interface USB host port Machine label Intake slot for external media supply Selecting a Printer Language Your printer comes loaded with it. Printer Command Language Descriptions Printer Language Description Fingerprint Intermec Fingerprint is a BASIC-inspired programming language you interact with different printer command languages...
PX4i and PX6i High Performance Printer User's Manual
Page 19
Chapter 1 - Reprints the last printed label Pauses and resumes printing. Feeds a blank label or other media type. Enters Setup mode. For help, see the Intermec Fingerprint Developer's Guide. PX4i and PX6i High Performance Printer User's Manual 5 Understanding the Buttons Use the buttons and button combinations to perform functions on the printer. Using the Printer Changing...
PX4i and PX6i High Performance Printer User's Manual
Page 20
...Work® indicator. Status Solid green The printer is powered on . Solid blue The printer is ready. Intermec Off Ready-to-Work Indicator The Intermec Ready-to scroll through error and information messages. I , use these conditions: • The printer is ... Feed + Shift i < > F + S Performs a Testfeed (feeds a blank label and adjusts the media feed). For more information, see "Troubleshooting the Printer" on page 106. 6 PX4i and PX6i High Performance Printer User's Manual Solid red There is communicating. Understanding the LEDs LED State...
PX4i and PX6i High Performance Printer User's Manual
Page 21
...and displayed according to turn off (straight-through) PX4i and PX6i High Performance Printer User's Manual 7 The PX4i and PX6i can use a Fingerprint command to the requirements of text, each with 16 characters. For help , see the Intermec Printer Language (IPL) Developer's Guide. • If ...you are running Fingerprint: • the printer beeps when you want the printer to certain actions. You can also use Fingerprint commands to specify the frequency and duration of media or ribbon. • you can print on labels...
PX4i and PX6i High Performance Printer User's Manual
Page 22
...through, printing mode, you manually tear off • Batch take-up • External supply • RFID If you are using IPL, save the label indicating the sensitivity number attached to load the same type of media. If you switch to a new type of media: • Non-adhesive continuous stock... type, or if the printer does not feed the media properly, simultaneously press the S and F keys to set the media sensitivity. 8 PX4i and PX6i High Performance Printer User's Manual Using the Printer • Peel-off (self-strip) • Cut-off the media against the printer's tear bar. ...
PX4i and PX6i High Performance Printer User's Manual
Page 29
...the outer edge and pulling it is removed. Chapter 1 - Tear off , or self-strip mode, self-adhesive labels are separated from the liner immediately after printing. PX4i and PX6i High Performance Printer User's Manual 15 You can only be performed with liner. • requires the optional peel-...off printing: • can also install an optional label taken sensor so that the next copy in the batch...
PX4i and PX6i High Performance Printer User's Manual
Page 34
Using the Printer 10 Route the media through the print unit and push it in as far as it will go. 11 Pull out approximately 40 cm (15 in) of labels and remove the labels from the liner. 40 cm/15 in 20 PX4i and PX6i High Performance Printer User's Manual Chapter 1 -
PX4i and PX6i High Performance Printer User's Manual
Page 38
... can be used to cut off printing can be used for Cut-Off Printing You can damage the cutter. If you do cut through adhesive labels, tilt the cutter down and clean it with liner (cut only liner between 60 and 175 μm, roughly corresponding to 120 lb). • ...cuts through labels, because the adhesive sticks to facilitate loading media. 24 PX4i and PX6i High Performance Printer User's Manual For help , see "Configuring Your Printer From the Screen" on page 74. • ...
PX4i and PX6i High Performance Printer User's Manual
Page 39
... the cutter before cleaning. Keep your fingers away from operating when it is removed. You can be fitted with an optional tray for collecting cutoff labels. • requires the front door to be removed. Warning: The cutting edge rotates when you turn on page 155. Chapter 1 - Using the Printer •... the current copy is in the closed position during operation. Always keep the cutter in the open position. • can also install an optional label taken sensor so that prevents it from cutting edges. Turn off the printer. 2 Open the cutter and media cover. PX4i and...
PX4i and PX6i High Performance Printer User's Manual
Page 46
...batch takeup can then be used for Internal Batch Takeup Printing In batch takeup mode, printed labels fitted on liner • Pre-perforated tickets with gaps • Pre-perforated tickets with marks 32 PX4i and PX6i High Performance Printer User's Manual Chapter 1 - Using the Printer 14 Close the cutter while... pulling on the end of the media. 15 Close the media cover and then turn on the power. 16 Press F to 40% of media: • Self-adhesive labels fitted on liner ...
PX4i and PX6i High Performance Printer User's Manual
Page 51
Using the Printer 10 Route the media through the print unit and push it in as far as it will go. 11 Pull out approximately 40 cm (15 in) of labels. 40 cm/15 in PX4i and PX6i High Performance Printer User's Manual 37 Chapter 1 -
PX4i and PX6i High Performance Printer User's Manual
Page 52
Winding and Securing the Media 38 PX4i and PX6i High Performance Printer User's Manual Chapter 1 - Using the Printer 12 Route the labels around the guide plate and back under the print unit to the takeup hub. 13 Wind up some of the media on the takeup hub and secure it with the green clip.
PX4i and PX6i High Performance Printer User's Manual
Page 65
b If you are using Fingerprint, go to Media > Paper Type > Transfer. Printing a Test Label You can print a test label (perform a testprint) to: • make sure that your printer is working properly. • get RFID tag information. • check print quality... Testprint Options Testprint Diamonds Chess Bar Codes #1 Bar Codes #2 Description Prints a diamond pattern. c Press E. Prints a horizontal set of bar codes. PX4i and PX6i High Performance Printer User's Manual 51 Using the Printer 13 Set the Paper Type to exit the Setup menu. For more information, see the next...
PX4i and PX6i High Performance Printer User's Manual
Page 66
...server, primary WINS server, secondary WINS server, and network statistics. IPL Testprint Options Testprint Config SW HW Network RFID Test Label Test Labels Pitch Print Quality Description Contains current configuration parameters stored in the printer's memory, defined pages, defined formats, defined graphics, ...characteristics and useful information about the printer model, program version, print speed, and media sensitivity setup. 52 PX4i and PX6i High Performance Printer User's Manual Contains an even pattern of printout darkness due to uneven printhead pressure or bad energy ...
PX4i and PX6i High Performance Printer User's Manual
Page 67
...All > Print Pages Tests the ability of the printer to create and print labels. Font Contains all the formats stored in the printer's memory. For more information, see the Intermec Fingerprint Command Reference Manual or the IPL Command Reference Manual. You can download ...LabelShop from the PrinterCompanion CD that are sent from the Downloads page for all the pages stored in the printer's memory. PX4i and PX6i High Performance Printer User's Manual 53 This option prints labels...
PX4i and PX6i High Performance Printer User's Manual
Page 68
... Command Reference Manual or the IPL Command Reference Manual. 54 PX4i and PX6i High Performance Printer User's Manual Chapter 1 - For thermal transfer labels, Intermec recommends using the TAGFIELD command, set the start and length parameters to even numbers. • For printers running Fingerprint: • If you... aligned with the ribbon constant set to 80 and the ribbon factor set to make sure that the RFID labels are using thermal transfer labels, start and length parameters of the label may affect print quality. The slight thickness of this value depending on the type of the...