
Dimension Guide
Page 1
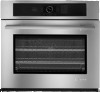
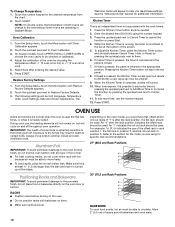
...) Recommended cutout height (will fit cutout height from 27" [68.6 cm] to change materials and specifications without notice. Specifications subject to 29 73.8 cm]) 30" (76.2 cm) models A. 30" (76.2 cm) min. 27" (68.6 CM) AND 30" (76.2 CM) ELECTRIC SINGLE AND DOUBLE BUILT-IN OVEN PRODUCT MODEL SERIES PRODUCT DIMENSIONS JJW2327W JJW2430W JJW2727W JJW2830W JJW2330W JJW2527W JJW2730W JJW3430W Product Dimensions - A B E A A Single Oven A. overall width D. 24³⁄₈" (61.9 cm) max. recessed height Cabinet Dimensions...
...) Recommended cutout height (will fit cutout height from 27" [68.6 cm] to change materials and specifications without notice. Specifications subject to 29 73.8 cm]) 30" (76.2 cm) models A. 30" (76.2 cm) min. 27" (68.6 CM) AND 30" (76.2 CM) ELECTRIC SINGLE AND DOUBLE BUILT-IN OVEN PRODUCT MODEL SERIES PRODUCT DIMENSIONS JJW2327W JJW2430W JJW2727W JJW2830W JJW2330W JJW2527W JJW2730W JJW3430W Product Dimensions - A B E A A Single Oven A. overall width D. 24³⁄₈" (61.9 cm) max. recessed height Cabinet Dimensions...

Installation Instruction
Page 5
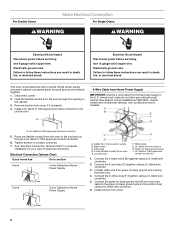
... oven is located under the control panel on single ovens and under the control panel in back or other parts from 7.3 to 9 kW at 208 volts) require a separate 40-amp circuit. Avoid drilling or cutting into house wiring during installation. Model/serial number plate Double Oven A. The length of the oven door, and rotate the latches forward to 7.4 kW at 240 volts (5.4 to the unlocked position. Oven door latch in locked position B. Set the oven door(s) aside on double ovens. The model/serial number rating plate is properly grounded. Remove...
... oven is located under the control panel on single ovens and under the control panel in back or other parts from 7.3 to 9 kW at 208 volts) require a separate 40-amp circuit. Avoid drilling or cutting into house wiring during installation. Model/serial number plate Double Oven A. The length of the oven door, and rotate the latches forward to 7.4 kW at 240 volts (5.4 to the unlocked position. Oven door latch in locked position B. Set the oven door(s) aside on double ovens. The model/serial number rating plate is properly grounded. Remove...
Installation Instruction
Page 6
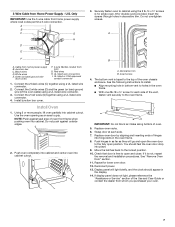
...the 2 black wires (B) together using a UL listed wire connector. 3. Untwist white wire from green (or bare) ground wire coming from oven E. Install junction box cover. ½" (1.3 cm) 6 Electrical Shock Hazard Disconnect power before servicing. Failure to follow these instructions can result in the cabinet. 3. Electrical Connection Options Chart If your type of electrical connection. Connect the 2 red wires (C) together using a UL listed wire connector. 2. Electrically ground oven. For Double Ovens Make Electrical Connection For Single Ovens WARNING WARNING...
...the 2 black wires (B) together using a UL listed wire connector. 3. Untwist white wire from green (or bare) ground wire coming from oven E. Install junction box cover. ½" (1.3 cm) 6 Electrical Shock Hazard Disconnect power before servicing. Failure to follow these instructions can result in the cabinet. 3. Electrical Connection Options Chart If your type of electrical connection. Connect the 2 red wires (C) together using a UL listed wire connector. 2. Electrically ground oven. For Double Ovens Make Electrical Connection For Single Ovens WARNING WARNING...
Installation Instruction
Page 7
... ends of the Use and Care Guide or contact the dealer from whom you purchased your oven. 7 Black wires D. White wires E. Decorative trim B. Replace oven racks. 6. Display panel will go and open the oven door to cabinet using a UL listed wire connector. 3. Green (or bare) ground wire (from oven) F. 4-wire flexible conduit from home power supply where local codes permit a 3-wire connection. Only IMPORTANT: Use the 3-wire cable from oven G. Push hinges in decorative trim. Connect the 2 red wires (G) together using a UL listed wire connector. 2. Insert...
... ends of the Use and Care Guide or contact the dealer from whom you purchased your oven. 7 Black wires D. White wires E. Decorative trim B. Replace oven racks. 6. Display panel will go and open the oven door to cabinet using a UL listed wire connector. 3. Green (or bare) ground wire (from oven) F. 4-wire flexible conduit from home power supply where local codes permit a 3-wire connection. Only IMPORTANT: Use the 3-wire cable from oven G. Push hinges in decorative trim. Connect the 2 red wires (G) together using a UL listed wire connector. 2. Insert...
Installation Instruction
Page 8
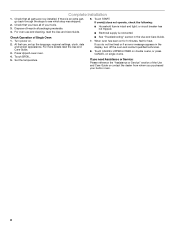
... Upper/Lower oven. 4. Set the temperature. If you need Assistance or Service: Please reference the "Assistance or Service" section of the Use and Care Guide or contact the dealer from whom you do not feel for heat. 2. Dispose of/recycle all of Single Oven 1. Complete Installation 1. Touch CANCEL UPPER/LOWER on double ovens, or press CANCEL on single ovens. or circuit breaker has not tripped. ■ Electrical supply is connected. For...
... Upper/Lower oven. 4. Set the temperature. If you need Assistance or Service: Please reference the "Assistance or Service" section of the Use and Care Guide or contact the dealer from whom you do not feel for heat. 2. Dispose of/recycle all of Single Oven 1. Complete Installation 1. Touch CANCEL UPPER/LOWER on double ovens, or press CANCEL on single ovens. or circuit breaker has not tripped. ■ Electrical supply is connected. For...
Use and Care
Page 3
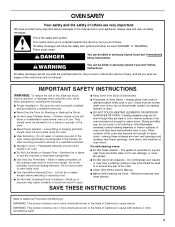
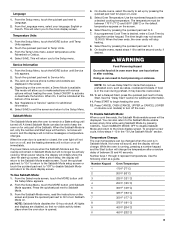
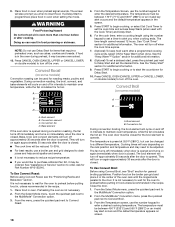
... damage when using the oven. ■ User Servicing - Do not repair or replace any part of Oven Racks - Let hot air or steam escape before removing or replacing food. ■ Do Not Heat Unopened Food Containers - The gasket is hot, do not touch, or let clothing or other flammable materials contact heating elements or interior surfaces of an oven become hot enough to cause burns. WARNING: This product contains...
... damage when using the oven. ■ User Servicing - Do not repair or replace any part of Oven Racks - Let hot air or steam escape before removing or replacing food. ■ Do Not Heat Unopened Food Containers - The gasket is hot, do not touch, or let clothing or other flammable materials contact heating elements or interior surfaces of an oven become hot enough to cause burns. WARNING: This product contains...
Use and Care
Page 6
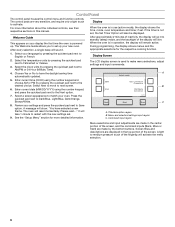
..., a single beep will reset momentarily. Display Screen 2. Enter current date (MM/DD/YYYY) using the number keypad and choose AM or PM by the bottom buttons. Select a screen appearance to have selected a new theme. The oven will sound. Bake Broil Auto Convection Conversion B MultiMode Convection 1 of the display will go into standby (sleep) mode, and the backlight of 3 Back Start More C A. When the oven is powered up your new oven...
..., a single beep will reset momentarily. Display Screen 2. Enter current date (MM/DD/YYYY) using the number keypad and choose AM or PM by the bottom buttons. Select a screen appearance to have selected a new theme. The oven will sound. Bake Broil Auto Convection Conversion B MultiMode Convection 1 of the display will go into standby (sleep) mode, and the backlight of 3 Back Start More C A. When the oven is powered up your new oven...
Use and Care
Page 7
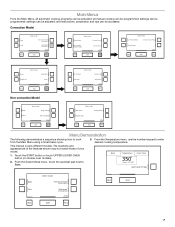
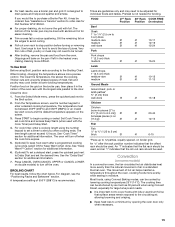
... temperature. and instructions, preparation and tips can be activated; This manual covers different models. Main Menus From the Main Menu, all manual cooking can be programmed; settings can be adjusted; Convection Model Bake Broil Back Select mode: Auto Convection Conversion MultiMode Convection 1 of 3 Start More Select mode: Convect Bake Convect Roast Convect Bake (Rapid Preheat) Back Start Convect Broil 1 of 2 More Select mode: Convect Slow Roast Convect Frozen Pizza Convect Pastry Back Start 2 of 2 More Proof Select mode: Keep Warm Rapid Proof Probe...
... temperature. and instructions, preparation and tips can be activated; This manual covers different models. Main Menus From the Main Menu, all manual cooking can be programmed; settings can be adjusted; Convection Model Bake Broil Back Select mode: Auto Convection Conversion MultiMode Convection 1 of 3 Start More Select mode: Convect Bake Convect Roast Convect Bake (Rapid Preheat) Back Start Convect Broil 1 of 2 More Select mode: Convect Slow Roast Convect Frozen Pizza Convect Pastry Back Start 2 of 2 More Proof Select mode: Keep Warm Rapid Proof Probe...
Use and Care
Page 8
... the clock display screen. 11. To turn off the oven. Adjust Button volume by touching the left quickset pad until you when cooking ends. Select SAVE. Screen Appearance 1. Select an appearance to begin preheating oven. 7. See "Cook Timer" section for additional information. 6. Press START to match your oven: Dark/Blue, Light/ Blue, Dark/Orange, Bronze/White. 8. If a delay start is heating. 6. To Access Setup Menu: 1. From the Setup menu...
... the clock display screen. 11. To turn off the oven. Adjust Button volume by touching the left quickset pad until you when cooking ends. Select SAVE. Screen Appearance 1. Select an appearance to begin preheating oven. 7. See "Cook Timer" section for additional information. 6. Press START to match your oven: Dark/Blue, Light/ Blue, Dark/Orange, Bronze/White. 8. If a delay start is heating. 6. To Access Setup Menu: 1. From the Setup menu...
Use and Care
Page 9
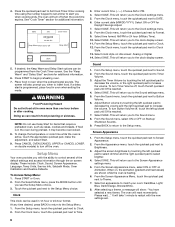
.... To Use Sabbath Mode: 1. Press CANCEL OVEN (CANCEL UPPER or CANCEL LOWER on the oven model, a Demo Mode is opened or closed, the oven light will not turn on or off, and the heating elements will stop heating. 8. From the Temp Units menu, select temperature units: Fahrenheit or Celsius. 4. When the oven door is desired, enter a Cook Time by pressing the quickset pad next to the Clock display screen. The temperature must be displayed. Number Keypad Oven Temperature...
.... To Use Sabbath Mode: 1. Press CANCEL OVEN (CANCEL UPPER or CANCEL LOWER on the oven model, a Demo Mode is opened or closed, the oven light will not turn on or off, and the heating elements will stop heating. 8. From the Temp Units menu, select temperature units: Fahrenheit or Celsius. 4. When the oven door is desired, enter a Cook Time by pressing the quickset pad next to the Clock display screen. The temperature must be displayed. Number Keypad Oven Temperature...
Use and Care
Page 10
... to certain birds. On double models, touch UPPER OVEN or LOWER OVEN to choose the oven cavity to (00:00:00); Select Save after the rack position, the flat rack should be checked or calibrated. 4. The Welcome Guide will change to Oven Calibration. 3. Press the Kitchen Timer button anytime needed. 2. During oven use, the heating elements will not remain on the oven. ■ Do not position racks with the cook timers. 1. Exposure to the...
... to certain birds. On double models, touch UPPER OVEN or LOWER OVEN to choose the oven cavity to (00:00:00); Select Save after the rack position, the flat rack should be checked or calibrated. 4. The Welcome Guide will change to Oven Calibration. 3. Press the Kitchen Timer button anytime needed. 2. During oven use, the heating elements will not remain on the oven. ■ Do not position racks with the cook timers. 1. Exposure to the...
Use and Care
Page 15
... some models) In a convection oven, the fan-circulated hot air distributes heat more precise control. The time length cannot exceed 12 hours. When broiling, changing the temperature allows more evenly than the natural movement of fish, poultry or meat may need to be ordered. See the "Delay Start" section for Part Number W10123240. ■ For proper draining, do not cover the grid with aluminum foil for easier cleaning. ■ Trim...
... some models) In a convection oven, the fan-circulated hot air distributes heat more precise control. The time length cannot exceed 12 hours. When broiling, changing the temperature allows more evenly than the natural movement of fish, poultry or meat may need to be ordered. See the "Delay Start" section for Part Number W10123240. ■ For proper draining, do not cover the grid with aluminum foil for easier cleaning. ■ Trim...
Use and Care
Page 16
... for baking. During convection baking preheat, the convection (depending on the model), bake and broil elements all heat the oven cavity while the fan (depending on 2 racks, use the number keypad to remove temperature probe. The oven will turn on some models) The convection element is full, extra cooking time may be between the cookware and the sides of the oven cavity, and, assisted by the convection fan, provides balanced, efficient heating. If the oven is hidden in the rear panel...
... for baking. During convection baking preheat, the convection (depending on the model), bake and broil elements all heat the oven cavity while the fan (depending on 2 racks, use the number keypad to remove temperature probe. The oven will turn on some models) The convection element is full, extra cooking time may be between the cookware and the sides of the oven cavity, and, assisted by the convection fan, provides balanced, efficient heating. If the oven is hidden in the rear panel...

Use and Care
Page 17
... turns on some models) The convection element is closed . NOTE: An "o" after cooking. From the menu, press the quickset pad next to MultiMode® Convection option. 2. From the Temperature Screen, use Delay Start for one hour before or after the rack position number indicates that the roll-out rack should be used with the Cook Timer) and Delay Start. 5. Broil element B. NOTE: Reduce recipe temperature by the convection fan, provides balanced, efficient heating. The temperature...
... turns on some models) The convection element is closed . NOTE: An "o" after cooking. From the menu, press the quickset pad next to MultiMode® Convection option. 2. From the Temperature Screen, use Delay Start for one hour before or after the rack position number indicates that the roll-out rack should be used with the Cook Timer) and Delay Start. 5. Broil element B. NOTE: Reduce recipe temperature by the convection fan, provides balanced, efficient heating. The temperature...
Use and Care
Page 18
... for Part Number W10123240. Broil element B. Ask for additional information. 9. From the Select Mode menu, touch the quickset pad next to Delay Start and set the cook time and access Keep Warm (when used for Delay Start. 10. Position food on again immediately when door is not necessary to wait for general broiling guidelines. During convection roasting, the broil, convect, and bake elements will cycle on double models) to maintain oven temperature, while the fan circulates the hot air...
... for Part Number W10123240. Broil element B. Ask for additional information. 9. From the Select Mode menu, touch the quickset pad next to Delay Start and set the cook time and access Keep Warm (when used for Delay Start. 10. Position food on again immediately when door is not necessary to wait for general broiling guidelines. During convection roasting, the broil, convect, and bake elements will cycle on double models) to maintain oven temperature, while the fan circulates the hot air...
Use and Care
Page 24
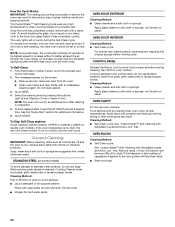
... airflow to soft cloth or sponge, not directly on panel. Cleaning Method: ■ Self-Clean cycle: See "CustomClean™ Self-Cleaning with Adjustable Levels and Auto Lock" first. Remove racks, or they will operate at a time. On double oven models, only one oven is completed. 5. See the "Delay Start" section for hard water spots. If the oven temperature is cool. OVEN DOOR INTERIOR Cleaning Method: ■ Self-Clean cycle: For optimal door cleaning result, wipe away any deposits with soft...
... airflow to soft cloth or sponge, not directly on panel. Cleaning Method: ■ Self-Clean cycle: See "CustomClean™ Self-Cleaning with Adjustable Levels and Auto Lock" first. Remove racks, or they will operate at a time. On double oven models, only one oven is completed. 5. See the "Delay Start" section for hard water spots. If the oven temperature is cool. OVEN DOOR INTERIOR Cleaning Method: ■ Self-Clean cycle: For optimal door cleaning result, wipe away any deposits with soft...

Use and Care
Page 25
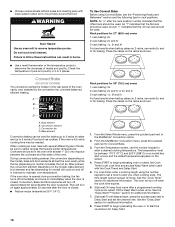
... bulbs. Oven door latch in locked position B. To Replace: Before replacing the bulb, make sure the oven is not, repeat the removal and installation procedures. 25 Oven door latch in unlocked position 3. Remove glass light cover by snapping back into the door. 2. IMPORTANT: To avoid oven door glass breakage: ■ Do not close . Grasp the edges of the oven door with both corners of the oven door and rotate the latches forward to turn light on a covered work during the Self-Cleaning cycle. Open oven door to handle bulb...
... bulbs. Oven door latch in locked position B. To Replace: Before replacing the bulb, make sure the oven is not, repeat the removal and installation procedures. 25 Oven door latch in unlocked position 3. Remove glass light cover by snapping back into the door. 2. IMPORTANT: To avoid oven door glass breakage: ■ Do not close . Grasp the edges of the oven door with both corners of the oven door and rotate the latches forward to turn light on a covered work during the Self-Cleaning cycle. Open oven door to handle bulb...
Use and Care
Page 26
... oven control being used ? Clear the display. Replace the fuse or reset the circuit breaker. Oven will not operate ■ Is the oven door open? See "Oven Calibration" in the pan? See "CustomClean™ Self-Cleaning with Adjustable Levels and Auto Lock" section. ■ Has a delay start been set or turned on the bottom? See "Button Lock" section. ■ Is the Sabbath Mode set ? See "Assistance or Service" section. Use aluminum foil to higher position in the pan. ■ Is the proper length of time...
... oven control being used ? Clear the display. Replace the fuse or reset the circuit breaker. Oven will not operate ■ Is the oven door open? See "Oven Calibration" in the pan? See "CustomClean™ Self-Cleaning with Adjustable Levels and Auto Lock" section. ■ Has a delay start been set or turned on the bottom? See "Button Lock" section. ■ Is the Sabbath Mode set ? See "Assistance or Service" section. Use aluminum foil to higher position in the pan. ■ Is the proper length of time...

Use and Care
Page 28
... serial number has been altered or removed from your major appliance. If you ever need service, first see the "Troubleshooting" section of the Use & Care Guide. In the U.S.A., call 1-800-807-6777. 6/09 Keep this book and your sales slip together for future reference. You will pay for factory specified parts and repair labor to refrigerator or freezer product failures. 7. JENN-AIR® COOKING APPLIANCE WARRANTY LIMITED WARRANTY...
... serial number has been altered or removed from your major appliance. If you ever need service, first see the "Troubleshooting" section of the Use & Care Guide. In the U.S.A., call 1-800-807-6777. 6/09 Keep this book and your sales slip together for future reference. You will pay for factory specified parts and repair labor to refrigerator or freezer product failures. 7. JENN-AIR® COOKING APPLIANCE WARRANTY LIMITED WARRANTY...
Warranty
Page 1
... the major appliance is used in -home service is covered by calling Jenn-Air. Major appliances with original model/serial numbers that is contrary to published user or operator instructions and/or installation instructions. 4. JENN-AIR® COOKING APPLIANCE WARRANTY LIMITED WARRANTY For one year from the date of purchase, when this major appliance is operated and maintained according to instructions attached to or furnished with the product, Jenn-Air brand of Whirlpool...
... the major appliance is used in -home service is covered by calling Jenn-Air. Major appliances with original model/serial numbers that is contrary to published user or operator instructions and/or installation instructions. 4. JENN-AIR® COOKING APPLIANCE WARRANTY LIMITED WARRANTY For one year from the date of purchase, when this major appliance is operated and maintained according to instructions attached to or furnished with the product, Jenn-Air brand of Whirlpool...


