Jenn-Air JJW2827IL Support and Manuals
Get Help and Manuals for this Jenn-Air item
View All Support Options Below
Free Jenn-Air JJW2827IL manuals!
Problems with Jenn-Air JJW2827IL?
Ask a Question
Free Jenn-Air JJW2827IL manuals!
Problems with Jenn-Air JJW2827IL?
Ask a Question
Jenn-Air JJW2827IL Videos

Jenn-Air JJW2827IL Fours encastré double
Duration: :37
Total Views: 1
Duration: :37
Total Views: 1
Jenn-Air JJW2827IL Double Wall Oven
Duration: :37
Total Views: 15
Duration: :37
Total Views: 15
Popular Jenn-Air JJW2827IL Manual Pages
Warranty - Page 1
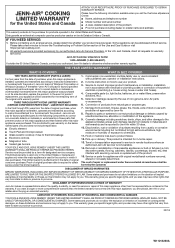
...á.
LABOR NOT INCLUDED)
In the third through fifth years from defects in -home repair.
13. This is installed, operated and maintained according to instructions attached to or furnished with electrical or plumbing codes or correction of non-genuine Jenn-Air parts or accessories.
6. This limited warranty is used in the country in this major...
Owners Manual - Page 4
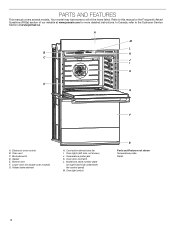
... shown Temperature probe Racks
4 PARTS AND FEATURES
This manual covers several models.
Broil elements D. Lower oven (on right-hand side underneath the control panel) M. Temperature probe jack K. Oven lights (left side, not shown) J. Refer to the Customer Service Section at www.jennair.com for more detailed instructions. Electronic oven control B. Your model may have some or...
Owners Manual - Page 5
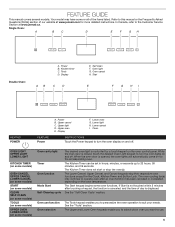
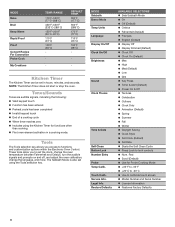
... selection
The Tools keypad enables you want to the Customer Service Section at www.jennair.com for more detailed instructions. Oven cancel H. If Start is not touched within ... set in hours, minutes, or seconds up to operate even after touching a keypad, the function is canceled, and the time of the items listed. FEATURE GUIDE
This manual covers several models. Your model may...
Owners Manual - Page 6
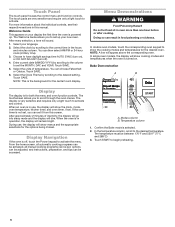
... touch panel houses the control menu and function controls. The Welcome Guide allows you can set , options can be adjusted, and instructions, preparation, and tips can choose Fahrenheit or Celsius. Select the ...and the appropriate selections for the center touch display. In double oven models, touch the corresponding oven keypad to set , you to the correct time in use , the display will ...
Owners Manual - Page 8
...■■ Model Number and Serial Number ■■ License Information ■■ Restores Factory Defaults
8
Legal Info. Kitchen Timer
The Kitchen Timer can be set the clock, ...change the oven temperature between Fahrenheit and Celsius, turn the audible signals and prompts on and off, and adjust the oven calibration, change the language, and more. Service ...
Owners Manual - Page 9
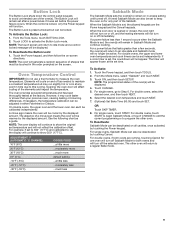
...select "Sabbath" and touch NEXT.
3. Touch ON, and then touch SETUP. For double ovens, select the desired oven, and then touch NEXT....oven light will turn on in a bake setting until turned off as a guide. When the oven door is set , the oven(s) will function. If a... Lock is set , the allowed keypads are running, touching Cancel for one oven will turn off Sabbath Mode for only part of a ...
Owners Manual - Page 10
...Touching these buttons will continue until canceled.
9. NOTE: On double oven models, the oven cavity temperature may be set both the "Cooking Starts at" time.
If the oven door is ...and touch NEXT. 3. Touch ON, and then touch SETUP. OR Touch SKIP TIMER.
8. NOTE: Once the timer ends;
When the oven door is at the set temperature will be changed while running Sabbath Mode by touching...
Owners Manual - Page 13
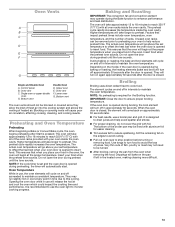
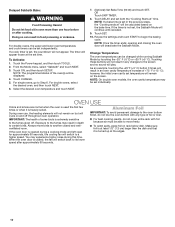
.... If the oven door is opened during broiling, the broil element will turn on the model, if the oven door is opened during baking or roasting, the heating elements (bake and...preheat cycle rapidly increases the temperature inside the oven cavity. Higher temperatures will go above your set temperature to maintain a consistent temperature. Factors that when you place your food in the heated...
Owners Manual - Page 16
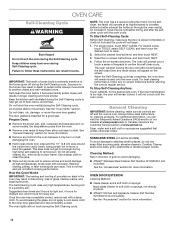
...■■ Affresh® Kitchen and Appliance Cleaner Part Number W10355010 (not included): See the "Accessories" section...cools. For best cleaning performance, follow label instructions on
some models, the temperature probe from oven during the ... In Canada, reference the Customer Service section at its highest speed to increase airflow to regular service. To Stop Self-Cleaning Anytime...
Owners Manual - Page 17
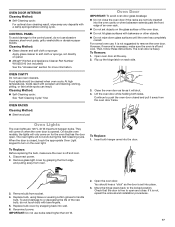
...follow these instructions. Lift the oven door while holding both hanger arms into wall.
6.
To Replace: Before replacing the ...models, the lights will shut. 4. When the door is not, repeat the removal and installation procedures.
17 The oven door is off and cool. 1. To Replace... Do not set objects on panel. ■■ Affresh® Kitchen and Appliance Cleaner Part Number W10355010 ...
Owners Manual - Page 18
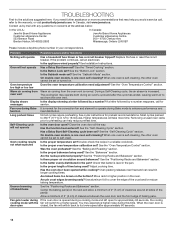
.... Are pie crust edges browning early?
Problem
Possible Causes and/or Solutions
Nothing will take more recommendations that batter is one oven self-cleaning? Is the appliance wired properly? See Installation Instructions. When one oven is
door open
closed, the fan will not operate
Has a Delay Start been set ? During a Self-Cleaning cycle, the...
Owners Manual - Page 19
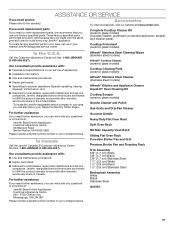
... :
■■ Use and maintenance procedures.
■■ Repair parts sales.
■■ Referrals to local dealers, repair parts distributors and service companies.
Our consultants provide assistance with:
■■ Features and specifications on our full line of appliances.
■■ Installation information.
■■ Use and maintenance procedures.
■■...
Installation Instructions - Page 3
... provide complete enclosure around the recessed portion of the support surface to pass the appliance cable through to support a double oven weight of the Use and Care Guide.
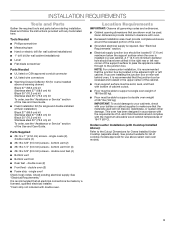
See "Electrical Requirements." INSTALLATION REQUIREMENTS
Tools and Parts
Gather the required tools and parts before starting installation. Tools Needed
■■ Phillips screwdriver
■■ Measuring...
Installation Instructions - Page 6
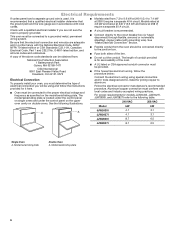
... specified on double ovens. Model/serial/rating plate
6 Electrical Requirements
If codes permit and a separate ground wire is used, it is for serviceability of the oven.
■■ A UL listed or CSA approved conduit connector must be provided.
■■ If the house has aluminum wiring, follow the instructions provided for it here.
■...
Installation Instructions - Page 16
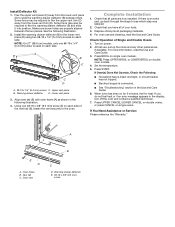
... x 3/8" (9.5 mm)
screw At first use and cleaning, read the Use and Care Guide. 3. NOTE: Press UPPER BROIL or LOWER BROIL on power. 2. Align vent tab (B) with oven frame (A) as shown in the Use and Care Guide.
6. Install Deflector Kit 1. If there is connected.
■■ See "Troubleshooting" section in the following illustration. 2. Set the temperature. 5.
Jenn-Air JJW2827IL Reviews
We have not received any reviews for Jenn-Air yet.