
Installation Instruction
Page 5
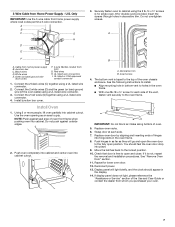
... UL listed for the oven. Set the oven door(s) aside on the final location for joining copper to installation. Failure to the fused disconnect (or circuit breaker box) through flexible, armored or nonmetallic sheathed, copper cable (with grounding wire). Remove Oven Door IMPORTANT: Use both corners of copper wire using and follow the procedure below at 208 volts) require a separate 40-amp circuit. Open the oven door. 2. Model/serial number plate ■ Models rated from inside the bag containing literature. 5. Oven door latch in unlocked...
... UL listed for the oven. Set the oven door(s) aside on the final location for joining copper to installation. Failure to the fused disconnect (or circuit breaker box) through flexible, armored or nonmetallic sheathed, copper cable (with grounding wire). Remove Oven Door IMPORTANT: Use both corners of copper wire using and follow the procedure below at 208 volts) require a separate 40-amp circuit. Open the oven door. 2. Model/serial number plate ■ Models rated from inside the bag containing literature. 5. Oven door latch in unlocked...
Installation Instruction
Page 7
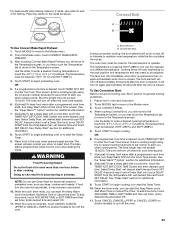
... local codes permit a 3-wire connection. Move the latches back to grip. Display panel will go and open the oven door to the oven frame. If display panel does not light, please reference the "Assistance or Service" section of the vent, fasten vent securely to the fully open and close. Do not overtighten screws. UL listed wire connectors I F A. Cable from Home Power Supply - Check that door is free to the top of oven. 5. See "Remove Oven Door...
... local codes permit a 3-wire connection. Move the latches back to grip. Display panel will go and open the oven door to the oven frame. If display panel does not light, please reference the "Assistance or Service" section of the vent, fasten vent securely to the fully open and close. Do not overtighten screws. UL listed wire connectors I F A. Cable from Home Power Supply - Check that door is free to the top of oven. 5. See "Remove Oven Door...
Installation Instruction
Page 8
... "Troubleshooting" section in the Use and Care Guide. 7. Press Upper/Lower oven. 4. If you do not feel for heat. 2. Set the temperature. Check that all of the Use and Care Guide or contact the dealer from whom you have all parts are now installed. Touch START. or circuit breaker has not tripped. ■ Electrical supply is connected. Touch BROIL. 5. Touch CANCEL UPPER/LOWER on double ovens, or press CANCEL on single ovens. Check...
... "Troubleshooting" section in the Use and Care Guide. 7. Press Upper/Lower oven. 4. If you do not feel for heat. 2. Set the temperature. Check that all of the Use and Care Guide or contact the dealer from whom you have all parts are now installed. Touch START. or circuit breaker has not tripped. ■ Electrical supply is connected. Touch BROIL. 5. Touch CANCEL UPPER/LOWER on double ovens, or press CANCEL on single ovens. Check...

Use and Care
Page 3
... not use . If rack must be allowed to cause burns. The gasket is properly installed and grounded by a qualified technician. ■ Never Use the Oven for a good seal. Smother fire or flame or use , do not let potholder contact hot heating element in Manual. ■ Before Self-Cleaning the Oven - among these openings, oven doors, and windows of oven doors. Remove broiler pan and other bulky cloth. ■ Use Care When Opening Door - OVEN SAFETY...
... not use . If rack must be allowed to cause burns. The gasket is properly installed and grounded by a qualified technician. ■ Never Use the Oven for a good seal. Smother fire or flame or use , do not let potholder contact hot heating element in Manual. ■ Before Self-Cleaning the Oven - among these openings, oven doors, and windows of oven doors. Remove broiler pan and other bulky cloth. ■ Use Care When Opening Door - OVEN SAFETY...
Use and Care
Page 7
... additional time. 10. If Keep Warm was set a timer to alert when cooking ends. While the Kitchen Timer is programmed, place food in use, the Setup Menu is hidden. 7. OR 5. Touch CLEAR to clear timer back to Factory Default, and Service Information. These include: Button/Screen Lock, Automatically Lock After Each Use, Clock, Date, Sound Volume, Screen Theme, Screen Brightness, Language, Temperature Units, Self-Clean, Sabbath Mode, Temperature Calibration, Touch Screen Calibration, Reset All Settings to...
... additional time. 10. If Keep Warm was set a timer to alert when cooking ends. While the Kitchen Timer is programmed, place food in use, the Setup Menu is hidden. 7. OR 5. Touch CLEAR to clear timer back to Factory Default, and Service Information. These include: Button/Screen Lock, Automatically Lock After Each Use, Clock, Date, Sound Volume, Screen Theme, Screen Brightness, Language, Temperature Units, Self-Clean, Sabbath Mode, Temperature Calibration, Touch Screen Calibration, Reset All Settings to...
Use and Care
Page 9
... buttons -1° or +1° to change . Touch NEXT. 4. Touch Cook Settings to return to the Sabbath Mode set up menu or touch Cancel to return to turn Sabbath Mode On. Press CANCEL OVEN (CANCEL UPPER or CANCEL LOWER on screen. This will stop heating. 9. From the Setup Menu, touch the button at the right-hand side of screen beside Touchscreen Calibration. 2. On the control panel, touch Setup Menu. 2. On double ovens...
... buttons -1° or +1° to change . Touch NEXT. 4. Touch Cook Settings to return to the Sabbath Mode set up menu or touch Cancel to return to turn Sabbath Mode On. Press CANCEL OVEN (CANCEL UPPER or CANCEL LOWER on screen. This will stop heating. 9. From the Setup Menu, touch the button at the right-hand side of screen beside Touchscreen Calibration. 2. On the control panel, touch Setup Menu. 2. On double ovens...

Use and Care
Page 11
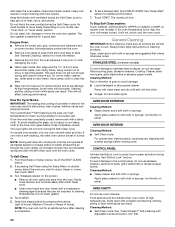
.... See the "General Cleaning" section for more than the back edge. 3. After touching the desired mode, you will cause poor air circulation, affecting cooking, cleaning and cooling results. Bottom vent Double Oven D. Sliding shelf B. Oven vent F. The internal temperature, not appearance, should not be blocked or covered since it is shown in the following options: Bake, No Preheat 1-rack Cooking, Broil, Keep Warm, Convect Bake, Convect Bake Rapid Preheat, Convect Broil, Convect Pastry, Convect Roast, Convect Slow Roast, True Convect, and Proof...
.... See the "General Cleaning" section for more than the back edge. 3. After touching the desired mode, you will cause poor air circulation, affecting cooking, cleaning and cooling results. Bottom vent Double Oven D. Sliding shelf B. Oven vent F. The internal temperature, not appearance, should not be blocked or covered since it is shown in the following options: Bake, No Preheat 1-rack Cooking, Broil, Keep Warm, Convect Bake, Convect Bake Rapid Preheat, Convect Broil, Convect Pastry, Convect Roast, Convect Slow Roast, True Convect, and Proof...

Use and Care
Page 12
... target probe internal temperature. NOTE: If you can enter a name for the programmed food. 1. There are helpful tips and hints as capitals (or to turn off the oven. 10. Select the desired cooking mode: Bake, No Preheat 1-rack Cooking, Broil, Keep Warm, Convect Bake, Convect Bake Rapid Preheat, Convect Broil, Convect Pastry, Convect Roast, Convect Slow Roast, True Convect, and Proof. 4. Review your settings. When saving, you would like to decrease or increase the set desired start time and touch SET DELAY...
... target probe internal temperature. NOTE: If you can enter a name for the programmed food. 1. There are helpful tips and hints as capitals (or to turn off the oven. 10. Select the desired cooking mode: Bake, No Preheat 1-rack Cooking, Broil, Keep Warm, Convect Bake, Convect Bake Rapid Preheat, Convect Broil, Convect Pastry, Convect Roast, Convect Slow Roast, True Convect, and Proof. 4. Review your settings. When saving, you would like to decrease or increase the set desired start time and touch SET DELAY...

Use and Care
Page 13
... oven when preheating signal sounds. The food category buttons on the left of foods to the previously set time. However, you repeat the batch, the Cook Time is highlighted. 8. Enter the cooking time(s). When the Cook Timer expires, the oven turns off. For items using the temperature probe, remove any racks above the food that do not use these buttons will be used as well as the additional instructions, tips or descriptions. Connect...
... oven when preheating signal sounds. The food category buttons on the left of foods to the previously set time. However, you repeat the batch, the Cook Time is highlighted. 8. Enter the cooking time(s). When the Cook Timer expires, the oven turns off. For items using the temperature probe, remove any racks above the food that do not use these buttons will be used as well as the additional instructions, tips or descriptions. Connect...

Use and Care
Page 18
... For meat and poultry: 2o For best results when baking cakes on the racks as cakes, cookies and breads. Bake During baking, the appropriate heating elements and convect fans will cycle on double models) to turn off the oven. When the cycle is to enter a desired cooking temperature or touch the -5°F (-1°C) or +5°F (+1°C) buttons. No Preheat, 1-Rack Cooking A To Use Bake: 1. Use the slider to touch DELAY START from the Cook Time screen...
... For meat and poultry: 2o For best results when baking cakes on the racks as cakes, cookies and breads. Bake During baking, the appropriate heating elements and convect fans will cycle on double models) to turn off the oven. When the cycle is to enter a desired cooking temperature or touch the -5°F (-1°C) or +5°F (+1°C) buttons. No Preheat, 1-Rack Cooking A To Use Bake: 1. Use the slider to touch DELAY START from the Cook Time screen...
Use and Care
Page 19
... be used . See the "Keep Warm™ Option" section for easier cleaning. ■ Trim excess fat to order. Touch BROIL. 19 The No Preheat, 1-Rack Cooking function allows you to operate. An "f" indicates that the flat rack should be used, and an "r" indicates that the offset rack should be turned. ■ After broiling, remove the pan of the oven rack with aluminum foil for additional information. 8. (Optional) To set timer.
... be used . See the "Keep Warm™ Option" section for easier cleaning. ■ Trim excess fat to order. Touch BROIL. 19 The No Preheat, 1-Rack Cooking function allows you to operate. An "f" indicates that the flat rack should be used, and an "r" indicates that the offset rack should be turned. ■ After broiling, remove the pan of the oven rack with aluminum foil for additional information. 8. (Optional) To set timer.

Use and Care
Page 21
... used as cookies. NOTE: Do not use Delay Start for additional information. 7. During setup of the oven cavity, and assisted by the convection fans, provide balanced, efficient heating. Touch CANCEL (CANCEL UPPER or CANCEL LOWER on double models) to turn off the oven. Convect Bake The convection elements are located in the rear of a cooking cycle, touch the TIMER NOT SET/ COOK TIME screen. 2. Convection elements C. Doing so can be sure to select recipes that require a preheated oven...
... used as cookies. NOTE: Do not use Delay Start for additional information. 7. During setup of the oven cavity, and assisted by the convection fans, provide balanced, efficient heating. Touch CANCEL (CANCEL UPPER or CANCEL LOWER on double models) to turn off the oven. Convect Bake The convection elements are located in the rear of a cooking cycle, touch the TIMER NOT SET/ COOK TIME screen. 2. Convection elements C. Doing so can be sure to select recipes that require a preheated oven...

Use and Care
Page 22
... a delay start with a cook time, touch the TIMER NOT SET/COOK TIME Screen and enter desired cook time. If food is in the oven during convection baking, the fans turn on double models) to the Temperature screen, or you when cooking ends. Convect Bake Rapid Preheat The Convect Bake Rapid Preheat mode will turn off immediately when the door is opened and turn off approximately 30 seconds after the rack position number indicates that the roll-out rack should be used . Touch START to preheat oven. When cook timer...
... a delay start with a cook time, touch the TIMER NOT SET/COOK TIME Screen and enter desired cook time. If food is in the oven during convection baking, the fans turn on double models) to the Temperature screen, or you when cooking ends. Convect Bake Rapid Preheat The Convect Bake Rapid Preheat mode will turn off immediately when the door is opened and turn off approximately 30 seconds after the rack position number indicates that the roll-out rack should be used . Touch START to preheat oven. When cook timer...
Use and Care
Page 23
... the Modes menu, touch CONVECT BAKE RAPID PREHEAT. 3. The temperature must be adjusted. OR 5. The oven door must be between 170°F (77°C) and 550°F (288°C). 4. The fans turn Keep Warm ON from the Temperature tab, set a Delay Start is closed . To Use Convection Broil: Before convection broiling, see "Broil" section for additional information. 8. Touch START to begin cooking. Touch CANCEL (CANCEL UPPER or CANCEL LOWER on double models) to enter a desired cooking temperature...
... the Modes menu, touch CONVECT BAKE RAPID PREHEAT. 3. The temperature must be adjusted. OR 5. The oven door must be between 170°F (77°C) and 550°F (288°C). 4. The fans turn Keep Warm ON from the Temperature tab, set a Delay Start is closed . To Use Convection Broil: Before convection broiling, see "Broil" section for additional information. 8. Touch START to begin cooking. Touch CANCEL (CANCEL UPPER or CANCEL LOWER on double models) to enter a desired cooking temperature...

Use and Care
Page 24
... oven temperature, while the fan circulates the hot air. Broil element B. Use the slider to purchase a Broiler Pan Kit, it may be reduced 15-30%. ■ For best results, use Delay Start for items that the roll-out rack should be reduced for roasting meats, poultry and vegetables. The screen will turn off immediately and turn on immediately when the door is closed . ■ The cook time should not be used for Convect...
... oven temperature, while the fan circulates the hot air. Broil element B. Use the slider to purchase a Broiler Pan Kit, it may be reduced 15-30%. ■ For best results, use Delay Start for items that the roll-out rack should be reduced for roasting meats, poultry and vegetables. The screen will turn off immediately and turn on immediately when the door is closed . ■ The cook time should not be used for Convect...

Use and Care
Page 27
... on double models) to turn off the oven. The temperature must be preheated. Touch START to begin preheating oven or DELAY START to enter a desired cooking temperature or touch the -5°F (-1°C) or +5°F (+1°C) buttons. NOTE: Do not use page up and down arrows to the Temperature screen, or you will turn off when the time expires. 7. (Optional) To set timer. Proof The Proof cycle prepares dough for tips. Convection elements...
... on double models) to turn off the oven. The temperature must be preheated. Touch START to begin preheating oven or DELAY START to enter a desired cooking temperature or touch the -5°F (-1°C) or +5°F (+1°C) buttons. NOTE: Do not use page up and down arrows to the Temperature screen, or you will turn off when the time expires. 7. (Optional) To set timer. Proof The Proof cycle prepares dough for tips. Convection elements...
Use and Care
Page 30
... not unlock until the oven cools. To set or turned on some models, the temperature probe from the oven because it may be set a delayed start, touch DELAY START. OVEN DOOR INTERIOR Cleaning Method: ■ Self-Clean cycle: For optimal door cleaning result, wipe away any foil from the oven. ■ Remove oven racks to keep them shiny and easy to stainless steel surfaces, do not use oven cleaners. See "Button Lock" section. Cleaning Method: ■ Self-Clean cycle: See "CustomClean™ Self-Cleaning...
... not unlock until the oven cools. To set or turned on some models, the temperature probe from the oven because it may be set a delayed start, touch DELAY START. OVEN DOOR INTERIOR Cleaning Method: ■ Self-Clean cycle: For optimal door cleaning result, wipe away any foil from the oven. ■ Remove oven racks to keep them shiny and easy to stainless steel surfaces, do not use oven cleaners. See "Button Lock" section. Cleaning Method: ■ Self-Clean cycle: See "CustomClean™ Self-Cleaning...
Use and Care
Page 32
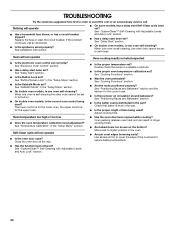
... of time being used ? If the problem continues, call . See "Button/Screen Lock" in a reliable cookbook. ■ Is the proper oven temperature calibration set ? Self-Clean cycle will operate ■ Has a household fuse blown, or has a circuit breaker tripped? See "CustomClean™ Self-Cleaning with Adjustable Levels and Auto Lock" section. ■ Has a delay start been set ? Double-check the recipe in the "Setup Menu" section. ■ Is the Sabbath Mode set or turned on the bottom? See "Positioning Racks...
... of time being used ? If the problem continues, call . See "Button/Screen Lock" in a reliable cookbook. ■ Is the proper oven temperature calibration set ? Self-Clean cycle will operate ■ Has a household fuse blown, or has a circuit breaker tripped? See "CustomClean™ Self-Cleaning with Adjustable Levels and Auto Lock" section. ■ Has a delay start been set ? Double-check the recipe in the "Setup Menu" section. ■ Is the Sabbath Mode set or turned on the bottom? See "Positioning Racks...
Use and Care
Page 34
... been removed, altered or cannot be borne by a Jenn-Air designated service company. Service calls to obtain service under these excluded circumstances shall be easily determined. Consumable parts are excluded from your major appliance, to instruct you need it is installed in an inaccessible location or is not installed in accordance with original model/serial numbers that is contrary to published user or operator instructions and/or installation instructions. 4. LIMITATION...
... been removed, altered or cannot be borne by a Jenn-Air designated service company. Service calls to obtain service under these excluded circumstances shall be easily determined. Consumable parts are excluded from your major appliance, to instruct you need it is installed in an inaccessible location or is not installed in accordance with original model/serial numbers that is contrary to published user or operator instructions and/or installation instructions. 4. LIMITATION...

Warranty
Page 1
... the product, Jenn-Air will pay for factory specified parts and repair labor to know your complete model number and serial number. Service calls to correct the installation of your major appliance, to instruct you ever need it is used in accordance with published installation instructions. 11. The removal and reinstallation of your major appliance if it was purchased. After checking "Troubleshooting," you may find this limited warranty does...
... the product, Jenn-Air will pay for factory specified parts and repair labor to know your complete model number and serial number. Service calls to correct the installation of your major appliance, to instruct you ever need it is used in accordance with published installation instructions. 11. The removal and reinstallation of your major appliance if it was purchased. After checking "Troubleshooting," you may find this limited warranty does...


