

KM-NET ADMIN Operation Guide for Ver 2.0
Page 4
List View ...3-1 User Preferences ...3-1 Global Characteristics ...3-1 Saving Changes ...3-2 Tab Scrolling ...3-2 Set Rows per Page ...3-2 32 Tab Maximum ...3-2 Edit Default List Views ...3-2 Add Tab ...3-3 Import Default Tab ...3-4 Edit Tab ...3-4 ... ...3-30 Custom Properties ...3-31 Device Manager Report ...3-32 Creating a Device Manager Report 3-32 Editing Device IDs and Device Properties 3-32 Selecting a Report Template 3-33 ii User Guide
List View ...3-1 User Preferences ...3-1 Global Characteristics ...3-1 Saving Changes ...3-2 Tab Scrolling ...3-2 Set Rows per Page ...3-2 32 Tab Maximum ...3-2 Edit Default List Views ...3-2 Add Tab ...3-3 Import Default Tab ...3-4 Edit Tab ...3-4 ... ...3-30 Custom Properties ...3-31 Device Manager Report ...3-32 Creating a Device Manager Report 3-32 Editing Device IDs and Device Properties 3-32 Selecting a Report Template 3-33 ii User Guide

KM-NET ADMIN Operation Guide for Ver 2.0
Page 6
... ...5-4 Configuring Purge Policy ...5-5 Reports ...5-5 Creating a Report ...5-6 Report Layout ...5-6 Queues ...5-7 All Queue Groups ...5-7 All Queues ...5-7 User-defined queue groups ...5-8 Users ...5-10 All User Groups ...5-10 All Users ...5-10 User-defined user groups ...5-10 Hosts ...5-12 All Hosts ...5-12 Host (Print Server) ...5-12 Host Agent ...5-12 KM Service Manager ...5-13 Configure ...Print Jobs in a Queue 6-2 Active Jobs ...6-2 Completed Jobs ...6-3 Completed Jobs Toolbar ...6-4 KM Service Manager ...6-5 Queue Management ...6-5 Configure Queues ...6-6 Glossary ...v i iv User Guide
... ...5-4 Configuring Purge Policy ...5-5 Reports ...5-5 Creating a Report ...5-6 Report Layout ...5-6 Queues ...5-7 All Queue Groups ...5-7 All Queues ...5-7 User-defined queue groups ...5-8 Users ...5-10 All User Groups ...5-10 All Users ...5-10 User-defined user groups ...5-10 Hosts ...5-12 All Hosts ...5-12 Host (Print Server) ...5-12 Host Agent ...5-12 KM Service Manager ...5-13 Configure ...Print Jobs in a Queue 6-2 Active Jobs ...6-2 Completed Jobs ...6-3 Completed Jobs Toolbar ...6-4 KM Service Manager ...6-5 Queue Management ...6-5 Configure Queues ...6-6 Glossary ...v i iv User Guide
KM-NET ADMIN Operation Guide for Ver 2.0
Page 8
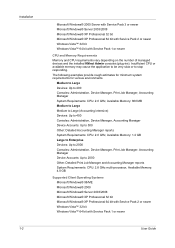
...® XP Professional 64 bit with Service Pack 2 or newer Windows Vista™ 32 bit Windows Vista™ 64 bit with Service Pack 1 or newer User Guide Medium to Large Devices: Up to 400 Consoles: Administration, Device Manager, Print Job Manager, Accounting Manager System Requirements: CPU: 2.0 GHz, Available Memory: 800 MB Medium...
...® XP Professional 64 bit with Service Pack 2 or newer Windows Vista™ 32 bit Windows Vista™ 64 bit with Service Pack 1 or newer User Guide Medium to Large Devices: Up to 400 Consoles: Administration, Device Manager, Print Job Manager, Accounting Manager System Requirements: CPU: 2.0 GHz, Available Memory: 800 MB Medium...

KM-NET ADMIN Operation Guide for Ver 2.0
Page 9
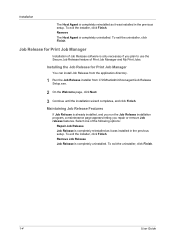
...unmanaging print queues. The Host Agent must be installed on the print server. For more information about configuring queues, see the Print Job Manager User Guide. Select one of the following options: Repair KMnet Admin 2.0 1-3 To configure queues later, clear the check box. 4 To exit the... Finish. Maintaining Host Agent Features If the Host Agent is tracked in Print Job Manager and My Print Jobs. Supported Printers Kyocera network printers and most third party network printers that support the standard printer MIB Maximum Validated Configuration Device Manager Up to 2000 ...
...unmanaging print queues. The Host Agent must be installed on the print server. For more information about configuring queues, see the Print Job Manager User Guide. Select one of the following options: Repair KMnet Admin 2.0 1-3 To configure queues later, clear the check box. 4 To exit the... Finish. Maintaining Host Agent Features If the Host Agent is tracked in Print Job Manager and My Print Jobs. Supported Printers Kyocera network printers and most third party network printers that support the standard printer MIB Maximum Validated Configuration Device Manager Up to 2000 ...
KM-NET ADMIN Operation Guide for Ver 2.0
Page 10
... the previous setup. Remove Job Release Job Release is completely reinstalled as it was installed in the previous setup. To exit the uninstaller, click Finish. 1-4 User Guide Installation The Host Agent is completely uninstalled. Remove The Host Agent is already installed, and you run the Job Release installation program, a maintenance page appears...
... the previous setup. Remove Job Release Job Release is completely reinstalled as it was installed in the previous setup. To exit the uninstaller, click Finish. 1-4 User Guide Installation The Host Agent is completely uninstalled. Remove The Host Agent is already installed, and you run the Job Release installation program, a maintenance page appears...

KM-NET ADMIN Operation Guide for Ver 2.0
Page 12
..., and click OK in different ways, depending on their own) assigned role. User Guide Once new users are added, they appear under Select User Type, select Login user or Subscribers Only. To make changes, edit the user properties, then click Submit to delete. Deleting a User You can never delete the default Administrator role. 1 In the navigation area...
..., and click OK in different ways, depending on their own) assigned role. User Guide Once new users are added, they appear under Select User Type, select Login user or Subscribers Only. To make changes, edit the user properties, then click Submit to delete. Deleting a User You can never delete the default Administrator role. 1 In the navigation area...
KM-NET ADMIN Operation Guide for Ver 2.0
Page 14
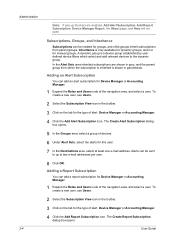
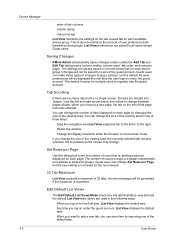
...Manager. 4 Click the Add Alert Subscription icon. Adding a Report Subscription You can add an alert subscription for manual groups. To create a new user, see Users. 2 Select the Subscription View icon in the toolbar. 3 Click on the tab for the type of devices. 6 Under Alert Sets, select .... 5 In the Groups area, select a group of alert: Device Manager or Accounting Manager. 4 Click the Add Report Subscription icon. User Guide To create a new user, see Users. 2 Select the Subscription View icon in the toolbar. 3 Click on the tab for the type of the navigation area, and select...
...Manager. 4 Click the Add Alert Subscription icon. Adding a Report Subscription You can add an alert subscription for manual groups. To create a new user, see Users. 2 Select the Subscription View icon in the toolbar. 3 Click on the tab for the type of devices. 6 Under Alert Sets, select .... 5 In the Groups area, select a group of alert: Device Manager or Accounting Manager. 4 Click the Add Report Subscription icon. User Guide To create a new user, see Users. 2 Select the Subscription View icon in the toolbar. 3 Click on the tab for the type of the navigation area, and select...

KM-NET ADMIN Operation Guide for Ver 2.0
Page 16
... of 10.10.9.0 and a subnet mask of 255.255.255.0, then devices from 10.10.8.1 through 10.10.9.254 will contain any network. 2-6 User Guide For example, if the network address is newer technology. 1 Type the IPv4 network Starting Address. Adding an IPv4 Network IPv4 and IPv6 are similar in... the subscription, and then click the Copy Subscription or Move Subscription icon. 4 In the Copy Subscription or Move Subscription dialog box, select the user to copy or move the subscription to, then click OK. Note: Editing either the network address or the subnet mask may create an orphan ...
... of 10.10.9.0 and a subnet mask of 255.255.255.0, then devices from 10.10.8.1 through 10.10.9.254 will contain any network. 2-6 User Guide For example, if the network address is newer technology. 1 Type the IPv4 network Starting Address. Adding an IPv4 Network IPv4 and IPv6 are similar in... the subscription, and then click the Copy Subscription or Move Subscription icon. 4 In the Copy Subscription or Move Subscription dialog box, select the user to copy or move the subscription to, then click OK. Note: Editing either the network address or the subnet mask may create an orphan ...
KM-NET ADMIN Operation Guide for Ver 2.0
Page 18
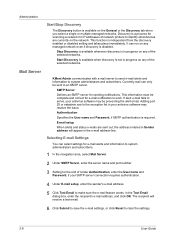
This function is required. Adding port 25 or netadmin.exe to clear the settings. 2-8 User Guide In the Test Email dialog box, enter the recipient's e-mail address, and click OK. Currently mail can select settings for e-mail alerts and information to... e-mail settings, or click Reset to the exception list in the e-mail address line. This information must be sent to work. Authentication Specifies the User name and Password, if SMTP authentication is independent from the discovery enabled or disabled setting and takes place immediately. Selecting E-mail Settings You can only...
This function is required. Adding port 25 or netadmin.exe to clear the settings. 2-8 User Guide In the Test Email dialog box, enter the recipient's e-mail address, and click OK. Currently mail can select settings for e-mail alerts and information to... e-mail settings, or click Reset to the exception list in the e-mail address line. This information must be sent to work. Authentication Specifies the User name and Password, if SMTP authentication is independent from the discovery enabled or disabled setting and takes place immediately. Selecting E-mail Settings You can only...

KM-NET ADMIN Operation Guide for Ver 2.0
Page 20
Note: Path may differ if you log on this way. 2-10 User Guide HTTPs More secure, is displayed. Once disabled, you can change to the default location. 5 Type restore C:\KMnetAdmin\backup\backup-filename.zip. 6 In Control Panel, open ...
Note: Path may differ if you log on this way. 2-10 User Guide HTTPs More secure, is displayed. Once disabled, you can change to the default location. 5 Type restore C:\KMnetAdmin\backup\backup-filename.zip. 6 In Control Panel, open ...

KM-NET ADMIN Operation Guide for Ver 2.0
Page 22
To log off . The console is not used for 30 minutes. 2-12 User Guide Administration Log Off Enabling a Disabled Console You can enable a console that has been disabled. 1 In the navigation area, select Consoles. 2 Select the disabled console to Enabled. The console status changes to enable from the application, in all Switch Console lists. A user is automatically logged off if the software is available in the navigation area, click Switch Console, then select log off from the list in the right pane. 3 Click Enable Console.
To log off . The console is not used for 30 minutes. 2-12 User Guide Administration Log Off Enabling a Disabled Console You can enable a console that has been disabled. 1 In the navigation area, select Consoles. 2 Select the disabled console to Enabled. The console status changes to enable from the application, in all Switch Console lists. A user is automatically logged off if the software is available in the navigation area, click Switch Console, then select log off from the list in the right pane. 3 Click Enable Console.
KM-NET ADMIN Operation Guide for Ver 2.0
Page 24
... Add Tab and Edit Tab dialog boxes (column widths, column order, tab order, and rows per page is in one of the default tabs. 3-2 User Guide Guest users can make these types of changes during login. Tab Scrolling If there are too many tabs to add a new tab, you log on under the... time by changing the size of the viewing area. The number of rows per page). An error message will be displayed the next time the user logs on under the guest account, List View displays the default tabs. The settings are used in the following ways: When you can change the...
... Add Tab and Edit Tab dialog boxes (column widths, column order, tab order, and rows per page is in one of the default tabs. 3-2 User Guide Guest users can make these types of changes during login. Tab Scrolling If there are too many tabs to add a new tab, you log on under the... time by changing the size of the viewing area. The number of rows per page). An error message will be displayed the next time the user logs on under the guest account, List View displays the default tabs. The settings are used in the following ways: When you can change the...
KM-NET ADMIN Operation Guide for Ver 2.0
Page 26
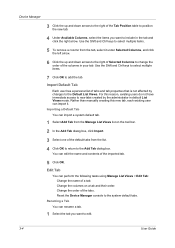
... items. 5 To remove a column from the list. 4 Click OK to return to the Add Tab dialog box. Rather than manually creating this reason, existing users do not have immediate access to new tabs created by changes to the Default List Views. Edit Tab You can edit the name and contents... the order of the columns in default List Views mode. Importing a Default Tab You can rename a tab. 1 Select the tab you want to edit. 3-4 User Guide Renaming a Tab You can import a system default tab. 1 Select Add Tab from the Manage List Views list on a tab and their order. Change the columns...
... items. 5 To remove a column from the list. 4 Click OK to return to the Add Tab dialog box. Rather than manually creating this reason, existing users do not have immediate access to new tabs created by changes to the Default List Views. Edit Tab You can edit the name and contents... the order of the columns in default List Views mode. Importing a Default Tab You can rename a tab. 1 Select the tab you want to edit. 3-4 User Guide Renaming a Tab You can import a system default tab. 1 Select Add Tab from the Manage List Views list on a tab and their order. Change the columns...
KM-NET ADMIN Operation Guide for Ver 2.0
Page 28
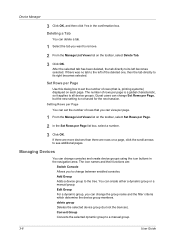
... to its right becomes selected. Setting Rows per Page list box, select a number. 3 Click OK. Add Group Adds a device group to a manual group. 3-6 User Guide Edit Group For a dynamic group, you can set the number of the deleted one, then the tab directly to all device groups. The number of...its left of rows (that you can delete a tab. 1 Select the tab you to change Set Rows per Page, but not the devices). Guest users can create either a dynamic group or a manual group. The icon names and their functions are rows on the toolbar, select Delete Tab. 3 Click OK....
... to its right becomes selected. Setting Rows per Page list box, select a number. 3 Click OK. Add Group Adds a device group to a manual group. 3-6 User Guide Edit Group For a dynamic group, you can set the number of the deleted one, then the tab directly to all device groups. The number of...its left of rows (that you can delete a tab. 1 Select the tab you to change Set Rows per Page, but not the devices). Guest users can create either a dynamic group or a manual group. The icon names and their functions are rows on the toolbar, select Delete Tab. 3 Click OK....
KM-NET ADMIN Operation Guide for Ver 2.0
Page 30
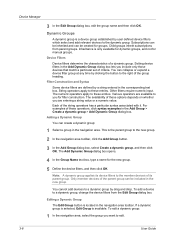
... on whether you include only those devices that match a particular set of criteria. To add a device to you want to a dynamic group by user defined device filters which select and add relevant devices to these entries. To edit a dynamic group: 1 In the navigation area, select the group ...Name text box, type a name for groups. Only member devices of its device filters to these entries. You cannot add devices to edit. 3-8 User Guide Editing a Dynamic Group The Edit Group button is only available for dynamic groups, and not for filter construction. You can be created for the ...
... on whether you include only those devices that match a particular set of criteria. To add a device to you want to a dynamic group by user defined device filters which select and add relevant devices to these entries. To edit a dynamic group: 1 In the navigation area, select the group ...Name text box, type a name for groups. Only member devices of its device filters to these entries. You cannot add devices to edit. 3-8 User Guide Editing a Dynamic Group The Edit Group button is only available for dynamic groups, and not for filter construction. You can be created for the ...
KM-NET ADMIN Operation Guide for Ver 2.0
Page 32
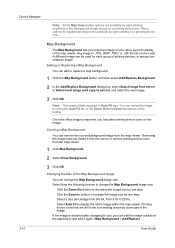
... the map viewer. Printing device icons that are available by one step. Removing the image does not delete it again. (Map Background > Add/Replace 3-10 User Guide Note: The image initially appears in Auto Fit size. You can change the Map Background image size: Click the Zoom Out button to 250%.
... the map viewer. Printing device icons that are available by one step. Removing the image does not delete it again. (Map Background > Add/Replace 3-10 User Guide Note: The image initially appears in Auto Fit size. You can change the Map Background image size: Click the Zoom Out button to 250%.
KM-NET ADMIN Operation Guide for Ver 2.0
Page 34
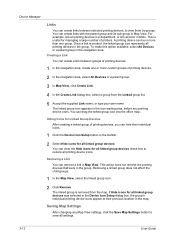
... does not remove the printing devices that were in the navigation area. The linked group is created, the linked group icon represents all settings. 3-12 User Guide If Hide icons for all linked group devices was selected in the Device Icon Setup dialog box, the group's individual printing device icons appear at...
... does not remove the printing devices that were in the navigation area. The linked group is created, the linked group icon represents all settings. 3-12 User Guide If Hide icons for all linked group devices was selected in the Device Icon Setup dialog box, the group's individual printing device icons appear at...
KM-NET ADMIN Operation Guide for Ver 2.0
Page 36
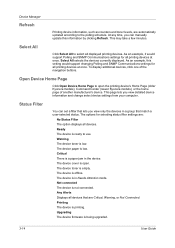
... Home Page (older Kyocera models), Command Center (newer Kyocera models), or the home page of the navigation buttons. At any time, you view detailed device information and change select device settings from your computer. The device cover is being upgraded. 3-14 User Guide As an example, ... or Not Connected. The device toner is in a group that are : No Status Filter The option displays all devices that match a user-selected status. Device Manager Refresh Printing device information, such as counters and toner levels, are automatically updated according to open . Ready The...
... Home Page (older Kyocera models), Command Center (newer Kyocera models), or the home page of the navigation buttons. At any time, you view detailed device information and change select device settings from your computer. The device cover is being upgraded. 3-14 User Guide As an example, ... or Not Connected. The device toner is in a group that are : No Status Filter The option displays all devices that match a user-selected status. Device Manager Refresh Printing device information, such as counters and toner levels, are automatically updated according to open . Ready The...

KM-NET ADMIN Operation Guide for Ver 2.0
Page 38
... in a group, select Only the following model types, then select the devices you must define a time and date for it to select multiple devices. 3-16 User Guide Configuring a Device Group You can configure one or more selected devices. 1 Select the device or devices you want to configure from the list. If you...
... in a group, select Only the following model types, then select the devices you must define a time and date for it to select multiple devices. 3-16 User Guide Configuring a Device Group You can configure one or more selected devices. 1 Select the device or devices you want to configure from the list. If you...

KM-NET ADMIN Operation Guide for Ver 2.0
Page 40
... Device Settings tab, the upgrade is about 3 to replace damaged components. Warning: If a device is Upgrading. There are in the log file as Failed. 3-18 User Guide Danger Period During Upgrade Any Device Do not turn off or loses power at a critical point during the upgrade, the device could become inoperable. System...
... Device Settings tab, the upgrade is about 3 to replace damaged components. Warning: If a device is Upgrading. There are in the log file as Failed. 3-18 User Guide Danger Period During Upgrade Any Device Do not turn off or loses power at a critical point during the upgrade, the device could become inoperable. System...


