

KM-NET ADMIN Operation Guide for Ver 2.0
Page 12
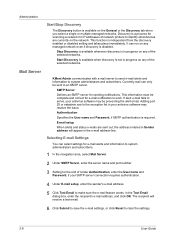
... area, select a role or user. 2 Click the Add User icon. 3 In the Add User dialog box, under Required Properties: User login name, Password, Confirm password, Role (privilege level), and E-mail address 1. Adding a User You can only receive alerts and reports. 4 Enter information under Select User Type, select ...to delete. 2 Click the Delete Role icon, and click OK in the dialog when you can also click Reset to go back to specific users. You can click the Change Password icon to apply the changes. User Guide Do not use invisible Unicode or extended ASCII characters. 5 Enter ...
... area, select a role or user. 2 Click the Add User icon. 3 In the Add User dialog box, under Required Properties: User login name, Password, Confirm password, Role (privilege level), and E-mail address 1. Adding a User You can only receive alerts and reports. 4 Enter information under Select User Type, select ...to delete. 2 Click the Delete Role icon, and click OK in the dialog when you can also click Reset to go back to specific users. You can click the Change Password icon to apply the changes. User Guide Do not use invisible Unicode or extended ASCII characters. 5 Enter ...
KM-NET ADMIN Operation Guide for Ver 2.0
Page 18
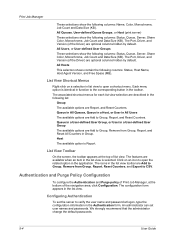
...in Sender address will receive a test email. 6 Click Submit to save the e-mail settings, or click Reset to an SMTP server. Authentication Specifies the User name and Password, if SMTP authentication is independent from the discovery enabled or disabled setting and takes place immediately. Administration Start... be preventing the alert email. SMTP Server Defines an SMTP server for the end of Under Authentication, enter the User name and Password, if your antivirus software may be sent to clear the settings. 2-8 User Guide Stop Discovery is available whenever discovery is in ...
...in Sender address will receive a test email. 6 Click Submit to save the e-mail settings, or click Reset to an SMTP server. Authentication Specifies the User name and Password, if SMTP authentication is independent from the discovery enabled or disabled setting and takes place immediately. Administration Start... be preventing the alert email. SMTP Server Defines an SMTP server for the end of Under Authentication, enter the User name and Password, if your antivirus software may be sent to clear the settings. 2-8 User Guide Stop Discovery is available whenever discovery is in ...
KM-NET ADMIN Operation Guide for Ver 2.0
Page 78
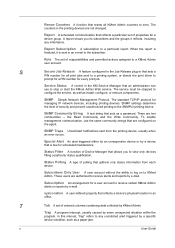
... described in the list view. The associated shortcut menus for each list view selection are Report, and Reset Counters. An administrator can set the server to verify the user name and password at the top of the Driver) are Add to Group, Remove from Group, Report, and...User-defined User Group, or User in a User-defined User Group The available options are Add to Group, Report, and Reset Counters. Configuring Authentication To set user names and passwords. Host The available option is selected. Click on a selection in the application. The Port, Driver, and Version (of ...
... described in the list view. The associated shortcut menus for each list view selection are Report, and Reset Counters. An administrator can set the server to verify the user name and password at the top of the Driver) are Add to Group, Remove from Group, Report, and...User-defined User Group, or User in a User-defined User Group The available options are Add to Group, Report, and Reset Counters. Configuring Authentication To set user names and passwords. Host The available option is selected. Click on a selection in the application. The Port, Driver, and Version (of ...

KM-NET ADMIN Operation Guide for Ver 2.0
Page 84
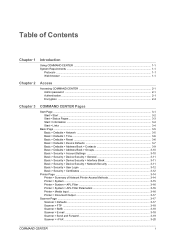
...for user items. If you assign to the printing systems. Each user is provided a user name and password by individual user. Usage reports are available for user items. If you click Reset All Counters in Group, all counters of all users contained in a selected group are Add to zero....area are , select All User Groups, All Users, or any single group item is selected. The administrator can set to Group, Report, and Reset Counters. Navigation Area The options in Group, all counters of host. It contains information by group, rather than by the administrator. Print Job ...
...for user items. If you assign to the printing systems. Each user is provided a user name and password by individual user. Usage reports are available for user items. If you click Reset All Counters in Group, all counters of all users contained in a selected group are Add to zero....area are , select All User Groups, All Users, or any single group item is selected. The administrator can set to Group, Report, and Reset Counters. Navigation Area The options in Group, all counters of host. It contains information by group, rather than by the administrator. Print Job ...
KM-NET ADMIN Operation Guide for Ver 2.0
Page 102
Renew Counters A function that resets all print jobs sent to a printing system, or directs the print driver to any inheritance. The service must be stopped to zero. The standard TCP/... on to a particular report. SNMP settings determine the level of properties for a user account to receive alerts and reports by a specific device condition, such as a password. Special Alert An alert triggered either by an unresponsive device or by e-mail. Role The set of responsibilities and permitted actions assigned to stop or...
Renew Counters A function that resets all print jobs sent to a printing system, or directs the print driver to any inheritance. The service must be stopped to zero. The standard TCP/... on to a particular report. SNMP settings determine the level of properties for a user account to receive alerts and reports by a specific device condition, such as a password. Special Alert An alert triggered either by an unresponsive device or by e-mail. Role The set of responsibilities and permitted actions assigned to stop or...

KM-NET Viewer Operation Guide Rev-5.2-2010.10
Page 55
... Settings these logical printer ports must match the port number entered in the Command Center Basic tab. To restart, select General > Reset. Login Settings The Login section lets you set the port number from 5 to check for the device. A higher number will ... user login information. Communication Timeout Enter the number of day. The available range is selected, enter the Login user name and Password for account counter information. The available range is a cryptographic protocol that provides security for device communication. Secure Protocol Settings Secure Sockets...
... Settings these logical printer ports must match the port number entered in the Command Center Basic tab. To restart, select General > Reset. Login Settings The Login section lets you set the port number from 5 to check for the device. A higher number will ... user login information. Communication Timeout Enter the number of day. The available range is selected, enter the Login user name and Password for account counter information. The available range is a cryptographic protocol that provides security for device communication. Secure Protocol Settings Secure Sockets...

PRESCRIBE Commands Command Reference Manual Rev 4.8
Page 9
...fill PATtern 393 Index Index - 1 Contents-v Unit Of Measurement per dots 355 VMAL - set rows and columns 374 XBCP 9 - select barcode type/reset all other XBCP parameters---------- 365 XBCP 1 - specify narrowest element width 366 XBCP 2 - specify error correction level by percentage 367 XBCP 3 - ... enable addressee ID 380 XBCP 15 - TPRS - determine bar height 373 XBCP 8 - set UNIT of measurement 353 UOM - set Virtual Mailbox PassWord 359 WIDE - enable block count 377 XBCP 12 - enable Macro PDF417 symbol mode 385 XBCP 19 - set data code word rows 369 XBCP ...
...fill PATtern 393 Index Index - 1 Contents-v Unit Of Measurement per dots 355 VMAL - set rows and columns 374 XBCP 9 - select barcode type/reset all other XBCP parameters---------- 365 XBCP 1 - specify narrowest element width 366 XBCP 2 - specify error correction level by percentage 367 XBCP 3 - ... enable addressee ID 380 XBCP 15 - TPRS - determine bar height 373 XBCP 8 - set UNIT of measurement 353 UOM - set Virtual Mailbox PassWord 359 WIDE - enable block count 377 XBCP 12 - enable Macro PDF417 symbol mode 385 XBCP 19 - set data code word rows 369 XBCP ...

PRESCRIBE Commands Command Reference Manual Rev 4.8
Page 142
... the mailbox is specified by deleting all jobs stored in the mailboxes and clearing the aliases and the passwords altogether (JOBD 15, 0, 0;). 132 Mode 15 resets all the mailboxes 1 to 255 = tray ID (specified by JOBS) Character string = job ID or alias of virtual mailbox, must be used for ... temporary jobs 2 = Deletes permanent jobs 8 = Deletes the jobs in the hard disk. This command may be enclosed by single or double quotation marks password: four-digit number specified by VMPW to a clean state by mailbox-id. JOB Deletion Format JOBD [mode[, job-id or mailbox-id...
... the mailbox is specified by deleting all jobs stored in the mailboxes and clearing the aliases and the passwords altogether (JOBD 15, 0, 0;). 132 Mode 15 resets all the mailboxes 1 to 255 = tray ID (specified by JOBS) Character string = job ID or alias of virtual mailbox, must be used for ... temporary jobs 2 = Deletes permanent jobs 8 = Deletes the jobs in the hard disk. This command may be enclosed by single or double quotation marks password: four-digit number specified by VMPW to a clean state by mailbox-id. JOB Deletion Format JOBD [mode[, job-id or mailbox-id...

ID Register Operation Guide Rev-1
Page 8
... start ID Register Follow the steps below to start ID Register. 1 Click [Start]→[Program]→[Kyocera]→[ID Register]. If you click [Yes], the information pertaining to open the ID card list on...an existing file after modified - Refer to its initial state. NOTE: If you are prompted to reset the default administrator settings to To open the ID card list on page 9 for details. Refer to... list file and register in as an administrator to start ID Register. 2 Enter the password if necessary. 3 Select one of the following options to start ID Register. • New - ...
... start ID Register Follow the steps below to start ID Register. 1 Click [Start]→[Program]→[Kyocera]→[ID Register]. If you click [Yes], the information pertaining to open the ID card list on...an existing file after modified - Refer to its initial state. NOTE: If you are prompted to reset the default administrator settings to To open the ID card list on page 9 for details. Refer to... list file and register in as an administrator to start ID Register. 2 Enter the password if necessary. 3 Select one of the following options to start ID Register. • New - ...

ID Register Operation Guide Rev-1
Page 22
... entered is incorrect. The passwords you wish to the When you input in both text boxes again. Cannot open registry. Try again by taking away the ID card and resetting it again from the machine.For downloading the Account List, refer to export the ID card list for editing (*.icr) from the...
... entered is incorrect. The passwords you wish to the When you input in both text boxes again. Cannot open registry. Try again by taking away the ID card and resetting it again from the machine.For downloading the Account List, refer to export the ID card list for editing (*.icr) from the...
Kyocera Command Center Operation Guide Rev 6.3
Page 3
... CENTER ...1-1 System Requirements ...1-1 Protocols ...1-1 Web browser ...1-1 Chapter 2 Access Accessing COMMAND CENTER 2-1 Admin password ...2-1 Authentication ...2-1 Encryption ...2-2 Chapter 3 COMMAND CENTER Pages Start Page ...3-1 Start > Start ...3-2 Start > Status Pages ...3-3 Start > Information ...3-4 Start > Links ...3-4 Basic Page ...3-5 Basic > Defaults > Network ...3-5 Basic > Defaults > Time ...3-6 Basic > Defaults > Reset ...3-6 Basic > Defaults > Device Defaults 3-7 Basic > Defaults > Address Book > Contacts 3-9 Basic > Defaults...
... CENTER ...1-1 System Requirements ...1-1 Protocols ...1-1 Web browser ...1-1 Chapter 2 Access Accessing COMMAND CENTER 2-1 Admin password ...2-1 Authentication ...2-1 Encryption ...2-2 Chapter 3 COMMAND CENTER Pages Start Page ...3-1 Start > Start ...3-2 Start > Status Pages ...3-3 Start > Information ...3-4 Start > Links ...3-4 Basic Page ...3-5 Basic > Defaults > Network ...3-5 Basic > Defaults > Time ...3-6 Basic > Defaults > Reset ...3-6 Basic > Defaults > Device Defaults 3-7 Basic > Defaults > Address Book > Contacts 3-9 Basic > Defaults...
Kyocera Command Center Operation Guide Rev 6.3
Page 63
... making the settings? Basic > Defaults > Reset on panel selected? Contact your dealer or service center. Did you click the Submit button after you have while COMMAND CENTER is Is there an error message displayed under the shown in operation? The administrator has forgotten the Admin password. Error or Warning is finished with...
... making the settings? Basic > Defaults > Reset on panel selected? Contact your dealer or service center. Did you click the Submit button after you have while COMMAND CENTER is Is there an error message displayed under the shown in operation? The administrator has forgotten the Admin password. Error or Warning is finished with...

250ci/300ci/400ci/500ci/552ci Operation Guide Rev-1
Page 372
... out the machine, press the Logout key to return to enter the sleep mode • When auto sleep is activated • When auto panel reset is activated • When auto low power mode is activated • When low power mode is pressed to the login user name/login... password entry screen. Logout Management 4 Enter the login password and press [OK]. If Network Authentication is enabled, you can be selected as the authentication destination. 5 Check the login user ...
... out the machine, press the Logout key to return to enter the sleep mode • When auto sleep is activated • When auto panel reset is activated • When auto low power mode is activated • When low power mode is pressed to the login user name/login... password entry screen. Logout Management 4 Enter the login password and press [OK]. If Network Authentication is enabled, you can be selected as the authentication destination. 5 Check the login user ...
250ci/300ci/400ci/500ci/552ci Operation Guide Rev-1
Page 382
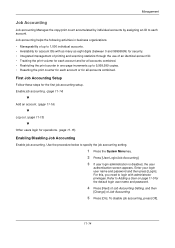
... each account or for all accounts combined. • Restricting the print counter in one-page increments up to 9,999,999 copies. • Resetting the print counter for each account. Management Job Accounting Job accounting Manages the copy/print count accumulated by individual accounts by assigning an ID to... Adding a User on page 11-5 for the default login user name and password. 4 Press [Next] of Job Accounting Setting, and then [Change] of an identical account ID. • Tracking the print volume for each ...
... each account or for all accounts combined. • Restricting the print counter in one-page increments up to 9,999,999 copies. • Resetting the print counter for each account. Management Job Accounting Job accounting Manages the copy/print count accumulated by individual accounts by assigning an ID to... Adding a User on page 11-5 for the default login user name and password. 4 Press [Next] of Job Accounting Setting, and then [Change] of an identical account ID. • Tracking the print volume for each ...

250ci/300ci/400ci/500ci/552ci Operation Guide Rev-1
Page 391
Counts are as the total number of pages printed. A new count can check the pages used for the default login user name and password. 11-23 Scanned Pages Displays the number of pages scanned for copying, faxing* and other paper sizes. • You can use the [Count by Duplex... This counts the number of pages used in Combine (None) mode, Combine (2in1) mode, Combine (4in1) mode and the total for all accounts and resets the counts for all three. Types of the counts are classified into Total Job Accounting and Each Job Accounting. Use the procedure below to login...
Counts are as the total number of pages printed. A new count can check the pages used for the default login user name and password. 11-23 Scanned Pages Displays the number of pages scanned for copying, faxing* and other paper sizes. • You can use the [Count by Duplex... This counts the number of pages used in Combine (None) mode, Combine (2in1) mode, Combine (4in1) mode and the total for all accounts and resets the counts for all three. Types of the counts are classified into Total Job Accounting and Each Job Accounting. Use the procedure below to login...
250ci/300ci/400ci/500ci/552ci Operation Guide Rev-1
Page 392
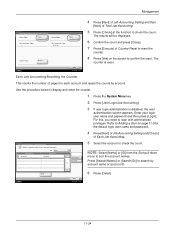
...Login/Job Accounting]. 3 If user login administration is reset. Status Detail Close 10/10/2008 10:10 6 Press [Detail]. 11-24 Each Job Accounting/Resetting the Counter This counts the number of pages for the default login user name and password. 4 Press [Next] of Job Accounting Setting and... [Check] of Each Job Accounting. Enter your login user name and password and then press [Login]. Each Job Accounting Maintain a separate counter for each account and resets the counts by account name or account ID. Total Job Accounting Printed Pages: Check Scanned...
...Login/Job Accounting]. 3 If user login administration is reset. Status Detail Close 10/10/2008 10:10 6 Press [Detail]. 11-24 Each Job Accounting/Resetting the Counter This counts the number of pages for the default login user name and password. 4 Press [Next] of Job Accounting Setting and... [Check] of Each Job Accounting. Enter your login user name and password and then press [Login]. Each Job Accounting Maintain a separate counter for each account and resets the counts by account name or account ID. Total Job Accounting Printed Pages: Check Scanned...

250ci/300ci/400ci/500ci/552ci Operation Guide Rev-1
Page 393
... Adding a User on page 11-26. Status Cancel OK 10/10/2008 10:10 11 11-25 In addition to confirm the reset. Enter your login user name and password and then press [Login]. For this, you need to specify media type. 7 Select the media type and press [OK]. 8 Press [... size. 6 Press [Media Type] to login with administrator privileges. If no media type is specified, usage is counted for the default login user name and password. 4 Press [Next] of Job Accounting Setting, [Next] of Default Setting, [Change] of Count by paper size (e.g. The counter will be displayed. 8 Confirm ...
... Adding a User on page 11-26. Status Cancel OK 10/10/2008 10:10 11 11-25 In addition to confirm the reset. Enter your login user name and password and then press [Login]. For this, you need to specify media type. 7 Select the media type and press [OK]. 8 Press [... size. 6 Press [Media Type] to login with administrator privileges. If no media type is specified, usage is counted for the default login user name and password. 4 Press [Next] of Job Accounting Setting, [Next] of Default Setting, [Change] of Count by paper size (e.g. The counter will be displayed. 8 Confirm ...

Fax System (S) C Operation Guide Rev-2
Page 115
...status of fax use the machine and job accounting that controls the usage per account can be known for up to 1,000 users can reset the counting, referring to the number of fax sheets to 1,000 accounts for sending fax by all the accounts or by all the ...to the machine's Operation Guide. Description of Job Accounting Item Description Registration of User Enable/Disable User accounting Register user access privileges, User ID and Password. Enable/Disable job Enable job accounting. NOTE: For details, refer to 8 digits can use per account. You can be sent. Requires 2 optional...
...status of fax use the machine and job accounting that controls the usage per account can be known for up to 1,000 users can reset the counting, referring to the number of fax sheets to 1,000 accounts for sending fax by all the accounts or by all the ...to the machine's Operation Guide. Description of Job Accounting Item Description Registration of User Enable/Disable User accounting Register user access privileges, User ID and Password. Enable/Disable job Enable job accounting. NOTE: For details, refer to 8 digits can use per account. You can be sent. Requires 2 optional...

