

Owners Manual
Page 10
... the power is turned off as they generate intense heat. • The heat does not indicate a defect or a problem of the projector when it is operating. Do not look into the front of the lens when the projector is operating so use it may cause a fire or electric shock. Never try to your dealer or local Service Center for inspection, adjustment or repairs...
... the power is turned off as they generate intense heat. • The heat does not indicate a defect or a problem of the projector when it is operating. Do not look into the front of the lens when the projector is operating so use it may cause a fire or electric shock. Never try to your dealer or local Service Center for inspection, adjustment or repairs...

Owners Manual
Page 17
... the grounding system of the National Electric Code (U.S.A.). The code provides guidelines for proper grounding and, in Wire Antenna Discharge Unit (NEC Section 810-20) Grounding Conductor (NEC Section 810-21) Power Service Grounding Electrode System (NEC Art 250, Part H) ENGLISH For USA NOTE TO CABLE/TV INSTALLER This reminder is provided to call the CATV system...
... the grounding system of the National Electric Code (U.S.A.). The code provides guidelines for proper grounding and, in Wire Antenna Discharge Unit (NEC Section 810-20) Grounding Conductor (NEC Section 810-21) Power Service Grounding Electrode System (NEC Art 250, Part H) ENGLISH For USA NOTE TO CABLE/TV INSTALLER This reminder is provided to call the CATV system...

Owners Manual
Page 26
... Projection Distance per Screen Size 1 Place the projector on a sturdy, level surface, together with the PC or audio/ video source. 2 Place the projector an appropriate distance away from the screen. The distance between the projector and the screen determines the actual size of the projector and the connected device to the wall outlet. To correct the distortion, use the Keystone function. 4 Connect the power cord of the image. 3 Position the projector so that the lens...
... Projection Distance per Screen Size 1 Place the projector on a sturdy, level surface, together with the PC or audio/ video source. 2 Place the projector an appropriate distance away from the screen. The distance between the projector and the screen determines the actual size of the projector and the connected device to the wall outlet. To correct the distortion, use the Keystone function. 4 Connect the power cord of the image. 3 Position the projector so that the lens...

Owners Manual
Page 40
... the connected device's specifications, USB-C cable status, or surroundings. • The USB PD (for power supply) function may not operate according to the specifications of the connected equipment. • Check the resolution of the connected devices before using a USB-C cable. Only the smartphones that support USB-C will work. • (INPUT) [Home Dashboard] [INPUTS] [USB-C] Optional Extras NOTE • PD (Power Delivery) and DP Alternate Mode are supported. -- ENGLISH 40 Connecting with a USB-C Cable Connect the USB-C terminal of the projector to the USB-C output...
... the connected device's specifications, USB-C cable status, or surroundings. • The USB PD (for power supply) function may not operate according to the specifications of the connected equipment. • Check the resolution of the connected devices before using a USB-C cable. Only the smartphones that support USB-C will work. • (INPUT) [Home Dashboard] [INPUTS] [USB-C] Optional Extras NOTE • PD (Power Delivery) and DP Alternate Mode are supported. -- ENGLISH 40 Connecting with a USB-C Cable Connect the USB-C terminal of the projector to the USB-C output...
Owners Manual
Page 51
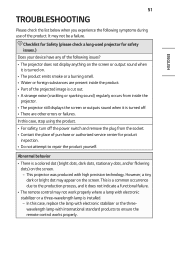
... issues? • The projector does not display anything on the screen or output sound when it is turned on. • The product emits smoke or a burning smell. • Water or foreign substances are other errors or failures. Abnormal behavior • There is turned off the power switch and remove the plug from inside the product. • Part of the projected image is cut out...
... issues? • The projector does not display anything on the screen or output sound when it is turned on. • The product emits smoke or a burning smell. • Water or foreign substances are other errors or failures. Abnormal behavior • There is turned off the power switch and remove the plug from inside the product. • Part of the projected image is cut out...

Owners Manual
Page 61
... operate properly. Although interference can also happen when using the 5 GHz frequency, it , and then turn the power on to solve the problem. • LG Electronics is less likely to occur. • The wireless environment can make wireless network service run slowly. • Failure to turn off all local home networks may cause excessive traffic on some devices. • The access point device must support wireless connections...
... operate properly. Although interference can also happen when using the 5 GHz frequency, it , and then turn the power on to solve the problem. • LG Electronics is less likely to occur. • The wireless environment can make wireless network service run slowly. • Failure to turn off all local home networks may cause excessive traffic on some devices. • The access point device must support wireless connections...

Owners Manual
Page 66
... broadcast signal. • The types of buttons appearing on the [More Actions] vary, depending on the region and the type of connected device. • Some models may not be supported. ENGLISH 14 3 You can capture your projector screen. • Some models may not be supported. • You can view/delete screen-captured images in the [Photo & Video] app. • You can set the video/sound mode for...
... broadcast signal. • The types of buttons appearing on the [More Actions] vary, depending on the region and the type of connected device. • Some models may not be supported. ENGLISH 14 3 You can capture your projector screen. • Some models may not be supported. • You can view/delete screen-captured images in the [Photo & Video] app. • You can set the video/sound mode for...

Owners Manual
Page 71
... to output sound to the external audio equipment connected through the HDMI® cable, set to the device, the input will also be a problem using the device if the device does not meet the required specifications. • A high-speed HDMI® cable with CEC (Consumer Electronics Control) function is not automatically connected to use various multimedia devices connected through HDMI with the logo. When the projector automatically connects to [On], turning on...
... to output sound to the external audio equipment connected through the HDMI® cable, set to the device, the input will also be a problem using the device if the device does not meet the required specifications. • A high-speed HDMI® cable with CEC (Consumer Electronics Control) function is not automatically connected to use various multimedia devices connected through HDMI with the logo. When the projector automatically connects to [On], turning on...

Owners Manual
Page 80
ENGLISH 28 Using [TV SCHEDULER] This function is used to set the time and date for watching a specific program. 1 Press the remote control's button, and select the [TV SCHEDULER] tab on the left side of the screen. 2 Select the at the top right. 1 2 3 4 1 You can sort the list. 2 You can set the Delete Mode. 3 You can set the New Reminder. 4 Launch [GUIDE].
ENGLISH 28 Using [TV SCHEDULER] This function is used to set the time and date for watching a specific program. 1 Press the remote control's button, and select the [TV SCHEDULER] tab on the left side of the screen. 2 Select the at the top right. 1 2 3 4 1 You can sort the list. 2 You can set the Delete Mode. 3 You can set the New Reminder. 4 Launch [GUIDE].

Owners Manual
Page 96
... focus on the USB storage device you back up any important files. Select the connected USB from [Home Dashboard] [INPUTS] and select the [FORMAT] button to provide Smart projector services such as the saving and retrieving of 2 TB or less. • If a USB HDD with power-saving function does not work, turn the hard drive off and on the remote control. See the owner's manual for the USB...
... focus on the USB storage device you back up any important files. Select the connected USB from [Home Dashboard] [INPUTS] and select the [FORMAT] button to provide Smart projector services such as the saving and retrieving of 2 TB or less. • If a USB HDD with power-saving function does not work, turn the hard drive off and on the remote control. See the owner's manual for the USB...

Owners Manual
Page 123
... adjust the selected picture mode in detail. The closer to Green 50, the more red the color will reset the picture settings. -- The closer to 100, the deeper the color. • [Tint] Adjusts the color balance between red and green displayed on the screen. The settings you wish to 50, the sharper and clearer the image. • [Color] Tones down or up the colors displayed on the screen. Depending upon model. • [Contrast] Adjusts...
... adjust the selected picture mode in detail. The closer to Green 50, the more red the color will reset the picture settings. -- The closer to 100, the deeper the color. • [Tint] Adjusts the color balance between red and green displayed on the screen. The settings you wish to 50, the sharper and clearer the image. • [Color] Tones down or up the colors displayed on the screen. Depending upon model. • [Contrast] Adjusts...

Owners Manual
Page 125
... of the screen for optimal results depending on the brightness of the picture. • [Super Resolution] Adjusts the resolution to Expert, you can control it by selecting areas of colors to display. • [Color Filter] Filters a specific color spectrum in noticeable color changes. Settings) [Picture] [Picture Mode Settings] [Expert Controls] If you set the picture mode to make dim and blurred images clearer. • [Color Gamut] Selects the range of six colors ([Red]/[Green]/[Blue]/[Cyan]/[Magenta]/[Yellow]). For normal images, adjustments may...
... of the screen for optimal results depending on the brightness of the picture. • [Super Resolution] Adjusts the resolution to Expert, you can control it by selecting areas of colors to display. • [Color Filter] Filters a specific color spectrum in noticeable color changes. Settings) [Picture] [Picture Mode Settings] [Expert Controls] If you set the picture mode to make dim and blurred images clearer. • [Color Gamut] Selects the range of six colors ([Red]/[Green]/[Blue]/[Cyan]/[Magenta]/[Yellow]). For normal images, adjustments may...

Owners Manual
Page 126
... be changed only in the picture for a smooth picture. • [Black Level] Compensates the screen brightness and contrast by adjusting the darkness of digital video signals. • [Smooth Gradation] It reduces jaggies in [User] mode. The configurable items differ depending upon the input signal or the selected picture mode, the available options may differ. 74 [Picture Options] ENGLISH (Q. Optimizes the image quality of fast-moving pictures. -- [Off]: Turns...
... be changed only in the picture for a smooth picture. • [Black Level] Compensates the screen brightness and contrast by adjusting the darkness of digital video signals. • [Smooth Gradation] It reduces jaggies in [User] mode. The configurable items differ depending upon the input signal or the selected picture mode, the available options may differ. 74 [Picture Options] ENGLISH (Q. Optimizes the image quality of fast-moving pictures. -- [Off]: Turns...
Owners Manual
Page 137
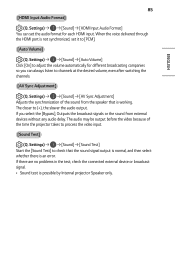
... after switching the channels. [AV Sync Adjustment] (Q. When the voice delivered through the HDMI port is an error. Settings) [Sound] [Sound Test] Start the [Sound Test] to process the video input. [Sound Test] (Q. Settings) [Sound] [HDMI Input Audio Format] You can always listen to (+), the slower the audio output. If there are no problems in the test, check the connected external device or broadcast signal. • Sound test is working. Settings) [Sound] [Auto Volume] Click [On] to [PCM]. [Auto Volume...
... after switching the channels. [AV Sync Adjustment] (Q. When the voice delivered through the HDMI port is an error. Settings) [Sound] [Sound Test] Start the [Sound Test] to process the video input. [Sound Test] (Q. Settings) [Sound] [HDMI Input Audio Format] You can always listen to (+), the slower the audio output. If there are no problems in the test, check the connected external device or broadcast signal. • Sound test is working. Settings) [Sound] [Auto Volume] Click [On] to [PCM]. [Auto Volume...

Owners Manual
Page 146
... projector. Settings) [General] [Timers] [Timer Power On]/[Timer Power Off] You can set the time and date manually if the automatically set the time correctly. [Auto Off] (Q. ENGLISH [Sleep Timer] (Q. If you are not going to disable [Sleep Timer], select [Off]. [Timer Power On]/[Timer Power Off] (Q. Select [Off] if you want to set [Timer Power On]/[Timer Power Off]. • To use [Timer Power On]/[Timer Power Off], set current time is no input signal or button press, the projector automatically turns off at a specified time...
... projector. Settings) [General] [Timers] [Timer Power On]/[Timer Power Off] You can set the time and date manually if the automatically set the time correctly. [Auto Off] (Q. ENGLISH [Sleep Timer] (Q. If you are not going to disable [Sleep Timer], select [Off]. [Timer Power On]/[Timer Power Off] (Q. Select [Off] if you want to set [Timer Power On]/[Timer Power Off]. • To use [Timer Power On]/[Timer Power Off], set current time is no input signal or button press, the projector automatically turns off at a specified time...
Owners Manual
Page 148
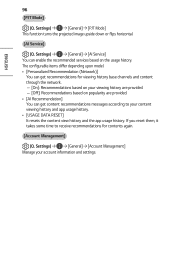
... network. -- [On]: Recommendations based on the usage history. 96 [PJT Mode] (Q. If you reset them, it takes some time to your content viewing history and app usage history. • [USAGE DATA RESET] It resets the content view history and the app usage history. Settings) [General] [AI Service] You can get recommendations for contents again. [Account Management] (Q. Settings) [General] [PJT Mode] This function turns the projected image upside...
... network. -- [On]: Recommendations based on the usage history. 96 [PJT Mode] (Q. If you reset them, it takes some time to your content viewing history and app usage history. • [USAGE DATA RESET] It resets the content view history and the app usage history. Settings) [General] [AI Service] You can get recommendations for contents again. [Account Management] (Q. Settings) [General] [PJT Mode] This function turns the projected image upside...
Owners Manual
Page 151
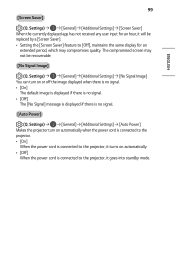
...; [On] The default image is displayed if there is no signal. [Auto Power] (Q. Settings) [General] [Additional Settings] [Auto Power] Makes the projector turn on automatically. • [Off] When the power cord is no signal. • [Off] The [No Signal] message is displayed if there is connected to [Off], maintains the same display for an hour, it goes into standby mode. Settings) [General] [Additional Settings] [Screen Saver] When the currently displayed app has not received any user input for an...
...; [On] The default image is displayed if there is no signal. [Auto Power] (Q. Settings) [General] [Additional Settings] [Auto Power] Makes the projector turn on automatically. • [Off] When the power cord is no signal. • [Off] The [No Signal] message is displayed if there is connected to [Off], maintains the same display for an hour, it goes into standby mode. Settings) [General] [Additional Settings] [Screen Saver] When the currently displayed app has not received any user input for an...

Owners Manual
Page 152
... reset, the projector will revert all settings to Initial Settings] (Q. ENGLISH [Home/Store Mode] (Q. Settings) [General] [Additional Settings] [Home/Store Mode] You can choose between [Home Mode] and [Store Mode]. 100 [High Altitude] (Q. This will automatically turn off and on again after waiting for store display. [Reset to their default values. The [Store Mode] provide settings optimized for several minutes. • Some models may overheat or its initial settings. To use the projector at...
... reset, the projector will revert all settings to Initial Settings] (Q. ENGLISH [Home/Store Mode] (Q. Settings) [General] [Additional Settings] [Home/Store Mode] You can choose between [Home Mode] and [Store Mode]. 100 [High Altitude] (Q. This will automatically turn off and on again after waiting for store display. [Reset to their default values. The [Store Mode] provide settings optimized for several minutes. • Some models may overheat or its initial settings. To use the projector at...
Owners Manual
Page 156
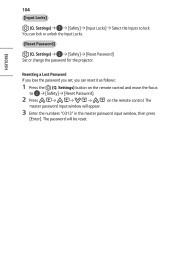
... the password you set, you can lock or unlock the Input Locks. [Reset Password] (Q. Settings) button on the remote control. 104 [Input Locks] (Q. The master password input window will be reset. You can reset it as follows: 1 Press the (Q. The password will appear. 3 Enter the numbers "0313" in the master password input window, then press [Enter]. Settings) [Safety] [Reset Password] Set or change the password for the projector. Settings) [Safety] [Input Locks] Select the Inputs to [Safety] [Reset Password]. 2 Press on the remote control and move the focus...
... the password you set, you can lock or unlock the Input Locks. [Reset Password] (Q. Settings) button on the remote control. 104 [Input Locks] (Q. The master password input window will be reset. You can reset it as follows: 1 Press the (Q. The password will appear. 3 Enter the numbers "0313" in the master password input window, then press [Enter]. Settings) [Safety] [Reset Password] Set or change the password for the projector. Settings) [Safety] [Input Locks] Select the Inputs to [Safety] [Reset Password]. 2 Press on the remote control and move the focus...

Owners Manual
Page 171
ENGLISH 119 Network Connection Problems You can check the network connection status as shown below. • (Q. Settings) [Connection] [Wired Connection (Ethernet)] • (Q. The projector. • If you are using a wireless connection, change the SSID (Network name) and wireless channel of the AP (Router), Cable Modem, wait 10 seconds. When X appears next to Gateway • Check the AP (Router) or consult your router has the latest firmware version installed. Reapply power. • Initialize (Reset) on...
ENGLISH 119 Network Connection Problems You can check the network connection status as shown below. • (Q. Settings) [Connection] [Wired Connection (Ethernet)] • (Q. The projector. • If you are using a wireless connection, change the SSID (Network name) and wireless channel of the AP (Router), Cable Modem, wait 10 seconds. When X appears next to Gateway • Check the AP (Router) or consult your router has the latest firmware version installed. Reapply power. • Initialize (Reset) on...


