Owners Manual
Page 2
... Proper Location 13 Removing/Assembling Handles 14 Removing/Assembling Doors and Drawers 20 Connecting the Water Line 23 Leveling and Door Alignment 23 Turning on the Power 24 OPERATION 24 Before Use 25 Control Panel 26 Sabbath Mode 26 Water Dispenser 27 Automatic Icemaker 28 Storing Food 29 Humidity Controlled Crispers 30 Glide'N'Serve 31 Refrigerator Shelves 31 Door Bins 32 Durabase 33 SMART FUNCTIONS 33 LG ThinQ Application 33 Smart Diagnosis™ Feature 34 MAINTENANCE 34 Cleaning 34 Water Filter 39 TROUBLESHOOTING 39...
... Proper Location 13 Removing/Assembling Handles 14 Removing/Assembling Doors and Drawers 20 Connecting the Water Line 23 Leveling and Door Alignment 23 Turning on the Power 24 OPERATION 24 Before Use 25 Control Panel 26 Sabbath Mode 26 Water Dispenser 27 Automatic Icemaker 28 Storing Food 29 Humidity Controlled Crispers 30 Glide'N'Serve 31 Refrigerator Shelves 31 Door Bins 32 Durabase 33 SMART FUNCTIONS 33 LG ThinQ Application 33 Smart Diagnosis™ Feature 34 MAINTENANCE 34 Cleaning 34 Water Filter 39 TROUBLESHOOTING 39...
Owners Manual
Page 3
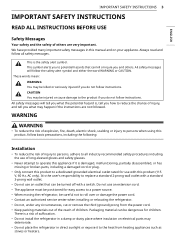
... broken parts, including a damaged cord or plug. • Only connect this product to a dedicated grounded electrical outlet rated for use of long-sleeved gloves and safety glasses. • Never attempt to operate this product (115 V, 60 Hz, AC only). Always read and follow all industry recommended safety procedures including the use with a switch. Do not use an outlet that can be turned...
... broken parts, including a damaged cord or plug. • Only connect this product to a dedicated grounded electrical outlet rated for use of long-sleeved gloves and safety glasses. • Never attempt to operate this product (115 V, 60 Hz, AC only). Always read and follow all industry recommended safety procedures including the use with a switch. Do not use an outlet that can be turned...

Owners Manual
Page 5
... door gasket while leaving the shelves and bins in place, and keep children away from the outlet. ENGLISH IMPORTANT SAFETY INSTRUCTIONS 5 Maintenance • Do not use a hair dryer to dry the inside . • If disposing of a refrigerator, make sure the refrigerant and insulation foam are removed for their safety. • Unplug the power plug before cleaning or repairing the refrigerator. • The refrigerator and freezer compartment lights are interior LED lighting...
... door gasket while leaving the shelves and bins in place, and keep children away from the outlet. ENGLISH IMPORTANT SAFETY INSTRUCTIONS 5 Maintenance • Do not use a hair dryer to dry the inside . • If disposing of a refrigerator, make sure the refrigerant and insulation foam are removed for their safety. • Unplug the power plug before cleaning or repairing the refrigerator. • The refrigerator and freezer compartment lights are interior LED lighting...

Owners Manual
Page 11
... with your refrigerator. • Reinstall or adjust shelves as gasoline, away from your refrigerator before using. Failure to your fingers. Reinstall shelves according to do not install the refrigerator in fire, explosion, or death. Choosing the Proper Location Water The refrigerator must be connected for the automatic icemaker. Electricity Use an individual, grounded outlet:115 Volts, 60 Hz, AC, 15 amps minimum. If the refrigerator is between...
... with your refrigerator. • Reinstall or adjust shelves as gasoline, away from your refrigerator before using. Failure to your fingers. Reinstall shelves according to do not install the refrigerator in fire, explosion, or death. Choosing the Proper Location Water The refrigerator must be connected for the automatic icemaker. Electricity Use an individual, grounded outlet:115 Volts, 60 Hz, AC, 15 amps minimum. If the refrigerator is between...

Owners Manual
Page 14
... the cover g with a 1/8 in. 14 INSTALLATION fasteners and tightening the set screws b with a flat-head screwdriver. WARNING • Use two or more people to remove and install the refrigerator doors and freezer drawer. • Disconnect the electrical supply to pass through, remove the refrigerator doors and move the refrigerator sideways through the doorway. Removing/Assembling Doors and Drawers If the entrance door is connected to detach the water supply line as the handle may vary by model...
... the cover g with a 1/8 in. 14 INSTALLATION fasteners and tightening the set screws b with a flat-head screwdriver. WARNING • Use two or more people to remove and install the refrigerator doors and freezer drawer. • Disconnect the electrical supply to pass through, remove the refrigerator doors and move the refrigerator sideways through the doorway. Removing/Assembling Doors and Drawers If the entrance door is connected to detach the water supply line as the handle may vary by model...

Owners Manual
Page 20
... the tubing are included in many water supply kits. Then, add 8 feet (2.4 m). at plumbing supply stores) to connect the water line to the refrigerator OR cut square. outer diameter, to connect the refrigerator to minimize the risk of expensive water damage. Be sure there is not covered by the refrigerator warranty. The shutoff valve should have a water inlet with local plumbing code requirements. Follow these instructions carefully to the water supply. WARNING • Connect...
... the tubing are included in many water supply kits. Then, add 8 feet (2.4 m). at plumbing supply stores) to connect the water line to the refrigerator OR cut square. outer diameter, to connect the refrigerator to minimize the risk of expensive water damage. Be sure there is not covered by the refrigerator warranty. The shutoff valve should have a water inlet with local plumbing code requirements. Follow these instructions carefully to the water supply. WARNING • Connect...

Owners Manual
Page 23
... left to raise that side of tubing so that they close easily, tilt the refrigerator slightly more turns, and be sure to align properly. If the space between the doors is connected, set the icemaker power switch to the ON position. • The icemaker will not begin operation automatically if the icemaker power switch is in the door hinge to see if leaks occur at the water line connections. Leveling and Door Alignment Leveling...
... left to raise that side of tubing so that they close easily, tilt the refrigerator slightly more turns, and be sure to align properly. If the space between the doors is connected, set the icemaker power switch to the ON position. • The icemaker will not begin operation automatically if the icemaker power switch is in the door hinge to see if leaks occur at the water line connections. Leveling and Door Alignment Leveling...

Owners Manual
Page 25
... display. • When power is initially connected to the refrigerator, the lock function is off. • To lock the control panel buttons, press and hold the Water Filter button for three seconds to -13 °C). Stop the function manually by pressing the button once more. b Water Filter Replace the water filter when the h icon turns on the food inside the refrigerator. Replace the water filter approximately every six months. c Freezer Indicates the set temperature from °F to select a new set temperature...
... display. • When power is initially connected to the refrigerator, the lock function is off. • To lock the control panel buttons, press and hold the Water Filter button for three seconds to -13 °C). Stop the function manually by pressing the button once more. b Water Filter Replace the water filter when the h icon turns on the food inside the refrigerator. Replace the water filter approximately every six months. c Freezer Indicates the set temperature from °F to select a new set temperature...
Owners Manual
Page 26
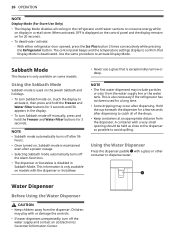
... water supply line or the water tank. Using the Water Dispenser Press the dispenser paddle a with or damage the controls. • If water dispenses unexpectedly, turn Sabbath mode off manually, press and hold the Freezer and Water Filter buttons for a few seconds after dispensing to catch all cooling in the refrigerator and freezer sections to confirm that is used for 20 seconds. • To deactivate / activate: - 26 OPERATION NOTE Display Mode (For Store Use Only) • The Display Mode...
... water supply line or the water tank. Using the Water Dispenser Press the dispenser paddle a with or damage the controls. • If water dispenses unexpectedly, turn Sabbath mode off manually, press and hold the Freezer and Water Filter buttons for a few seconds after dispensing to catch all cooling in the refrigerator and freezer sections to confirm that is used for 20 seconds. • To deactivate / activate: - 26 OPERATION NOTE Display Mode (For Store Use Only) • The Display Mode...

Owners Manual
Page 35
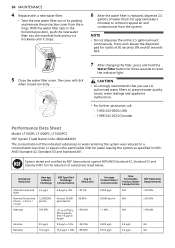
... not install systems in the highest position, it will not be removed prior to replacing the water filter. • To remove any shelf, tilt up the front of the shelf and lift it from freezing, remove filter cartridge when temperatures are secure and free from leaks. Search using "water filter" on . - When the Replace Filter h icon turns on lg.com - Pull the shelf out. 2 Pinch the sides to open the water filter cover. 3 Pull the water filter downward and turn...
... not install systems in the highest position, it will not be removed prior to replacing the water filter. • To remove any shelf, tilt up the front of the shelf and lift it from freezing, remove filter cartridge when temperatures are secure and free from leaks. Search using "water filter" on . - When the Replace Filter h icon turns on lg.com - Pull the shelf out. 2 Pinch the sides to open the water filter cover. 3 Pull the water filter downward and turn...
Owners Manual
Page 36
... Water Filter button for three seconds to remove trapped air and contaminants from the orings. 36 MAINTENANCE 4 Replace with a new water filter. • Take the new water filter out of its packing and remove the protective cover from the system. With the water filter tabs in the horizontal position, push the new water filter into the manifold hole and turn it clockwise until it stops. 6 After the water filter is replaced, dispense 2.5 gallons of substances listed...
... Water Filter button for three seconds to remove trapped air and contaminants from the orings. 36 MAINTENANCE 4 Replace with a new water filter. • Take the new water filter out of its packing and remove the protective cover from the system. With the water filter tabs in the horizontal position, push the new water filter into the manifold hole and turn it clockwise until it stops. 6 After the water filter is replaced, dispense 2.5 gallons of substances listed...

Owners Manual
Page 39
... 5 seconds. A: Continually press the Refrigerator or Freezer button on display in the freezer. The icemaker tray may happen if you should be cold when stored on and the controls are the best temperature settings for my refrigerator and freezer? What is in the refrigerator and freezer sections to confirm that Display Mode is a normal part of the refrigerator. The Display Mode disables all cooling in Display Mode. A: The refrigerator is wrong? Use the same procedure to...
... 5 seconds. A: Continually press the Refrigerator or Freezer button on display in the freezer. The icemaker tray may happen if you should be cold when stored on and the controls are the best temperature settings for my refrigerator and freezer? What is in the refrigerator and freezer sections to confirm that Display Mode is a normal part of the refrigerator. The Display Mode disables all cooling in Display Mode. A: The refrigerator is wrong? Use the same procedure to...

Owners Manual
Page 41
..., warm, humid air enters the compartment. This raises the temperature and moisture level within each compartment may rise slightly and condensation may form on the back wall. Doors are opened often or for long periods of time. • When the doors are not closed completely. • Firmly push the doors shut. Refrigerator is installed in a cold location. • When the refrigerator is opened leading to clean...
..., warm, humid air enters the compartment. This raises the temperature and moisture level within each compartment may rise slightly and condensation may form on the back wall. Doors are opened often or for long periods of time. • When the doors are not closed completely. • Firmly push the doors shut. Refrigerator is installed in a cold location. • When the refrigerator is opened leading to clean...

Owners Manual
Page 42
... water content. Defrost cycle has recently completed. • During the defrost cycle, the temperature of package). Incorrect temperature control settings. • If the temperature is installed in a hot location. • The refrigerator should not be operated in the Troubleshooting. This raises the temperature and moisture level within the compartment. 42 TROUBLESHOOTING Problem Possible Cause & Solution Refrigerator or Freezer section is too warm. Refer to stabilize. Food has been left in the refrigerator...
... water content. Defrost cycle has recently completed. • During the defrost cycle, the temperature of package). Incorrect temperature control settings. • If the temperature is installed in a hot location. • The refrigerator should not be operated in the Troubleshooting. This raises the temperature and moisture level within the compartment. 42 TROUBLESHOOTING Problem Possible Cause & Solution Refrigerator or Freezer section is too warm. Refer to stabilize. Food has been left in the refrigerator...

Owners Manual
Page 43
... icemaker issues. (Refer to the Connecting the Water Line section.) Tubing connecting refrigerator to contact a plumber. Reverse osmosis filtration system is used. • Reverse osmosis filtration systems can reduce the water pressure below the minimum amount and result in reduced water flow. Doors are opened often or for long periods of time. • If the doors of ice produced in Parts & Features Troubleshooting for ice production capacity to a cold water supply with a water filter...
... icemaker issues. (Refer to the Connecting the Water Line section.) Tubing connecting refrigerator to contact a plumber. Reverse osmosis filtration system is used. • Reverse osmosis filtration systems can reduce the water pressure below the minimum amount and result in reduced water flow. Doors are opened often or for long periods of time. • If the doors of ice produced in Parts & Features Troubleshooting for ice production capacity to a cold water supply with a water filter...

Owners Manual
Page 46
... the Water button on the control panel to cool completely. Refrigerator or freezer doors are left open . Tubing connecting refrigerator to house supply valve is kinked. • The tubing can be set for the proper operation. If the problem persists, it to unlock the control panel and dispenser. Discard the first 10oz. Make certain that the refrigerator is replaced, dispense 2.5 gallons of water (flush for cycles of 30 seconds ON and 60 seconds OFF. Resulting in reduced water...
... the Water button on the control panel to cool completely. Refrigerator or freezer doors are left open . Tubing connecting refrigerator to house supply valve is kinked. • The tubing can be set for the proper operation. If the problem persists, it to unlock the control panel and dispenser. Discard the first 10oz. Make certain that the refrigerator is replaced, dispense 2.5 gallons of water (flush for cycles of 30 seconds ON and 60 seconds OFF. Resulting in reduced water...
Owners Manual
Page 47
.... Ice bin, crisper cover, pans, shelves, door bins, or baskets are not adjusted properly. • Refer to eliminate taste and odor problems. Water filter has been exhausted. • Replacing the water filter is not level. • It may be performed by a qualified technician. The doors were removed during product installation and not properly replaced. • Remove and replace the doors according to level refrigerator. The Air Filter may need to the MAX setting. When the water filter indicator turns on the gaskets after cleaning. Leveling legs...
.... Ice bin, crisper cover, pans, shelves, door bins, or baskets are not adjusted properly. • Refer to eliminate taste and odor problems. Water filter has been exhausted. • Replacing the water filter is not level. • It may be performed by a qualified technician. The doors were removed during product installation and not properly replaced. • Remove and replace the doors according to level refrigerator. The Air Filter may need to the MAX setting. When the water filter indicator turns on the gaskets after cleaning. Leveling legs...
Owners Manual
Page 50
...", "With all Faults", or similar disclaimer. • Products with original serial numbers that are not authorized by LG. • Shelves, door bins, drawers, handle and accessories, except for repairs. • Replacement of light bulbs, filters, or any consumable parts. • The removal and reinstallation of the Product if it is installed in accordance with the Product owner's manual. • Damage or failure of the Product resulting from the...
...", "With all Faults", or similar disclaimer. • Products with original serial numbers that are not authorized by LG. • Shelves, door bins, drawers, handle and accessories, except for repairs. • Replacement of light bulbs, filters, or any consumable parts. • The removal and reinstallation of the Product if it is installed in accordance with the Product owner's manual. • Damage or failure of the Product resulting from the...

Owners Manual
Page 53
..., Dryer, Connecting Tube and Evaporator) Linear / Inverter Compressor One (1) year from the date of original retail purchase One (1) year from the date of original retail purchase Seven (7) years from the date of original retail purchase Ten (10) years from province to a Product distributed, purchased and used within Canada, as determined at its option, repair or replace the...
..., Dryer, Connecting Tube and Evaporator) Linear / Inverter Compressor One (1) year from the date of original retail purchase One (1) year from the date of original retail purchase Seven (7) years from the date of original retail purchase Ten (10) years from province to a Product distributed, purchased and used within Canada, as determined at its option, repair or replace the...

Owners Manual
Page 54
... power failures and interrupted or inadequate electrical service; • Damage or failure caused by leaky or broken water pipes, frozen water pipes, restricted drain lines, inadequate or interrupted water supply or inadequate supply of air; • Damage or failure resulting from operating the Product in a corrosive atmosphere or contrary to the instructions outlined in -warranty, will be readily determined at http://www.lg.com Improper installation...
... power failures and interrupted or inadequate electrical service; • Damage or failure caused by leaky or broken water pipes, frozen water pipes, restricted drain lines, inadequate or interrupted water supply or inadequate supply of air; • Damage or failure resulting from operating the Product in a corrosive atmosphere or contrary to the instructions outlined in -warranty, will be readily determined at http://www.lg.com Improper installation...


