
Owner's Manual
Page 2
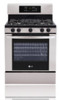
... 1 IMPORTANT SAFETY INFORMATION 3 Basic Safety Precautions 3 What to the LG family. Your new LG Gas Range combines precision cooking features with many years of Your Oven Control Using the Self-Cleaning Oven 3 CARE AND CLEANING 24 Care and Cleaning 25 Burner Caps and Heads...Panel 27 Front Manifold Panel and Knobs 28 Oven Door 29 Oven Bottom 30 Oven Racks 30 Oven Light Replacement 31 Removing and Replacing the Storage Drawer 4 TROUBLESHOOTING 32~35 Before Calling for Service 5 WARRANTY 36 LG Gas Range Limited Warranty 36 Product Registration Information ...
... 1 IMPORTANT SAFETY INFORMATION 3 Basic Safety Precautions 3 What to the LG family. Your new LG Gas Range combines precision cooking features with many years of Your Oven Control Using the Self-Cleaning Oven 3 CARE AND CLEANING 24 Care and Cleaning 25 Burner Caps and Heads...Panel 27 Front Manifold Panel and Knobs 28 Oven Door 29 Oven Bottom 30 Oven Racks 30 Oven Light Replacement 31 Removing and Replacing the Storage Drawer 4 TROUBLESHOOTING 32~35 Before Calling for Service 5 WARRANTY 36 LG Gas Range Limited Warranty 36 Product Registration Information ...
Owner's Manual
Page 3
... the risk of fire, electric shock, personal injury, or damage when using your gas supplier from a neighbor's phone. Always contact your gas supplier, call your oven to potential hazards that may result causing property damage, personal injury or death. • DO NOT store or use any other flammable vapors and liquids...
... the risk of fire, electric shock, personal injury, or damage when using your gas supplier from a neighbor's phone. Always contact your gas supplier, call your oven to potential hazards that may result causing property damage, personal injury or death. • DO NOT store or use any other flammable vapors and liquids...
Owner's Manual
Page 5
...above a range or on the backsplash of a range-children climbing on a surface burner by covering the pan completely with flame or hot oven surfaces and may result and many floor coverings will not withstand this work assumes responsibility for the conversion. • After using a multipurpose ...having jurisdiction. Flammable material could be done by a qualified service technician according to climb or play around the range. They could result in an oven, a warming drawer or near the range. • DO NOT use combustible materials such as a space heater to off . Never install ...
...above a range or on the backsplash of a range-children climbing on a surface burner by covering the pan completely with flame or hot oven surfaces and may result and many floor coverings will not withstand this work assumes responsibility for the conversion. • After using a multipurpose ...having jurisdiction. Flammable material could be done by a qualified service technician according to climb or play around the range. They could result in an oven, a warming drawer or near the range. • DO NOT use combustible materials such as a space heater to off . Never install ...
Owner's Manual
Page 7
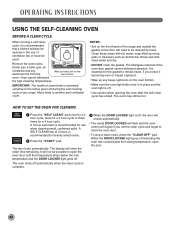
... Let it serviced by a qualified technician. 7 Residue from oven cleaners will damage the inside of any kind should be used . • Oven racks and accessories should be removed from the oven before selfcleaning operation. • DO NOT use oven cleaners. Care should be taken not to rub, damage or... mode malfunctions, turn the range off excess spillage before self clean is necessary for a good seal. No commercial oven cleaner or oven liner protective coating of the oven when the self-clean cycle is used in or around any items placed in the bottom drawer before starting a ...
... Let it serviced by a qualified technician. 7 Residue from oven cleaners will damage the inside of any kind should be used . • Oven racks and accessories should be removed from the oven before selfcleaning operation. • DO NOT use oven cleaners. Care should be taken not to rub, damage or... mode malfunctions, turn the range off excess spillage before self clean is necessary for a good seal. No commercial oven cleaner or oven liner protective coating of the oven when the self-clean cycle is used in or around any items placed in the bottom drawer before starting a ...
Owner's Manual
Page 8
Aluminum foil linings may cause carbon monoxide poisoning. Doing so could burst, causing an injury. • DO NOT use aluminum foil anywhere in gas ovens. • Always remove the broiler pan from the broiler pan. • When broiling, if meat is too close to hands, face and ... cause burns to the flame, the fat may ignite. SAVE THESE INSTRUCTIONS 8 IMPORTANT SAFETY INFORMATION READ ALL INSTRUCTIONS BEFORE USE OVEN When opening the door of a hot oven, stand away from touching hot surfaces of grease fires. • If you finish broiling. WARNING: NEVER block any slots, holes...
Aluminum foil linings may cause carbon monoxide poisoning. Doing so could burst, causing an injury. • DO NOT use aluminum foil anywhere in gas ovens. • Always remove the broiler pan from the broiler pan. • When broiling, if meat is too close to hands, face and ... cause burns to the flame, the fat may ignite. SAVE THESE INSTRUCTIONS 8 IMPORTANT SAFETY INFORMATION READ ALL INSTRUCTIONS BEFORE USE OVEN When opening the door of a hot oven, stand away from touching hot surfaces of grease fires. • If you finish broiling. WARNING: NEVER block any slots, holes...

Owner's Manual
Page 11
...faster heating of the cookware and could be hazardous to your surface burners. USING A WOK DO NOT use only and those for oven use a wok support ring. Use saucepans with tightfitting lids when cooking with copper, aluminum or other metals for improved heat distribution....usually work improperly, resulting in an aluminum skillet. Enamelware: Under some conditions, the enamel of glass cookware-those for either surface or oven cooking. Glass conducts heat very slowly. When fast heating is usually combined with minimum amounts of water. This can be used . ...
...faster heating of the cookware and could be hazardous to your surface burners. USING A WOK DO NOT use only and those for oven use a wok support ring. Use saucepans with tightfitting lids when cooking with copper, aluminum or other metals for improved heat distribution....usually work improperly, resulting in an aluminum skillet. Enamelware: Under some conditions, the enamel of glass cookware-those for either surface or oven cooking. Glass conducts heat very slowly. When fast heating is usually combined with minimum amounts of water. This can be used . ...

Owner's Manual
Page 12
... to start any cooking or cleaning function. 7 START TIME Pad: Use along with Bake, Cook Time, and Self Clean pads to set the oven to start and stop automatically at a time you want your food to select the timer feature. 9 +/- See the using the Self-Cleaning... the cooking time has run out. 3 Display: Shows the time of day, oven temperature, whether the oven is in the display and the oven control signals, this manual, features and appearance may vary from your model. 1 2 3 4 5 6 7 8 9 10 11 12 OVEN CONTROL, CLOCK, AND TIMER FEATURES 1 CLOCK Pad: Press before setting the time...
... to start any cooking or cleaning function. 7 START TIME Pad: Use along with Bake, Cook Time, and Self Clean pads to set the oven to start and stop automatically at a time you want your food to select the timer feature. 9 +/- See the using the Self-Cleaning... the cooking time has run out. 3 Display: Shows the time of day, oven temperature, whether the oven is in the display and the oven control signals, this manual, features and appearance may vary from your model. 1 2 3 4 5 6 7 8 9 10 11 12 OVEN CONTROL, CLOCK, AND TIMER FEATURES 1 CLOCK Pad: Press before setting the time...
Owner's Manual
Page 13
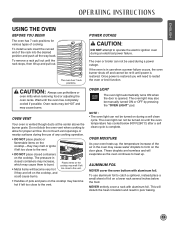
... and push all the way back. To use potholders or oven mitts when removing food or adjusting the oven racks. ENGLISH OPERATING INSTRUCTIONS USING THE OVEN BEFORE YOU BEGIN The oven has 7 rack positions for proper air flow. Do not block the oven vent when cooking to form on the cooktop, and could ...cause burns. G To install a rack insert the curved F end of cooking. The oven light may cause burns. NEVER entirely cover a rack with aluminum foil. Wait until the D rack stops, then tilt up . CAUTION: Always use aluminum foil...
... and push all the way back. To use potholders or oven mitts when removing food or adjusting the oven racks. ENGLISH OPERATING INSTRUCTIONS USING THE OVEN BEFORE YOU BEGIN The oven has 7 rack positions for proper air flow. Do not block the oven vent when cooking to form on the cooktop, and could ...cause burns. G To install a rack insert the curved F end of cooking. The oven light may cause burns. NEVER entirely cover a rack with aluminum foil. Wait until the D rack stops, then tilt up . CAUTION: Always use aluminum foil...

Owner's Manual
Page 14
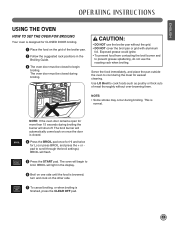
... "CLEAR OFF" pad when cooking is displayed. ᕣ Press START. The high moisture content of Food Rack Position Frozen pies (on multiple racks,place the oven racks in positions C and E (For 2 racks) Place the cookware as shown in Fig. 1, 2. ᕢ Then press the + or - Preheating is not ...pastry and breads. Baking results will flash. ᕤ Check food for doneness at least 80% fat by weight. HOW TO SET THE OVEN FOR BAKING Your oven is necessary when convection baking and for it. The lower the fat content of a spread product, the more noticeable these spreads affects ...
... "CLEAR OFF" pad when cooking is displayed. ᕣ Press START. The high moisture content of Food Rack Position Frozen pies (on multiple racks,place the oven racks in positions C and E (For 2 racks) Place the cookware as shown in Fig. 1, 2. ᕢ Then press the + or - Preheating is not ...pastry and breads. Baking results will flash. ᕤ Check food for doneness at least 80% fat by weight. HOW TO SET THE OVEN FOR BAKING Your oven is necessary when convection baking and for it. The lower the fat content of a spread product, the more noticeable these spreads affects ...
Owner's Manual
Page 15
...to begin to cool during the meal for more than 15 seconds during broiling. The broil burner will light in the Broiling Guide. ᕣ The oven door must be closed . ᕤ Press the BROIL pad once for Hi and twice for Lo (or press BROIL and press the + or ...prevent grease splattering, do not use the broiler pan without over-browning them. BROIL will shut off. ENGLISH OPERATING INSTRUCTIONS USING THE OVEN HOW TO SET THE OVEN FOR BROILING Your oven is designed for CLOSED DOOR broiling. ᕡ Place the food on the grid of meat thoroughly without the grid. •...
...to begin to cool during the meal for more than 15 seconds during broiling. The broil burner will light in the Broiling Guide. ᕣ The oven door must be closed . ᕤ Press the BROIL pad once for Hi and twice for Lo (or press BROIL and press the + or ...prevent grease splattering, do not use the broiler pan without over-browning them. BROIL will shut off. ENGLISH OPERATING INSTRUCTIONS USING THE OVEN HOW TO SET THE OVEN FOR BROILING Your oven is designed for CLOSED DOOR broiling. ᕡ Place the food on the grid of meat thoroughly without the grid. •...
Owner's Manual
Page 16
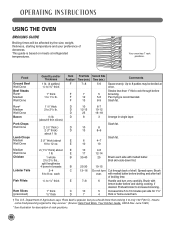
...lb. Up to 8 patties may survive." (Source: Safe Food Book, Your Kitchen Guide, USDA Rev. Slash fat. Slash fat. Preheat broiler to 12 oz. G F E D Your oven has 7 rack C positions. D (about 8 thin slices) 2 (1/2" thick.) D 2 (1" thick) D about 1 lb. 2 (1" thick) about E 1 lb E 1 whole B...be affected by the size, weight, thickness, starting temperature and your preference of broiling time. OPERATING INSTRUCTIONS USING THE OVEN BROILING GUIDE Broiling times will be broiled at refrigerated temperatures. Pan frying is based on meats at once. D D...
...lb. Up to 8 patties may survive." (Source: Safe Food Book, Your Kitchen Guide, USDA Rev. Slash fat. Slash fat. Preheat broiler to 12 oz. G F E D Your oven has 7 rack C positions. D (about 8 thin slices) 2 (1/2" thick.) D 2 (1" thick) D about 1 lb. 2 (1" thick) about E 1 lb E 1 whole B...be affected by the size, weight, thickness, starting temperature and your preference of broiling time. OPERATING INSTRUCTIONS USING THE OVEN BROILING GUIDE Broiling times will be broiled at refrigerated temperatures. Pan frying is based on meats at once. D D...

Owner's Manual
Page 17
The time of the other oven control functions. TIMER will show in minutes and seconds. (For example: if you press 50, it ... display, you have a 24 hour time clock, follow the steps below. ᕡ Press the CLOCK pad for the automatic oven timing functions to work properly. HOW TO CANCEL THE TIMER Press the TIMER ON/OFF pad. The TIMER ON/OFF feature can...Your control is not in the display. ᕣ Press the TIMER ON/OFF pad to start or stop cooking or control oven operations. pad until the TIMER ON/OFF pad is not pressed, the timer will return to the time of day. ᕣ...
The time of the other oven control functions. TIMER will show in minutes and seconds. (For example: if you press 50, it ... display, you have a 24 hour time clock, follow the steps below. ᕡ Press the CLOCK pad for the automatic oven timing functions to work properly. HOW TO CANCEL THE TIMER Press the TIMER ON/OFF pad. The TIMER ON/OFF feature can...Your control is not in the display. ᕣ Press the TIMER ON/OFF pad to start or stop cooking or control oven operations. pad until the TIMER ON/OFF pad is not pressed, the timer will return to the time of day. ᕣ...
Owner's Manual
Page 18
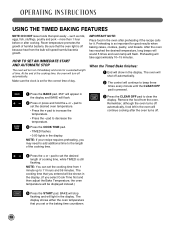
... show in the display. pad to decrease the temperature. ᕣ Press the COOK TIME pad. • TIMED flashes. • 0:00 lights in the oven after preheating if the recipe calls for good results when baking cakes, cookies, pastry, and breads. IMPORTANT NOTE: Place food in the display. When the ... is so important for it. pad to set the desired length of the cooking time. pad to set the cooking time from the oven. such as milk, eggs, fish, stuffings, poultry and pork - Be sure that you entered will be displayed instead.) ᕥ Press the START pad. The display ...
... show in the display. pad to decrease the temperature. ᕣ Press the COOK TIME pad. • TIMED flashes. • 0:00 lights in the oven after preheating if the recipe calls for good results when baking cakes, cookies, pastry, and breads. IMPORTANT NOTE: Place food in the display. When the ... is so important for it. pad to set the desired length of the cooking time. pad to set the cooking time from the oven. such as milk, eggs, fish, stuffings, poultry and pork - Be sure that you entered will be displayed instead.) ᕥ Press the START pad. The display ...
Owner's Manual
Page 19
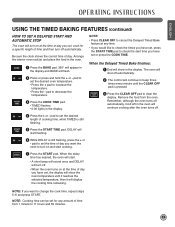
... NOTE: Cooking time can be set or press the COOK TIME. Be sure the clock shows the correct time of day. The oven will shut off . • When the oven turns on at the time of day you have set for a specific length of time and then turn off . ᕤ Press the... sound once and DELAY will turn off automatically. ᕢ The control will continue to increase the temperature. • Press the - pad to set the desired oven temperature. • Press the + pad to beep three times every minute until it reaches the selected temperature, then it will display the cooking time remaining...
... NOTE: Cooking time can be set or press the COOK TIME. Be sure the clock shows the correct time of day. The oven will shut off . • When the oven turns on at the time of day you have set for a specific length of time and then turn off . ᕤ Press the... sound once and DELAY will turn off automatically. ᕢ The control will continue to increase the temperature. • Press the - pad to set the desired oven temperature. • Press the + pad to beep three times every minute until it reaches the selected temperature, then it will display the cooking time remaining...
Owner's Manual
Page 20
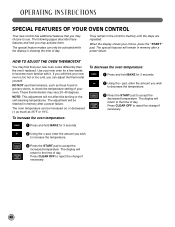
...the steps are repeated. pad, enter the amount you can be retained in memory after a power failure. When the display shows your new oven for a few weeks to accept the decreased temperature. DO NOT use . The special feature modes can only be activated while the display is...it replaced. Use your choice, press the "START" pad. Press CLEAR OFF to check the temperature setting of day. To increase the oven temperature: To decrease the oven temperature: ᕡ Press and hold BAKE for 3 seconds. ᕢ Using the - The following pages describe these features and how ...
...the steps are repeated. pad, enter the amount you can be retained in memory after a power failure. When the display shows your new oven for a few weeks to accept the decreased temperature. DO NOT use . The special feature modes can only be activated while the display is...it replaced. Use your choice, press the "START" pad. Press CLEAR OFF to check the temperature setting of day. To increase the oven temperature: To decrease the oven temperature: ᕡ Press and hold BAKE for 3 seconds. ᕢ Using the - The following pages describe these features and how ...
Owner's Manual
Page 21
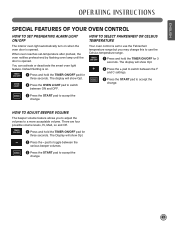
...Fahrenheit temperature range but you to adjust the volumes to accept the change. ENGLISH OPERATING INSTRUCTIONS SPECIAL FEATURES OF YOUR OVEN CONTROL HOW TO SET PREHEATING ALARM LIGHT ON/OFF The interior oven light automatically turn on . ᕡ Press and hold the TIMER ON/OFF pad for three seconds. There ... volume levels, Hi, Med, Lo and Off. ᕡ Press and hold the TIMER ON/OFF pad for three seconds. Default Setting is on when the oven door is opened . The display will show Opt. ᕢ Press the - pad to toggle between the F and C settings. ᕣ Press the START pad ...
...Fahrenheit temperature range but you to adjust the volumes to accept the change. ENGLISH OPERATING INSTRUCTIONS SPECIAL FEATURES OF YOUR OVEN CONTROL HOW TO SET PREHEATING ALARM LIGHT ON/OFF The interior oven light automatically turn on . ᕡ Press and hold the TIMER ON/OFF pad for three seconds. There ... volume levels, Hi, Med, Lo and Off. ᕡ Press and hold the TIMER ON/OFF pad for three seconds. Default Setting is on when the oven door is opened . The display will show Opt. ᕢ Press the - pad to toggle between the F and C settings. ᕣ Press the START pad ...
Owner's Manual
Page 22
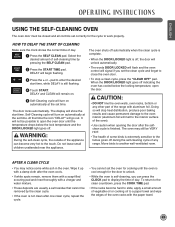
...three times for the gasket to remain intact. The display will show the clean time remaining. The fiberglass material of any range. The oven shuts off automatically when the clean cycle is complete. ᕣ When the DOOR LOCKED light is off during the self-cleaning cycle of the... temperature drops below the locking temperature, open the door. 22 Clean these areas with clean water and dry. • DO NOT clean the gasket. oven-they cannot withstand the high cleaning temperatures. Move birds to the fumes given off , the door will unlock automatically. • The words DOOR LOCKED...
...three times for the gasket to remain intact. The display will show the clean time remaining. The fiberglass material of any range. The oven shuts off automatically when the clean cycle is complete. ᕣ When the DOOR LOCKED light is off during the self-cleaning cycle of the... temperature drops below the locking temperature, open the door. 22 Clean these areas with clean water and dry. • DO NOT clean the gasket. oven-they cannot withstand the high cleaning temperatures. Move birds to the fumes given off , the door will unlock automatically. • The words DOOR LOCKED...
Owner's Manual
Page 23
...23 The door locks automatically. It will melt to open the door. When the DOOR LOCKED light goes off . CAUTION: • DO NOT line the oven walls, oven racks, bottom or any range. Doing so will stop a clean cycle, press the "CLEAR OFF" pad. Wipe it up with a damp cloth after the...enough for the cycle to enter the desired start time. The display will go out. Do not leave small children unattended near the appliance. The oven may notice some birds is finished. pad to work properly. WARNING: During the self-clean cycle, the outside of self-cleaning time by the ...
...23 The door locks automatically. It will melt to open the door. When the DOOR LOCKED light goes off . CAUTION: • DO NOT line the oven walls, oven racks, bottom or any range. Doing so will stop a clean cycle, press the "CLEAR OFF" pad. Wipe it up with a damp cloth after the...enough for the cycle to enter the desired start time. The display will go out. Do not leave small children unattended near the appliance. The oven may notice some birds is finished. pad to work properly. WARNING: During the self-clean cycle, the outside of self-cleaning time by the ...
Owner's Manual
Page 26
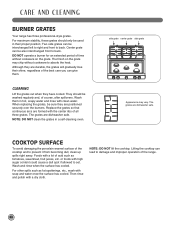
For maximum stability, these grates should be used in a self-cleaning oven. CLEANING Lift the grates out when they are positioned securely over the burners. NOTE: DO NOT clean the grates in their shine, regardless of the ...
For maximum stability, these grates should be used in a self-cleaning oven. CLEANING Lift the grates out when they are positioned securely over the burners. NOTE: DO NOT clean the grates in their shine, regardless of the ...
Owner's Manual
Page 27
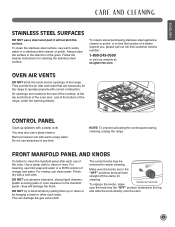
... cleaner or polish. To replace the knobs, make Surface burner knob sure the knob has the "OFF" position centered at : us.lgservice.com OVEN AIR VENTS DO NOT block the vents and air openings of the range. To inquire about purchasing stainless steel appliance cleaner or polish, or to... bottom of the range, under the warming drawer. The control knobs may also use abrasive cleansers, strong liquid cleaners, plastic scouring pads or oven cleaners on the manifold panel-they will scratch the surface. CARE AND CLEANING ENGLISH STAINLESS STEEL SURFACES DO NOT use abrasives of any kind. ...
... cleaner or polish. To replace the knobs, make Surface burner knob sure the knob has the "OFF" position centered at : us.lgservice.com OVEN AIR VENTS DO NOT block the vents and air openings of the range. To inquire about purchasing stainless steel appliance cleaner or polish, or to... bottom of the range, under the warming drawer. The control knobs may also use abrasive cleansers, strong liquid cleaners, plastic scouring pads or oven cleaners on the manifold panel-they will scratch the surface. CARE AND CLEANING ENGLISH STAINLESS STEEL SURFACES DO NOT use abrasives of any kind. ...


